


作为入门教程,本章是最后一章教程,Dgraph 还有很多东西可以介绍,如果有时间,后面在出Dgraph的进阶教程。对数据库最重要的操作就是增删改查。本章将详细介绍。
1、查询
Dgraph 在你创建GraphQL的时候会自动创建查询。查询用的是Queries。
比如创建
type Post {
    id: ID!
    title: String! @search
    text: String
    score: Float @search
    completed: Boolean @search
    datePublished: DateTime @search(by: [year])
    author: Author!
}

type Author {
    id: ID!
    name: String! @search
    posts: [Post!]
    friends: [Author]
}
下面的查询会自动创建
getPost(postID: ID!): Post
queryPost(filter: PostFilter, order: PostOrder, first: Int, offset: Int): [Post]
aggregatePost(filter: PostFilter): PostAggregateResult
第一个查询根据ID获取数据,第二个查询允许你根据一些过滤条件,排序查询数据,第三个查询允许你获得一些聚合参数。
执行下面的语句让你获取Post和关联对象
query {
  getPost(id: "0x1") {
    id
    title
    text
    datePublished
    author {
      name
      friends {
        name
      }
    }
  }
}
你也可以通过Author去查询Post 甚至可以对Post在添加查询过滤条件
query {
  getAuthor(id: "0x1") {
    name
    posts(filter: {
      title: {
        allofterms: "GraphQL"
      }
    }) {
      title
      text
      datePublished
    }
  }
}
注意,这些查询支持哪些查询还去觉得定义Shema的时候给的条件,比如tile 后面的指令 @search。
Dgraph 支持一些聚合查询,比如获取Post的数量
   query {
     aggregatePost {
       count
     }
   }
聚合查询时,也可以加入一些判断条件
   query {
     aggregatePost(filter: {
       title: {
         anyofterms: "GraphQL"
         }
       }) {
       count
     }
   }
也可以对子节点做高级聚合查询。比如
   query {
     queryAuthor {
       name
       postsAggregate {
         scoreMin
         scoreMax
         scoreAvg
       }
     }
   }
支持 And,Or和Not,类似下面的语句
queryPost(filter: {
  title: { allofterms: "GraphQL"},
  or: { title: { allofterms: "Dgraph" } }
} ) { ... }
支持排序和分页
queryPost(order: { desc: datePublished, then: { desc: numLikes } }, first: 5) { ... }
@cascade 指定可以去除不必要的字段。@skip和@include 可以对语句传入需要的参数。skip和include 是反的。
query ($skipTitle: Boolean!) {
  queryPost {
    id
    title @skip(if: $skipTitle)
    text
  }
}
查询之前在云平台测试过,这里就不作演示了,可以自己去测试。
2、增,删,改
和查询不同,增删改用的是Mutations。和查询一样,在创建Shema 的时候,下面的Mutaion的将被自动创建
type Mutation {
	addAuthor(input: [AddAuthorInput!]!): AddAuthorPayload
	updateAuthor(input: UpdateAuthorInput!): UpdateAuthorPayload
	deleteAuthor(filter: AuthorFilter!): DeleteAuthorPayload
	addPost(input: [AddPostInput!]!): AddPostPayload
	updatePost(input: UpdatePostInput!): UpdatePostPayload
	deletePost(filter: PostFilter!): DeletePostPayload
}

type AddAuthorPayload {
	author(filter: AuthorFilter, order: AuthorOrder, first: Int, offset: Int): [Author]
	numUids: Int
}

type AddPostPayload {
	post(filter: PostFilter, order: PostOrder, first: Int, offset: Int): [Post]
	numUids: Int
}

type DeleteAuthorPayload {
	author(filter: AuthorFilter, order: AuthorOrder, first: Int, offset: Int): [Author]
	msg: String
	numUids: Int
}

type DeletePostPayload {
	post(filter: PostFilter, order: PostOrder, first: Int, offset: Int): [Post]
	msg: String
	numUids: Int
}

type UpdateAuthorPayload {
	author(filter: AuthorFilter, order: AuthorOrder, first: Int, offset: Int): [Author]
	numUids: Int
}

type UpdatePostPayload {
	post(filter: PostFilter, order: PostOrder, first: Int, offset: Int): [Post]
	numUids: Int
}
里面涵盖了三个操作:增加 Add,删除deleta 和改 update。
2.1、Add
用add 添加的时候,会自动创建input 类型。下面是自动创建的input 类型和添加一个对象的示例
input AddAuthorInput {
	name: String!
	dob: DateTime
	posts: [PostRef]
}

mutation {
  addAuthor(
    input: {
      name: "A.N. Author",
      lastName: "2000-01-01",
    }
  )
  {
    ...
  }
}
Dgraph 可以一次执行多个添加,且是互不影响的
mutation ($post: AddPostInput!, $author: AddAuthorInput!) {
  addAuthor(input: [$author]) {
    author {
      name
    }
  }
  addPost(input: [$post]) {
    post {
      postID
      title
      text
    }
  }
}
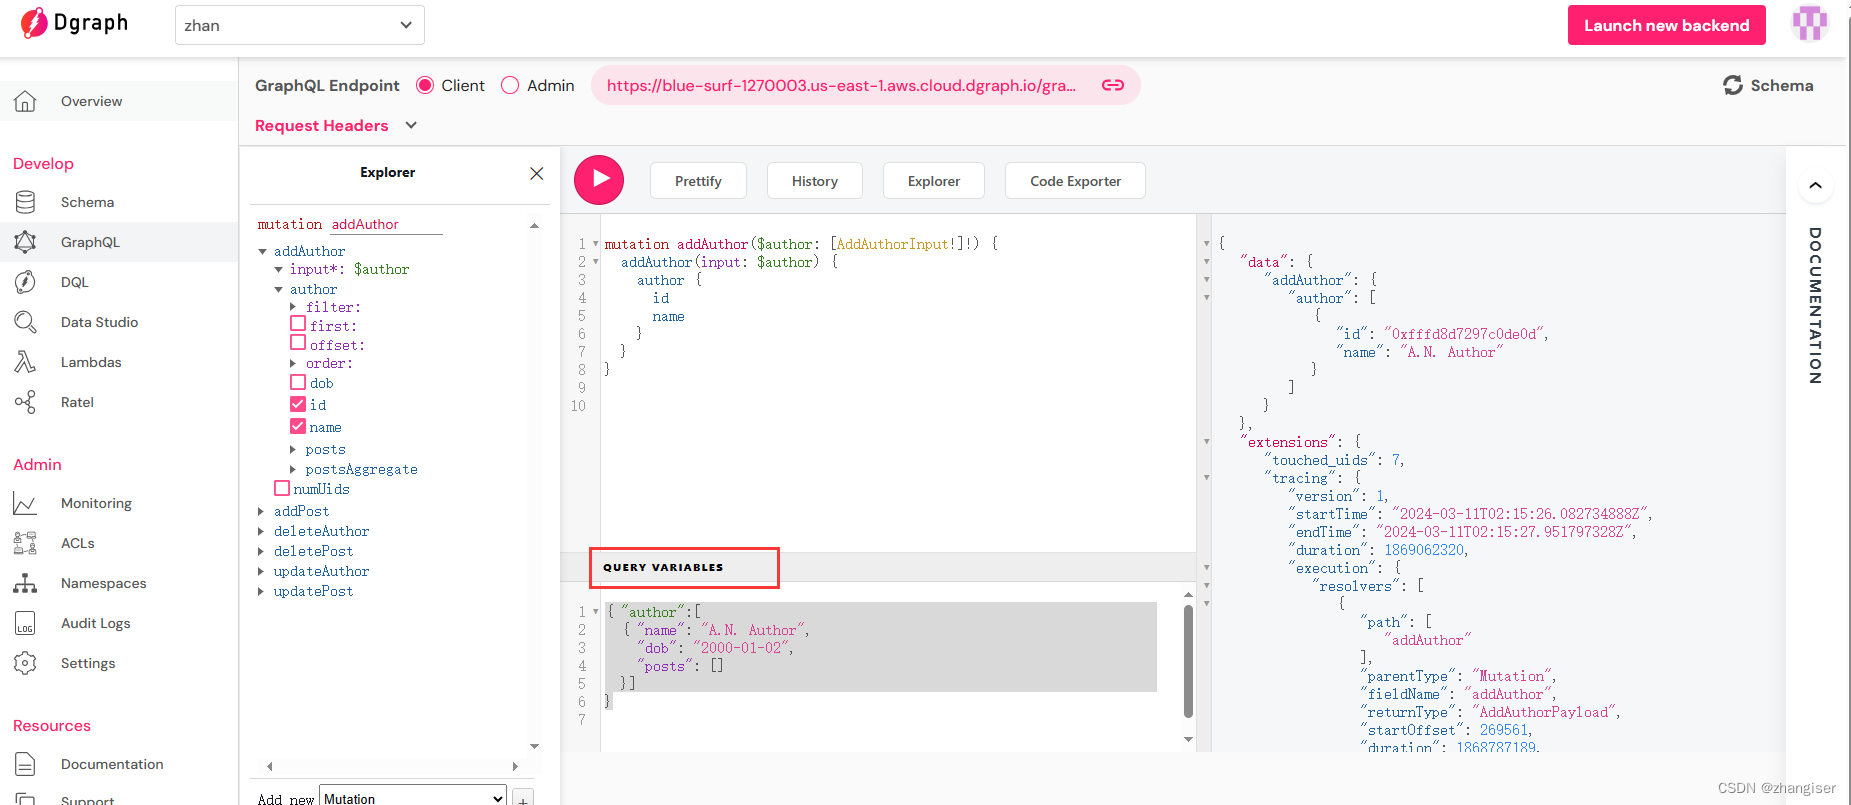
在云平台中应用Schema后,打开GraphQL,在Explorer里面可以看到下面的自动创建的Mutation,在中间输入输入我们的查询语句,点击运行,右侧可以看到添加成功。

我们可以在云平台中用变量的方式测试,输入语句和变量如下
mutation addAuthor($author: [AddAuthorInput!]!) {
  addAuthor(input: $author) {
    author {
      id
      name
    }
  }
}
//变量的写法一
{ "author":[
  { "name": "A.N. Author",
    "dob": "2000-01-02",
    "posts": []
  }]
}
//变量的写法二
{ "author":[
  { "name": "A.N. Author",
    "dob": "2000-01-02",
    "posts": []
  }]
}
如下,其中红框内输入变量,按照$author的原型是一个数组,变量的上面两种写法都是可以的。
如果想知道在代码中如何写,请查看Dgraph 入门教程四(开发环境的搭建)-CSDN博客
2.2 、update
update的原型如下
updatePost(input: UpdatePostInput!): UpdatePostPayload

input UpdatePostInput {
	filter: PostFilter!
	set: PostPatch
	remove: PostPatch
}

type UpdatePostPayload {
	post(filter: PostFilter, order: PostOrder, first: Int, offset: Int): [Post]
	numUids: Int
}
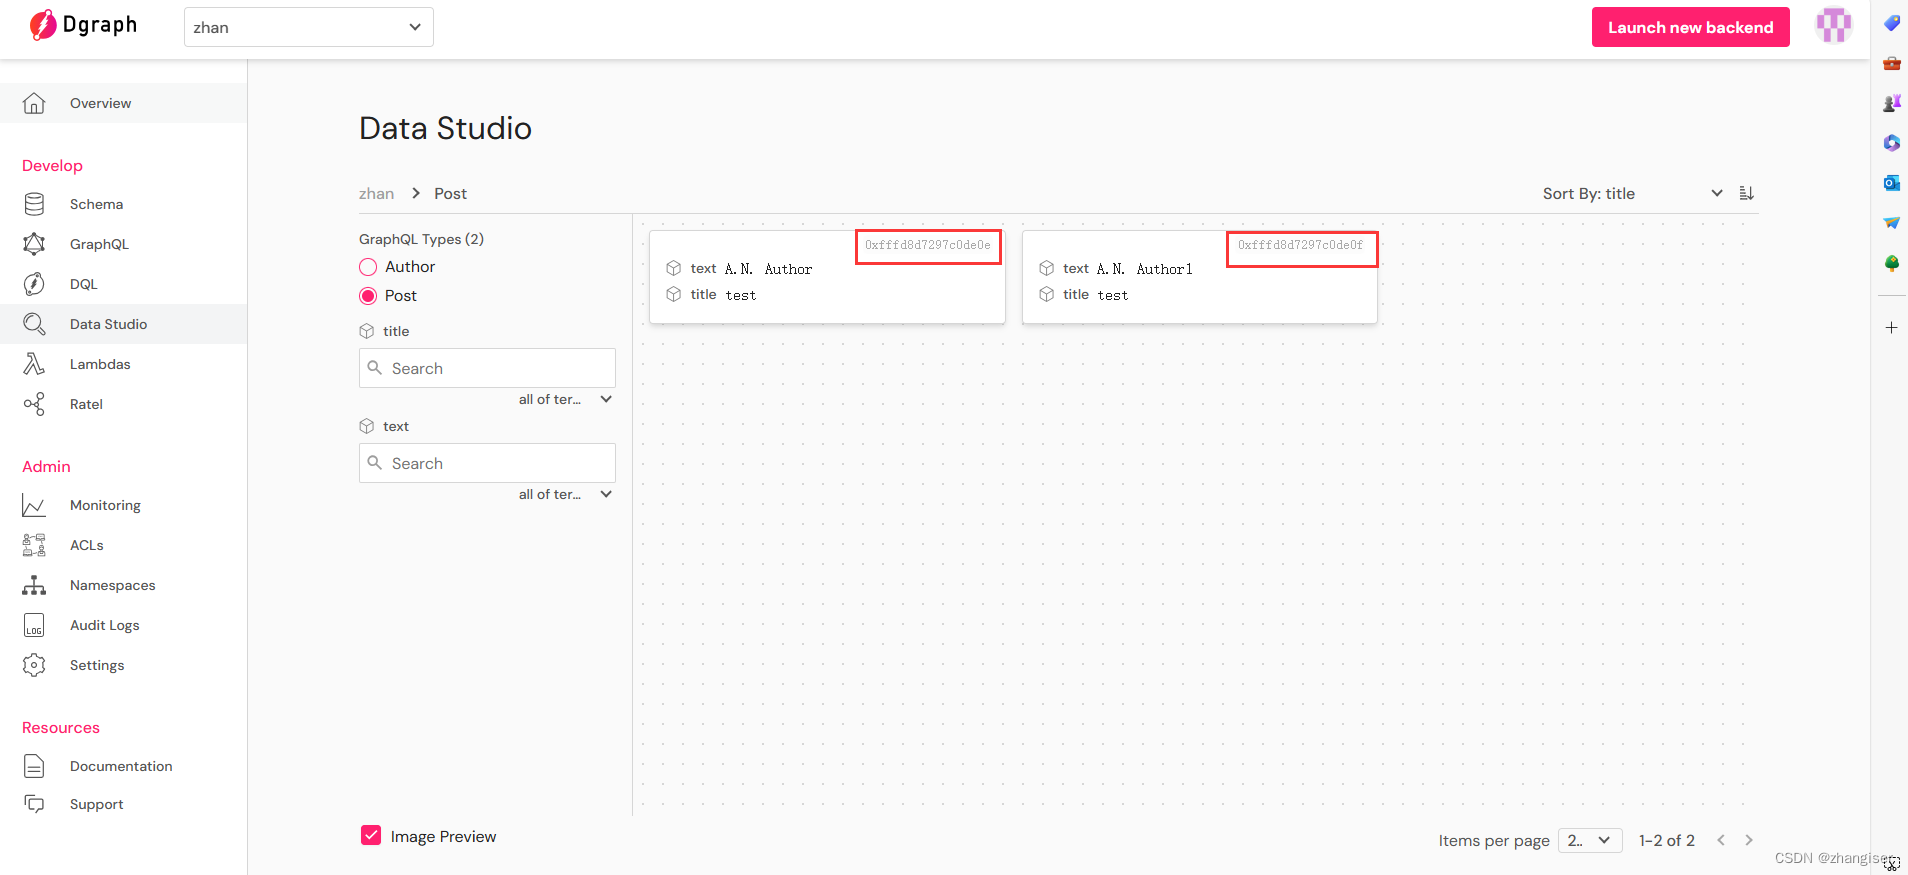
先验证下set和remove。在验证之前,先增加下面两条两条post
mutation {
  addPost(input: {text: "A.N. Author", title: "test"}){
    post{
      postID,
      text,
      title
    }
  }

}
mutation {
  addPost(input: {text: "A.N. Author1", title: "test"}){
    post{
      postID,
      text,
      title
    }
  }

}
添加完成后,可以通过Data Studio 去查看,可以看到Post 里面已经有两个对象,红框中是我们需要记住ID,用于后面的更新。
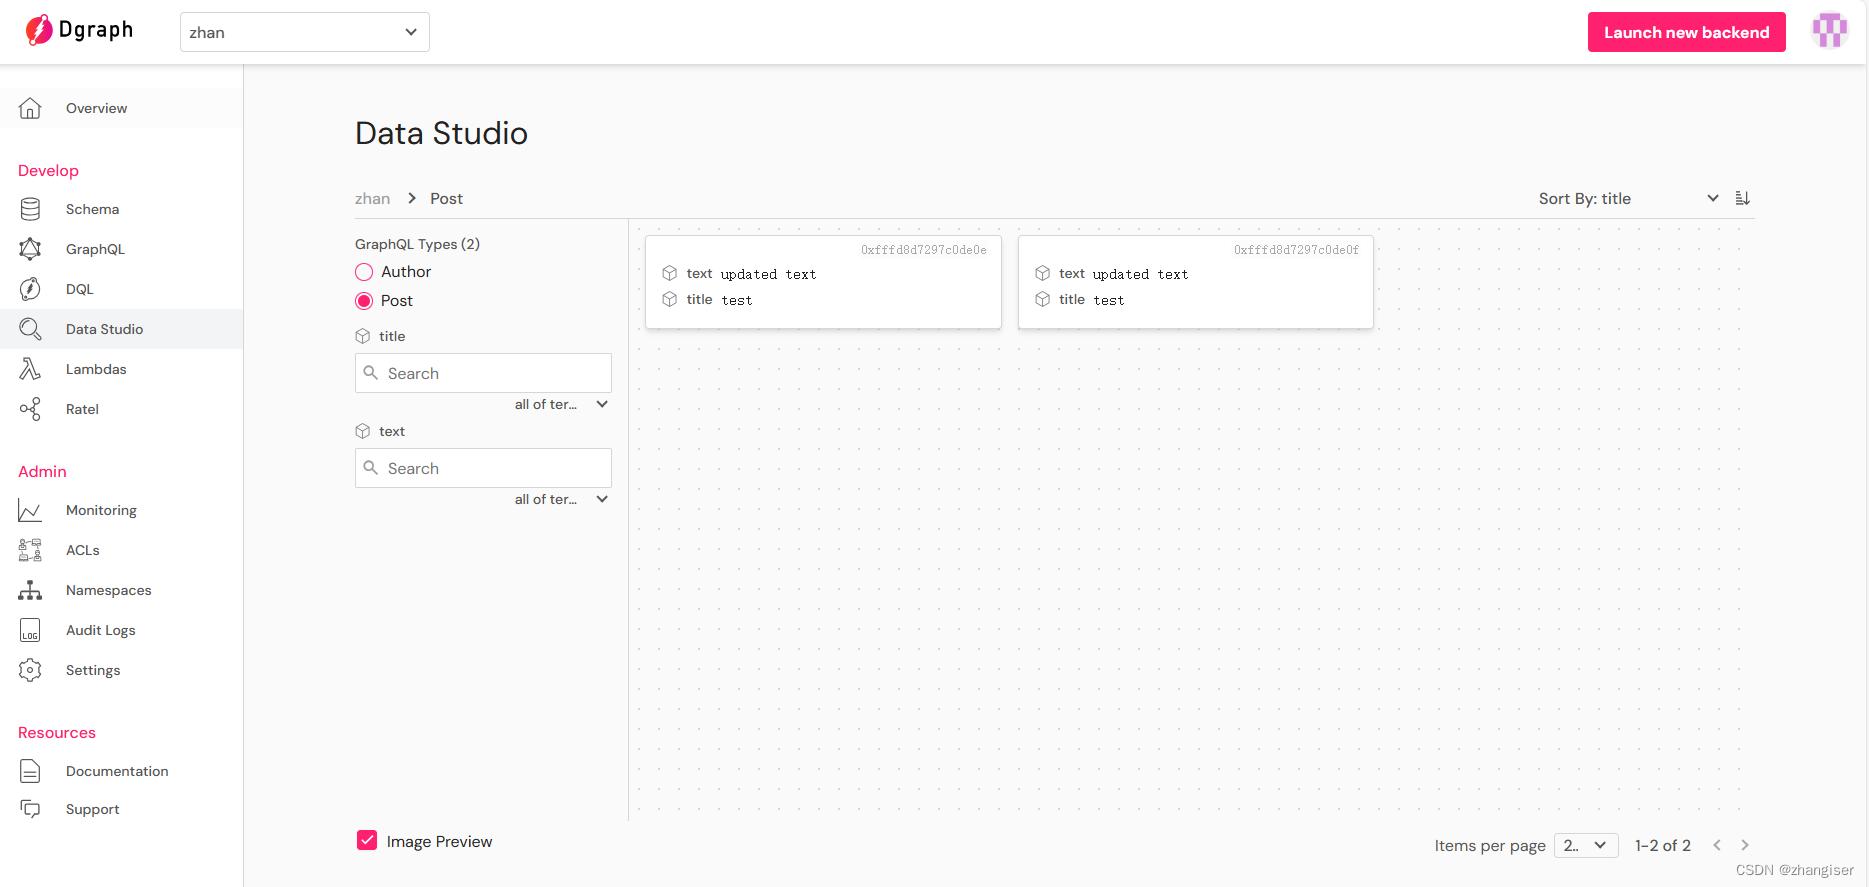
用带变量的验证set,输入下面的语句和变量
语句:
mutation updatePost($patch: UpdatePostInput!) {
  updatePost(input: $patch) {
    post {
      postID
      title
      text
    }
  }
}
变量
{ "patch":
  { "filter": {
      "postID": ["0xfffd8d7297c0de0e", "0xfffd8d7297c0de0f"]
    },
    "set": {
      "text": "updated text"
    }
  }
}
输入执行界面

查看数据,可以看到text已经变了。这个就是根据id更新text
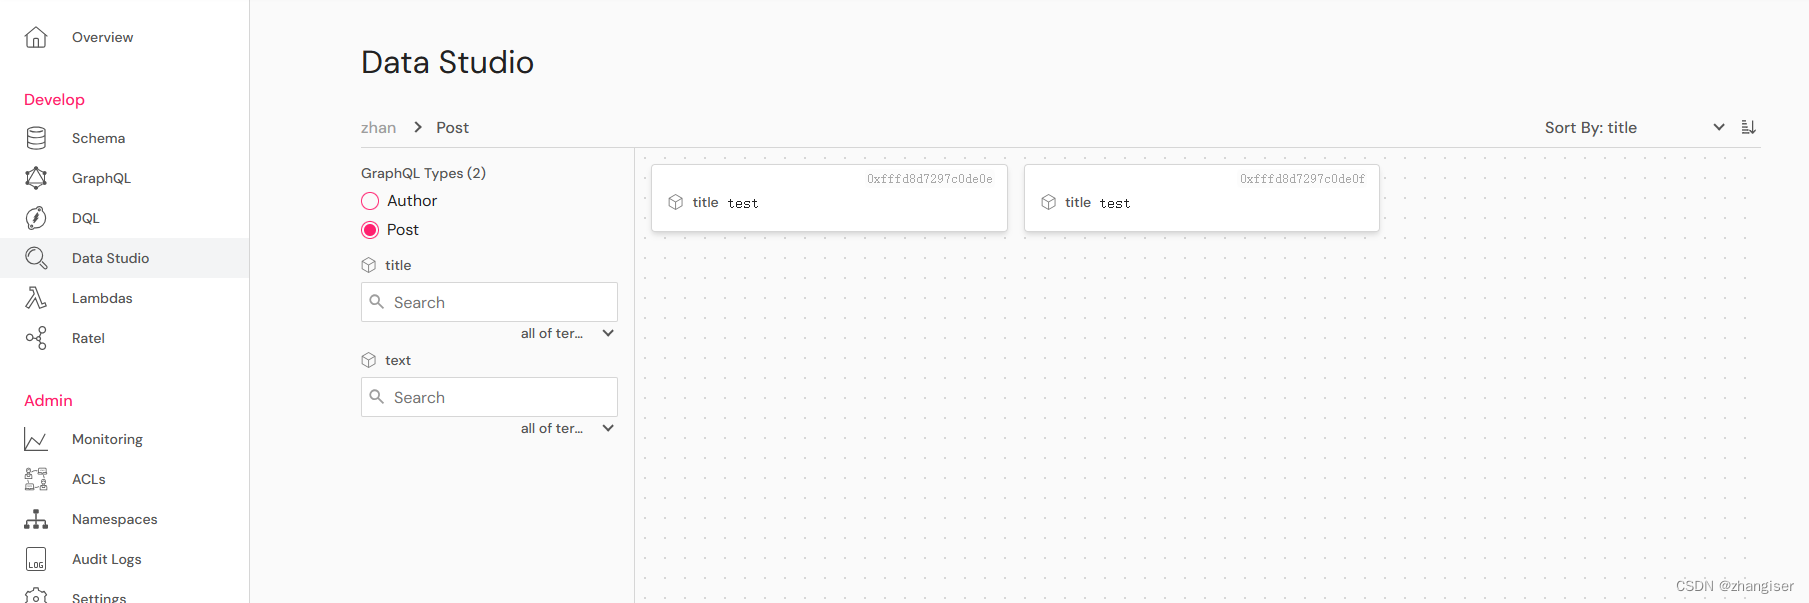
如果想要删除text 属性 ,我们可以执行remove。如下
语句
mutation updatePost($patch: UpdatePostInput!) {
  updatePost(input: $patch) {
    post {
      postID
      title
      text
    }
  }
}
变量
{ "patch":
  { "filter": {
      "postID": ["0xfffd8d7297c0de0e", "0xfffd8d7297c0de0f"]
    },
    "remove": {
      "text": "updated text"
    }
  }
}
结果,可以看到已经只有title了。这里的remove 是对属性控制了。
2.3、delete
删除的原型
deleteAuthor(filter: AuthorFilter!): DeleteAuthorPayload

type DeleteAuthorPayload {
	author(filter: AuthorFilter, order: AuthorOrder, first: Int, offset: Int): [Author]
	msg: String
	numUids: Int
}
删除示例
语句:
mutation deleteAuthor($filter: AuthorFilter!) {
  deleteAuthor(filter: $filter) {
    msg
    author {
      name
      dob
    }
  }
}
变量
{ "filter":
  { "name": { "eq": "A.N. Author" } }
}
验证:
删除之前:
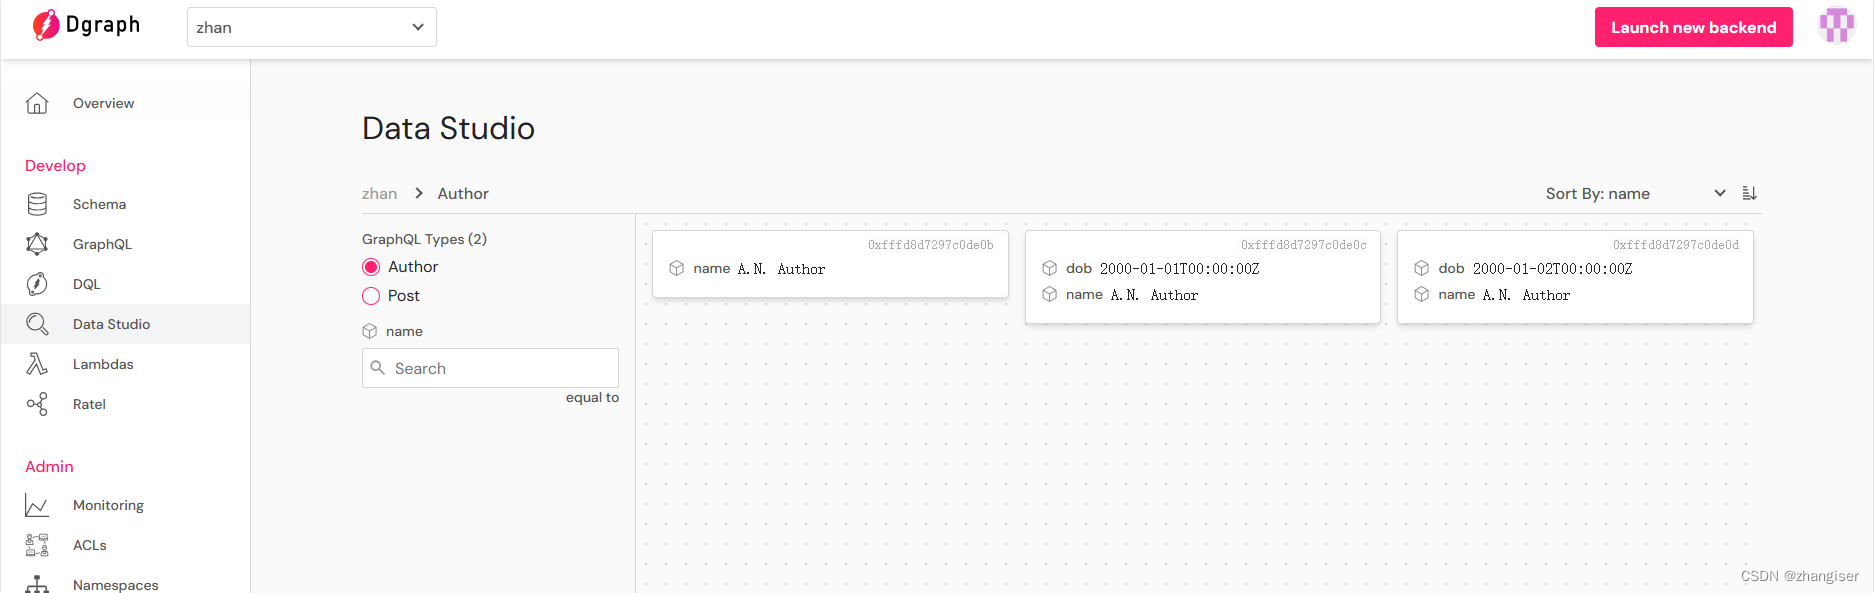
删除之后:
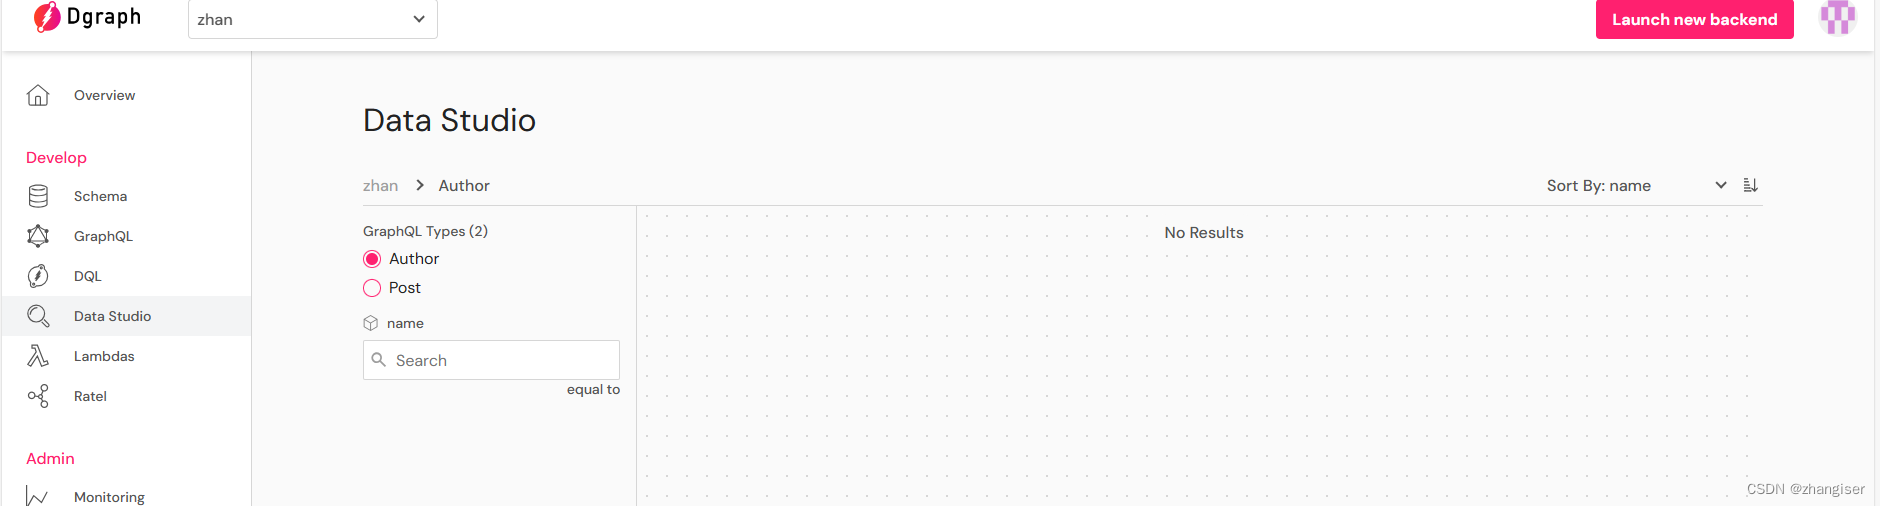
因为都是一个名字,所以全部删除了。
另外可以用Upsert 去增加,更新,如果有就更新,如果没有则直接添加,是个二合一的操作。还可以用deep 父子节点一起操作,需要的可以自己去云平台上测试,这里就不做演示了。


 4817
4817


 被折叠的 条评论
为什么被折叠?
被折叠的 条评论
为什么被折叠?
 到【灌水乐园】发言


