


概要
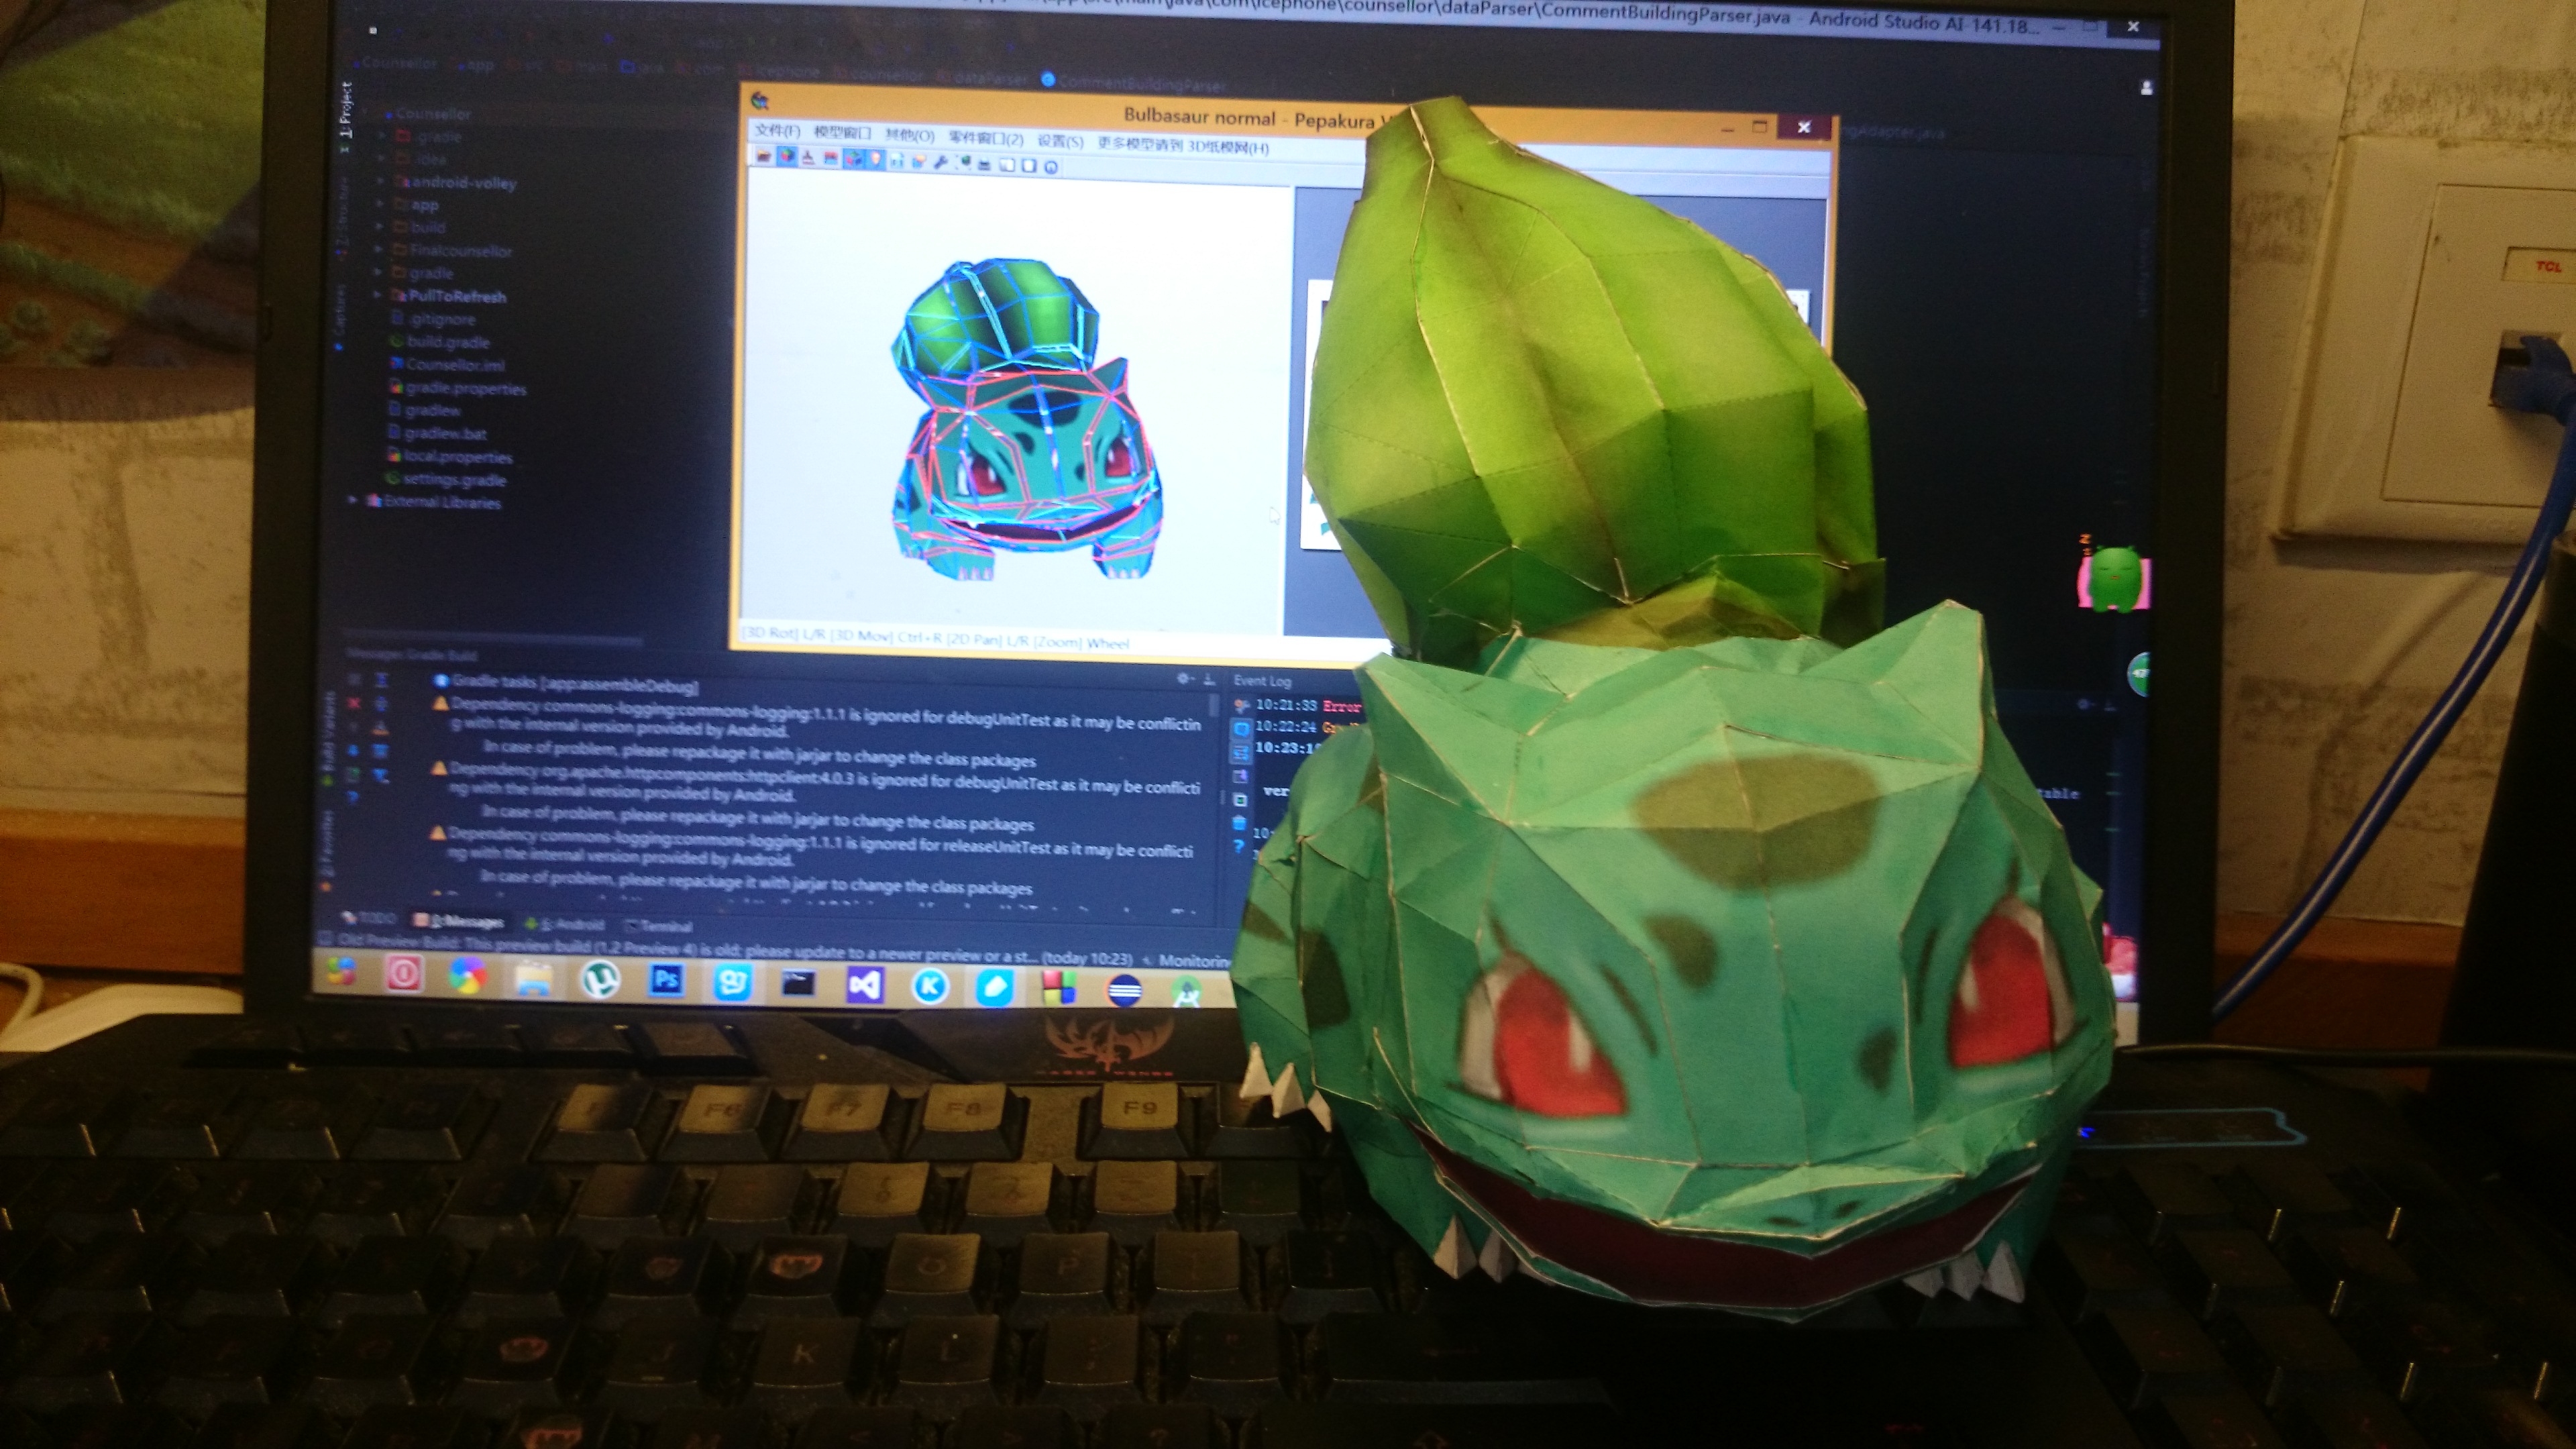
做了几天纸模,所以没来得及更新博客~生活才是主流嘛,嘿嘿,小展示一下我的成果

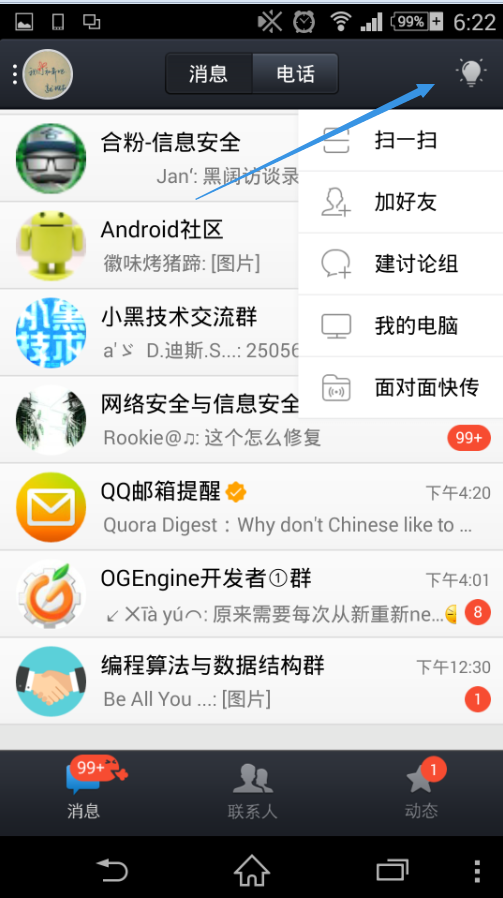
哈哈~言归正传,这次我们来看一下如何实现qq里面的下拉列表(我们的比他漂亮哦~)
效果展示
我们要实现的
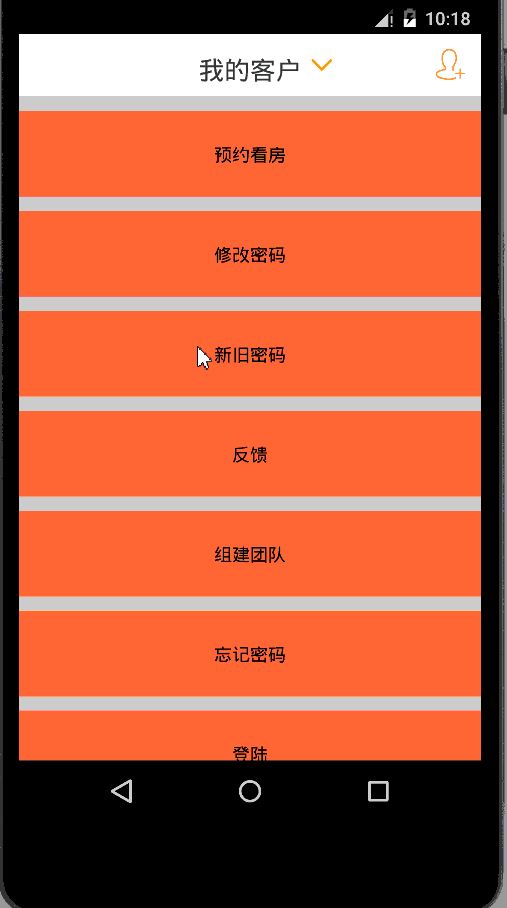
我们的效果
知识点
1.什么是popupwindow? 答:我们做的就是
2.什么是selector? 答:我们这里的selector主要是实现点击时和点击后控件呈现不同的动画效果
3.如何给LinearLayout设置selector,又怎么给它里面的textview设置同步效果? 答:代码里有解释
4.如何正确的设置popupwindow的位置?答: popupwindow的showasdropdown方法是默认左对齐的,具体如何让他居中请看代码
DEMO
我们要完成这个首先要完成这些东西:主界面、标题栏、popupwindow界面、linearLayout的selector点击效果(这里录得不明显,其实他是有一个变色效果的)、Textview的selector点击效果、主Activity的逻辑
主界面、标题栏就不再赘述了,首先看一下popupwindow的界面
就是一个垂直分布的linearlayout里面放了四个水平分布的linearlayout,每个水平的里面有一个textview
<?xml version="1.0" encoding="utf-8"?>
<LinearLayout
    xmlns:android="http://schemas.android.com/apk/res/android"
    android:orientation="vertical"
    android:layout_width="wrap_content"
    android:layout_height="wrap_content"
    android:background="@drawable/custom_pop">
    <LinearLayout

        android:layout_marginTop="8dp"
        android:id="@+id/all_customer"
        android:layout_width="fill_parent"
        android:layout_height="28dp"
        android:orientation="horizontal"
        android:background="@drawable/selector_lieanerlayout">
        <TextView
            android:duplicateParentState="true"
这里设置
android:duplicateParentState="true"
的意思是使他可以接受他所在的linearLayout的点击事件,这样当我们点击LinearLayout时,也会触发他的selector,使他跟着变颜色
            android:layout_marginLeft="8dp"
            android:id="@+id/tv_all_customer"
            android:layout_width="wrap_content"
            android:layout_height="wrap_content"
            android:text="全部"
            android:textSize="16dp"
            android:textColor="@color/selector_text"/>

    </LinearLayout>
    <LinearLayout
        android:id="@+id/recommend"
        android:layout_width="fill_parent"
        android:layout_height="28dp"
        android:orientation="horizontal"
        android:background="@drawable/selector_lieanerlayout"
这里的背景就是我们设置的selector
>
        <TextView
            android:duplicateParentState="true"
            android:layout_marginLeft="8dp"
            android:id="@+id/tv_recommend"
            android:layout_width="wrap_content"
            android:layout_height="wrap_content"
            android:text="推荐"
            android:textSize="16dp"
            android:textColor="@color/selector_text"
这个也是我们自己设置的selector
/>

    </LinearLayout>
    <LinearLayout
        android:id="@+id/appointment"
        android:layout_width="fill_parent"
        android:layout_height="28dp"
        android:orientation="horizontal"
        android:background="@drawable/selector_lieanerlayout">
        <TextView
            android:duplicateParentState="true"
            android:layout_marginLeft="8dp"
            android:id="@+id/tv_appointment"
            android:layout_width="wrap_content"
            android:layout_height="wrap_content"
            android:text="预约"
            android:textSize="16dp"
            android:textColor="@color/selector_text"/>

    </LinearLayout>
    <LinearLayout
        android:id="@+id/customer_entering"
        android:layout_width="fill_parent"
        android:layout_height="28dp"
        android:orientation="horizontal"
        android:background="@drawable/selector_lieanerlayout">
        <TextView
            android:duplicateParentState="true"
            android:layout_marginLeft="8dp"
            android:id="@+id/tv_customer_entering"
            android:layout_width="wrap_content"
            android:layout_height="wrap_content"
            android:text="案场录入"
            android:textSize="16dp"
            android:textColor="@color/selector_text"/>

    </LinearLayout>


</LinearLayout>
下面是两个selector
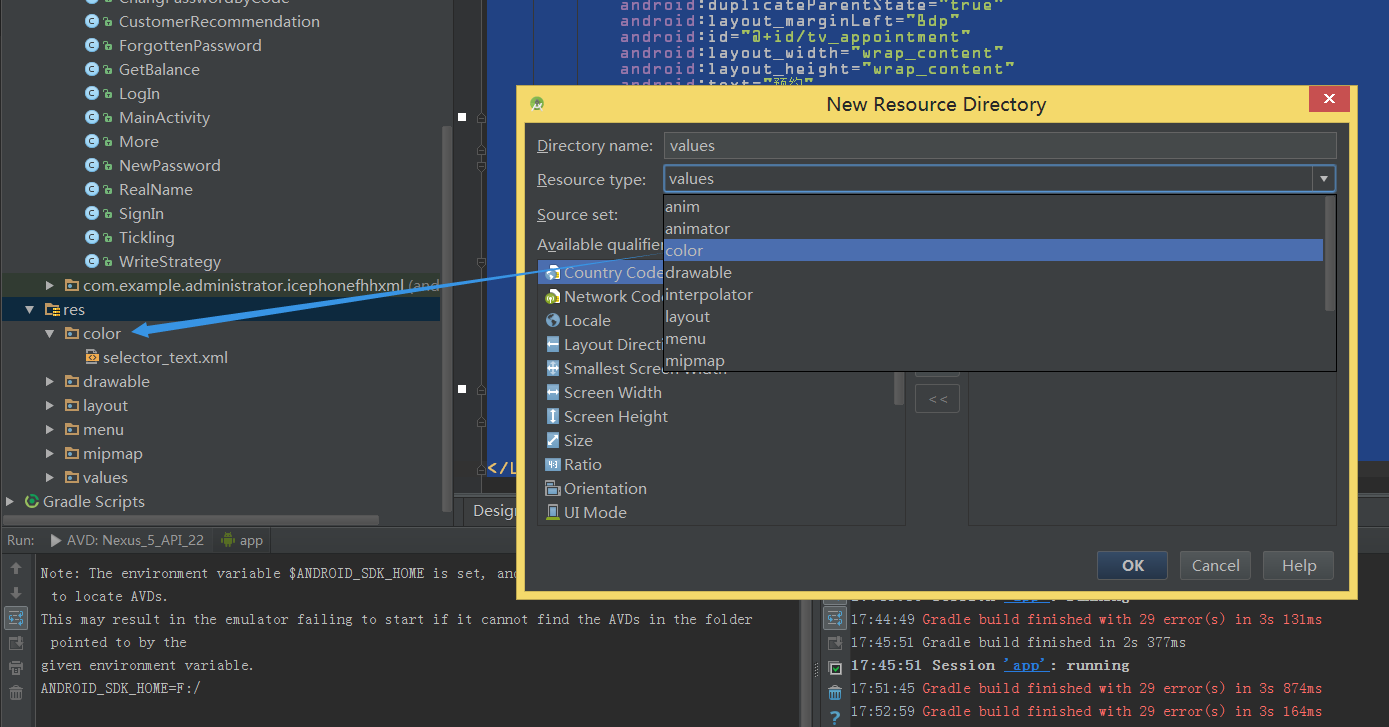
LinearLayout的布局文件放到drawable里(这个文件夹里的xml都要指定drawable属性,一般用来做背景切换的),所以我们认识到文字颜色不能放到这个文件夹,因为文字的颜色不是背景,如果这么用了只能设置文字背景,所以我们在res下新建一个color文件夹(color类型的)
然后在这个文件夹里放入更改文字的selector
下面上代码
linearLayout的selector
<?xml version="1.0" encoding="utf-8"?>
<selector xmlns:android="http://schemas.android.com/apk/res/android">
    <item android:state_pressed="true"
        android:drawable="@color/popupwindow1"/>
    <item android:state_enabled="true"
        android:drawable="@color/popupwindow2"/>

</selector>
这里说明一下,我们在res->value下有一个colors文件,用来统一管理color的,有时候一个项目需要使用一个颜色很多次,我们这样可以更方便的管理(如果你的ide没有可以自己建一个)

至于selector里的代码什么意思大家肯定一看就明白~全是英文╮(╯_╰)╭
继续,textview的selector
<?xml version="1.0" encoding="utf-8"?>
<selector xmlns:android="http://schemas.android.com/apk/res/android">
    <item android:state_selected="true" android:color="@color/orange" />
    <item android:state_focused="true" android:color="@color/orange" />
    <item android:state_pressed="true" android:color="@color/orange" />
    <item android:color="#ffffff" />

</selector>
这里面用的是android:color 而不是drawable,因为前者是颜色,后者是图片,文字设置的是颜色,不是图片~
继续,我们的前期工作都准备好了,就差最后一步了!!
首先要使用popupwindow我们就要知道他是什么,他是一个阻塞进程的对话框,也就是说正常情况下只要他在除了home键其他的都用不了,设置他的方法是这样
View root = this.getLayoutInflater().inflate(R.layout.poppupwin_my_client,null);
        popup = new PopupWindow(root,450,360);
        popup.setFocusable(true);
我们之前不是说过它可以阻塞进程吗?为什么我们的示例中点击别的地方它会消失??只要加上这两句即可
        popup.setOutsideTouchable(true);
        popup.setBackgroundDrawable(getResources().getDrawable(R.drawable.custom_pop));
最后我们给标题栏里的按钮设置监听,当点击时
popup.showAsDropDown(tittle,-tittle.getWidth()/2,4);
这样就完成了,最后记得给我们的Linearlayout加上监听,这样才能使其有效果
allCustom = (LinearLayout)root.findViewById(R.id.all_customer);
        recommend =(LinearLayout)root.findViewById(R.id.recommend);
        appointment=(LinearLayout)root.findViewById(R.id.appointment);
        customEntering=(LinearLayout)root.findViewById(R.id.customer_entering);
        allCustom.setOnClickListener(this);
        recommend.setOnClickListener(this);
        appointment.setOnClickListener(this);
        customEntering.setOnClickListener(this);
感想
作为一个程序员的我们真的要学会生活,人这一辈子最悲伤的事就是:“人死了钱没花了~”哈哈,程序员们!快乐的活着吧!!
每日一句:
他/她一定会来,你要等。


 6039
6039


 被折叠的 条评论
为什么被折叠?
被折叠的 条评论
为什么被折叠?
 到【灌水乐园】发言


