


联系作者:QQ:3176038642,wx: ilovework2200
目录
2.3 Library Compatibility Tests
5 Real-time Data (重点:command怎么写)
总体流程
mkdir Build_WRF
mkdir TESTS
cd Build_WRF
mkdir LIBRARIES
mkdir DATA
git clone https://github.com/wrf-model/WRF
git clone https://github.com/wrf-model/WPS


gfortran
gcc
cpp
g++


csh
perl
sh


tar -xf Fortran_C_tests.tar
gfortran TEST_1_fortran_only_fixed.f
./a.out

gfortran TEST_2_fortran_only_free.f90
./a.out

gcc TEST_3_c_only.c
./a.out

gcc -c -m64 TEST_4_fortran+c_c.c
gfortran -c -m64 TEST_4_fortran+c_f.f90
gfortran -m64 TEST_4_fortran+c_f.o TEST_4_fortran+c_c.o
./a.out


./TEST_csh.csh
./TEST_perl.pl
./TEST_sh.sh


sudo nano /etc/profile.d/myenv.sh
export DIR=/home/xiaoxi/Build_WRF/LIBRARIES
export CC=gcc
export CXX=g++
export FC=gfortran
export FCFLAGS=-m64
export F77=gfortran
export FFLAGS=-m64
export JASPERLIB=$DIR/grib2/lib
export JASPERINC=$DIR/grib2/include
export LDFLAGS=-L$DIR/grib2/lib
export CPPFLAGS=-I$DIR/grib2/include
export PATH=$DIR/netcdf/bin:$PATH
export NETCDF=$DIR/netcdf
export PATH=$DIR/mpich/bin:$PATH


tar xzvf netcdf-4.1.3.tar.gz
cd netcdf-4.1.3
./configure --prefix=$DIR/netcdf --disable-dap --disable-netcdf-4 --disable-shared
make
make install
cd ..

tar xzvf mpich-3.0.4.tar.gz
cd mpich-3.0.4
./configure --prefix=$DIR/mpich
make
make install
cd ..

tar xzvf zlib-1.2.7.tar.gz
cd zlib-1.2.7
./configure --prefix=$DIR/grib2
make
make install
cd ..

tar xzvf libpng-1.2.50.tar.gz
cd libpng-1.2.50
./configure --prefix=$DIR/grib2
make
make install
cd ..

tar xzvf jasper-1.900.1.tar.gz
cd jasper-1.900.1
./configure --prefix=$DIR/grib2
make
make install
cd ..


cd
cd TESTS
tar -xf Fortran_C_NETCDF_MPI_tests.tar
cp ${NETCDF}/include/netcdf.inc .
gfortran -c 01_fortran+c+netcdf_f.f
gcc -c 01_fortran+c+netcdf_c.c
gfortran 01_fortran+c+netcdf_f.o 01_fortran+c+netcdf_c.o -L${NETCDF}/lib -lnetcdff -lnetcdf
./a.out

mpif90 -c 02_fortran+c+netcdf+mpi_f.f
mpicc -c 02_fortran+c+netcdf+mpi_c.c
mpif90 02_fortran+c+netcdf+mpi_f.o 02_fortran+c+netcdf+mpi_c.o -L${NETCDF}/lib -lnetcdff -lnetcdf
mpirun ./a.out


cd
cd Build_WRF
cd WRF
./configure

./compile em_real >& log.compile

ls -ls main/*.exe
1、部署虚拟机和CentOS系统
VMware安装Centos7超详细过程(图文)_小七的玩偶的博客-CSDN博客_vmware安装centos
2、Compile WRF
WRF online tutorial: Compiling WRF
2.1 System Environment Tests
①查看有没有gfortran, cpp, gcc
# 查看有没有gfortran,cpp,gcc
which gfortran
which cpp
which gcc
②创建目录Build_WRF和TESTS
mkdir Build_WRF
mkdir TESTS
③根据tutorial给的测试代码,测试compiler是否运行正常
④确保csh,perl,sh正常,我这里csh没有安装,因此
yum install csh

# 提示Error: This command has to be run with superuser privileges (under the root user on most systems).

su  #root
yum install csh
⑤测试tutorial里需要的其他所有的commands
2.2 Building Libraries
①进入Build_WRF目录,并创建LIBRARIES目录
cd Build_WRF
mkdir LIBRARIES
②下载tutorial中让下载的5个包,链接见tutorial
③设置环境变量
setenv DIR /path_to_directory/Build_WRF/LIBRARIES
setenv CC gcc
setenv CXX g++
setenv FC gfortran
setenv FCFLAGS -m64
setenv F77 gfortran
setenv FFLAGS -m64
setenv JASPERLIB $DIR/grib2/lib
setenv JASPERINC $DIR/grib2/include
setenv LDFLAGS -L$DIR/grib2/lib
setenv CPPFLAGS -I$DIR/grib2/include参考Set an Environment Variable in Linux Permanently in https://phoenixnap.com/kb/linux-set-environment-variable
摘录如下:
If you wish a variable to persist after you close the shell session, you need to set it as an environmental variable permanently. You can choose between setting it for the current user or all users.
To set permanent environment variables for all users, create an .sh file in the /etc/profile.d folder:
sudo nano /etc/profile.d/myenv.sh


退出上述文件:Ctrl+X,然后问你要不要保存,选Y,然后回车,就跳出这个文件,回到之前目录下了。
保存sh文件之后,关掉命令窗重新开
测试有没有成功设置永久的环境变量
printenv

# printenv 你设置的环境变量
printenv DIR
printenv EXAMPLE
测试结果例子
![]()
④编译安装上述5个libraries,具体参考tutorial链接
# NetCDF
tar xzvf netcdf-4.1.3.tar.gz
cd netcdf-4.1.3
./configure --prefix=$DIR/netcdf --disable-dap --disable-netcdf-4 --disable-shared
make
make install
setenv PATH $DIR/netcdf/bin:$PATH
setenv NETCDF $DIR/netcdf
cd ..


# MPICH
tar xzvf mpich-3.0.4.tar.gz
cd mpich-3.0.4
./configure --prefix=$DIR/mpich
make
make install
setenv PATH $DIR/mpich/bin:$PATH
cd ..


# zlib
cd zlib-1.2.7
./configure --prefix=$DIR/grib2
make
make install
cd ..


# libpng
tar xzvf libpng-1.2.50.tar.gz
cd libpng-1.2.50
./configure --prefix=$DIR/grib2
make
make install
cd ..

# Jasper
tar xzvf jasper-1.900.1.tar.gz
cd jasper-1.900.1
./configure --prefix=$DIR/grib2
make
make install
cd ..
2.3 Library Compatibility Tests
①下载测试包到TESTS中,在online tutorial中,并解压

tar -xf Fortran_C_NETCDF_MPI_tests.tar共有2个测试
②Test #1: Fortran + C + NetCDF
(准备)将NETCDF package拷贝到当前目录(手动拷贝,代码拷贝均可)
cp ${NETCDF}/include/netcdf.inc .测试:
gfortran -c 01_fortran+c+netcdf_f.f
gcc -c 01_fortran+c+netcdf_c.c
gfortran 01_fortran+c+netcdf_f.o 01_fortran+c+netcdf_c.o -L${NETCDF}/lib -lnetcdff -lnetcdf
./a.out
测试结果:
C function called by Fortran
Values are xx = 2.00 and ii = 1
SUCCESS test 1 fortran + c + netcdf③Test #2: Fortran + C + NetCDF + MPI
(准备)将NETCDF package拷贝到当前目录(手动拷贝,代码拷贝均可)
cp ${NETCDF}/include/netcdf.inc .测试:
mpif90 -c 02_fortran+c+netcdf+mpi_f.f
mpicc -c 02_fortran+c+netcdf+mpi_c.c
mpif90 02_fortran+c+netcdf+mpi_f.o 02_fortran+c+netcdf+mpi_c.o -L${NETCDF}/lib -lnetcdff -lnetcdf
mpirun ./a.out
测试结果:
C function called by Fortran
Values are xx = 2.00 and ii = 1
status = 2
SUCCESS test 2 fortran + c + netcdf + mpi
2.4 Building WRF
①下载WRF source code
下载教程:WRF Modeling System Download: New User Registration
2种方法:
(1)用git命令下载
WRF Model Source Code (includes WRF, WRFDA, & WRF-Chem):
git clone https://github.com/wrf-model/WRF

WRF Preprocessing System Source Code :
git clone https://github.com/wrf-model/WPS
(2)通过github下载压缩包
②configure:进入WRF目录,创建configuration,直接输入下面命令
./configure之后会让你选择compiler

这里我选择的是32,GNU(gfortran/gcc)下的serial
关于serial, smpar,dmpar, dm+sm选哪个,参考链接:https://www2.mmm.ucar.edu/wrf/OnLineTutorial/Compile/arw_compile2.php
摘录如下:

之后会问 Compile for nesting? 根据链接(https://www2.mmm.ucar.edu/wrf/OnLineTutorial/Compile/arw_compile2.php),选择了1basic
摘录如下:

我的设置截图:

之后生成了configure.wrf的文件,需要的话,你可以进行手动修改。
③ compile
./compile case_name >& log.compile

# 我的选项
./compile em_real >& log.compile # 把compile的过程输出到 log.compile文件中case_name用下列选项代替:
    em_real (3d real case)
    em_quarter_ss (3d ideal case)
    em_b_wave (3d ideal case)
    em_les (3d ideal case)
    em_heldsuarez (3d ideal case)
    em_tropical_cyclone (3d ideal case)
    em_hill2d_x (2d ideal case)
    em_squall2d_x (2d ideal case)
    em_squall2d_y (2d ideal case)
    em_grav2d_x (2d ideal case)
    em_seabreeze2d_x (2d ideal case)
    em_scm_xy (1d ideal case)
编译过程大概持续20-30分钟.
关于选哪一项,参考链接:
https://www2.mmm.ucar.edu/wrf/users/docs/user_guide_V3/users_guide_chap4.htm
WRF user guide v3: Chapter 4: WRF Initialization(转载)_balabalaxi~的博客-CSDN博客
Index of /wrf/users/docs/user_guide_V3
摘录如下:
The WRF model has two large classes of simulations that it is able to generate: those with an ideal initialization and those utilizing real data. The idealized simulations typically manufacture an initial condition file for the WRF model from an existing 1-D or 2-D sounding and assume a simplified analytic orography. The real-data cases usually require pre-processing from the WPS package, which provides each atmospheric and static field with fidelity appropriate to the chosen grid resolution for the model. The WRF model executable itself is not altered by choosing one initialization option over another (idealized vs. real), but the WRF model pre-processors (the real.exe and ideal.exe programs) are specifically built based upon a user's selection.
The real.exe and ideal.exe programs are never used together. Both the real.exe and ideal.exe are the programs that are processed just prior to the WRF model run.
The ideal vs. real cases are divided as follows:
·Ideal cases – initialization programs named “ideal.exe”
o 3d
·em_b_wave - baroclinic wave, 100 km
·em_fire – surface fire, 50 m
·em_heldsuarez – global case with polar filtering, 625 km
·em_les – large eddy simulation, 100 m
·em_quarter_ss - super cell, 2 km
·em_tropical_cyclone – hurricane, 15 km
o 2d
·em_grav2d_x – gravity current, 100 m
·em_hill2d_x – flow over a hill, 2 km
·em_seabreeze2d_x – water and land, 2 km, full physics
·em_squall2d_x – squall line, 250 m
·em_squall2d_y – transpose of above problem
o 1d
·em_scm_xy – single column model, 4 km, full physics
·Real data cases – initialization program named “real.exe”
o em_real – examples from 4 to 30 km, full physics
The selection of the type of forecast is made when issuing the ./compile statement. When selecting a different case to study, the code must be re-compiled to choose the correct initialization for the model. For example, after configuring the setup for the architecture (with the ./configure command), if the user issues the command ./compile em_real, then the initialization program is built using module_initialize_real.F as the target module (one of the ./WRFV3/dyn_em/module_initialize_*.F files). Similarly, if the user specifies ./compile em_les, then the Fortran module for the large eddy simulation (module_initialize_les.F) is automatically inserted into the build for ideal.exe. 。。。
④检查compile的结果
ls -ls main/*.exe # 查看main文件夹里的exe文件如果选择的是real case,应该看到以下4个exe:
    wrf.exe (model executable)
    real.exe (real data initialization)
    ndown.exe (one-way nesting)
    tc.exe (for tc bogusing--serial only)
Idealized case:
    wrf.exe (model executable)
    ideal.exe (ideal case initialization)
These executables are linked to 2 different directories:
    WRF/run
    WRF/test/em_real
You can choose to run WRF from either directory.
3 Building WPS
①下载WPS的source code
②进入WPS目录,并确保路径是clean的
cd WPS

./clean
③设置环境变量
setenv JASPERLIB $DIR/grib2/lib

setenv JASPERINC $DIR/grib2/include
④configure
./configure从list中选择支持的平台,这里官方推荐说不要选带NO_GRIB2的。根据前面选的,我这里选1 gfortran (serial)

检查configure.wps里有没有以下这句话,WPS会用到WRF里的一些I/O libraries
WRF_DIR = ../WRF⑤compile WPS
./compile >& log.compile会持续一会时间
⑥检查
If the compilation is successful, there should be 3 executables in the WPS top-level directory, that are linked to their corresponding src/ directories:
# 3个可执行文件

    geogrid.exe -> geogrid/src/geogrid.exe
    ungrib.exe -> ungrib/src/ungrib.exe
    metgrid.exe -> metgrid/src/metgrid.exe

Verify that they are not zero-sized (inside the */src/ directory). To see file size, you can type (for e.g.,):
ls -ls geogrid/src/geogrid.exe
4 Static Geography Data
①WRF的运行会需要地形,土地利用等地理位置相关的信息,因此需要下载static geography data,下载到Build_WRF目录下

②解压
gunzip geog.tar.gz
tar -xf geog.tar
③查看解压后的命名为“WPS_GEOG”
④在namelist.wps文件中,把geog_data_path对应的路径修改了
geog_data_path = '/home/work/Build_WRF/WPS_GEOG' # 这里就是WPS_GEOG的实际路径⑤接下来这个数据就可以用来测试geogrid.exe了
5 Real-time Data (重点:command怎么写)
For real-data cases, the WRF model requires up-to-date meteorological information for both an initial condition and also for lateral boundary conditions. This meteorological data is traditionally a Grib file that is provided by a previously run external model or analysis. For a semi-operational set-up, the meteorological data is usually sourced from a global model, which permits locating the WRF model's domains anywhere on the globe.
The National Centers for Environmental Prediction (NCEP) run the Global Forecast System (GFS) model four times daily (initializations valid for 0000, 0600, 1200, and 1800 UTC). This is a global, isobaric, 0.5 degree latitude/longitude, forecast data set that is freely available, and is usually accessible +4h after the initialization time period.
A single data file needs to be acquired for each requested time period. For example, if we would like hours 0, 6, and 12 of a forecast that is initialized 2019 July 12 at 0000 UTC(这里的时间决定了后续下载数据时链接里的时间设置), we need the following times:
2019071200 – 0 h
2019071206 – 6 h
2019071212 – 12 hThese translate to the following file names to access:
gfs.2019071200/gfs.t00z.pgrb2.0p50.f000
gfs.2019071200/gfs.t00z.pgrb2.0p50.f006
gfs.2019071200/gfs.t00z.pgrb2.0p50.f012Note that the initialization data and time (gfs.2019071200) remains the same, and that the forecast cycle remains the same (t00z). What is incremented is the forecast hour (f00, f06, f12).
Before obtaining the data, creat a directory in Build_WRF, called "DATA", and then go into that directory:
    mkdir DATA
    cd DATA
A simple set of interactive commands to grab these files from the NCEP servers in real-time would look like: (例子如下:)
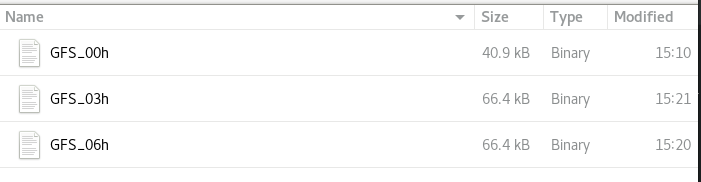
# 注意时间,anonymous: 后面的邮箱,以及ftp://前面的文件名称的设置
curl -s --disable-epsv --connect-timeout 30 -m 60 -u anonymous:USER_ID@INSTITUTION -o GFS_00h ftp://ftpprd.ncep.noaa.gov/pub/data/nccf/com/gfs/prod/gfs.20210122/00/gfs.t00z.pgrb2.0p50.f000
curl -s --disable-epsv --connect-timeout 30 -m 60 -u anonymous:USER_ID@INSTITUTION -o GFS_03h ftp://ftpprd.ncep.noaa.gov/pub/data/nccf/com/gfs/prod/gfs.20210122/00/gfs.t00z.pgrb2.0p50.f003
curl -s --disable-epsv --connect-timeout 30 -m 60 -u anonymous:USER_ID@INSTITUTION -o GFS_06h ftp://ftpprd.ncep.noaa.gov/pub/data/nccf/com/gfs/prod/gfs.20210122/00/gfs.t00z.pgrb2.0p50.f006
**Notes
- This is just an example time/date. Typically on the NCEP data servers, only the most recent 2-3 days are available at any given time. To use up-to-date real-time data, you will need to adjust the commands to reflect current date and time information.
- Typically these commands return a complete file within a couple of minutes. The files returned from these commands (GFS_00h, GFS_06h, GFS_12h) are Grib Edition 2 files, able to be directly used by the ungrib program. You can use the naming convention we provided (e.g., GFS_00h), or you can name these whatever you like. Just take care to make sure you do not overwrite them when downloading the files.
- You need to fill in the anonymous login information (which is not private, so there are no security concerns about leaving these scripts around). Keep the word 'anonymous,' but use your actual email address for the part that follows. For example, the actual line should read something like anonymous:joe_wrf@wrf_institute.edu(在command中改成自己的邮箱). It may be useful to write a short script to automatically increment the initialization time.
- There are 3 commands below that should be entered in the command line separately. Each command is long and may wrap on your screen. Once you reach a full line space, you have reached the end of the command. E
下载得到3个文件
6 Run WPS and WRF
(未完待续。。。)


 165
165


 被折叠的 条评论
为什么被折叠?
被折叠的 条评论
为什么被折叠?
 到【灌水乐园】发言


