


 本文详细介绍了如何在iOS应用中实现Facebook第三方登录,包括创建Facebook应用、集成SDK、配置Info.plist、处理AppDelegate代码,以及检测登录成功后获取用户信息的方法。在遇到问题时,提供了解决崩溃和自定义登录button的技巧。
网站配置
- 创建应用

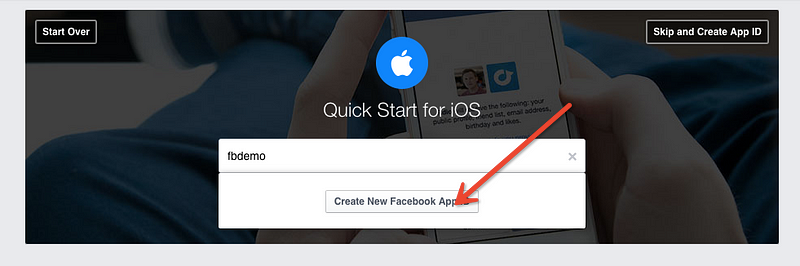
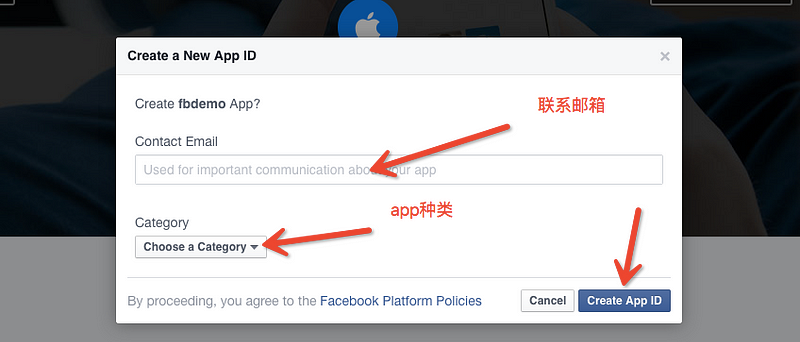
-
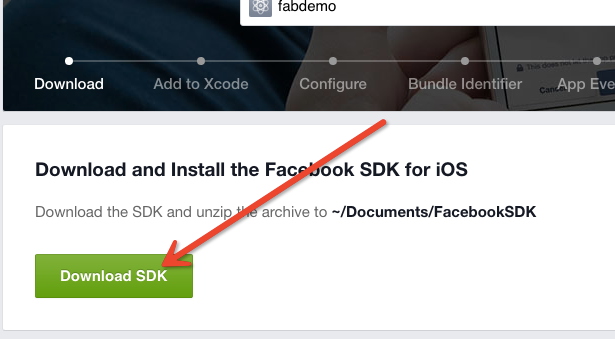
下载sdk
-
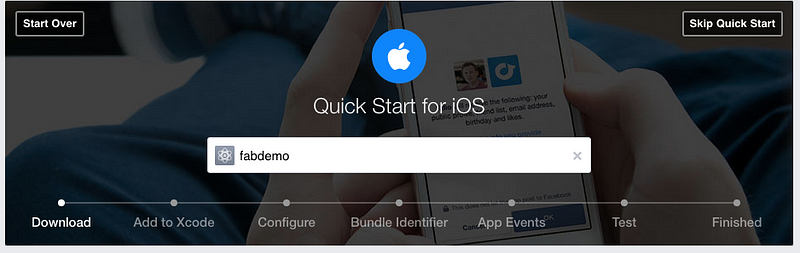
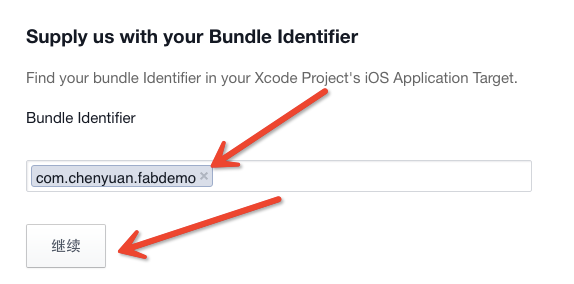
在Facebook应用页输入自己的工程的唯一标识符,bundle identifier
工程配置
-
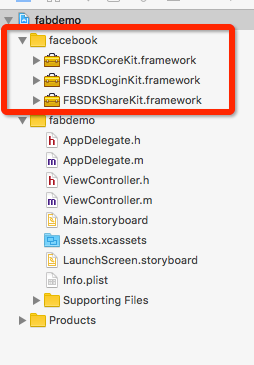
找到下载的sdk,并把sdk中的 FBSDKCoreKit.Framework, FBSDKLoginKit.Framework, FBSDKShareKit.Framework 添加到xcode工程中
-
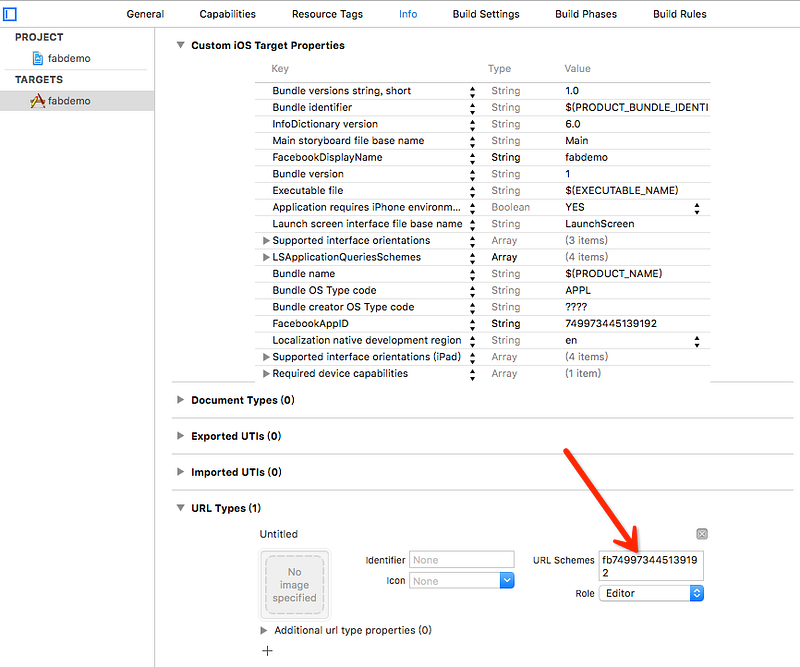
修改Info.plist文件配置
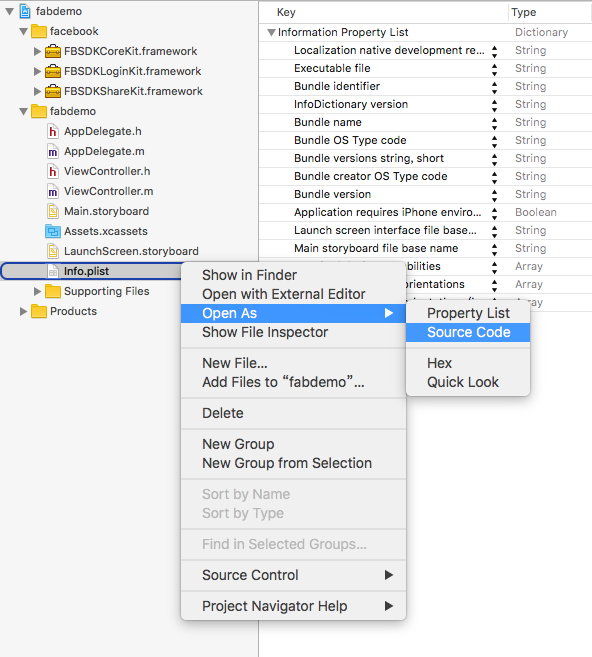
添加以下键值对,里面的键值对每个应用都是不一样的,注意在facebook创建的应用集成页生成自己的应用后,再复制到自己的工程中
<key>CFBundleURLTypes</key>
 <array>
   <dict>
   <key>CFBundleURLSchemes</key>
   <array>
     <string>fb749973445139192</string>
   </array>
   </dict>
 </array>
 <key>FacebookAppID</key>
 <string>749973445139192</string>
 <key>FacebookDisplayName</key>
 <string>fabdemo</string>
为了适配iOS9,还需要添加添加以下:
 <key>LSApplicationQueriesSchemes</key>
 <array>
   <string>fbapi</string>
   <string>fb-messenger-api</string>
   <string>fbauth2</string>
   <string>fbshareextension</string>
</array>- 配置 AppDelegate.m中的代码
头文件
#import <FBSDKCoreKit/FBSDKCoreKit.h>方法实现
 - (void)applicationDidBecomeActive:(UIApplication *)application {
   [FBSDKAppEvents activateApp];
 }

 - (BOOL)application:(UIApplication *)application didFinishLaunchingWithOptions:(NSDictionary *)launchOptions {
   [[FBSDKApplicationDelegate sharedInstance] application:application
                            didFinishLaunchingWithOptions:launchOptions];
   return YES;
 }

 - (BOOL)application:(UIApplication *)application
             openURL:(NSURL *)url
   sourceApplication:(NSString *)sourceApplication
          annotation:(id)annotation {
   return [[FBSDKApplicationDelegate sharedInstance]     application:application
                                                          openURL:url
                                                sourceApplication:sourceApplication
                                                       annotation:annotation];
 }
检测是否接入成功
在你的ViewController.m 中,添加facebook的按钮,试验一下看是否能跳转和登录。
头文件
  #import <FBSDKCoreKit/FBSDKCoreKit.h>
 #import <FBSDKLoginKit/FBSDKLoginKit.h>
Facebook的button
 FBSDKLoginButton *loginButton = [[FBSDKLoginButton alloc] init];
 loginButton.center = self.view.center;
 [self.view addSubview:loginButton];
如果这时候程序崩溃,尝试一下以下方法
- 检查一下你的Info.plist文件是否正确,设置完后clean一下工程
- 自己设置appID

- 自己手动配置url schemes
自定义button
自定义一个button,给button加入以下点击事件
//自定义login button的点击事件
 - (IBAction)loginBtnClicked:(id)sender {
     FBSDKLoginManager *login = [[FBSDKLoginManager alloc] init];
     [login
      logInWithReadPermissions: @[@"public_profile"]
      fromViewController:self
      handler:^(FBSDKLoginManagerLoginResult *result, NSError *error) {
          NSLog(@"facebook login result.grantedPermissions = %@,error = %@",result.grantedPermissions,error);
          if (error) {
              NSLog(@"Process error");
          } else if (result.isCancelled) {
              NSLog(@"Cancelled");
          } else {
              NSLog(@"Logged in");
          }
      }];
 }
这样,根据登录成功与失败的结果,我们就能做一些操作了。
登录成功我们可以通过 FBSDKProfile 这个类来访问到 用户信息
我们可以注册一个通知,来监听 userProfile是否改变,如果改变,就把它显示在页面的label上
 [[NSNotificationCenter defaultCenter] addObserver:self
                                              selector:@selector(_updateContent:)
                                                  name:FBSDKProfileDidChangeNotification
                                                object:nil];
实现通知事件
- (void)_updateContent:(NSNotification *)notification {
     self.infoLabel.text = [NSString stringWithFormat:@"name = %@,userID = %@",[FBSDKProfile currentProfile].name,[FBSDKProfile currentProfile].userID];
 }
另外,为了保证profile能自动跟随access token的更新而更新,在AppDelegate.m中还要添加
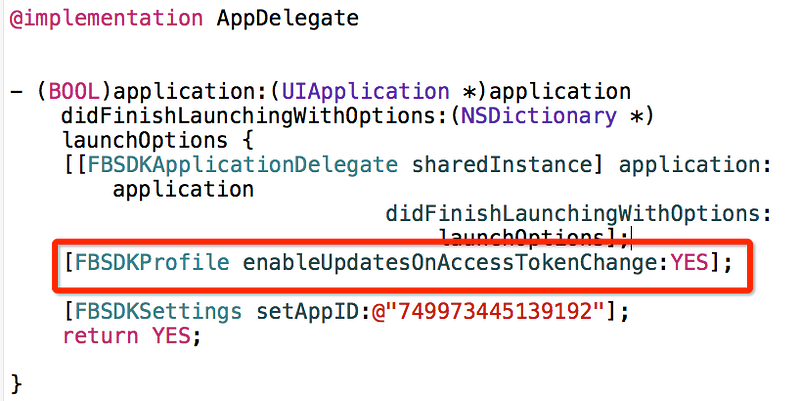
[FBSDKProfile enableUpdatesOnAccessTokenChange:YES];Tips
- 应用没有通过facebook审核的时候,只能通过你在facebook创建app的账号来进行第三方登录


 3577
3577

 被折叠的 条评论
为什么被折叠?
被折叠的 条评论
为什么被折叠?
 到【灌水乐园】发言


