


OK,我们先创建电影信息的数据库表:
CREATE TABLE `movie_info` (
  `id` int(11) NOT NULL AUTO_INCREMENT COMMENT '主键id,自动增长',
  `movie_name` varchar(50) DEFAULT NULL COMMENT '电影名称',
  `movie_title` varchar(100) DEFAULT NULL COMMENT '电影标题',
  `hot` char(1) DEFAULT NULL COMMENT '是否热门。1=是,0=否',
  `image_name` varchar(255) DEFAULT NULL COMMENT '主图地址',
  `movie_content` longtext COMMENT '电影详情,存入富文本内容',
  `create_time` date DEFAULT NULL COMMENT '发布日期',
  PRIMARY KEY (`id`)
) ENGINE=InnoDB DEFAULT CHARSET=utf8;
先下载 CKEditor富文本编辑器,提供下载链接:https://pan.baidu.com/s/1Kw6xx-94gM7VaChnQB-xwQ 提取码: 9uur
不要从官网里下载,亲测有 bug。
下载完毕解压到本地硬盘,然后把解压的文件夹复制、粘贴到我们项目的 static 目录下。与 EasyUI 的方法一样,粘贴到项目的 static 目录下

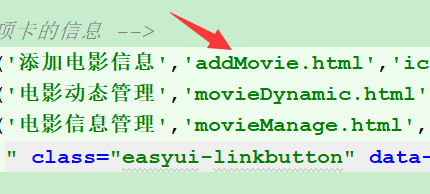
OK,我们在 html 目录下,创建 addMovie.html 与 main.html 的“添加电影信息”的文件对应。
addMovie.html 完整代码如下:
<!DOCTYPE html>
<html>
<head>
<meta charset="UTF-8">
<title>添加电影信息</title>
<link rel="stylesheet" type="text/css" href="/static/jquery-easyui-1.7.0/themes/default/easyui.css"></link>
<link rel="stylesheet" type="text/css" href="/static/jquery-easyui-1.7.0/themes/icon.css"></link>
<script type="text/javascript" src="/static/jquery-easyui-1.7.0/jquery.min.js"></script>
<script type="text/javascript" src="/static/jquery-easyui-1.7.0/jquery.easyui.min.js"></script>
<script type="text/javascript" src="/static/jquery-easyui-1.7.0/locale/easyui-lang-zh_CN.js"></script>
<script type="text/javascript" src="/static/ckeditor/ckeditor.js"></script>
<script type="text/javascript">
//提交内容数据
function submitData(){
$("#fm").form("submit",{
//提交到后台的 RUL 路径
url:"/admin/movie/save",
onSubmit:function(){
var content= CKEDITOR.instances.content.getData();
if(content == ""){
$.messager.alert("系统提示","内容不能为空!");
return false;
}
return $(this).form("validate");
},
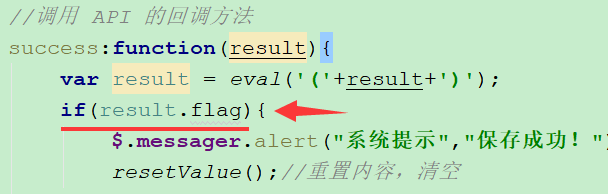
//调用 API 的回调方法
success:function(result){
var result = eval('('+result+')');
if(result.flag){
$.messager.alert("系统提示","保存成功!");
resetValue();//重置内容,清空
}else{
$.messager.alert("系统提示","保存失败!");
return;
}
}
});
}
//重置内容
function resetValue(){
$("#movieName").val("");
$("#movieTitle").val("");
$("#imageFile").val("");
$("#no").prop("checked", true);
CKEDITOR.instances.content.setData("");
}
</script>
</head>
<body style="margin: 10px">
<div id="p" class="easyui-panel" title="添加电影信息" style="padding: 10px">
<form id="fm" method="post" enctype="multipart/form-data">
<table cellspacing="20px">
<tr>
<td width="80px">电影名称:</td>
<td><input type="text" id="movieName" name="movieName" style="width: 400px;" class="easyui-validatebox" required="true"/></td>
</tr>
<tr>
<td width="80px">电影标题:</td>
<td><input type="text" id="movieTitle" name="movieTitle" style="width: 400px;" class="easyui-validatebox" required="true"/></td>
</tr>
<tr>
<td width="80px">电影主图:</td>
<td><input type="file" id="imageFile" name="imageFile" /></td>
</tr>
<tr>
<td width="80px">是否热门:</td>
<td><input type="radio" id="yes" value="1" name="hot" ><label for="yes">是 </label>
<input type="radio" id="no" value="0" checked="checked" name="hot" /><label for="no">否 </label></td>
</tr>
<tr>
<td valign="top">电影详情:</td>
<td>
<!-- 在引入 ckeditor.js 的文件里,textarea id="content" 会自动变成富文本编辑器 -->
<textarea id="content" name="movieContent" rows="20" cols="100"></textarea>
</td>
</tr>
<tr>
<td></td>
<td>
<a href="javascript:submitData()" class="easyui-linkbutton" data-options="iconCls:'icon-submit'">发布信息</a>
</td>
</tr>
</table>
</form>
</div>
<script>
CKEDITOR.replace( 'content' );
</script>
</body>
</html>说明:
1、在引入 ckeditor.js 的文件里,textarea id="content" 会自动变成富文本编辑器的样式。
2、表单提交的地址:url:"/admin/movie/save":我们需要提供对应的 API 接口。
3、回调函数获取的是返回的 flag,所有后台 API 接口需要返回对应的字段,且是布尔类型(boolean)。
4、class="easyui-panel" 设置样式为 EasyUI 的,以便能以面板的方式打开一个 html 页面。
此外,我们打开 ckeditor 目录,找到 config.js ,可以看到这里定义了文件上传的 URL,后台需要提供对应的 API 接口。

接下来,我们编写后台 API 的接口,用来保存电影信息到数据库。
先使用 Mybatis 逆向工程,创建基本的实体、mapper 映射文件。修改 mybatis-generator.xml 的 table 属性,然后通过 maven 生成。(Mybatis 逆向工程可以翻之前的博客)

然后把生成的 entity 文件和 mapper 文件剪切到对应的目录下:

MovieInfoEntity 代码(需要自行增加属性的 get/set 方法):
package com.movie.entity;
import java.io.Serializable;
import java.util.Date;
public class MovieInfoEntity implements Serializable {
private static final long serialVersionUID = 8353695799215791481L;
private Integer id;
private String movieName;//电影名称
private String movieTitle;//电影标题
private String hot;//是否热门,1=是,0=否
private String imageName;//主图 URL 地址
private Date createTime;//发布日期
private String movieContent;//电影详情
为缩短篇幅,请自行增加属性的 get/set 方法
}
MovieInfoEntityMapper.xml 完整代码如下:
<?xml version="1.0" encoding="UTF-8"?>
<!DOCTYPE mapper PUBLIC "-//mybatis.org//DTD Mapper 3.0//EN" "http://mybatis.org/dtd/mybatis-3-mapper.dtd">
<mapper namespace="com.movie.database.dao.MovieInfoDao">
  <resultMap id="BaseResultMap" type="com.movie.entity.MovieInfoEntity">
    <id column="id" jdbcType="INTEGER" property="id" />
    <result column="movie_name" jdbcType="VARCHAR" property="movieName" />
    <result column="movie_title" jdbcType="VARCHAR" property="movieTitle" />
    <result column="hot" jdbcType="CHAR" property="hot" />
    <result column="image_name" jdbcType="VARCHAR" property="imageName" />
    <result column="movie_content" jdbcType="LONGVARCHAR" property="movieContent" />
    <result column="create_time" jdbcType="DATE" property="createTime" />
  </resultMap>

    <!-- 根据主键 id 删除 -->
  <delete id="delete" parameterType="java.lang.Integer">
    delete from movie_info
    where id = #{id,jdbcType=INTEGER}
  </delete>

    <!-- 新增,发布时间直接使用 mysql 的 now() 函数 -->
  <insert id="insert" parameterType="com.movie.entity.MovieInfoEntity">
    insert into movie_info
    (movie_name, movie_title,hot, image_name, movie_content,create_time)
    values
    (#{movieName,jdbcType=VARCHAR},
      #{movieTitle,jdbcType=VARCHAR},
      #{hot,jdbcType=CHAR},
      #{imageName,jdbcType=VARCHAR},
      #{movieContent,jdbcType=LONGVARCHAR},
      now())
  </insert>

    <!-- 更新 -->
  <update id="update" parameterType="com.movie.entity.MovieInfoEntity">
    update movie_info
    <set>
        <if test=" movieName != null and movieName != '' ">
            movie_name = #{movieName,jdbcType=VARCHAR},
        </if>
        <if test=" movieTitle != null and movieTitle != '' ">
            movie_title = #{movieTitle,jdbcType=VARCHAR},
        </if>
        <if test=" hot != null and hot != '' ">
            hot = #{hot,jdbcType=CHAR},
        </if>
        <if test=" imageName != null and imageName != '' ">
            image_name = #{imageName,jdbcType=VARCHAR},
        </if>
        <if test=" movieContent != null and movieContent != '' ">
            movie_content = #{movieContent,jdbcType=LONGVARCHAR}
        </if>
    </set>
    where id = #{id,jdbcType=INTEGER}
  </update>

    <!-- 根据主键 id 查询 -->
  <select id="selectById" parameterType="java.lang.Integer" resultMap="BaseResultMap">
    select id, movie_name, movie_title, hot, image_name, movie_content,create_time
    from movie_info
    where id = #{id,jdbcType=INTEGER}
  </select>

</mapper>
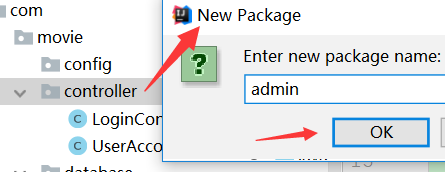
接下来,我们先在 controller 包下创建包 admin,用于存放所有管理后台的 controller 类。
然后,在 admin 包下,创建 MovieInfoController 类,完整代码如下:
package com.movie.controller.admin;

import com.movie.entity.MovieInfoEntity;
import com.movie.manage.MovieInfoManage;
import org.springframework.beans.factory.annotation.Autowired;
import org.springframework.web.bind.annotation.RequestMapping;
import org.springframework.web.bind.annotation.RequestParam;
import org.springframework.web.bind.annotation.ResponseBody;
import org.springframework.web.bind.annotation.RestController;
import org.springframework.web.multipart.MultipartFile;

import java.util.HashMap;
import java.util.Map;

/**
 * @author biandan
 * @signature 让天下没有难写的代码
 * @create 2019-11-17 上午 11:27
 */
@RestController
@RequestMapping(value = "/admin/movie")
public class MovieInfoController {

    @Autowired
    private MovieInfoManage movieInfoManage;

    @ResponseBody
    @RequestMapping("/save")
    public Map<String,Object> save(MovieInfoEntity entity, @RequestParam("imageFile") MultipartFile file){
        Map<String,Object> map = new HashMap<>();
        boolean flag = movieInfoManage.save(entity,file);
        map.put("flag",flag);
        return map;
    }

    //富文本编辑器上传文件
    @ResponseBody
    @RequestMapping("/ckeditorUpload")
    public String ckeditorUpload(@RequestParam("upload")MultipartFile file,String CKEditorFuncNum){
        String result = movieInfoManage.ckeditorUpload(file,CKEditorFuncNum);
        return  result;
    }
}
说明:
1、Controller 层不应该写很多逻辑处理代码,而是交给业务层(即 manage 层)去处理。
2、@RequestMapping(value = "/admin/movie") 对应 html 的请求路径。注意对应 html 里的路径。
3、第一个接口返回的参数,Map里需要有 flag 作为 key,对应前端获取的返回数据。
然后,在 manage 包下创建 MovieInfoMange 接口,完整代码如下:
package com.movie.manage;

import com.movie.entity.MovieInfoEntity;
import org.springframework.web.multipart.MultipartFile;

/**
 * @author biandan
 * @signature 让天下没有难写的代码
 * @create 2019-11-17 上午 11:32
 */
public interface MovieInfoManage {

    //保存电影信息
    boolean save(MovieInfoEntity entity, MultipartFile file);

    //富文本编辑器上传文件
    String ckeditorUpload(MultipartFile file,String CKEditorFuncNum);
}
然后,在 impl 包下创建 MovieInfoMangeIml 实现类,继承 MovieInfoMange 接口,完整代码:
package com.movie.manage.impl;
import com.movie.database.service.MovieInfoService;
import com.movie.entity.MovieInfoEntity;
import com.movie.manage.MovieInfoManage;
import org.springframework.beans.factory.annotation.Autowired;
import org.springframework.beans.factory.annotation.Value;
import org.springframework.stereotype.Service;
import org.springframework.util.FileCopyUtils;
import org.springframework.util.StringUtils;
import org.springframework.web.multipart.MultipartFile;
import org.springframework.web.util.HtmlUtils;
import java.io.FileOutputStream;
/**
* @author biandan
* @signature 让天下没有难写的代码
* @create 2019-11-17 上午 11:36
*/
@Service
public class MovieInfoManageImpl implements MovieInfoManage {
@Value("${image.path}")
private String imageFilePath;
@Autowired
private MovieInfoService movieInfoService;
//新增电影信息
@Override
public boolean save(MovieInfoEntity entity, MultipartFile file) {
boolean flag = false;
try {
if (!file.isEmpty()) {
String originalFilename = file.getOriginalFilename();//获取文件名
String suffixName = originalFilename.substring(originalFilename.lastIndexOf("."));//获取文件后缀
String newFileName = System.currentTimeMillis() + suffixName;//新的文件名,避免文件名重复
FileCopyUtils.copy(file.getInputStream(), new FileOutputStream(imageFilePath + newFileName));
entity.setImageName(newFileName);//设置到实体中
}
//将富文本的 html 代码转换特殊字符,防止对网站进行xss跨站攻击
//方案 1:转成十进制
String movieContent = HtmlUtils.htmlEscapeDecimal(entity.getMovieContent());
//方案 2:转成十六进制
//String movieContent = HtmlUtils.htmlEscapeHex(entity.getMovieContent());
entity.setMovieContent(movieContent);
//解码只需一个方法即可,解码后返回给前端,跟传递进来的时候是一样的。
//String movieContent = HtmlUtils.htmlUnescape(entity.getMovieContent());
int count = movieInfoService.insert(entity);
if (count > 0) {
flag = true;
}
} catch (Exception e) {
e.printStackTrace();
}
return flag;
}
//富文本编辑器上传文件
@Override
public String ckeditorUpload(MultipartFile file,String CKEditorFuncNum){
String result = "";
try{
String originalFilename = file.getOriginalFilename();//获取文件名
String suffixName = originalFilename.substring(originalFilename.lastIndexOf("."));//获取文件后缀
String newFileName = System.currentTimeMillis() + suffixName;//新的文件名,避免文件名重复
FileCopyUtils.copy(file.getInputStream(), new FileOutputStream(imageFilePath + newFileName));
StringBuilder sb = new StringBuilder();
sb.append("<script type=\"text/javascript\">");
//注意:/movieImages/ 返回虚拟路径给前端,对应配置类 WebConfig 的路径。
sb.append("window.parent.CKEDITOR.tools.callFunction("+ CKEditorFuncNum + ",'" + "/movieImages/" + newFileName + "','')");
sb.append("</script>");
result = sb.toString();
}catch (Exception e){
e.printStackTrace();
}
return result;
}
}
说明:
1、这里需要注意构建的 JavaScript 返回给前端的参数,有个虚拟的访问路径,对应配置类 WebConfig 的路径(稍后说)。
2、需要对富文本编辑器(即 content 字段)做字符转化处理,防止特殊字符对网站攻击。提供2种转换方式,十六进制和十进制。使用的是 org.springframework.web.util.HtmlUtils 的工具类。解码的时候,只需要一个方法即可。
然后,在 database 包的 service 包下,创建 MovieInfoService 类,完整代码如下:
package com.movie.database.service;

import com.movie.database.dao.MovieInfoDao;
import com.movie.entity.MovieInfoEntity;
import org.springframework.beans.factory.annotation.Autowired;
import org.springframework.stereotype.Service;

/**
 * @author biandan
 * @signature 让天下没有难写的代码
 * @create 2019-11-17 下午 12:27
 */
@Service
public class MovieInfoService {

    @Autowired(required = false)
    private MovieInfoDao movieInfoDao;

    //新增电影信息。
    //@Transactional(readOnly = false) //readOnly 的事务默认为 false,有读写的操作,可以不设置
    public int insert(MovieInfoEntity entity){
        return movieInfoDao.insert(entity);
    }

}
然后,在 database 包的 dao 包下创建 MovieInfoDao 接口,完整代码如下:
package com.movie.database.dao;

import com.movie.entity.MovieInfoEntity;
import org.apache.ibatis.annotations.Mapper;

/**
 * @author biandan
 * @signature 让天下没有难写的代码
 * @create 2019-11-17 下午 12:33
 */
@Mapper
public interface MovieInfoDao {

    //新增电影信息
    int insert(MovieInfoEntity entity);
}
注意:
我们的 MovieInfoEntityMapper.xml 文件配置的 <mapper namespace="com.movie.database.dao.MovieInfoDao"> 需要对应 dao 文件路径。方法之前的博客已经说过。
application.yml 配置文件的完整配置信息如下:
# 配置服务相关信息
server:
# 端口号
port: 8080
# 电影详情里的图片路径配置
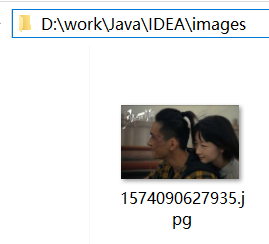
image:
path: D:/work/Java/IDEA/images/
# 服务名称和数据源配置
spring:
# 静态资源的过滤配置
mvc:
static-path-pattern: /static/**
# 静态资源路径的配置
resources:
static-locations: file:${image.path},classpath:/META-INF/resources/,classpath:/resources/,classpath:/static/,classpath:/public/
thymeleaf:
cache: false
prefix: classpath:/templates/
suffix: .html
application:
name: haolaiwu
datasource:
# 使用阿里巴巴的 druid 数据源
druid:
driver-class-name: com.mysql.jdbc.Driver
url: jdbc:mysql://localhost:3306/movie?characterEncoding=utf-8
username: root
password: 123456
# mybatis 配置
mybatis:
# Mybatis扫描的mapper文件
mapper-locations: classpath:mapper/*.xml
# 扫描哪个包下的对象
type-aliases-package: com.movie.entity
# Mybatis配置文件
config-location: classpath:mybatis-config.xml
说明:
1、因为 SpringBoot 已经集成了 tomcat 服务器,所以我们需要把文件保存在其它路径中,不可能把文件上传到 jar 包下吧?文件的目录自己定义,但是需要注意符号问题,使用 / 符号,不要溜掉最后一个 / 符号。
# 电影详情里的图片路径配置
image:
  path: D:/work/Java/IDEA/images/
2、需要配置静态资源的过滤,否则前端无法访问到 resources 目录下的文件。注意:“file:${image.path}”的写法,获取到的是上面配置的本地磁盘的路径。其它的路径在本项目中是非必须的,为了统一,都配上。此外还有 thymeleaf 模板的相关配置。
spring:
  # 静态资源的过滤配置
  mvc:
    static-path-pattern: /static/**
  # 静态资源路径的配置
  resources:
    static-locations: file:${image.path},classpath:/META-INF/resources/,classpath:/resources/,classpath:/static/,classpath:/public/
  thymeleaf:
    cache: false
    prefix: classpath:/templates/
    suffix: .html
单单配置静态资源过滤还不行,我们还需要配置虚拟路径,让 SpringBoot 能够访问到本地的文件。
在 config 包下,创建配置类:WebConfig,实现 WebMvcConfigurer 接口(这是 SpringBoot 2.0 之后的做法。在 SpringBoot 1.0 是 extends WebMvcConfigurerAdapter,官方已经不推荐这样做了。)如果不配置虚拟路径,会导致报错:
Not allowed to load local resource: file:///.......
WebConfig 完整代码如下:
package com.movie.config;

import org.springframework.beans.factory.annotation.Value;
import org.springframework.context.annotation.Configuration;
import org.springframework.web.servlet.config.annotation.ResourceHandlerRegistry;
import org.springframework.web.servlet.config.annotation.WebMvcConfigurer;

/**
 * @author biandan
 * @signature 让天下没有难写的代码
 * @create 2019-11-17 下午 7:02
 */
@Configuration
public class WebConfig implements WebMvcConfigurer {

    @Value("${image.path}")
    private String imageFilePath;

    @Override
    public void addResourceHandlers(ResourceHandlerRegistry registry) {
        //addResourceHandler 里的参数是虚拟路径,/movieImages/**  要对应返回给前端的路径
        //addResourceLocations 里的参数是磁盘的路径,“file:/+本地图片的地址”
        registry.addResourceHandler("/movieImages/**").addResourceLocations("file:/"+imageFilePath);
    }
}
说明:
addResourceHandler 里的参数是虚拟路径,/movieImages/** 要对应返回给前端的路径,即对应 MovieInfoManageImpl 里的

启动服务,测试我们的功能。浏览器地址输入:http://localhost:8080/login 输入准确的用户名、密码。点击“添加电影信息”
先输出电影的基本信息:

接下来简单说一下 CKEditor富文本编辑器的使用。
①添加一段外部链接到 iframe。找到 IFrame 按钮,点击它。

②去优酷视频网找一段视频,其它视频也可以,然后找到左下角的“分享”,复制通用代码。把复制的代码抽取地址部分,粘贴到 IFrame URL 中。

宽度输入 700 高度输入 500,点击确定:http://player.youku.com/embed/XNDQxNTU1MzM4MA==

然后可以去网上找一些关于电影的介绍信息,写到富文本编辑器里,想怎么玩就怎么玩,随你。
③接下来演示如何上传图片到我们的指定路径。找到编辑器的 图片 按钮

选择好图片后,点击“上传到服务器” 。这时候,就会调用我们的 ckeditorUpload 接口,可以打断点进行调试。

上传成功后,在“图像信息”里可以看到我们后台返回的数据,这个就是访问图片的路径,我们已经配置了这个“虚拟路径”映射到我们的电脑磁盘了。如果无法回显图片,证明后台的接口有问题,请根据教程来配置。

在显示框上我们可以设置图片的其它信息,如宽度、高度等。点击“高级”,我们设置一下图片的标题。

OK,点击“确定”,就完成了图片的上传。这时候,我们去到我们配置的存放路径,可以看到图片已经上传了。
回到富文本编辑器,也看到回显的照片了。这时候我们点击“发布信息”。

提示保存成功。

我们去数据库看下具体的数据,已经成功保存了。值得注意的是 movie_content 字段的值,已经进行了特殊字符转换,主要是为了防止数据库被脚本代码注入和攻击,我们需要做处理。

为了测试方便,我们可以增加测试数据:
INSERT INTO `movie_info` VALUES (null, '少年的你-测试', '《少年的你》由周冬雨、易烊千玺主演', '1', '1574090681049.jpg', '<p>优酷预告片:</p>\r\n\r\n<p><iframe frameborder="0" height="500" scrolling="no" src="http://player.youku.com/embed/XNDQxNTU1MzM4MA==" width="700"></iframe></p>\r\n\r\n<p>《少年的你》是根据玖月晞小说改编的电影,由导演曾国祥执导,周冬雨、易烊千玺主演 。</p>\r\n\r\n<p>该片讲述在高考前夕,被一场校园意外改变命运的两个少年,如何守护彼此成为想成为的成年人的故事。</p>\r\n\r\n<p>影片于2019年10月25日在中国内地上映。</p>\r\n\r\n<p>一场高考前夕的校园意外,改变了两个少年的命运。</p>\r\n\r\n<p>陈念性格内向,是学校里的优等生,努力复习、考上好大学是高三的她唯一的念头。同班同学的意外坠楼牵扯出一连串不为人知的故事,陈念也被一点点卷入其中&hellip;在她最孤独的时刻,一个叫&quot;小北&quot;的少年闯入了她的世界&hellip;</p>\r\n\r\n<p>大多数人的18岁都是明媚、快乐的,而他们却在18岁这个夏天提前尝到了成人世界的漠然。一场秘而不宣的&quot;战斗&quot;正在上演,他们将一起守护少年的尊严。</p>\r\n\r\n<p><img alt="" src="/movieImages/1574090627935.jpg" style="height:240px; width:384px" title="《少年的你》剧组照" /></p>\r\n', '2019-11-18');
INSERT INTO `movie_info` VALUES (null, '少年的你-测试', '《少年的你》由周冬雨、易烊千玺主演', '1', '1574090681049.jpg', '<p>优酷预告片:</p>\r\n\r\n<p><iframe frameborder="0" height="500" scrolling="no" src="http://player.youku.com/embed/XNDQxNTU1MzM4MA==" width="700"></iframe></p>\r\n\r\n<p>《少年的你》是根据玖月晞小说改编的电影,由导演曾国祥执导,周冬雨、易烊千玺主演 。</p>\r\n\r\n<p>该片讲述在高考前夕,被一场校园意外改变命运的两个少年,如何守护彼此成为想成为的成年人的故事。</p>\r\n\r\n<p>影片于2019年10月25日在中国内地上映。</p>\r\n\r\n<p>一场高考前夕的校园意外,改变了两个少年的命运。</p>\r\n\r\n<p>陈念性格内向,是学校里的优等生,努力复习、考上好大学是高三的她唯一的念头。同班同学的意外坠楼牵扯出一连串不为人知的故事,陈念也被一点点卷入其中&hellip;在她最孤独的时刻,一个叫&quot;小北&quot;的少年闯入了她的世界&hellip;</p>\r\n\r\n<p>大多数人的18岁都是明媚、快乐的,而他们却在18岁这个夏天提前尝到了成人世界的漠然。一场秘而不宣的&quot;战斗&quot;正在上演,他们将一起守护少年的尊严。</p>\r\n\r\n<p><img alt="" src="/movieImages/1574090627935.jpg" style="height:240px; width:384px" title="《少年的你》剧组照" /></p>\r\n', '2019-11-18');
INSERT INTO `movie_info` VALUES (null, '少年的你-测试', '《少年的你》由周冬雨、易烊千玺主演', '1', '1574090681049.jpg', '<p>优酷预告片:</p>\r\n\r\n<p><iframe frameborder="0" height="500" scrolling="no" src="http://player.youku.com/embed/XNDQxNTU1MzM4MA==" width="700"></iframe></p>\r\n\r\n<p>《少年的你》是根据玖月晞小说改编的电影,由导演曾国祥执导,周冬雨、易烊千玺主演 。</p>\r\n\r\n<p>该片讲述在高考前夕,被一场校园意外改变命运的两个少年,如何守护彼此成为想成为的成年人的故事。</p>\r\n\r\n<p>影片于2019年10月25日在中国内地上映。</p>\r\n\r\n<p>一场高考前夕的校园意外,改变了两个少年的命运。</p>\r\n\r\n<p>陈念性格内向,是学校里的优等生,努力复习、考上好大学是高三的她唯一的念头。同班同学的意外坠楼牵扯出一连串不为人知的故事,陈念也被一点点卷入其中&hellip;在她最孤独的时刻,一个叫&quot;小北&quot;的少年闯入了她的世界&hellip;</p>\r\n\r\n<p>大多数人的18岁都是明媚、快乐的,而他们却在18岁这个夏天提前尝到了成人世界的漠然。一场秘而不宣的&quot;战斗&quot;正在上演,他们将一起守护少年的尊严。</p>\r\n\r\n<p><img alt="" src="/movieImages/1574090627935.jpg" style="height:240px; width:384px" title="《少年的你》剧组照" /></p>\r\n', '2019-11-18');
搞定!欢迎有问题留言。电脑有网络的话,也给个赞吧!


 5946
5946


 被折叠的 条评论
为什么被折叠?
被折叠的 条评论
为什么被折叠?
 到【灌水乐园】发言


