


#1).安装建立
服务端:
[root@fw126 ~]# yum install targetcli.noarch
[root@fw126 ~]# fdisk /dev/vdb #在本机分出一块设备用于共享
[root@fw126 ~]# systemctl start target
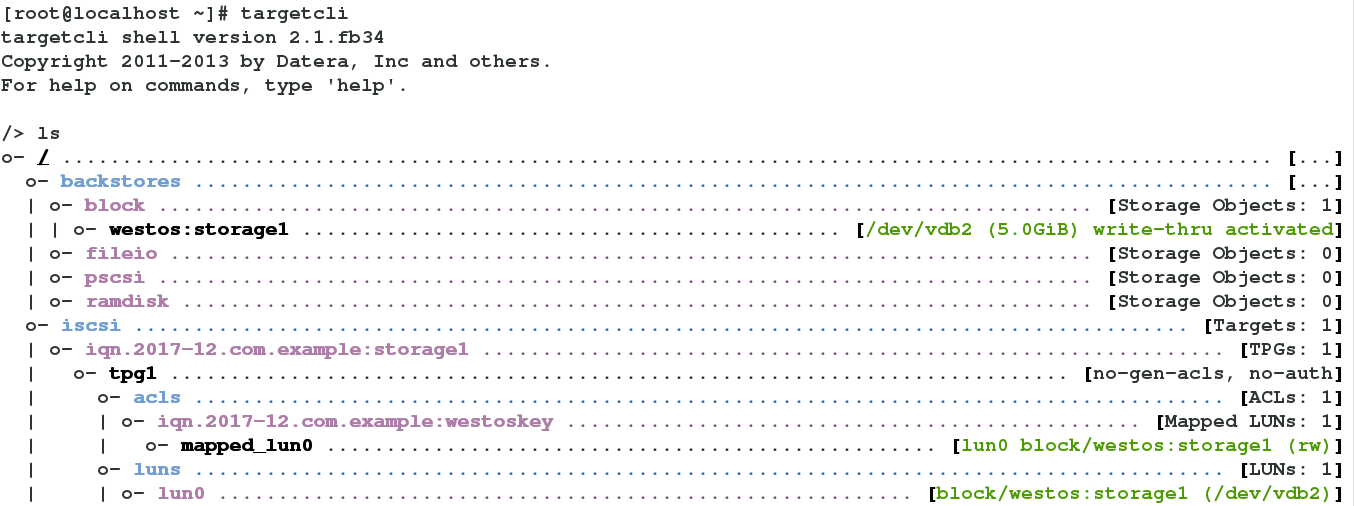
[root@fw126 ~]# targetcli
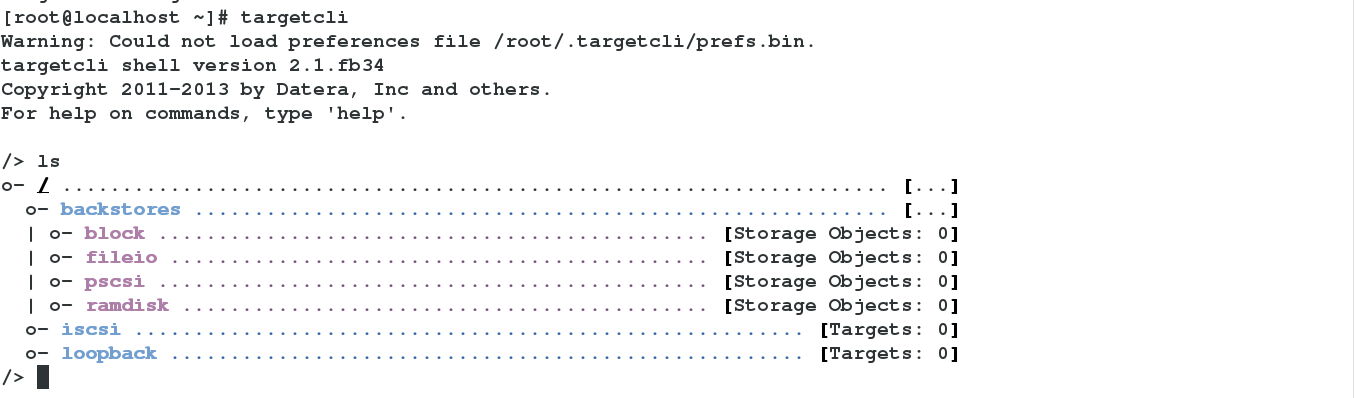
/> /backstores/block create westos:storage1 /dev/vdb1 #添加要共享的设备
Created block storage object westos:storage1 using /dev/vdb1.

Created target iqn.2017-12.com.example:storage1.
Created TPG 1.

Created Node ACL for iqn.2017-12.com.example:westoskey

Created LUN 0.
Created LUN 0->0 mapping in node ACL iqn.2017-12.com.example:westoskey

Using default IP port 3260
Created network portal 172.25.254.126:3260.

/> ls

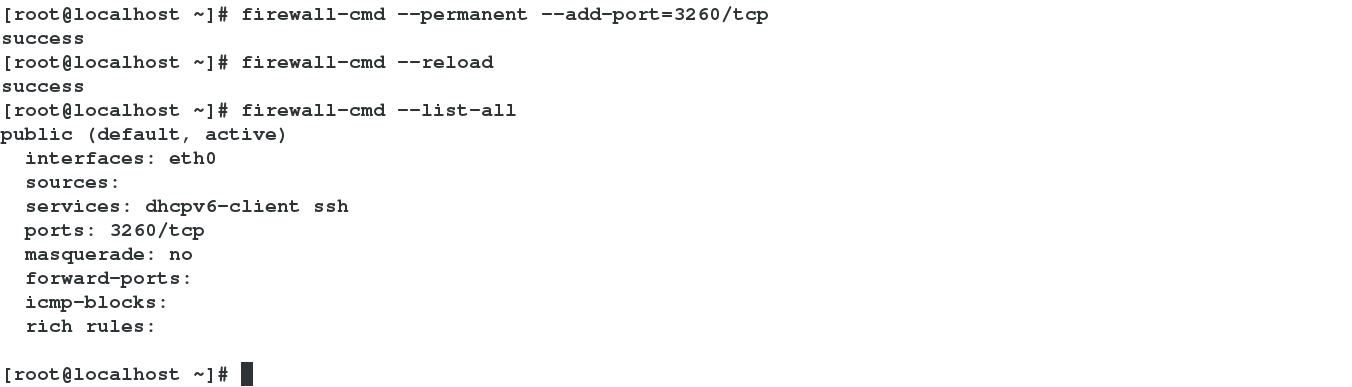
在本机上开启3260端口
客户端:
[root@kh226 ~]# yum install iscsi-initiator-utils.x86_64
[root@kh226 ~]# systemctl start iscsi
[root@kh226 ~]# vim /etc/iscsi/initiatorname.iscsi
InitiatorName=iqn.2017-12.com.example:westoskey #要共享的设备

172.25.254.126:3260,1 iqn.2017-12.com.example:storage1

[root@kh226 ~]# iscsiadm -m node -T iqn.2017-12.com.example:storage1 -p 172.25.254.126 -l #登陆设备
Logging in to [iface: default, target: iqn.2017-12.com.example:storage1, portal: 172.25.254.126,3260] (multiple)
Login to [iface: default, target: iqn.2017-12.com.example:storage1, portal: 172.25.254.126,3260] successful.
登陆是可能会遇到报错,这时可依次重启iscsid和iscsi服务,iscsid是iscsi的上层服务。

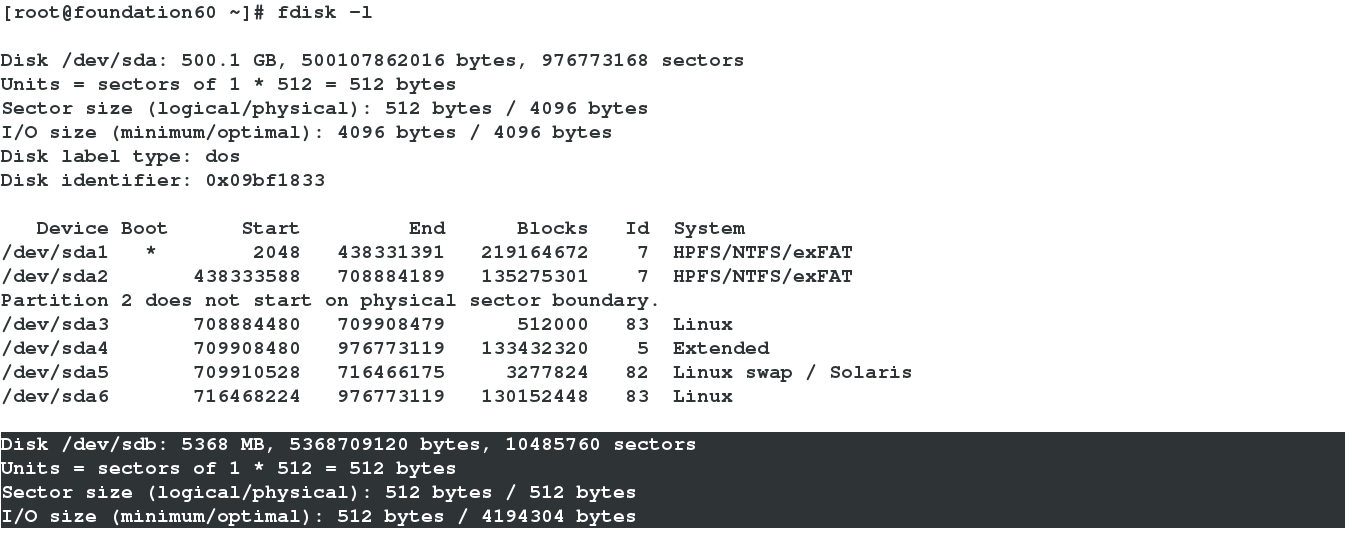
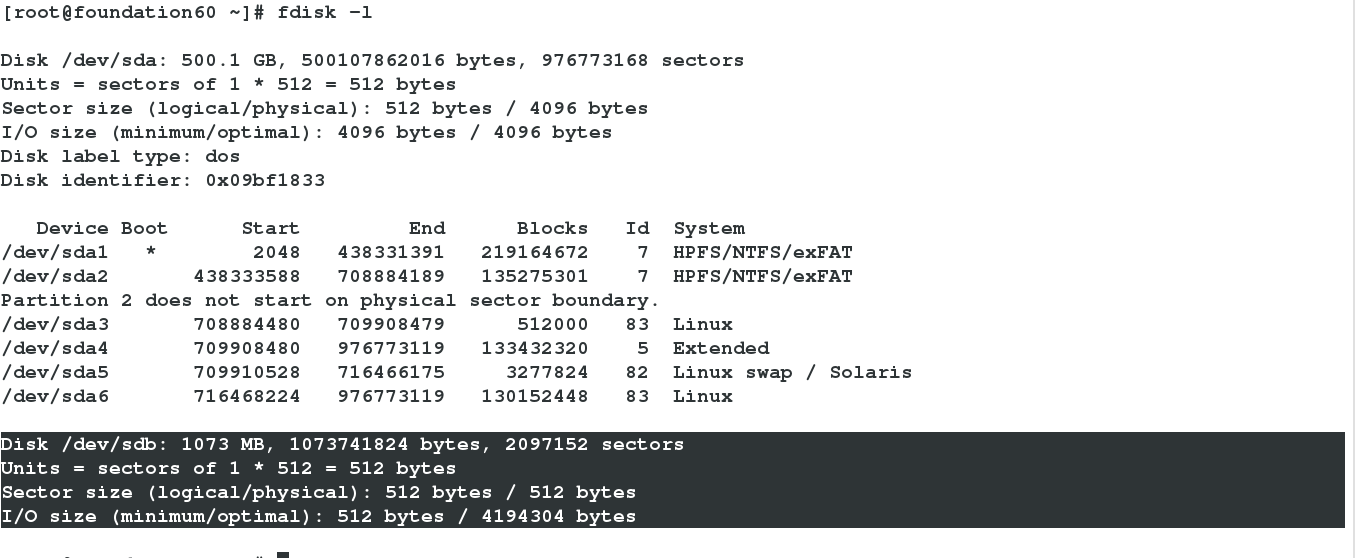
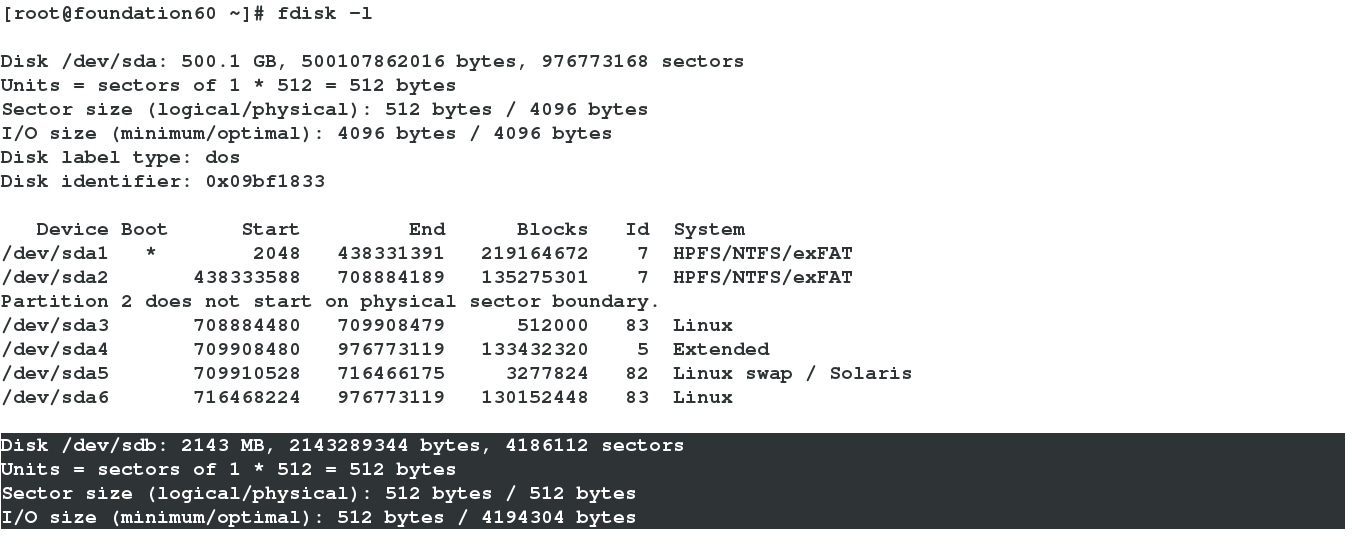
[root@kh226 ~]# fdisk -l
[root@kh226 ~]# fdisk /dev/sda #分区
[root@kh226 ~]# partprobe[root@kh226 ~]# mkfs.xfs /dev/sda1 #制作文件系统

[root@kh226 ~]# mount /dev/sda1 /mnt #挂载使用
[root@kh226 mnt]# df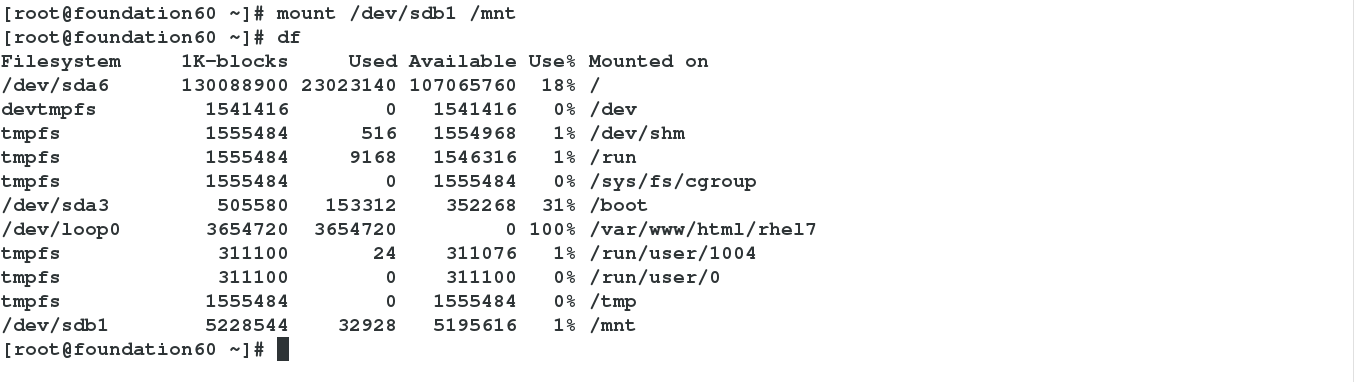
[root@kh226 ~]# cd /mnt
[root@kh226 mnt]# touch file
[root@kh226 mnt]# ls
f

[root@fw126 ~]# blkid #服务端没有文件系统
/dev/vda1: UUID="9bf6b9f7-92ad-441b-848e-0257cbb883d1" TYPE="xfs"
/dev/vdb1: PTTYPE="dos"

#3).开机自动挂载
[root@kh226 mnt]# blkid/dev/sda1: UUID="2305391d-c87a-4e16-aca9-b5a88daa491e" TYPE="xfs"
#查看设备的uuid,通过网络共享,设备名在不同主机上可能会发生漂移,但uuid是唯一的。因此通过uuid识别设备是比较可靠的方式
UUID="2305391d-c87a-4e16-aca9-b5a88daa491e" /mnt xfs defaults,_netdev 0 0
#系统启动会先读取fstab内容挂载设备,然后才开启网络。所以要用参数defaults,_netdev告诉系统,这块设备是网络设备。防止系统因找不到此设备而无法正常启动。
客户端:
[root@kh226 mnt]# umount /mnt
[root@kh226 mnt]# iscsiadm -m node -T iqn.2017-12.com.example:storage1 -p 172.25.254.126 -u #退出登陆
Logging out of session [sid: 1, target: iqn.2017-12.com.example:storage1, portal: 172.25.254.126,3260]
Logout of [sid: 1, target: iqn.2017-12.com.example:storage1, portal: 172.25.254.126,3260] successful.
[root@kh226 mnt]# iscsiadm -m node -T iqn.2017-12.com.example:storage1 -p 172.25.254.126 -o delete #清除缓存信息

[root@fw126 ~]# targetcli #执行clearconfig confirm=true命令即可
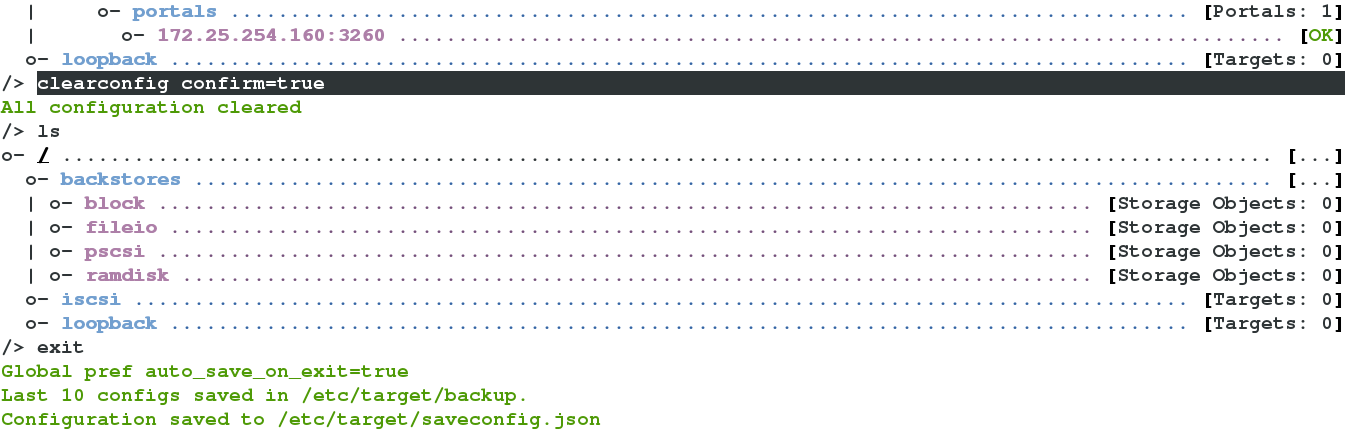
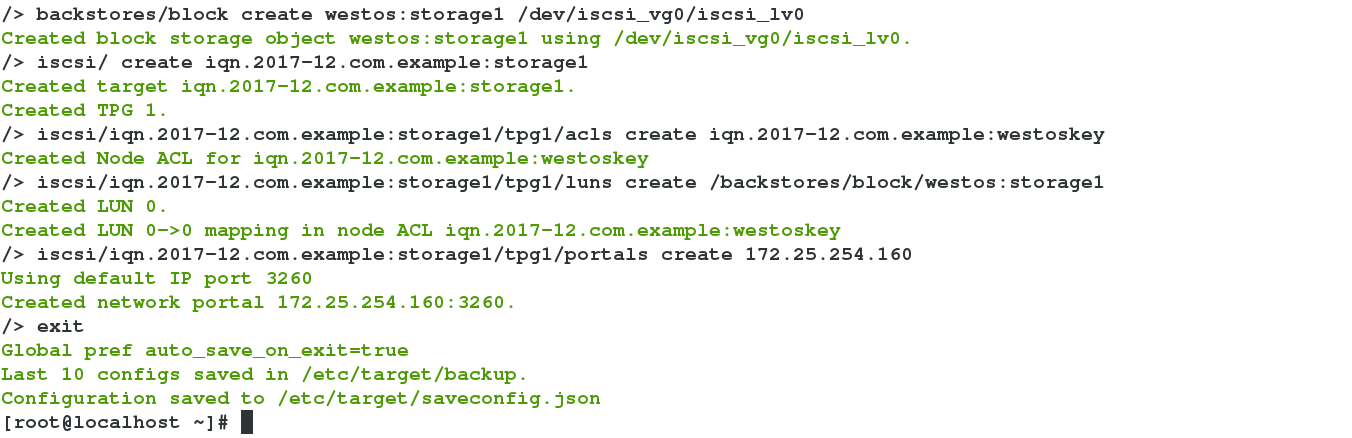
#5).建立逻辑卷设备共享
当我们真正在企业作共享服务时,由于数据的不断增多,一般会建立lvm可扩展的设备来提供共享服务。与一般的设备共享操作类似,这里只需建立一个lvm设备并把它共享出去即可。
[root@fw126 ~]# pvcreate /dev/vdb1
Physical volume "/dev/vdb1" successfully created
[root@fw126 ~]# vgcreate iscsi_vg0 /dev/vdb1
Volume group "iscsi_vg0" successfully created
[root@fw126 ~]# lvcreate -L 1020M -n iscsi_lv0 iscsi_vg0
Logical volume "iscsi_lv0" created #创建逻辑卷

targetcli shell version 2.1.fb34
Copyright 2011-2013 by Datera, Inc and others.
For help on commands, type 'help'.
[root@kh226 ~]# iscsiadm -m discovery -t st -p 172.25.254.126
172.25.254.126:3260,1 iqn.2017-12.com.example:storage1
[root@kh226 ~]# iscsiadm -m node -T iqn.2017-12.com.example:storage1 -p 172.25.254.126 -l
Logging in to [iface: default, target: iqn.2017-12.com.example:storage1, portal: 172.25.254.126,3260] (multiple)
Login to [iface: default, target: iqn.2017-12.com.example:storage1, portal: 172.25.254.126,3260] successful.

Disk /dev/sda: 1069 MB, 1069547520 bytes, 2088960 sectors
Units = sectors of 1 * 512 = 512 bytes
Sector size (logical/physical): 512 bytes / 512 bytes
I/O size (minimum/optimal): 512 bytes / 4194304 bytes
服务端:
[root@fw126 ~]# lvextend -L 2G /dev/iscsi_vg0/iscsi_lv0
Extending logical volume iscsi_lv0 to 2.00 GiB
Logical volume iscsi_lv0 successfully resized #扩张逻辑卷

[root@kh226 ~]# iscsiadm -m node -T iqn.2017-12.com.example:storage1 -p 172.25.254.126 -u
Logging out of session [sid: 3, target: iqn.2017-12.com.example:storage1, portal: 172.25.254.126,3260]
Logout of [sid: 3, target: iqn.2017-12.com.example:storage1, portal: 172.25.254.126,3260] successful.
[root@kh226 ~]# iscsiadm -m node -T iqn.2017-12.com.example:storage1 -p 172.25.254.126 -l
Logging in to [iface: default, target: iqn.2017-12.com.example:storage1, portal: 172.25.254.126,3260] (multiple)
Login to [iface: default, target: iqn.2017-12.com.example:storage1, portal: 172.25.254.126,3260] successful.

Disk /dev/sda: 2147 MB, 2147483648 bytes, 4194304 sectors
Units = sectors of 1 * 512 = 512 bytes
Sector size (logical/physical): 512 bytes / 512 bytes
I/O size (minimum/optimal): 512 bytes / 4194304 bytes #重新加载
若vg中的剩余空间也不足了,可参考lvm的管理。再分一块设备,制成pv加入要扩展共享lv所在的vg组里,在扩展lv即可
[root@localhost ~]# pvcreate /dev/vdb3
Physical volume "/dev/vdb2" successfully created
[root@localhost ~]# vgextend iscsi_vg0 /dev/vdb3
Volume group "iscsi_vg0" successfully extended


 271
271

 被折叠的 条评论
为什么被折叠?
被折叠的 条评论
为什么被折叠?
 到【灌水乐园】发言


