


#1).安装部署:
yum install dhcp httpd tftp-server.x86_64 syslinux
[root@fw126 ~]# vim /etc/xinetd.d/tftp
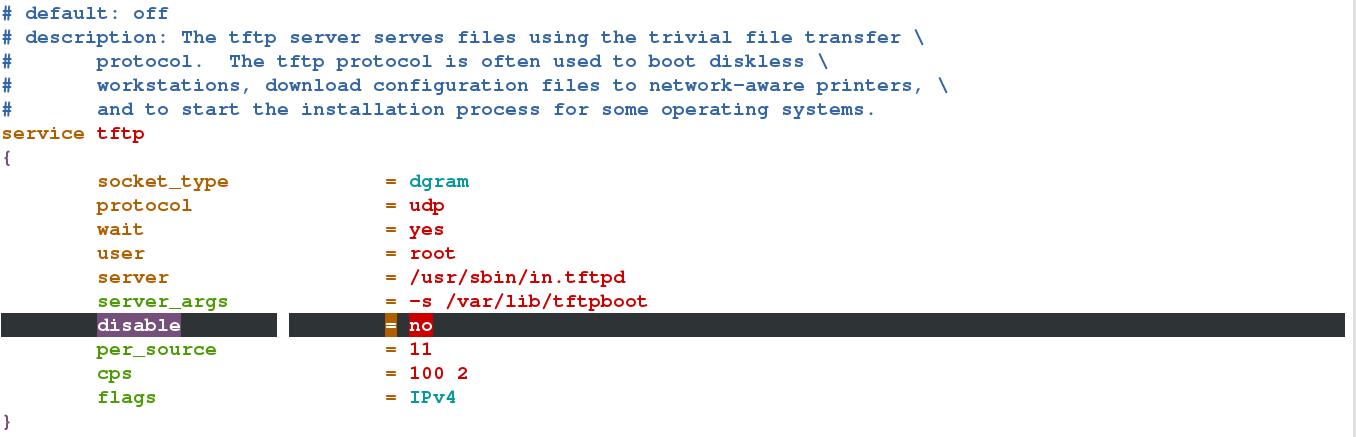
[root@fw126 ~]# systemctl restart xinetd.service
[root@fw126 ~]# netstat -antlupe | grep 69
udp 0 0 0.0.0.0:69 0.0.0.0:* 0 38911 2649/xinetd

[root@foundation26 ~]# cd /var/www/html/rhel7.0/isolinux/
[root@foundation26 isolinux]# scp * root@172.25.254.126:/var/lib/tftpboot
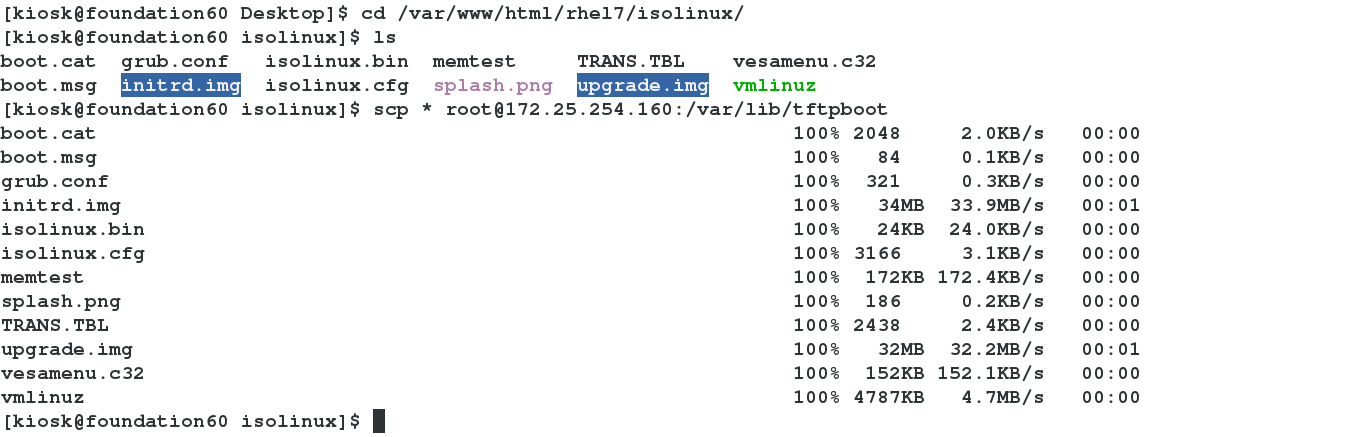
[root@fw126 tftpboot]# ls
boot.cat grub.conf isolinux.bin memtest TRANS.TBL vesamenu.c32
boot.msg initrd.img isolinux.cfg pxelinux.0 splash.png upgrade.img vmlinuz
[root@fw126 tftpboot]# mkdir pxelinux.cfg
[root@fw126 tftpboot]# cp isolinux.cfg pxelinux.cfg/default

cp: overwrite ‘/etc/dhcp/dhcpd.conf’? y
[root@fw126 tftpboot]# vim /etc/dhcp/dhcpd.conf

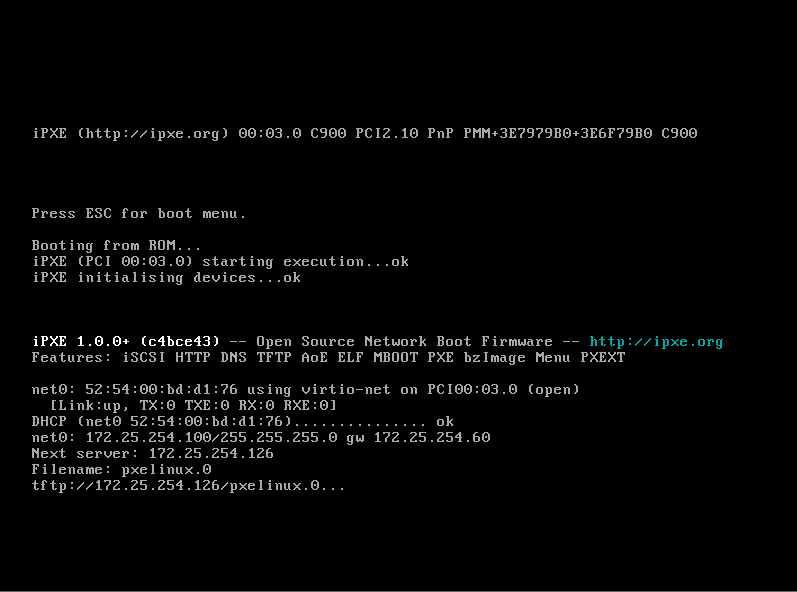
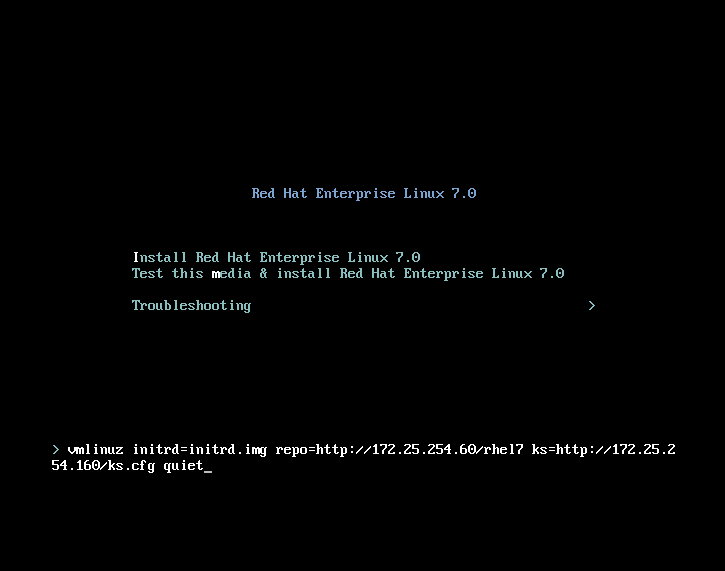
将要安装系统的主机通过网卡启动,会通过dhcpd服务获得一个ip来进行安装。但是会卡到第二幅图的界面,因为default里指定的安装源是镜像文件。所以要对安装源重新进行指定。
[root@fw126 tftpboot]# vim pxelinux.cfg/default
default vesamenu.c32
timeout 600 #等待时间
menu background haha.png #背景
menu title Red Hat Enterprise Linux 7.0 #标题
默认的安装源:

menu label ^Install Red Hat Enterprise Linux 7.0
kernel vmlinuz
append initrd=initrd.img repo=http://172.25.254.26/rhel7.0 quiet
新指定的安装源:

label check
menu label Test this ^media & install Red Hat Enterprise Linux 7.0
menu default #光标默认位置
kernel vmlinuz
append initrd=initrd.img inst.stage2=hd:LABEL=RHEL-7.0\x20Server.x86_64 rd.live.check quiet
修改背景要注意原背景的分辨率大小

用convert命令可以对图片做细些简单的修改。
[root@fw126 tftpboot]# yum whatprovides convert
[root@fw126 tftpboot]# yum install ImageMagick-6.7.8.9-10.el7.x86_64[root@fw126 tftpboot]# convert -resize 640x480! westos.png haha.png
[root@fw126 tftpboot]# file haha.png
haha.png: PNG image data, 640 x 480, 8-bit/color RGBA, non-interlaced
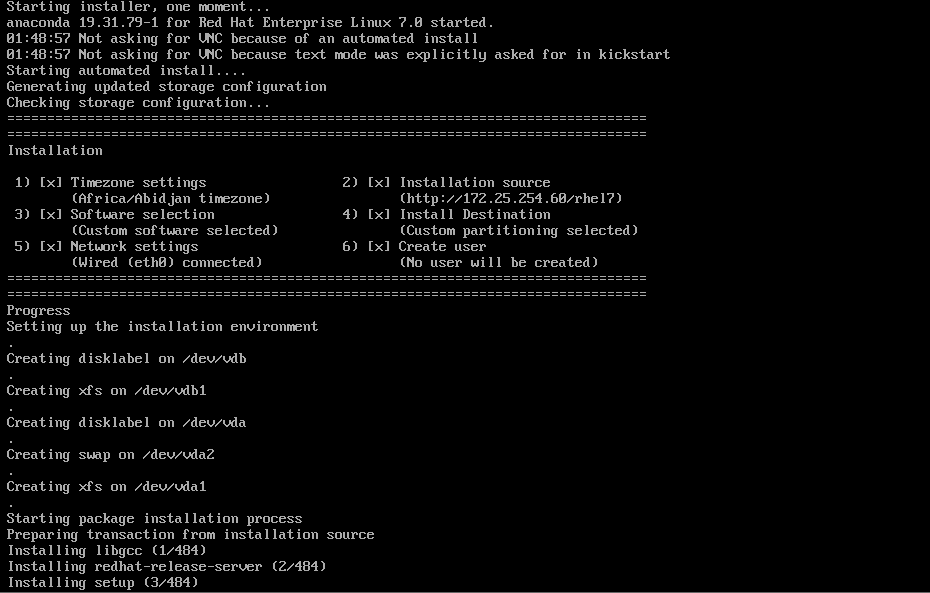
至此就可以通过网络进行正常的安装了。
#3).自动安装
将kickstart与远程安装结合,就可以实现远程自动安装了。
制作kickstart:

label linux
menu label ^Install Red Hat Enterprise Linux 7.0
kernel vmlinuz
append initrd=initrd.img repo=http://172.25.254.26/rhel7.0 ks=http://172.25.254.160/ks.cfg quiet #指定ks的位置

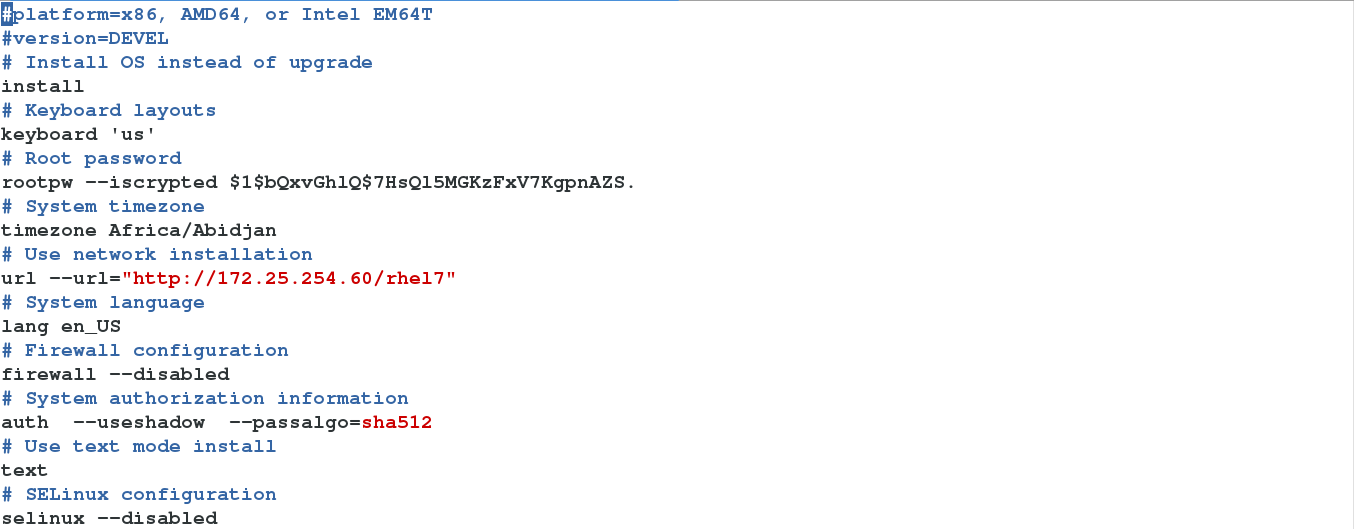
[root@fw126 tftpboot]# vim /var/www/html/ks.cfg
%packages #要安装的包
@base
%end
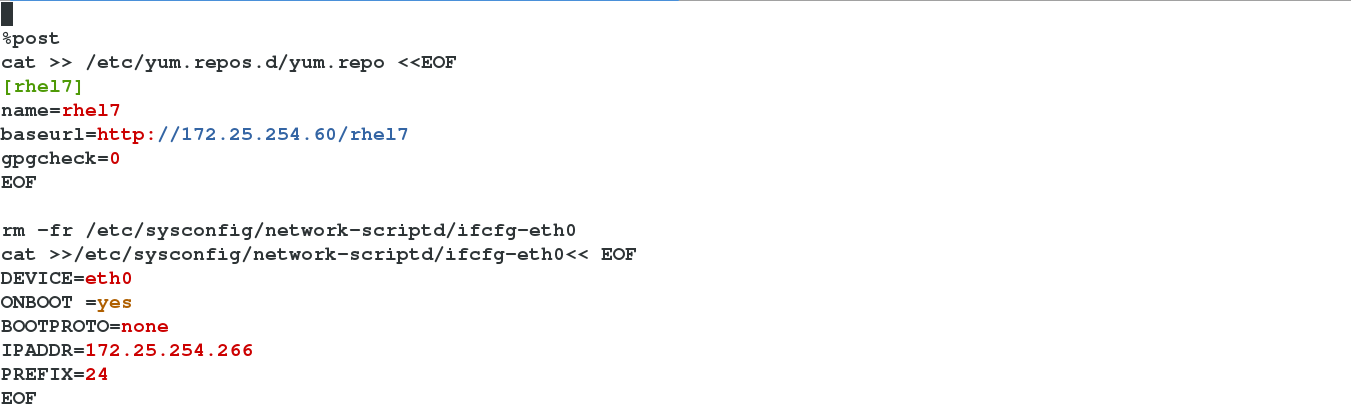
%post #安装后执行的动作
cat >> /etc/yum.repos.d/yum.repo <<EOF #配置yum源
[rhel7]
name=rhel7
baseurl=http://172.25.254.26/rhel7.0
gpgcheck=0
EOF
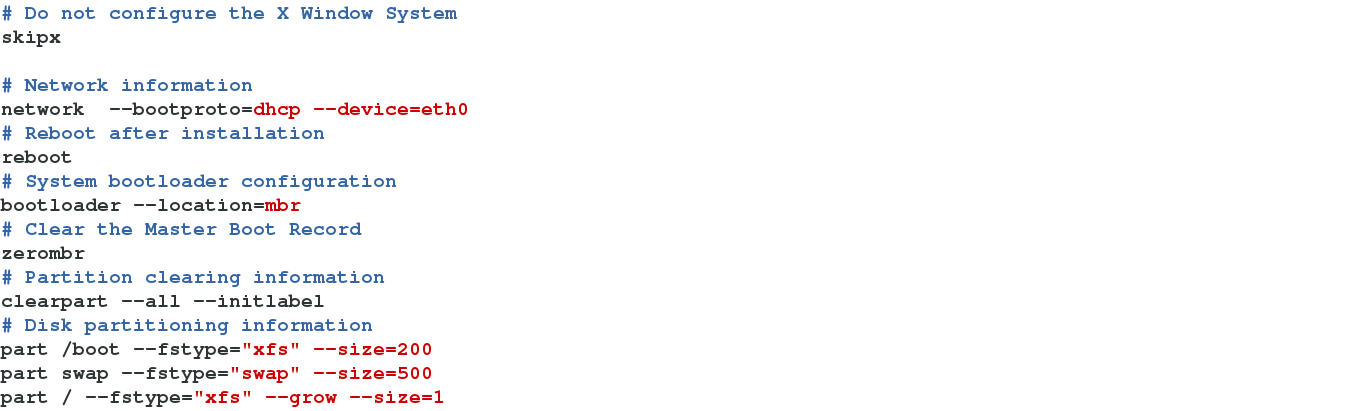
rm -fr /etc/sysconfig/network-scriptd/ifcfg-eth0 #配置网络
cat >>/etc/sysconfig/network-scriptd/ifcfg-eth0<< EOF
DEVICE=eth0
ONBOOT =yes
BOOTPROTO=none
IPADDR=172.25.254.266
PREFIX=24
EOF
yum install httpd -y #搭建httpd服务
systemctl start httpd
systemctl enable httpd
firewall-cmd --permanent --add-service=http
firewall-cmd--reload
%end
自动安装过程实现。至此我们只需要将要安装系统的主机通过网卡启动即可让它自动安装了。


 1273
1273

 被折叠的 条评论
为什么被折叠?
被折叠的 条评论
为什么被折叠?
 到【灌水乐园】发言


