


1、场景介绍
使用Python开发一个文件上传的功能,需要用户在前端执行上传操作。
Django是python中开发web应用的一个常用框架,使用它来开发一些web功能(如上传下载)或者API接口,比较简单便捷。
2、环境搭建
(1)Python环境搭建:Python之Windows环境搭建与问题解决
(2)添加django依赖包,此处下载的是3.2.18版本的。
【pip install django==3.2.18】
3、项目搭建
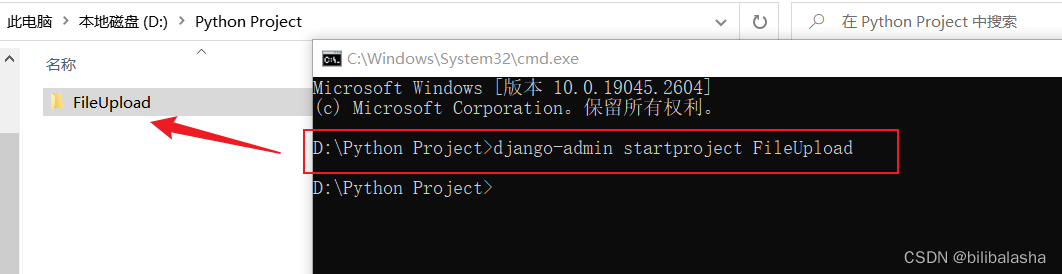
在Pycharm的Terminal窗口,或者cmd窗口,使用命令创建项目名为“FileUpload”的django项目。
【django-admin startproject FileUpload】
执行命令:
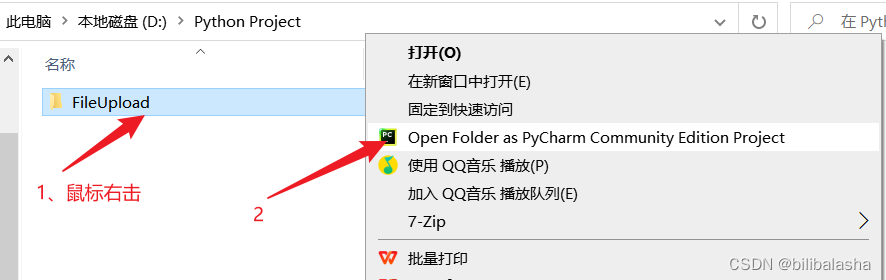
使用Pycharm打开“FileUpload”项目:
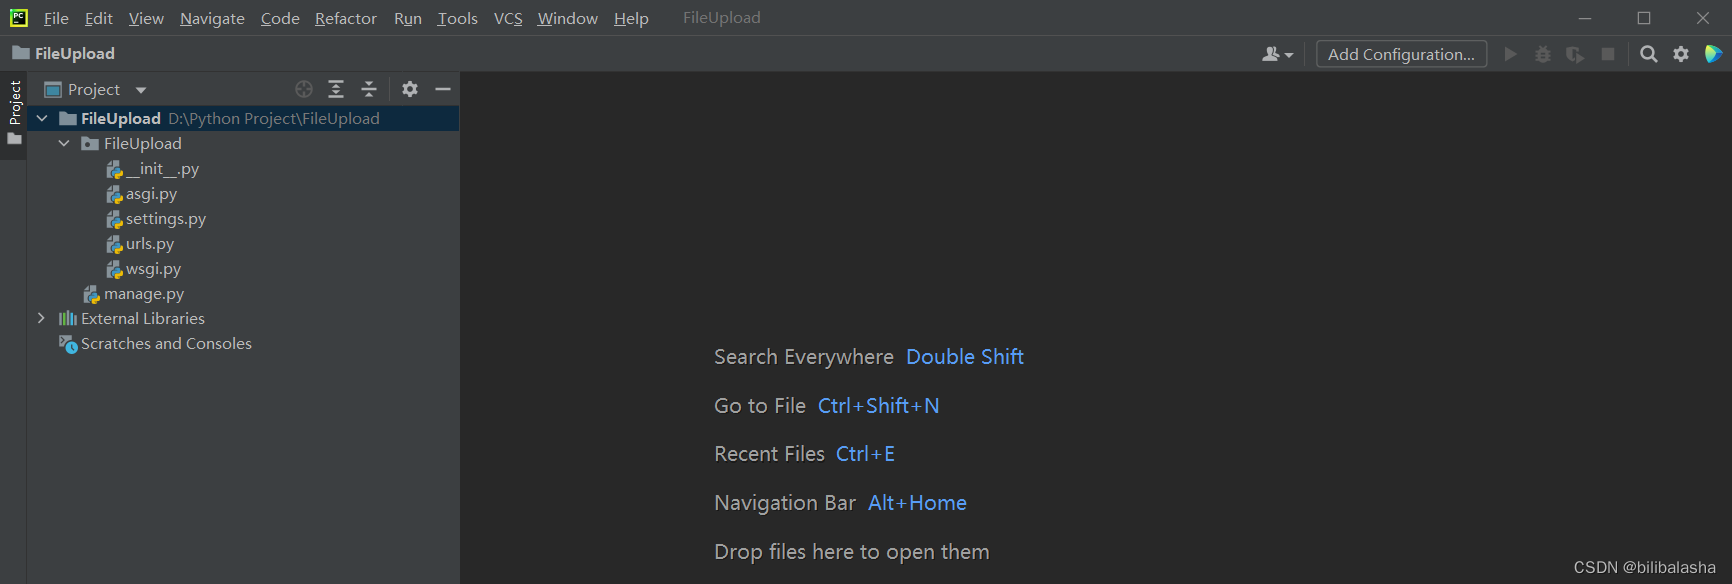
项目初始结构:
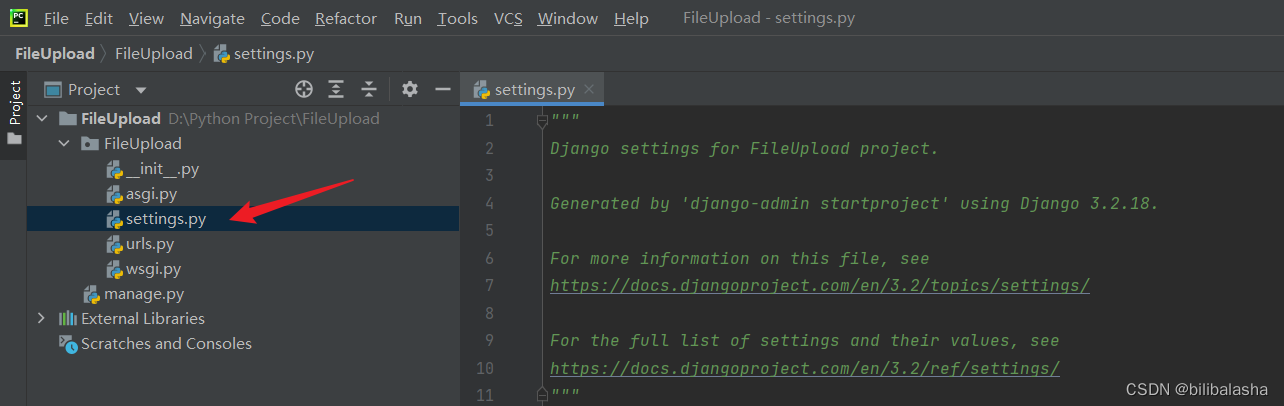
4、Settings.py配置
# SECURITY WARNING: don't run with debug turned on in production!
# 项目启动模式
# True:调试模式
# False:正式/上线模式
DEBUG = True
# []空列表,表示只有host为127.0.0.1能访问该项目,localhost访问本项目需要DEBUG=True时才有效;
# [‘*’],表示任何的host都能访问该项目;
# [’127.0.0.1’,‘199.168.3.123’],表示只有是当前两个host的请求才能访问该项目。
ALLOWED_HOSTS = ['*']
# LANGUAGE_CODE = 'en-us'
# 中文
LANGUAGE_CODE = 'zh-Hans'

# TIME_ZONE = 'UTC'
# 中国时区
TIME_ZONE = 'Asia/Shanghai'
5、项目开发
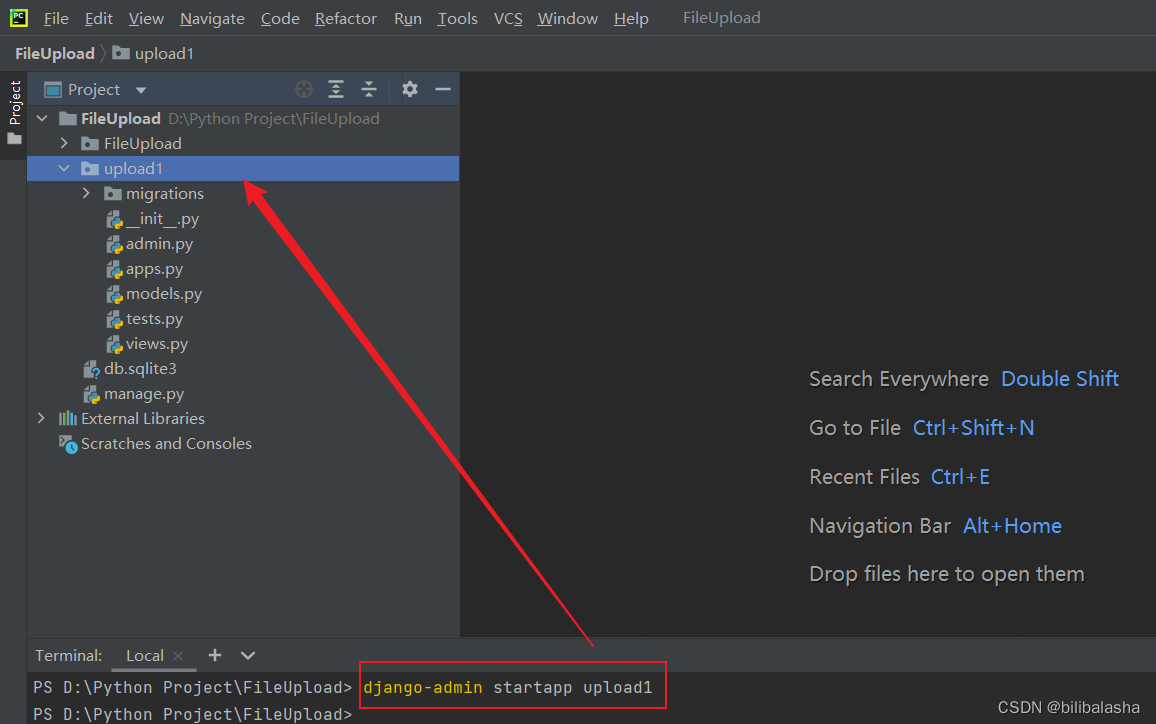
(1)该项目的名称是“FileUpload”,一个项目下可以包含多个实现不同功能的应用,每一个应用都可以在该项目下使用命令【django-admin startapp 应用名称】来创建,比如一个名为“upload1”的应用【django-admin startapp upload1】。
“upload1”的应用创建之后,需要在settings.py的installed app中添加该应用。
# Application definition
INSTALLED_APPS = [
    'django.contrib.admin',
    'django.contrib.auth',
    'django.contrib.contenttypes',
    'django.contrib.sessions',
    'django.contrib.messages',
    'django.contrib.staticfiles',
    'upload1',
]
在项目根目录下新建一个templates文件夹,用于存放html文件,并将之标记为模板文件夹(PyCharm社区版没有模板文件夹选项,也可以不标记),这样就可以直接渲染了。
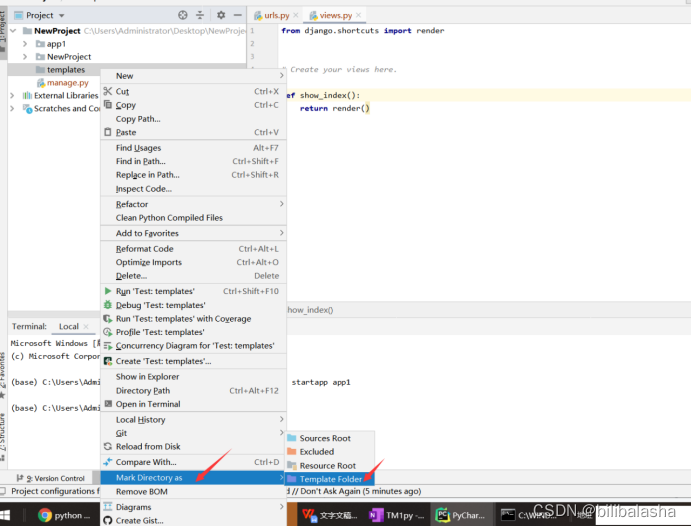
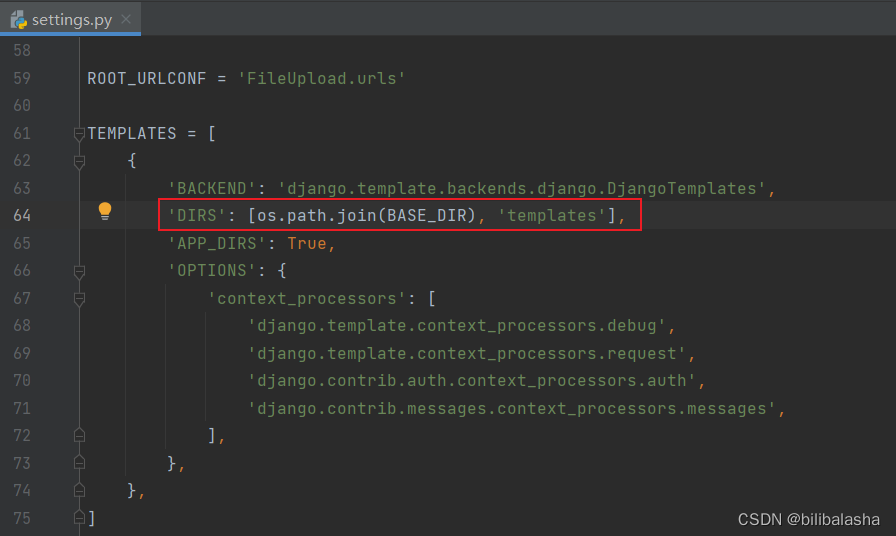
添加后,需要在settings.py中修改配置,让django知道templates文件夹就是放置html模板的文件夹。
在templates文件夹下建立一个index.html,用来测试。
<html>
<head>
    <title>附件上传</title>
    <meta http-equiv="Content-Type" content="text/html; charset=UTF-8">
    <meta http-equiv="pragma" content="no-cache">
    <meta http-equiv="cache-control" content="no-cache">
    <meta http-equiv="expires" content="0">
    <meta http-equiv="keywords" content="keyword1,keyword2,keyword3">
    <meta http-equiv="description" content="ajax方式">
<!--    <script src="http://apps.bdimg.com/libs/jquery/2.1.4/jquery.min.js"></script>-->
    <script src="https://ajax.aspnetcdn.com/ajax/jquery/jquery-1.8.3.min.js"></script>
    <script type="text/javascript">
        $(function () {
            let fileList = [];
            let files = $("#files");
            files.on("change", function (event) {
                for (var i = 0; i < files[0].files.length; i++) {
                    fileList.push(files[0].files[i]);
                }
                console.log(fileList)
            });

            $("#upload").click(function () {
                let formData = new FormData();
                fileList.forEach(function (file,index) {
                    formData.append('files', file, file.name);
                })
                formData.append("cube",$("#cube").text())
                formData.append("workflowtype",$("#workflowtype").text())
                formData.append("workflowID",$("#workflowID").text())
                formData.append("index",$("#index").text())
                formData.append("user",$("#user").text())


                $.ajax({
                    //几个参数需要注意一下
                    type: "POST",//方法类型
                    dataType: "json",//预期服务器返回的数据类型
                    url: "uploadfile" ,//url
                    data: formData,
                    contentType:false,
                    processData:false,
                    success: function (result) {
                        console.log(result);//打印服务端返回的数据(调试用)
                        if (result.status == 200) {
                            alert("上传成功!");
                            open(location, '_self').close();
                        }
                        if (result.status == 10000){
                            alert("文件已存在!");
                        }
                    },
                    error : function() {
                        alert("异常!");
                    }
                });
            })
        })

    </script>
</head>
<body>
<div id="form-div">
    <form id="form1" onsubmit="return false" action="/" method="post" enctype="multipart/form-data">
        <p id="cube" hidden>{{ cube }}</p>
        <p id="workflowtype" hidden>{{ workflowtype }}</p>
        <p id="workflowID" hidden>{{ workflowID }}</p>
        <p id="index" hidden>{{ index }}</p>
        <p id="user" hidden>{{ user }}</p>
        <p>附件: <input id="files" type="file" name="files" multiple="multiple"></p>
        <p><input id="upload" type="button" value="上传" > <input type="reset" value="重置"></p>
    </form>
</div>
</body>
</html>
(2)在upload1应用中的views.py,定义一个函数show_index(),该功能是显示一个首页,具体逻辑和返回值根据需求来。
import os
from django.http import HttpResponse
from django.shortcuts import render
import json

# 项目路径
BASE_DIR = os.path.dirname(os.path.dirname(os.path.abspath(__file__)))


def show_index(request):
    """上传文件 如果请求方式为get,显示网页;如果为post,进行上传文件操作"""
    if request.method == 'GET':
        return render(request, 'index.html')
    else:
        file_obj = request.FILES.get('files')
        file_name = file_obj.name
        # 上传文件存放的位置
        path = os.path.join('static/files/', file_name)
        if os.path.exists(path):
            msg = {
                'status': 10000,
                'msg': '文件已存在!',
            }
            return HttpResponse(json.dumps(msg))
        else:
            with open(path, 'wb') as fp:
                for chunk in file_obj.chunks():
                    fp.write(chunk)
                    fp.flush()
    msg = {
        'status': 200,
        'msg': '上传成功',
    }
    return HttpResponse(json.dumps(msg))
(3)在upload1应用中的urls.py中注册url(如果没有自己手动创建一个urls.py)。
from django.urls import path
from upload1.views import show_index

urlpatterns = [
    path('index', show_index),
    path('uploadfile', show_index),
]
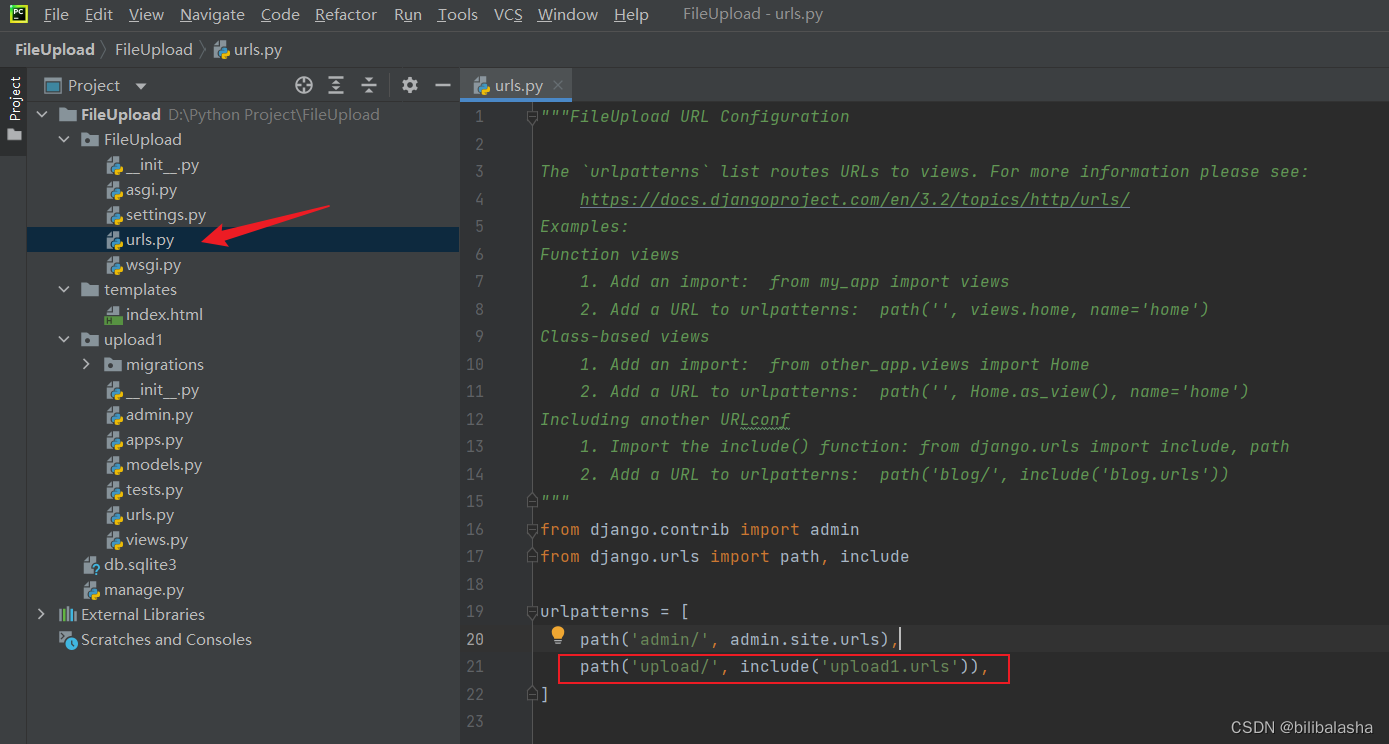
(4)在FileUpload项目下的urls.py中添加upload1应用下的url。
(5)django项目准备就绪,在终端输入命令就可以启动了。
【python manage.py runserver ip:port】
执行命令,启动成功:

访问成功:

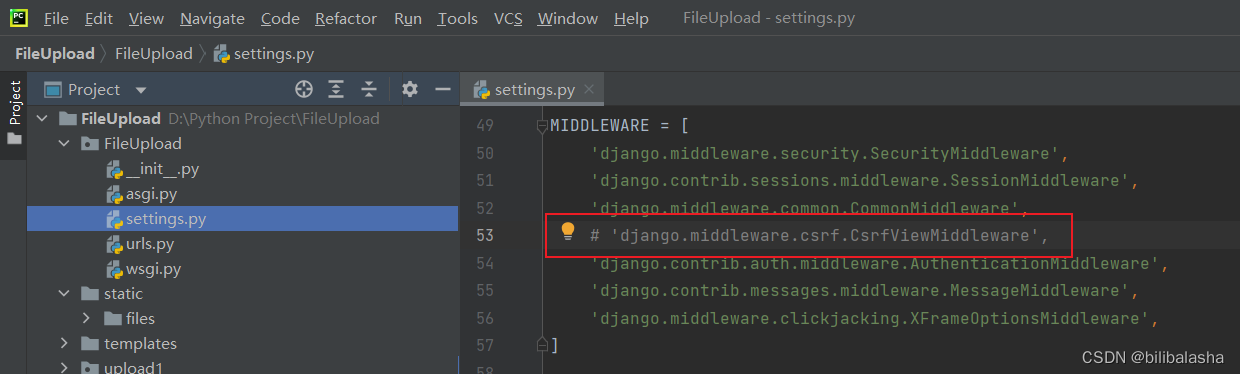
本地调试上传文件时,如果出现以下错误:Forbidden (CSRF token missing or incorrect.),需要把settings.py的以下代码注释掉,注意调式完之后要恢复回来。


 2418
2418


 被折叠的 条评论
为什么被折叠?
被折叠的 条评论
为什么被折叠?
 到【灌水乐园】发言


