


本文英文版地址:https://examples.javacodegeeks.com/enterprise-java/apache-solr/solr-zookeeper-example/
在Solr Zookeeper的这个例子中,我们将讨论如何使用嵌入了Solr的Zookeeper来执行分布式搜索。Solr提供Sharding选项以在多个服务器上分发索引。 Zookeeper帮助我们执行分布式搜索和检索结果集,就好像查询是在单个服务器上执行的。 在这个例子中,我们将告诉你如何设置Zookeeper,并显示分布式搜索的工作原理。
为了演示Solr Zookeeper示例,我们将安装Solr并创建另一个Solr副本。
对于这个例子,我们首选的环境是solr-5.3.0的Windows。在开始Solr安装之前,请确保已安装JDK并已正确设置Java_Home。
1.安装Apache Solr
首先,让我们从以下位置下载最新版本的Apache Solr:
http://lucene.apache.org/solr/downloads.html
在这个例子中,我们将运行两个Solr服务器,因此我们需要两个Solr实例。 现在创建一个名为node1的文件夹并解压缩zip文件。 下载Solr zip文件后,将其解压缩到文件夹中。提取的文件夹将如下所示:
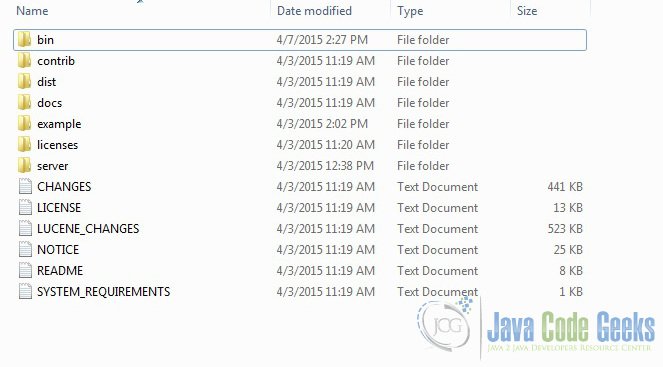
Solr文件夹
该bin文件夹中包含的脚本来启动和停止服务器。 该example文件夹包含几个示例文件。 我们将使用其中一个来演示Solr如何对数据进行索引。该server文件夹包含logs ,所有的Solr的日志写入文件夹。在索引期间检查日志中的任何错误将是有帮助的。 该solr下服务器文件夹包含不同的集合或核心。 每个核/集合的配置和数据存储在相应的核/集合文件夹中。
Apache Solr附带了一个内置的Jetty服务器。 但在我们启动solr实例之前,我们必须验证JAVA_HOME是否在机器上设置。
现在在文件夹node2下创建Solr的另一个副本。 您可以复制已提取的solr-5.3.0文件夹或在node2下重新解压缩下载的文件。
2.使用Zookeeper配置Solr
在这个例子中,我们将使用与Solr一起提供的嵌入式zookeeper。 我们可以使用命令行脚本启动服务器。 让我们转到bin目录从命令提示符并发出以下命令:
1 | <span class="notranslate"onmouseover="_tipon(this)"onmouseout="_tipoff()"><span class="google-src-text"style="direction: ltr; text-align: left">solr start -c</span> solr start -c</span> |
-c选项将以SolrCloud模式启动Solr,这也将启动Solr附带的嵌入式ZooKeeper实例。如果我们想使用已经运行的ZooKeeper,那么我们必须传递-z参数,当我们启动第二个节点时,我们将看到。
现在打开以下URL,看到solr正在运行。
http://localhost:8983/solr/#/
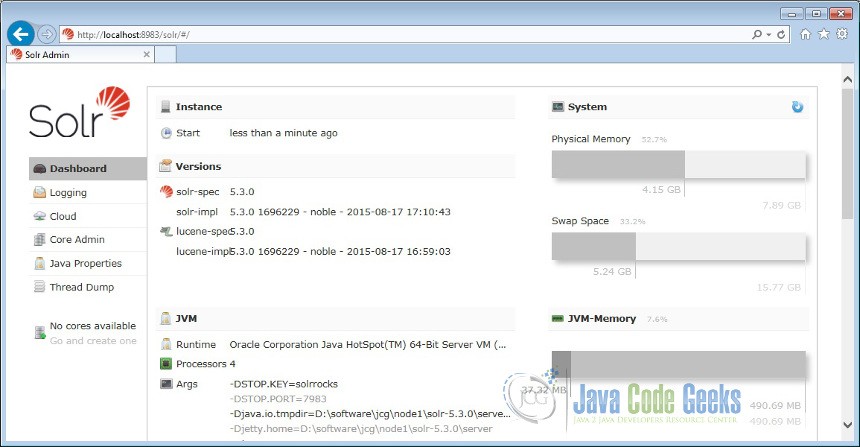
Solr Node1
现在,导航到第二个节点, \node2\solr-5.3.0\bin从命令提示符并发出以下命令。
1 | <span class="notranslate"onmouseover="_tipon(this)"onmouseout="_tipoff()"><span class="google-src-text"style="direction: ltr; text-align: left">solr start -c -p 7574 -z localhost:9983</span> solr start -c -p 7574 -z localhost:9983</span> |
在这里,我们再次从-c选项开始,而不是启动另一个嵌入的ZooKeeper,我们将使用ZooKeeper启动的节点1的一部分。注意,我们使用-z参数,并给定值为localhost:9893 ZooKeeper为节点1.节点1的ZooKeeper以缺省端口启动,该端口添加到Solr的默认端口(8983)。
现在打开以下URL来验证Solr正在节点2中运行。
http://localhost:7574/solr/#/
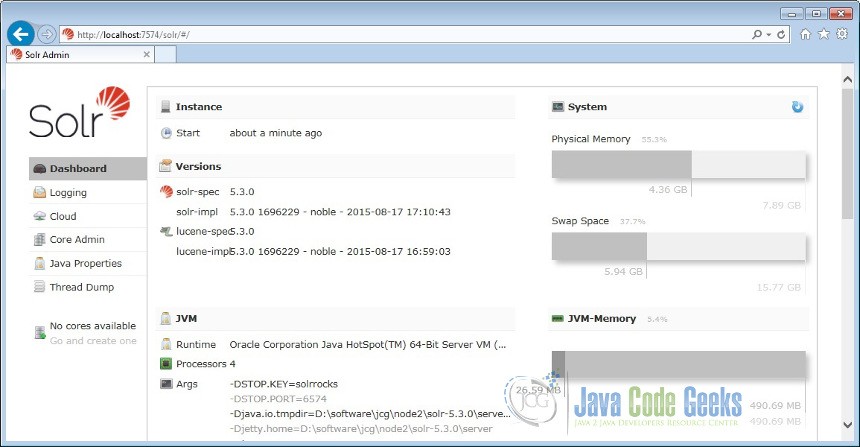
Solr Node2
3.创建集合
在本节中,我们将向您展示如何为solr实例配置核心/集合以及如何在不同节点之间建立索引。 Apache Solr附带一个名为Schemaless模式的选项。 此选项允许用户构建有效的模式,而无需手动编辑模式文件。
首先,我们需要创建一个用于索引数据的Core。 Solr create命令有以下选项:
- -c <名称> -芯或集合的名称来创建(必需)。
- -d <confdir> -配置目录,在SolrCloud模式是有用的。
- -n <CONFIGNAME> -配置名称。 此默认值与核心或集合的名称相同。
- -p <端口> -本地Solr的实例的端口发送创建命令;默认情况下,脚本尝试通过查找正在运行的Solr实例来检测端口。
- -s <碎片> -碎片的数量成,缺省值为1分割的集合。
- -rf <复制品> -集合中的每个文件的副本的数量。 默认值为1。
在这个例子中,我们将使用-c收集名称,参数-s定义碎片的数量和参数-d的配置目录参数。对于所有其他参数,我们使用默认设置。
现在,导航bin节点1的文件夹中的命令窗口,并发出以下命令:
1 | <span class="notranslate"onmouseover="_tipon(this)"onmouseout="_tipoff()"><span class="google-src-text"style="direction: ltr; text-align: left">solr create -c jcg -d data_driven_schema_configs -s 2</span> solr create -c jcg -d data_driven_schema_configs -s 2</span> |
我们将使用jcg作为集合名称,并使用data_driven_schema_configs作为无模式模式。还要注意,我们已经将-s参数的值2传递给创建两个分片。
我们可以在命令窗口中看到以下输出。
01 | <span class="notranslate"onmouseover="_tipon(this)"onmouseout="_tipoff()"><span class="google-src-text"style="direction: ltr; text-align: left">Connecting to ZooKeeper at localhost:9983 ...</span>正在连接到ZooKeeper在localhost:9983 ...</span> |
02 | <span class="notranslate"onmouseover="_tipon(this)"onmouseout="_tipoff()"><span class="google-src-text"style="direction: ltr; text-align: left">Uploading D:\software\jcg\node1\solr-5.3.0\server\solr\configsets\data_driven_sc</span>上传D:\ software \ jcg \ node1 \ solr-5.3.0 \ server \ solr \ configsets \ data_driven_sc</span> |
03 | <span class="notranslate"onmouseover="_tipon(this)"onmouseout="_tipoff()"><span class="google-src-text"style="direction: ltr; text-align: left">hema_configs\conffor config jcg to ZooKeeper at localhost:9983Creating new collection'jcg' using command:</span> hema_configs \ conffor config jcg to zookeeper at localhost:9983使用命令创建新集合'jcg':</span> |
04 | <span class="notranslate"onmouseover="_tipon(this)"onmouseout="_tipoff()"><span class="google-src-text"style="direction: ltr; text-align: left">http://localhost:8983/solr/admin/collections?action=CREATE&name=jcg&numShards=2&</span> http:// localhost:8983 / solr / admin / collections?action = CREATE&name = jcg&numShards = 2&</span> |
05 | <span class="notranslate"onmouseover="_tipon(this)"onmouseout="_tipoff()"><span class="google-src-text"style="direction: ltr; text-align: left">replicationFactor=1&maxShardsPerNode=1&collection.configName=jcg{</span> replicationFactor = 1&maxShardsPerNode = 1&collection.configName = jcg {</span> |
06 | <span class="notranslate"onmouseover="_tipon(this)"onmouseout="_tipoff()"><span class="google-src-text"style="direction: ltr; text-align: left">"responseHeader":{</span> “responseHeader”:{</span> |
07 | <span class="notranslate"onmouseover="_tipon(this)"onmouseout="_tipoff()"><span class="google-src-text"style="direction: ltr; text-align: left">"status":0,</span> “status”:0,</span> |
08 | <span class="notranslate"onmouseover="_tipon(this)"onmouseout="_tipoff()"><span class="google-src-text"style="direction: ltr; text-align: left">"QTime":10801},</span> “QTime”:10801},</span> |
09 | <span class="notranslate"onmouseover="_tipon(this)"onmouseout="_tipoff()"><span class="google-src-text"style="direction: ltr; text-align: left">"success":{"":{</span> “成功”:{””:{</span> |
10 | <span class="notranslate"onmouseover="_tipon(this)"onmouseout="_tipoff()"><span class="google-src-text"style="direction: ltr; text-align: left">"responseHeader":{</span> “responseHeader”:{</span> |
11 | <span class="notranslate"onmouseover="_tipon(this)"onmouseout="_tipoff()"><span class="google-src-text"style="direction: ltr; text-align: left">"status":0,</span> “status”:0,</span> |
12 | <span class="notranslate"onmouseover="_tipon(this)"onmouseout="_tipoff()"><span class="google-src-text"style="direction: ltr; text-align: left">"QTime":7143},</span> “QTime”:7143},</span> |
13 | <span class="notranslate"onmouseover="_tipon(this)"onmouseout="_tipoff()"><span class="google-src-text"style="direction: ltr; text-align: left">"core":"jcg_shard1_replica1"}}}</span> “core”:“jcg_shard1_replica1”}}}</span> |
现在我们导航到以下URL,我们可以看到jcg集合被填充在核心选择器中。 您还可以查看列出的其他配置配置。
http://localhost:8983/solr/#/

Solr JCG集合
现在点击左侧导航栏中的云图标。 您可以注意到两个分片是活动的,并在同一台机器上的不同端口上运行。
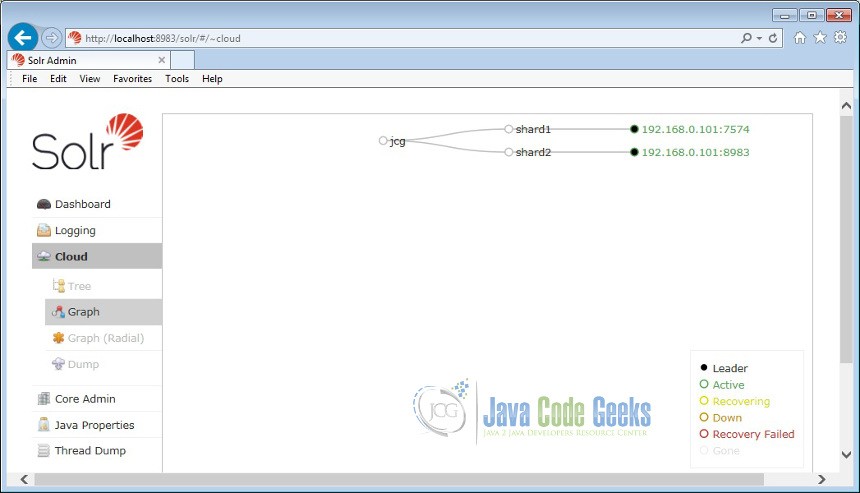
Solr碎片
4.索引数据
Apache Solr附带一个名为SimplePostTool的独立Java程序。 该程序打包成JAR,并提供与文件夹下的安装example\exampledocs 。
现在我们导航到\solr-5.3.0\example\exampledocs在命令提示文件夹,并输入以下命令。您将看到一堆使用该工具的选项。
1 | <span class="notranslate"onmouseover="_tipon(this)"onmouseout="_tipoff()"><span class="google-src-text"style="direction: ltr; text-align: left">java -jar post.jar -h</span> Java -jar post.jar -h</span> |
使用格式一般如下:
1 | <span class="notranslate"onmouseover="_tipon(this)"onmouseout="_tipoff()"><span class="google-src-text"style="direction: ltr; text-align: left">Usage: java [SystemProperties] -jar post.jar [-h|-] [<file|folder|url|arg></span>用法:java [SystemProperties] -jar post.jar [-h | - ] [<file| folder | url | arg></span> |
2 | <span class="notranslate"onmouseover="_tipon(this)"onmouseout="_tipoff()"><span class="google-src-text"style="direction: ltr; text-align: left">[<file|folder|url|arg>...]]</span> [<file| folder | url | arg> ...]</span> |
正如我们前面所说,我们将索引solr安装附带的“books.csv”文件中的数据。 我们将导航到solr-5.3.0\example\exampledocs在命令提示符并发出以下命令。
1 | <span class="notranslate"onmouseover="_tipon(this)"onmouseout="_tipoff()"><span class="google-src-text"style="direction: ltr; text-align: left">java -Dtype=text/csv -Durl=http://localhost:8983/solr/jcg/update -jar post.jar books.csv</span> java -Dtype = text / csv -Durl = http:// localhost:8983 / solr / jcg / update -jar post.jar books.csv</span> |
这里使用的SystemProperties是:
- -dtype -数据文件的类型。
- -Durl -网址为JCG核心。
文件“books.csv”现在将被索引,并且命令提示符将显示以下输出。
1 | <span class="notranslate"onmouseover="_tipon(this)"onmouseout="_tipoff()"><span class="google-src-text"style="direction: ltr; text-align: left">SimplePostTool version 5.0.0</span> SimplePostTool版本5.0.0</span> |
2 | <span class="notranslate"onmouseover="_tipon(this)"onmouseout="_tipoff()"><span class="google-src-text"style="direction: ltr; text-align: left">Posting files to [base] urlhttp://localhost:8983/solr/jcg/update using content-</span>将文件发布到[base] url http:// localhost:8983 / solr / jcg / update using content-</span> |
3 | <span class="notranslate"onmouseover="_tipon(this)"onmouseout="_tipoff()"><span class="google-src-text"style="direction: ltr; text-align: left">typetext/csv...</span>键入text / csv ...</span> |
4 | <span class="notranslate"onmouseover="_tipon(this)"onmouseout="_tipoff()"><span class="google-src-text"style="direction: ltr; text-align: left">POSTingfile books.csv to [base]</span>将文件books.csv发布到[base]</span> |
5 | <span class="notranslate"onmouseover="_tipon(this)"onmouseout="_tipoff()"><span class="google-src-text"style="direction: ltr; text-align: left">1 files indexed.</span> 1个文件已索引。</span> |
6 | <span class="notranslate"onmouseover="_tipon(this)"onmouseout="_tipoff()"><span class="google-src-text"style="direction: ltr; text-align: left">COMMITting Solr index changes tohttp://localhost:8983/solr/jcg/update...</span>提交Solr索引更改为http:// localhost:8983 / solr / jcg / update ...</span> |
7 | <span class="notranslate"onmouseover="_tipon(this)"onmouseout="_tipoff()"><span class="google-src-text"style="direction: ltr; text-align: left">Time spent: 0:00:00.647</span>所用时间:0:00:00.647</span> |
5.查询数据
现在让我们使用以下URL查询数据。 它将带来所有的数据分布在不同的碎片。
http://localhost:8983/solr/jcg/select?q=*:*
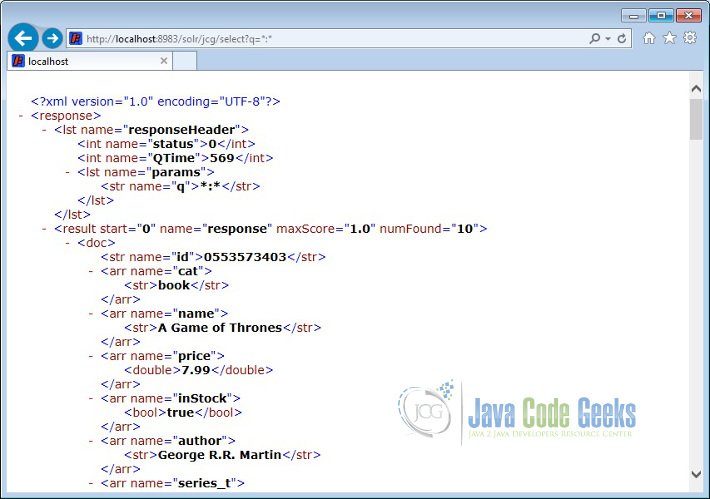
Solr ZooKeeper查询
类似地,打开以下URL。 结果集将与ZooKeeper在所有Shards中的分布式搜索相同。
http://localhost:7574/solr/jcg/select?q=*:*
ZooKeeper将在不同的Shard之间平均分配索引。 为了验证它,让我们查询一个碎片中的数据。
http://localhost:8983/solr/jcg/select?q=*:*&shards=localhost:7574/solr/jcg

Solr单碎片查询
您可以注意到,只有5条记录作为此查询的一部分返回。
6.结论
这是Apache Zoo与ZooKeeper集成的一个例子。 例如,我们已经看到了Zookeeper如何帮助我们执行分布式搜索和检索结果集,就好像查询是在单个服务器上执行的一样。


 2639
2639

 被折叠的 条评论
为什么被折叠?
被折叠的 条评论
为什么被折叠?
 到【灌水乐园】发言


