


在日常开发中,经常会有代码复用的情况,比如在很多个页面里,发现用户没有登录需要弹框登录的时候,比如多个页面顶部都有一个搜索框或者列表底部的暂无数据等等。
这个时候我们可以将页面内的功能模块抽象成自定义组件,以便在不同的页面中重复使用;也可以将复杂的页面拆分成多个低耦合的模块,有助于代码维护。
这里举一个弹出框登录组件的例子:进入小程序获取到用户昵称和头像,点击登录把当前页面的用户昵称和头像传给组件,然后在组件里将登录状态返回给页面。效果如下:
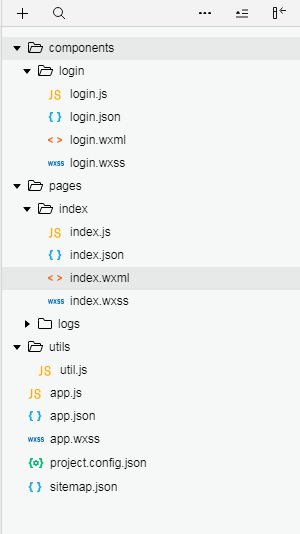
1.新建小程序项目,然后在项目里新建一个components文件夹存放组件,在components目录下创建login目录,在login目录下右键新建Component输入名称login然后回车,组件就创建好了,如下:
login.wxml:(其中class命名前面的~表示使用页面的样式,无需在组件里再重写样式)
<!-- 登录组件 -->
<!-- 背景遮罩层 -->
<view class="modal-mask" bindtap="hideRegistModal" wx:if="{{!registModalHidden}}"></view>
<!-- 登录弹框 -->
<view class="modal-login" wx:if="{{!registModalHidden}}">
  <view class="~userinfo">
    <image bindtap="bindViewTap" class="~userinfo-avatar" src="{{pic}}" mode="cover"></image>
    <text class="~userinfo-nickname">{{nickname}}</text>
  </view>
  <button class="~button" bindtap="login">确认登录</button>
</view>
login.js:(组件的properties可接受从页面传过来的参数,在组件的方法里可利用getCurrentPages将参数传给页面)
Component({
  /**
   * 组件的属性列表
   */
  properties: {
    pic: {
      type: "String",
      value: ''
    },
    nickname: {
      type: "String",
      value: ''
    }
  },
  /**
   * 组件的初始数据
   */
  data: {
    registModalHidden: false
  },
  /**
   * 组件的方法列表
   */
  methods: {
    /**
     * 确认登录
     */
    login: function() {
      /**修改父页面登录数据 */
      var pages = getCurrentPages();
      pages[0].setData({
        login_status: "已登录"
      })
      /**隐藏弹框 */
      this.setData({
        registModalHidden: true
      });
    },
  }
})
login.wxss:
/**登录弹框*/
.modal-mask {
  width: 100%;
  height: 100%;
  position: fixed;
  top: 0;
  left: 0;
  background: #000;
  opacity: 0.5;
  overflow: hidden;
  z-index: 9000;
  color: #fff;
}
.modal-login {
  width: 620rpx;
  height: 526rpx;
  position: fixed;
  top: 0;
  bottom: 0;
  left: 0;
  right: 0;
  margin: auto;
  overflow: hidden;
  z-index: 9999;
  background-color: #ffffff;
    border-radius: 15rpx;
}
2.在引用组件的页面的json文件里配置组件
index.json:
{
  "usingComponents": {
    "loginDialog": "/components/login/login"
  }
}
3.在页面引入组件
index.wxml:
<!--index.wxml-->
<view class="container">
  <view class="userinfo">
    <button wx:if="{{!hasUserInfo && canIUse}}" open-type="getUserInfo" bindgetuserinfo="getUserInfo"> 获取头像昵称 </button>
    <block wx:else>
      <image bindtap="bindViewTap" class="userinfo-avatar" src="{{userInfo.avatarUrl}}" mode="cover"></image>
      <text class="userinfo-nickname">{{userInfo.nickName}}</text>
    </block>
  </view>
  <view class="usermotto">
    <button class="button" bindtap="showLogin">{{login_status}}</button>
  </view>
</view>
<!-- 引入组件 -->
<loginDialog wx:if="{{showLogin}}" pic='{{userInfo.avatarUrl}}' nickname='{{userInfo.nickName}}' >
</loginDialog>
index.js:
//index.js
//获取应用实例
const app = getApp()

Page({
  data: {
    login_status: '点我弹出组件并传值给组件',
    showLogin:false,
    userInfo: {},
    hasUserInfo: false,
    canIUse: wx.canIUse('button.open-type.getUserInfo')
  },
  showLogin:function(){
    this.setData({
      showLogin: true
    })
  },
  //事件处理函数
  bindViewTap: function() {
    wx.navigateTo({
      url: '../logs/logs'
    })
  },
  onLoad: function () {
    if (app.globalData.userInfo) {
      this.setData({
        userInfo: app.globalData.userInfo,
        hasUserInfo: true
      })
    } else if (this.data.canIUse){
      // 由于 getUserInfo 是网络请求,可能会在 Page.onLoad 之后才返回
      // 所以此处加入 callback 以防止这种情况
      app.userInfoReadyCallback = res => {
        this.setData({
          userInfo: res.userInfo,
          hasUserInfo: true
        })
      }
    } else {
      // 在没有 open-type=getUserInfo 版本的兼容处理
      wx.getUserInfo({
        success: res => {
          app.globalData.userInfo = res.userInfo
          this.setData({
            userInfo: res.userInfo,
            hasUserInfo: true
          })
        }
      })
    }
  },
  getUserInfo: function(e) {
    console.log(e)
    app.globalData.userInfo = e.detail.userInfo
    this.setData({
      userInfo: e.detail.userInfo,
      hasUserInfo: true
    })
  }
})
index.wxss:
/**index.wxss**/
.userinfo {
  display: flex;
  flex-direction: column;
  align-items: center;
}

.userinfo-avatar {
  width: 128rpx;
  height: 128rpx;
  margin: 20rpx;
  border-radius: 50%;
}

.userinfo-nickname {
  color: #aaa;
}
.button {
  margin-top: 60px;
  font-weight: normal;
  background-color: #1c9dff;
  color: #fff;
}
这样我们就成功创建一个组件了,在小程序的其他页面需要用到这个登录弹框时直接引用就可以,而不用在每个页面都写一个弹框。关于组件的更多用法点击这里


 332
332

 被折叠的 条评论
为什么被折叠?
被折叠的 条评论
为什么被折叠?
 到【灌水乐园】发言


