


一、 创建虚拟环境,在虚拟环境下操作
1、安装scrapyd
pip install scrapyd
2、安装scrapyd-client
pip install scrapyd-client
3、安装scrapydweb
pip install scrapydweb
4、安装Logparser
pip install Logparser
二、新建一个scracyd的配置文件
sudo mkdir /etc/scrapyd
sudo vim /etc/scrapyd/scrapyd.conf
scrapyd.conf 内容如下:
[scrapyd]
eggs_dir    = /etc/scrapydweb_settings/eggs
logs_dir    = /etc/scrapydweb_settings/logs
items_dir   = /etc/scrapydweb_settings/items
jobs_to_keep = 5
dbs_dir     = /etc/scrapydweb_settings/dbs
max_proc    = 0
max_proc_per_cpu = 10
finished_to_keep = 100
poll_interval = 5.0
bind_address = 0.0.0.0
http_port   = 6800
debug       = off
runner      = scrapyd.runner
application = scrapyd.app.application
launcher    = scrapyd.launcher.Launcher
webroot     = scrapyd.website.Root

[services]
schedule.json     = scrapyd.webservice.Schedule
cancel.json       = scrapyd.webservice.Cancel
addversion.json   = scrapyd.webservice.AddVersion
listprojects.json = scrapyd.webservice.ListProjects
listversions.json = scrapyd.webservice.ListVersions
listspiders.json  = scrapyd.webservice.ListSpiders
delproject.json   = scrapyd.webservice.DeleteProject
delversion.json   = scrapyd.webservice.DeleteVersion
listjobs.json     = scrapyd.webservice.ListJobs
daemonstatus.json = scrapyd.webservice.DaemonStatus
注: eggs_dir, logs_dir, items_dir, dbs_dir, 四个文件路径需要手动去生成。
mkdir -p /etc/scrapydweb_settings/eggs
mkdir -p /etc/scrapydweb_settings/logs
mkdir -p /etc/scrapydweb_settings/items
创立软链接
ln -s /root/anaconda3/envs/py36/bin/scrapyd /usr/bin/scrapyd
ln -s /root/anaconda3/envs/py36/bin/scrapydweb /usr/bin/scrapydweb
删除软链接
unlink /usr/bin/scrapyd  (推荐, 更安全)
	或
rm -rf /usr/bin/scrapyd
注: 在你的项目目录下启动 scrapyd, 否则部署项目会报错, 我也不知道啥原因。。。
三、部署scrapydweb
scrapydweb 第一次运行时,会在当前pwd下生成一个配置文件 scrapydweb_settings_v10.py, 为了方便管理, 我们放在一个文件夹中.
pip install scrapydweb
mkdir -p /etc/scrapydweb_settings
cd /etc/scrapydweb_settings
scrapydweb
修改scrapydweb 的配置文件, 有6个todo 改一下就可以用了, 具体含义网上很多,大家自行查看
# coding: utf-8
"""
How ScrapydWeb works:
BROWSER <<<>>> SCRAPYDWEB_BIND:SCRAPYDWEB_PORT <<<>>> your SCRAPYD_SERVERS

GitHub: https://github.com/my8100/scrapydweb
DOCS: https://github.com/my8100/files/blob/master/scrapydweb/README.md
文档:https://github.com/my8100/files/blob/master/scrapydweb/README_CN.md
"""
import os

############################## QUICK SETUP start ##############################
############################## 快速设置 开始 ###################################
# Setting SCRAPYDWEB_BIND to '0.0.0.0' or IP-OF-THE-CURRENT-HOST would make
# ScrapydWeb server visible externally; Otherwise, set it to '127.0.0.1'.
# The default is '0.0.0.0'.
SCRAPYDWEB_BIND = '0.0.0.0'
# Accept connections on the specified port, the default is 5000.
SCRAPYDWEB_PORT = 5000

# The default is False, set it to True to enable basic auth for the web UI.
# ENABLE_AUTH = False
# # In order to enable basic auth, both USERNAME and PASSWORD should be non-empty strings.
# USERNAME = ''
# PASSWORD = ''

# todo 设置用户名密码
ENABLE_AUTH = True
USERNAME = ''
PASSWORD = ''

# Make sure that [Scrapyd](https://github.com/scrapy/scrapyd) has been installed
# and started on all of your hosts.
# Note that for remote access, you have to manually set 'bind_address = 0.0.0.0'
# in the configuration file of Scrapyd and restart Scrapyd to make it visible externally.
# Check out 'https://scrapyd.readthedocs.io/en/latest/config.html#example-configuration-file' for more info.
# ------------------------------ Chinese --------------------------------------
# 请先确保所有主机都已经安装和启动 [Scrapyd](https://github.com/scrapy/scrapyd)。
# 如需远程访问 Scrapyd,则需在 Scrapyd 配置文件中设置 'bind_address = 0.0.0.0',然后重启 Scrapyd。
# 详见 https://scrapyd.readthedocs.io/en/latest/config.html#example-configuration-file

# - the string format: username:password@ip:port#group
#   - The default port would be 6800 if not provided,
#   - Both basic auth and group are optional.
#   - e.g. '127.0.0.1:6800' or 'username:password@localhost:6801#group'
# - the tuple format: (username, password, ip, port, group)
#   - When the username, password, or group is too complicated (e.g. contains ':@#'),
#   - or if ScrapydWeb fails to parse the string format passed in,
#   - it's recommended to pass in a tuple of 5 elements.
#   - e.g. ('', '', '127.0.0.1', '6800', '') or ('username', 'password', 'localhost', '6801', 'group')
SCRAPYD_SERVERS = [
    '127.0.0.1:6800',
    # 'username:password@localhost:6801#group',
    # ('username', 'password', 'localhost', '6801', 'group'), # todo
]

# It's recommended to update the three options below
# if both ScrapydWeb and one of your Scrapyd servers run on the same machine.
# ------------------------------ Chinese --------------------------------------
# 假如 ScrapydWeb 和某个 Scrapyd 运行于同一台主机,建议更新如下三个设置项。

# If both ScrapydWeb and one of your Scrapyd servers run on the same machine,
# ScrapydWeb would try to directly read Scrapy logfiles from disk, instead of making a request
# to the Scrapyd server.
# e.g. '127.0.0.1:6800' or 'localhost:6801', do not forget the port number.
# LOCAL_SCRAPYD_SERVER = ''
LOCAL_SCRAPYD_SERVER = '127.0.0.1:6800'  # todo 当前服务器的 ip 和 port

# Enter the directory when you run Scrapyd, run the command below
# to find out where the Scrapy logs are stored:
# python -c "from os.path import abspath, isdir; from scrapyd.config import Config; path = abspath(Config().get('logs_dir')); print(path); print(isdir(path))"
# Check out https://scrapyd.readthedocs.io/en/stable/config.html#logs-dir for more info.
# e.g. 'C:/Users/username/logs' or '/home/username/logs'
LOCAL_SCRAPYD_LOGS_DIR = '/etc/scrapydweb_settings/logs'  # todo  设置路径

# The default is False, set it to True to automatically run LogParser as a subprocess at startup.
# Note that you can run the LogParser service separately via command 'logparser' as you like.
# Run 'logparser -h' to find out the config file of LogParser for more advanced settings.
# Visit https://github.com/my8100/logparser for more info.
# ENABLE_LOGPARSER = False
ENABLE_LOGPARSER = True  # todo 打开日志
############################## QUICK SETUP end ################################
############################## 快速设置 结束 ###################################


############################## ScrapydWeb #####################################
# The default is False, set it to True and add both CERTIFICATE_FILEPATH and PRIVATEKEY_FILEPATH
# to run ScrapydWeb in HTTPS mode.
# Note that this feature is not fully tested, please leave your comment here if ScrapydWeb
# raises any excepion at startup: https://github.com/my8100/scrapydweb/issues/18
ENABLE_HTTPS = False
# e.g. '/home/username/cert.pem'
CERTIFICATE_FILEPATH = ''
# e.g. '/home/username/cert.key'
PRIVATEKEY_FILEPATH = ''

############################## Scrapy #########################################
# ScrapydWeb is able to locate projects in the SCRAPY_PROJECTS_DIR,
# so that you can simply select a project to deploy, instead of packaging it in advance.
# e.g. 'C:/Users/username/myprojects' or '/home/username/myprojects'
SCRAPY_PROJECTS_DIR = '/home/ubuntu/myprojects'  # todo 当前项目路径

############################## Scrapyd ########################################
# ScrapydWeb would try every extension in sequence to locate the Scrapy logfile.
# The default is ['.log', '.log.gz', '.txt'].
SCRAPYD_LOG_EXTENSIONS = ['.log', '.log.gz', '.txt']

############################## LogParser ######################################
# Whether to backup the stats json files locally after you visit the Stats page of a job
# so that it is still accessible even if the original logfile has been deleted.
# The default is True, set it to False to disable this behaviour.
BACKUP_STATS_JSON_FILE = True

############################## Timer Tasks ####################################
# Run ScrapydWeb with argument '-sw' or '--switch_scheduler_state', or click the ENABLED|DISABLED button
# on the Timer Tasks page to turn on/off the scheduler for the timer tasks and the snapshot mechanism below.

# The default is 300, which means ScrapydWeb would automatically create a snapshot of the Jobs page
# and save the jobs info in the database in the background every 300 seconds.
# Note that this behaviour would be paused if the scheduler for timer tasks is disabled.
# Set it to 0 to disable this behaviour.
JOBS_SNAPSHOT_INTERVAL = 300

############################## Run Spider #####################################
# The default is False, set it to True to automatically
# expand the 'settings & arguments' section in the Run Spider page.
SCHEDULE_EXPAND_SETTINGS_ARGUMENTS = False

# The default is 'Mozilla/5.0', set it a non-empty string to customize the default value of `custom`
# in the drop-down list of `USER_AGENT`.
SCHEDULE_CUSTOM_USER_AGENT = 'Mozilla/5.0'

# The default is None, set it to any value of ['custom', 'Chrome', 'iPhone', 'iPad', 'Android']
# to customize the default value of `USER_AGENT`.
SCHEDULE_USER_AGENT = None

# The default is None, set it to True or False to customize the default value of `ROBOTSTXT_OBEY`.
SCHEDULE_ROBOTSTXT_OBEY = None

# The default is None, set it to True or False to customize the default value of `COOKIES_ENABLED`.
SCHEDULE_COOKIES_ENABLED = None

# The default is None, set it to a non-negative integer to customize the default value of `CONCURRENT_REQUESTS`.
SCHEDULE_CONCURRENT_REQUESTS = None

# The default is None, set it to a non-negative number to customize the default value of `DOWNLOAD_DELAY`.
SCHEDULE_DOWNLOAD_DELAY = None

# The default is "-d setting=CLOSESPIDER_TIMEOUT=60\r\n-d setting=CLOSESPIDER_PAGECOUNT=10\r\n-d arg1=val1",
# set it to '' or any non-empty string to customize the default value of `additional`.
# Use '\r\n' as the line separator.
SCHEDULE_ADDITIONAL = "-d setting=CLOSESPIDER_TIMEOUT=60\r\n-d setting=CLOSESPIDER_PAGECOUNT=10\r\n-d arg1=val1"

############################## Page Display ###################################
# The default is True, set it to False to hide the Items page, as well as
# the Items column in the Jobs page.
SHOW_SCRAPYD_ITEMS = True

# The default is True, set it to False to hide the Job column in the Jobs page with non-database view.
SHOW_JOBS_JOB_COLUMN = True

# The default is 0, which means unlimited, set it to a positive integer so that
# only the latest N finished jobs would be shown in the Jobs page with non-database view.
JOBS_FINISHED_JOBS_LIMIT = 0

# If your browser stays on the Jobs page, it would be reloaded automatically every N seconds.
# The default is 300, set it to 0 to disable auto-reloading.
JOBS_RELOAD_INTERVAL = 300

# The load status of the current Scrapyd server is checked every N seconds,
# which is displayed in the top right corner of the page.
# The default is 10, set it to 0 to disable auto-refreshing.
DAEMONSTATUS_REFRESH_INTERVAL = 10

############################## Send Text ######################################
########## usage in scrapy projects ##########
# See the "Send Text" page

########## slack ##########
# How to create a slack app:
# 1. Visit https://api.slack.com/apps and press the "Create New App" button.
# 2. Enter your App Name (e.g. myapp)and select one of your Slack Workspaces, the press "Create App".
# 3. Click the "OAuth & Permissions" menu in the sidebar on the left side of the page.
# 4. Scroll down the page and find out "Select Permission Scopes" in the "Scopes" section
# 5. Enter "send" and select "Send messages as <your-app-name>", then press "Save Changes"
# 6. Scroll up the page and press "Install App to Workspace", then press "Install"
# 7. Copy the "OAuth Access Token", e.g. xoxp-123-456-789-abcde
# See https://api.slack.com/apps for more info

# See step 1~7 above, e.g. 'xoxp-123-456-789-abcde'
SLACK_TOKEN = os.environ.get('SLACK_TOKEN', '')
# The default channel to use when sending text via slack, e.g. 'general'
SLACK_CHANNEL = 'general'

########## telegram ##########
# How to create a telegram bot:
# 1. Visit https://telegram.me/botfather to start a conversation with Telegram's bot that creates other bots.
# 2. Send the /newbot command to create a new bot in a chat with BotFather.
# 3. Follow the instructions to set up name and username (e.g. my_bot) for your bot.
# 4. You would get a token (e.g. 123:abcde) after step 3.
# 5. Visit telegram.me/<bot_username> (e.g. telegram.me/my_bot) and say hi to your bot to initiate a conversation.
# 6. Visit https://api.telegram.org/bot<token-in-setp-4>/getUpdates to get the chat_id.
#    (e.g. Visit https://api.telegram.org/bot123:abcde/getUpdates
#     and you can find the chat_id in "chat":{"id":123456789,...)
# See https://core.telegram.org/bots#6-botfather for more info

# See step 1~4 above, e.g. '123:abcde'
TELEGRAM_TOKEN = os.environ.get('TELEGRAM_TOKEN', '')
# See step 5~6 above, e.g. 123456789
TELEGRAM_CHAT_ID = int(os.environ.get('TELEGRAM_CHAT_ID', 0))

########## email ##########
# The default subject to use when sending text via email.
EMAIL_SUBJECT = 'Email from #scrapydweb'

########## email sender & recipients ##########
# Leave this option as '' to default to the EMAIL_SENDER option below; Otherwise, set it up
# if your email service provider requires an username which is different from the EMAIL_SENDER option below to login.
# e.g. 'username'
EMAIL_USERNAME = ''
# As for different email service provider, you might have to get an APP password (like Gmail)
# or an authorization code (like QQ mail) and set it as the EMAIL_PASSWORD.
# Check out links below to get more help:
# https://stackoverflow.com/a/27515833/10517783 How to send an email with Gmail as the provider using Python?
# https://stackoverflow.com/a/26053352/10517783 Python smtplib proxy support
# e.g. 'password4gmail'
EMAIL_PASSWORD = os.environ.get('EMAIL_PASSWORD', '')

# e.g. 'username@gmail.com'
EMAIL_SENDER = ''
# e.g. ['username@gmail.com', ]
EMAIL_RECIPIENTS = [EMAIL_SENDER]

########## email smtp settings ##########
# Check out this link if you are using ECS of Alibaba Cloud and your SMTP server provides TCP port 25 only:
# https://www.alibabacloud.com/help/doc-detail/56130.htm
# Config for https://mail.google.com using SSL: ('smtp.gmail.com', 465, True)
# Config for https://mail.google.com:           ('smtp.gmail.com', 587, False)
# Config for https://mail.qq.com using SSL:     ('smtp.qq.com', 465, True)
# Config for http://mail.10086.cn:              ('smtp.139.com', 25, False)
SMTP_SERVER = ''
SMTP_PORT = 0
SMTP_OVER_SSL = False
# The timeout in seconds for the connection attempt, the default is 30.
SMTP_CONNECTION_TIMEOUT = 30

############################## Monitor & Alert ################################
# The default is False, set it to True to launch the poll subprocess to monitor your crawling jobs.
ENABLE_MONITOR = False

########## poll interval ##########
# Tip: In order to be notified (and stop or forcestop a job when triggered) in time,
# you can reduce the value of POLL_ROUND_INTERVAL and POLL_REQUEST_INTERVAL,
# at the cost of burdening both CPU and bandwidth of your servers.

# Sleep N seconds before starting next round of poll, the default is 300.
POLL_ROUND_INTERVAL = 300
# Sleep N seconds between each request to the Scrapyd server while polling, the default is 10.
POLL_REQUEST_INTERVAL = 10

########## alert switcher ##########
# Tip: Set the SCRAPYDWEB_BIND option the in "QUICK SETUP" section to the actual IP of your host,
# then you can visit ScrapydWeb via the links attached in the alert.

# The default is False, set it to True to enable alert via Slack, Telegram, or Email.
# You have to set up your accounts in the "Send text" section above first.
ENABLE_SLACK_ALERT = False
ENABLE_TELEGRAM_ALERT = False
ENABLE_EMAIL_ALERT = False

########## alert working time ##########
# Monday is 1 and Sunday is 7.
# e.g, [1, 2, 3, 4, 5, 6, 7]
ALERT_WORKING_DAYS = []

# From 0 to 23.
# e.g. [9] + list(range(15, 18)) >>> [9, 15, 16, 17], or range(24) for 24 hours
ALERT_WORKING_HOURS = []

########## basic triggers ##########
# Trigger alert every N seconds for each running job.
# The default is 0, set it to a positive integer to enable this trigger.
ON_JOB_RUNNING_INTERVAL = 0

# Trigger alert when a job is finished.
# The default is False, set it to True to enable this trigger.
ON_JOB_FINISHED = False

########## advanced triggers ##########
# - LOG_XXX_THRESHOLD:
#   - Trigger alert the first time reaching the threshold for a specific kind of log.
#   - The default is 0, set it to a positive integer to enable this trigger.
# - LOG_XXX_TRIGGER_STOP (optional):
#   - The default is False, set it to True to stop current job automatically when reaching the LOG_XXX_THRESHOLD.
#   - The SIGTERM signal would be sent only one time to shut down the crawler gracefully.
#   - In order to avoid an UNCLEAN shutdown, the 'STOP' action would be executed one time at most
#   - if none of the 'FORCESTOP' triggers is enabled, no matter how many 'STOP' triggers are enabled.
# - LOG_XXX_TRIGGER_FORCESTOP (optional):
#   - The default is False, set it to True to FORCESTOP current job automatically when reaching the LOG_XXX_THRESHOLD.
#   - The SIGTERM signal would be sent twice resulting in an UNCLEAN shutdown, without the Scrapy stats dumped!
#   - The 'FORCESTOP' action would be executed if both of the 'STOP' and 'FORCESTOP' triggers are enabled.

# Note that the 'STOP' action and the 'FORCESTOP' action would still be executed even when the current time
# is NOT within the ALERT_WORKING_DAYS and the ALERT_WORKING_HOURS, though no alert would be sent.

LOG_CRITICAL_THRESHOLD = 0
LOG_CRITICAL_TRIGGER_STOP = False
LOG_CRITICAL_TRIGGER_FORCESTOP = False

LOG_ERROR_THRESHOLD = 0
LOG_ERROR_TRIGGER_STOP = False
LOG_ERROR_TRIGGER_FORCESTOP = False

LOG_WARNING_THRESHOLD = 0
LOG_WARNING_TRIGGER_STOP = False
LOG_WARNING_TRIGGER_FORCESTOP = False

LOG_REDIRECT_THRESHOLD = 0
LOG_REDIRECT_TRIGGER_STOP = False
LOG_REDIRECT_TRIGGER_FORCESTOP = False

LOG_RETRY_THRESHOLD = 0
LOG_RETRY_TRIGGER_STOP = False
LOG_RETRY_TRIGGER_FORCESTOP = False

LOG_IGNORE_THRESHOLD = 0
LOG_IGNORE_TRIGGER_STOP = False
LOG_IGNORE_TRIGGER_FORCESTOP = False

############################## System #########################################
# The default is False, set it to True to enable debug mode and the interactive debugger
# would be shown in the browser instead of the "500 Internal Server Error" page.
# Note that use_reloader is set to False in run.py
DEBUG = False

# The default is False, set it to True to change the logging level from INFO to DEBUG
# for getting more information about how ScrapydWeb works, especially while debugging.
VERBOSE = False

# The default is '', which means saving all program data in the Python directory.
# e.g. 'C:/Users/username/scrapydweb_data' or '/home/username/scrapydweb_data'
DATA_PATH = os.environ.get('DATA_PATH', '')

# The default is '', which means saving data of Jobs and Timer Tasks in DATA_PATH using SQLite.
# The data could be also saved in MySQL or PostgreSQL backend in order to improve concurrency.
# To use MySQL backend, run command: pip install --upgrade pymysql
# To use PostgreSQL backend, run command: pip install --upgrade psycopg2
# e.g.
# 'mysql://username:password@127.0.0.1:3306'
# 'postgres://username:password@127.0.0.1:5432'
# 'sqlite:///C:/Users/username'
# 'sqlite:home/username'
DATABASE_URL = os.environ.get('DATABASE_URL', '')
然后重启 ScrapydWeb,然后访问 ip:5000
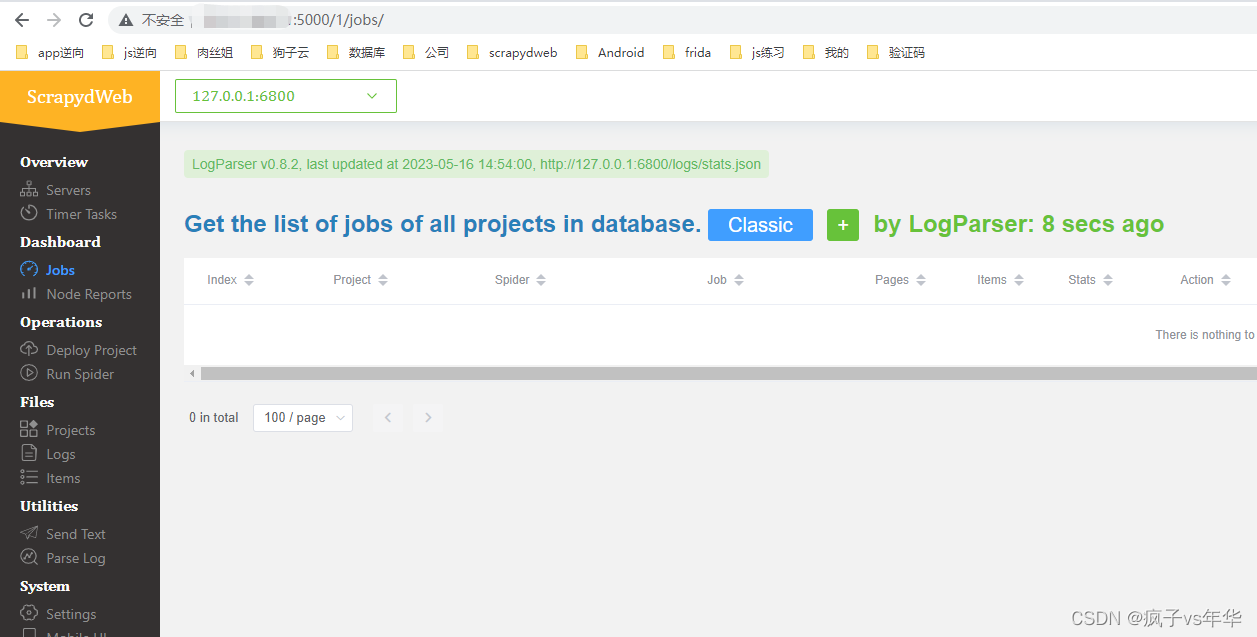
输入username和password可以看到scrapydweb的页面, 部署项目就ok了.


 200
200

 被折叠的 条评论
为什么被折叠?
被折叠的 条评论
为什么被折叠?
 到【灌水乐园】发言


