


1. 准备环境
本文将严格按照实验指导和实验要求进行撰写。首先要明确,我们这里所要分析的并不是Linux的启动过程的全部,仅仅是从start_kernel 到 init 的这段 kernel 初始化的过程,并不分析 kernel_start 函数前面的引导过程。
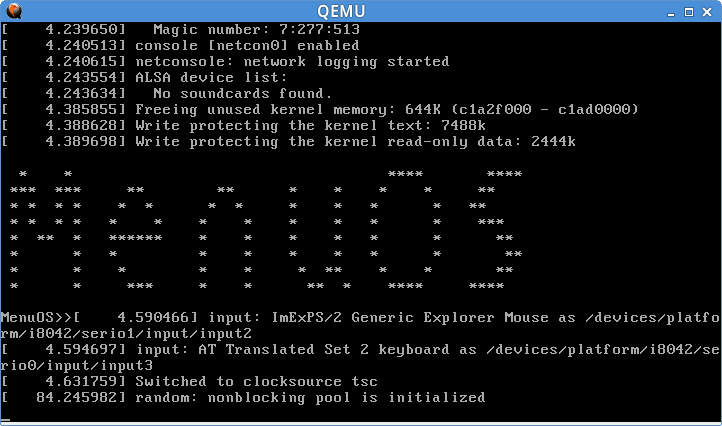
首先我们要启动一个Linux 内核,即要把这个内核跑起来,这样子我们才能进行后续的分析。根据实验指导,下载最新的 Linux3.18.6 源代码、编译源代码、制作根文件系统,最后启动 MenuOS,如下图;
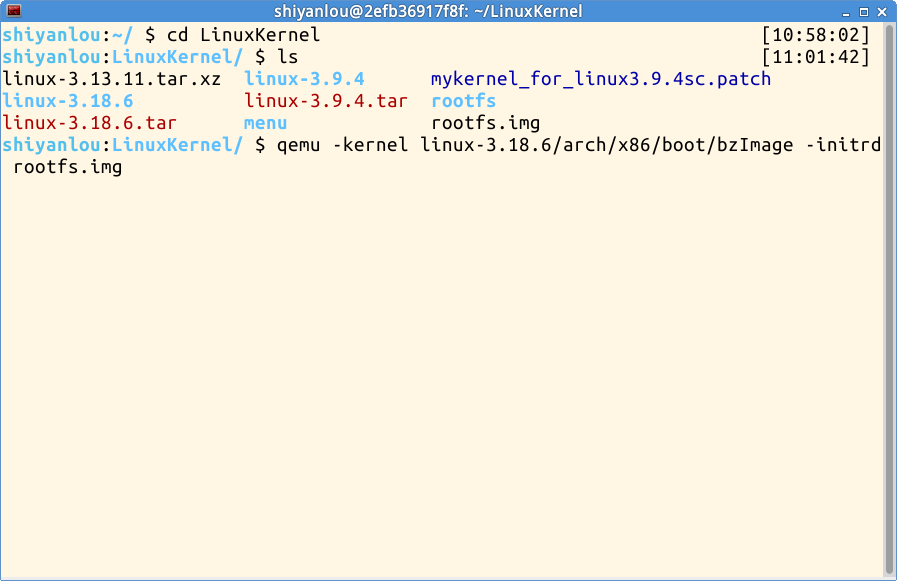
打开终端,然后输入上图的命令来启动Linux内核;而rootfs.img是事先打包好的有init可执行程序的文件
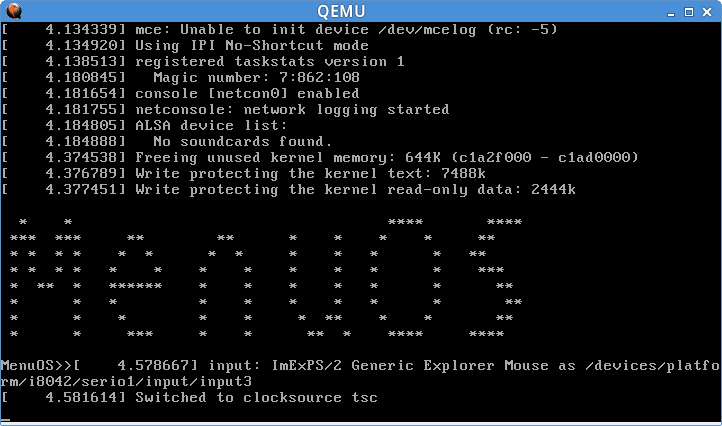
启动好的内核如图,init就是预先编译好的menu小程序
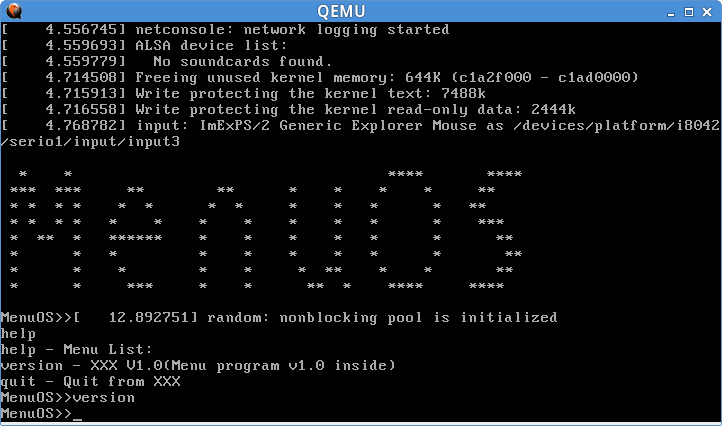
我们在可以尝试一下这个操作系统(程序)所支持的功能
2. 代码结构及程序流程
我们已经能够成功地运行起一个 Linux 系统了,并把 Menu 终端程序作为第一个启动起来的用户程序与用户进行交互。接下来,我们想要更了解 Linux 的话就必须要了解 Linux 系统的代码结构是怎么样的,因为只有清楚了代码结构是如何的,你才能知道系统是怎么跑的。

Linux3.18.6 代码结构
如图所示,Linux-3.18.6 的目录结构下,各个文件夹及文件有不同的作用,如 arch 目录下存放的是关于各个 CPU 体系架构相关的源文件;crypto 目录下存放的是跟安全有关的(加密、解密)源代码;init 目录下存放的是内核初始化时相关的源文件;ipc 目录下存放的是进程间通信相关的源文件;kernel 目录下存放的是于内核相关的源文件;mm 目录想存放的是跟内存管理相关的源文件;……
“start_kernel”函数
Linux 内核初始化的入口在 "init/main.c" 文件中的 start_kernel 函数,简要代码如下所示:
asmlinkage __visible void __init start_kernel(void)
{
	char *command_line;
	char *after_dashes;

        ......

	trap_init();
	mm_init();

	sched_init();

        ......

	/* Do the rest non-__init'ed, we're now alive */
	rest_init();
}
该函数开始一系列的初始化工作,如中断模块初始化、内存管理模块初始化、进程调度初始化等等。在处理完各种紧迫的,需要尽快初始化的模块之后,最后进入rest_init 函数进行剩余模块的初始化工作。
"rest_init"函数
rest_init 函数最主要的工作就是启动内核线程 kernel_init,代码如下所示:
static noinline void __init_refok rest_init(void)
{
	int pid;

	rcu_scheduler_starting();
	/*
	 * We need to spawn init first so that it obtains pid 1, however
	 * the init task will end up wanting to create kthreads, which, if
	 * we schedule it before we create kthreadd, will OOPS.
	 */
	kernel_thread(kernel_init, NULL, CLONE_FS);
	numa_default_policy();
	pid = kernel_thread(kthreadd, NULL, CLONE_FS | CLONE_FILES);
	rcu_read_lock();
	kthreadd_task = find_task_by_pid_ns(pid, &init_pid_ns);
	rcu_read_unlock();
	complete(&kthreadd_done);

	/*
	 * The boot idle thread must execute schedule()
	 * at least once to get things moving:
	 */
	init_idle_bootup_task(current);
	schedule_preempt_disabled();
	/* Call into cpu_idle with preempt disabled */
	cpu_startup_entry(CPUHP_ONLINE);
}
rest_init 函数在启动了 kernel_init 的同时也启动了内核线程 kthreadd,两者将分别启动第1号进程和第2号进程(由此可见rest_init 应为第0号进程)。函数最后来到了 cpu_startup_entry 函数。
"kernel_init"函数
kernel_init 函数的工作就是要启动第0号进程,经过释放不再沿用的内存、设置系统状态等操作后,开始准备启动第0号进程,代码如下所示:
static int __ref kernel_init(void *unused)
{
	int ret;

	kernel_init_freeable();
	/* need to finish all async __init code before freeing the memory */
	async_synchronize_full();
	free_initmem();
	mark_rodata_ro();
	system_state = SYSTEM_RUNNING;
	numa_default_policy();

	flush_delayed_fput();

	if (ramdisk_execute_command) {
		ret = run_init_process(ramdisk_execute_command);
		if (!ret)
			return 0;
		pr_err("Failed to execute %s (error %d)\n",
		       ramdisk_execute_command, ret);
	}

	/*
	 * We try each of these until one succeeds.
	 *
	 * The Bourne shell can be used instead of init if we are
	 * trying to recover a really broken machine.
	 */
	if (execute_command) {
		ret = run_init_process(execute_command);
		if (!ret)
			return 0;
		pr_err("Failed to execute %s (error %d).  Attempting defaults...\n",
			execute_command, ret);
	}
	if (!<strong>try_to_run_init_process</strong>("/sbin/init") ||
	    !<strong>try_to_run_init_process</strong>("/etc/init") ||
	    !<strong>try_to_run_init_process</strong>("/bin/init") ||
	    !<strong>try_to_run_init_process</strong>("/bin/sh"))
		return 0;

	panic("No working init found.  Try passing init= option to kernel. "
	      "See Linux Documentation/init.txt for guidance.");
}
kernel_init 启动的方式有三种:
- 通过 ramdisk_execute_command,即如果加载了根文件系统的话,按照参数中包含的路径条件,进行启动相应位置的“第0号进程”(实验中是打包后的 rootfs.img 中的可执行文件 init );
- 通过 execute_command,即通过控制台输入的路径参数,来启动相应位置的“第0号进程”;
- 如果前面两种方法都失败了,就要试图在系统中重要的、可能存在init程序的、可疑的位置来寻找“init”程序,按照可能性由高到低的顺序依次是: /sbin/init,这是init标准的位置;以及 /etc/init 和 /bin/init,两个可能的位置;
"cpu_startup_entry"函数
cpu_startup_entry 函数的一个重要作用就是调用 cpu_idle_loop 函数,代码如下所示:
void cpu_startup_entry(enum cpuhp_state state)
{
	/*
	 * This #ifdef needs to die, but it's too late in the cycle to
	 * make this generic (arm and sh have never invoked the canary
	 * init for the non boot cpus!). Will be fixed in 3.11
	 */
#ifdef CONFIG_X86
	/*
	 * If we're the non-boot CPU, nothing set the stack canary up
	 * for us. The boot CPU already has it initialized but no harm
	 * in doing it again. This is a good place for updating it, as
	 * we wont ever return from this function (so the invalid
	 * canaries already on the stack wont ever trigger).
	 */
	boot_init_stack_canary();
#endif
	arch_cpu_idle_prepare();
	cpu_idle_loop();
}
cpu_startup_entry 函数的作用可以借助 rest_init 中的注释来进行分析,“call into cpu_idle” 是调用 cpu_idle(查询 Linux 以前版本发现 cpu_start_up 函数的名称以前是cpu_idle(),改名了注释没改是个bug)。那么在当前的上下文情况下,应该就是调用 cpu_startup_entry 函数的意思,函数名 字面意思就是说这是 cpu启动的入口。
"cpu_idle_loop"函数
cpu_idle_loop 函数被 rest_init 函数中的 cpu_startup_entry 函数调用,其代码如下所示:
/*
 * Generic idle loop implementation
 *
 * Called with polling cleared.
 */
static void cpu_idle_loop(void)
{
      while (1) {
		/*
		 * If the arch has a polling bit, we maintain an invariant:
		 *
		 * Our polling bit is clear if we're not scheduled (i.e. if
		 * rq->curr != rq->idle).  This means that, if rq->idle has
		 * the polling bit set, then setting need_resched is
		 * guaranteed to cause the cpu to reschedule.
		 */

		__current_set_polling();
		tick_nohz_idle_enter();

		while (!need_resched()) {
			check_pgt_cache();
			rmb();

			if (cpu_is_offline(smp_processor_id()))
				arch_cpu_idle_dead();

			local_irq_disable();
			arch_cpu_idle_enter();

			/*
			 * In poll mode we reenable interrupts and spin.
			 *
			 * Also if we detected in the wakeup from idle
			 * path that the tick broadcast device expired
			 * for us, we don't want to go deep idle as we
			 * know that the IPI is going to arrive right
			 * away
			 */
			if (cpu_idle_force_poll || tick_check_broadcast_expired())
				cpu_idle_poll();
			else
				cpuidle_idle_call();

			arch_cpu_idle_exit();
		}

		/*
		 * Since we fell out of the loop above, we know
		 * TIF_NEED_RESCHED must be set, propagate it into
		 * PREEMPT_NEED_RESCHED.
		 *
		 * This is required because for polling idle loops we will
		 * not have had an IPI to fold the state for us.
		 */
		preempt_set_need_resched();
		tick_nohz_idle_exit();
		__current_clr_polling();

		/*
		 * We promise to call sched_ttwu_pending and reschedule
		 * if need_resched is set while polling is set.  That
		 * means that clearing polling needs to be visible
		 * before doing these things.
		 */
		smp_mb__after_atomic();

		sched_ttwu_pending();
		schedule_preempt_disabled();
	}
}
我们发现就是无限期地在做循环,idle循环以消耗空闲的CPU时间片, 该函数从不返回。然而,当有实际工作要处理时,该函数就会被抢占。[1]
初始化流程总结

初始化流程
从上图中可以看到,Linux 启动首先是以 start_kernel 作为入口的,经过一系列的初始化工作(需要尽早初始化的尽早初始化,时间紧迫的、时间要求高的,先初始化),最后来到 rest_init 函数。rest_init 函数接下来启动了kernel_init 进程(1号进程,第一个用户态进程),kthread 进程(2号进程);最后无事可做的 rest_init 来到了cpu_startup_entry 入口,CPU空闲时就会无限期地进行空转,若有事该进程就会被抢断。
我们阅读清楚代码,就相当于拿到了一副藏宝地图,哪里有怪兽,哪里有宝藏,哪里又能全身而退,都一清二楚。图中的各个节点就是我们接下来做实验——用 gdb 进行内核调试时,需要设置断点的地方,在相应的函数入口处设置断点,然后跟踪进入相应函数,进行对相应函数的分析。最后,根据内核初始化的流程安排,退出调试。
3. 使用gdb调试内核——实验过程
接下来,我们就按图索骥,照着原先分析好的,使用 gdb 对内核进行调试。不过首先需要对原先配置做小小的改动,在原来基础上,用 make menuconfig 命令重新配置,选中如下选项,使之携带调试信息,重新编译 Linux;编译好之后,再用如下命令进行启动:
kernel hacking—>
[*] compile the kernel with debug info
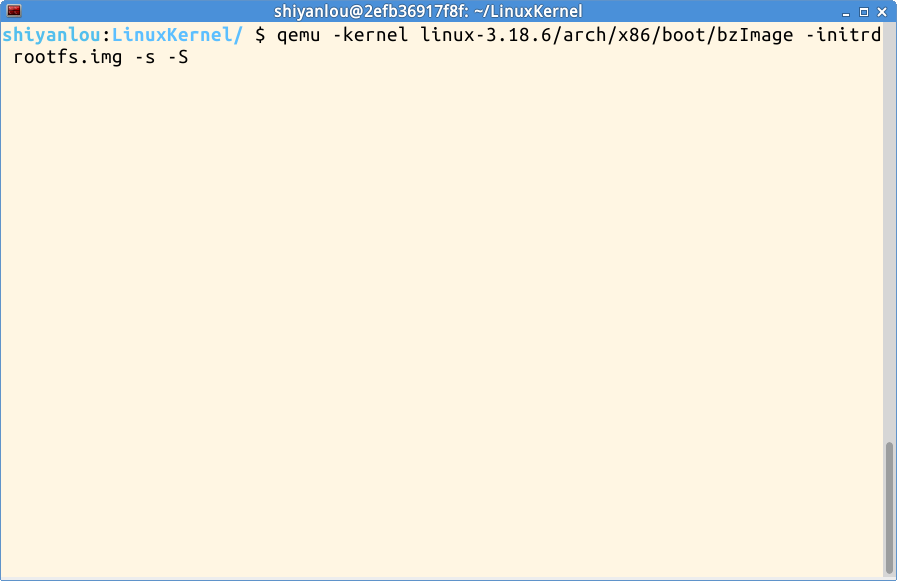
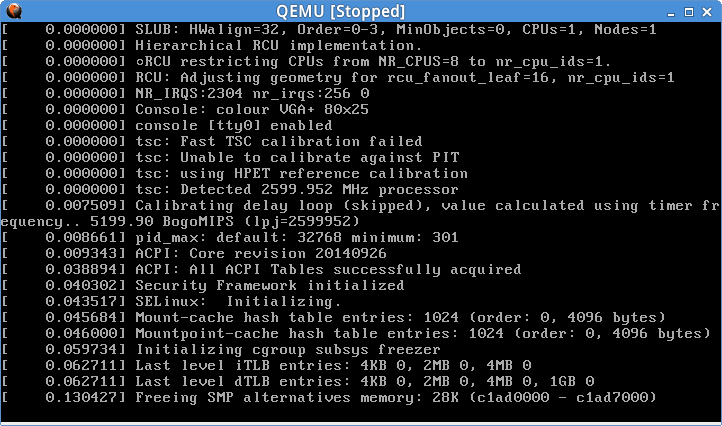
添加"-s"选项表示通过tcp协议的1234默认端口来跟远程机器通信
"-S"选项表示在启动内核的时候冻结 CPU

效果如上图,Caption 显示 Stopped
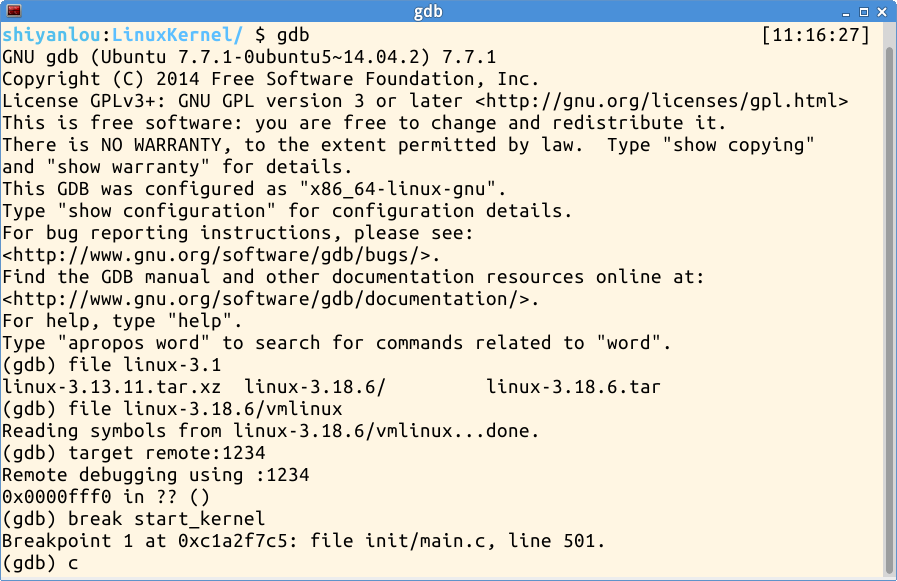
此时在gdb中设置断点“break start_kernel”于 start_kernel 函数处,然后输入“c”表示 continue,继续执行

这时,QEMU 模拟器中执行到 start_kernel 函数处时,自行停止
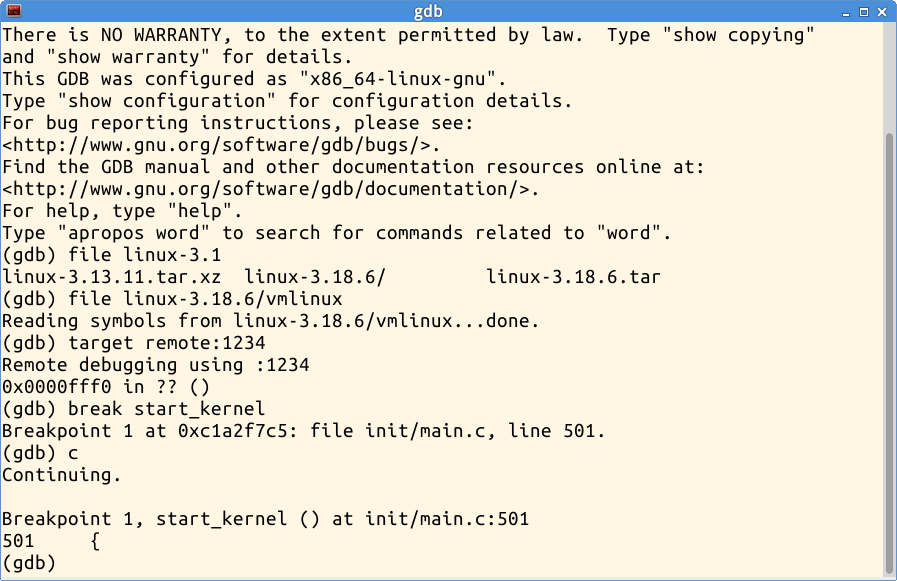
terminal中gdb显示“Breakpoint 1, start_kernel () at init/main.c:501”
到达第一个断点,位于 init 下的 main.c 文件的第501行
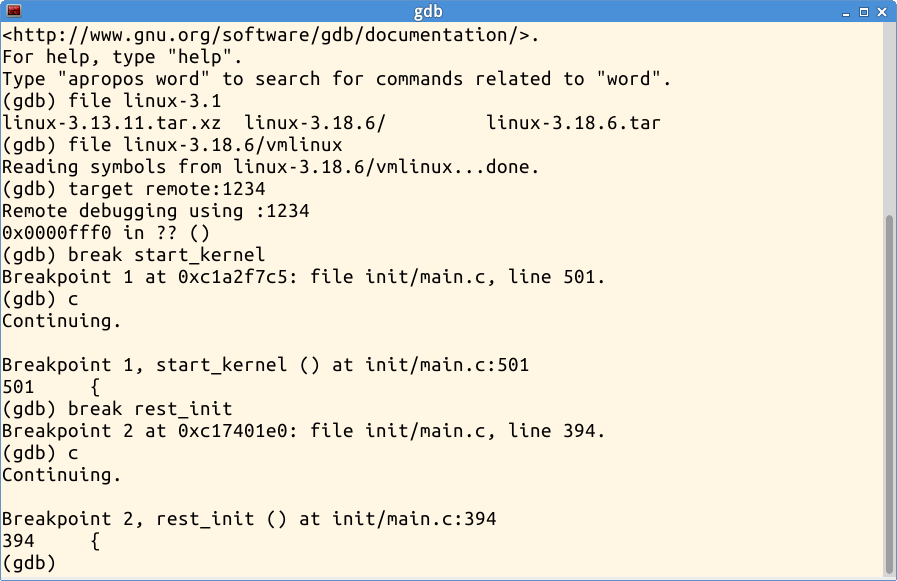
然后在 rest_init 函数处设置断点,并继续运行
Kernel 运行到 rest_init 时自动停止

rest_init step into:进入 rest_init 函数
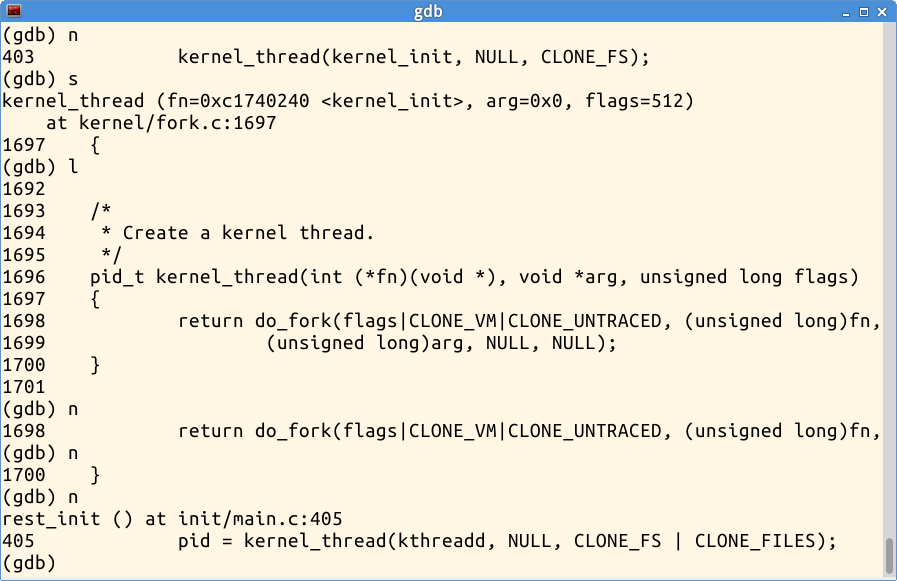
kernel_init_1st_process:1号进程被创建
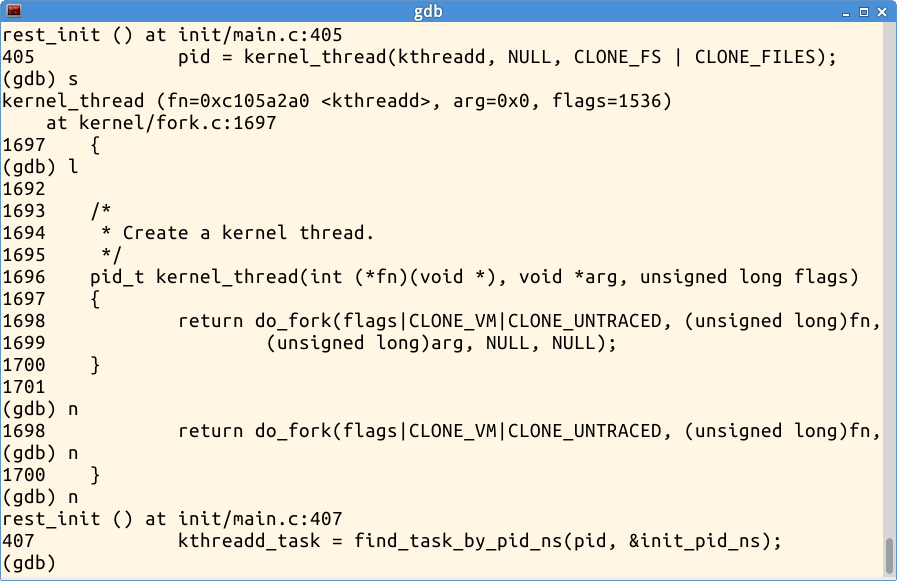
kthreadd_2nd_process:2号进程被创建
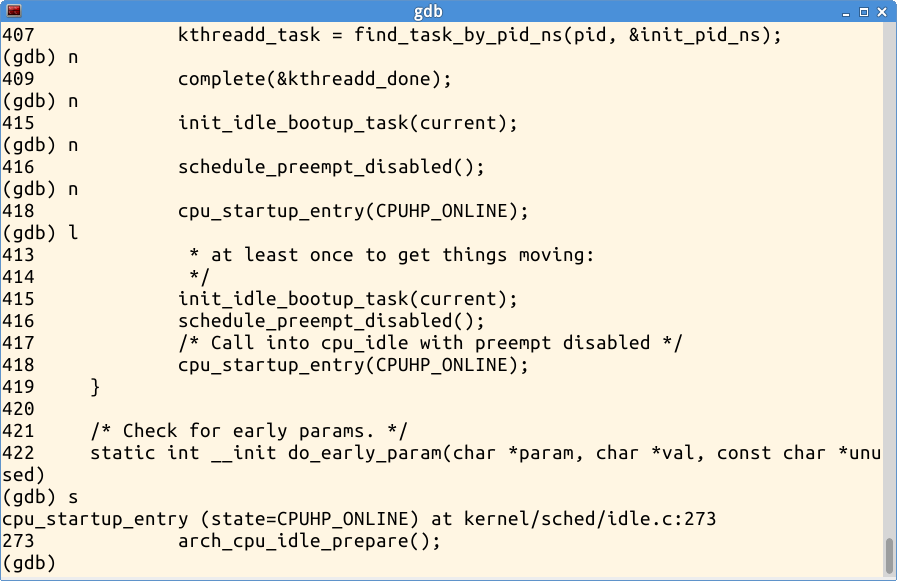
enter cpu_startup_entry:进入 cpu_startup_entry 函数
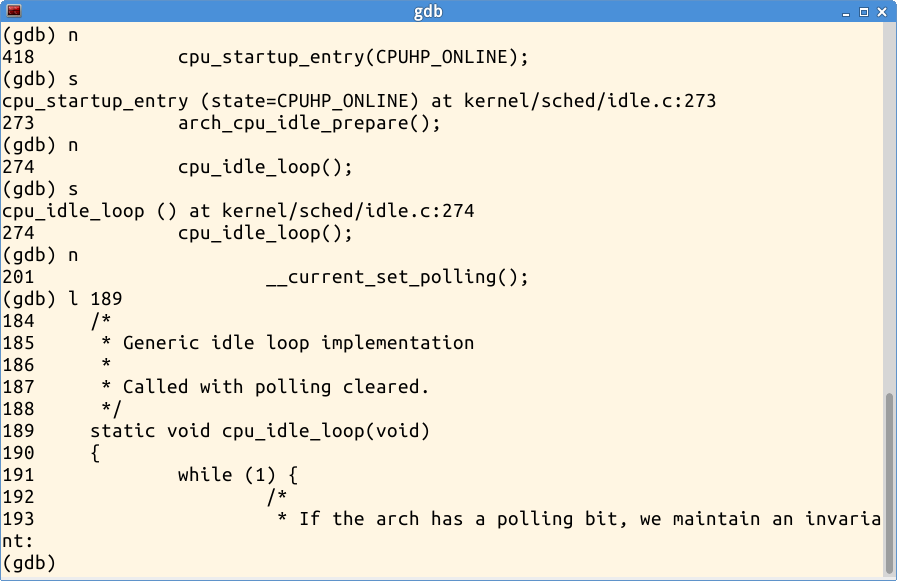
step into cpu_idle_loop:进入 cpu_idle_loop 函数
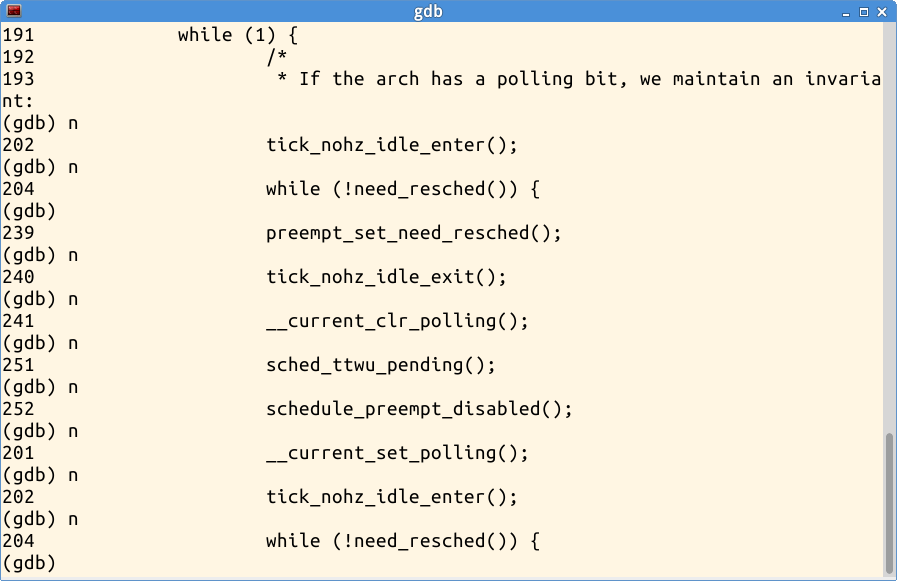
while(1):通过一条条地执行语句,从202到202,验证了idle 进程一直在做死循环
这时Kernel已经成功地加载了Menu OS(init:1号进程)
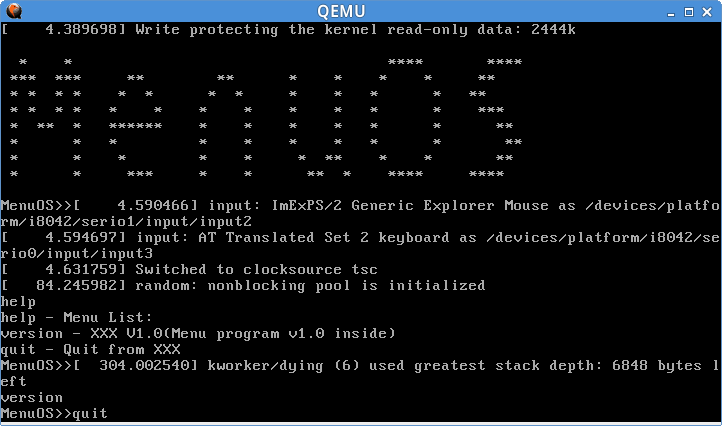
测试下Menu OS的功能

关闭Menu OS,再退出gdb,结束Kernel调试
4. 总结
这个实验在我看来,更多意义上的,是一种验证性的实验,是一种我们躲在电脑屏幕前偷偷观察的实验。不需要改动代码,只需要弄清楚Linux初始化流程如何便可以了。我自己对于代码的理解就是:rest_init 作为第0号进程,启动了第1号用户态进程 init 和 第2号用户态进程 kthreadd;1号进程就是呈现在中断中的menu程序,而第0号进程会沿用至 cpu_idle() 一直做空转,有工作时就会被抢断。
参考文献
[1]. Linux内核修炼之道.任桥伟.人民邮电出版社.2010, 06
[2]. 实验指导.孟宁
附注:
实验要求
- 使用gdb跟踪调试内核从start_kernel到init进程启动
-
详细分析从start_kernel到init进程启动的过程并结合实验截图撰写一篇署名博客,并在博客文章中注明“真实姓名(与最后申请证书的姓名务必一致) + 原创作品转载请注明出处 + 《Linux内核分析》MOOC课程http://mooc.study.163.com/course/USTC-1000029000 ”,博客内容的具体要求如下:
-
题目自拟,内容围绕Linux内核的启动过程,即从start_kernel到init进程启动;
-
博客中需要使用实验截图
-
博客内容中需要仔细分析start_kernel函数的执行过程
-
总结部分需要阐明自己对“Linux系统启动过程”的理解,尤其是idle进程、1号进程是怎么来的。
-
-
请提交博客文章URL到网易云课堂MOOC平台Linux内核分析MOOC课程,编辑成一个链接可以直接点击打开。
“陈金雷 + 原创作品转载请注明出处 + 《Linux内核分析》MOOC课程http://mooc.study.163.com/course/USTC-1000029000


 2075
2075


 被折叠的 条评论
为什么被折叠?
被折叠的 条评论
为什么被折叠?
 到【灌水乐园】发言


