


nginx负载均衡集群上部署wordpress
1.nginx的负载均衡及支持四层也支持七层(重点是七层)
2.upstream proxy_pass,先创建地址池在创建代理,代理的指向是地址池
3.upstream模块下的参数:server  down  backup weight ip_hash ......
4.nginx负载均衡的算法 轮询 ip_hash url_hash fair  加权轮询
5.四层和七层的区别
实验需要3台服务器
其中2台web,1台负载均衡代理(wordpress)
1,web-1部署:
安装nginx+php+mysql
[root@web-1 ~]# yum -y install nginx php php-mysql php-gd php-fpm gd
[root@web-1 ~]# wget https://dev.mysql.com/get/mysql80-community-release-el7-5.noarch.rpm
[root@web-1 ~]# vi /etc/yum.repos.d/mysql-community.repo  //开启5.7关闭8.0
[root@web-1 ~]# yum -y install mysql mysql-server
2,启动服务
[root@web-1 ~]# systemctl start nginx php-fpm mysqld
3,数据库部署
[root@web-1 ~]# cat /var/log/mysqld.log | grep password
2022-04-14T06:27:09.514601Z 1 [Note] A temporary password is generated for root@localhost: +NgKsm-;j4he
[root@web-1 ~]# mysqladmin -u root -p'+NgKsm-;j4he' password 'QianFeng@123'
[root@web-1 ~]# mysql -u root -pQianFeng@123
mysql> create database wordpress;
mysql> grant all on wordpress.* to 'wordpress'@'%' identified by 'QianFeng@123';
mysql> flush privileges;
mysql> exit
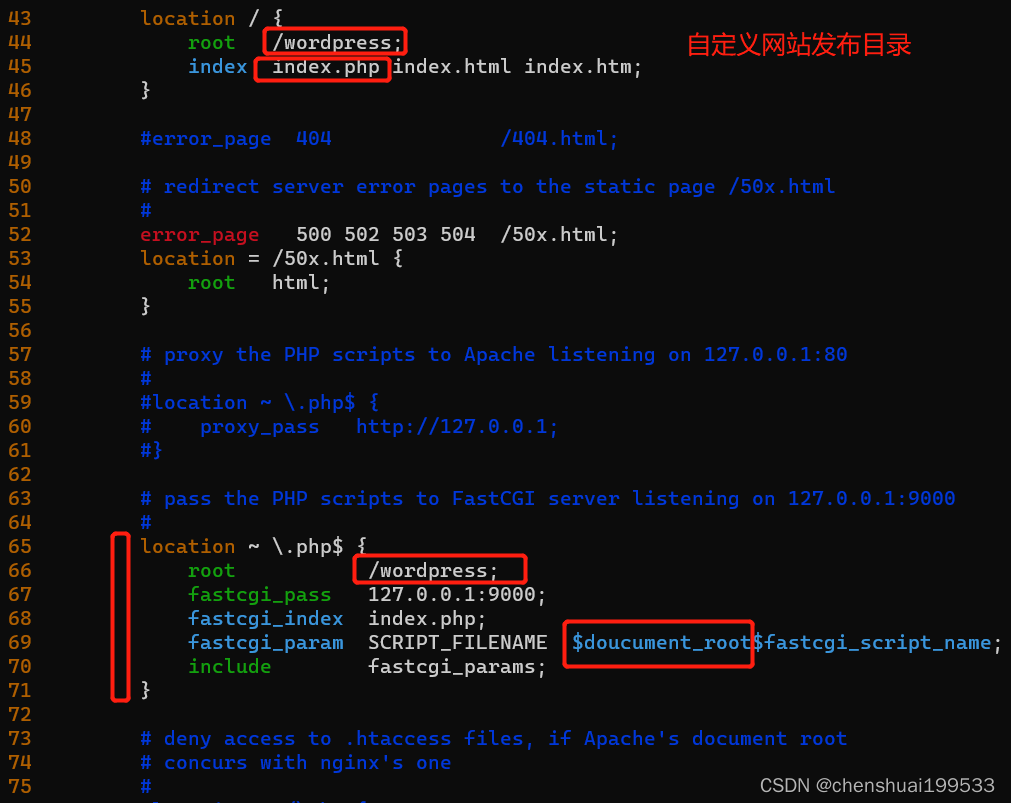
4,nginx部署
[root@web-1 ~]# cd /etc/nginx/
[root@web-1 nginx]# rm -rf nginx.conf
[root@web-1 nginx]# cp nginx.conf.default nginx.conf
[root@web-1 nginx]# vim nginx.conf
[root@web-1 nginx]#nginx  -t
[root@web-1 nginx]#nginx -s reload

将web-1的nginx.conf远程拷贝到web-2
[root@web-1 ~]#scp   /etc/nginx/nginx.conf   192.168.222.132:/etc/nginx/nginx.conf
5,nfs-client部署
[root@web-1 ~]# yum -y install nfs-utils  //安装目的是为了让web-1支持nfs的文件系统
[root@web-1 ~]# mkdir /wordpress  //创建一个挂载点,也就是web-1对应nginx的网站发布目录
[root@web-1 ~]# cat /etc/fstab
172.16.0.247:/wordpress /wordpress nfs defaults 0 0
[root@web-1 ~]# mount -a
[root@web-1 ~]# df -Th
172.16.0.247:/wordpress nfs4       40G  2.4G   35G   7% /wordpress
web-1网站源码将利用nfs自动同步
web-1重新启动nginx
6,web-2部署
安装nginx+php+nfs(创建一个目录(对外共享目录)作为网站发布目录)
[root@web-2 ~]# yum -y install nginx php php-mysql php-gd php-fpm gd
[root@web-2 ~]# systemctl start nginx php-fpm
7,nginx部署
web-1的nginx.conf已经拷贝到web-2中了,正常启动nginx就可以了
8,nfs-server端的部署(centos7版本以上,不用安装rpc也可以正常使用nfs)
[root@web-2 ~]# yum -y install nfs-utils
[root@web-2 ~]# systemctl start nfs
[root@web-2 ~]# mkdir /wordpress
[root@web-2 ~]# cat /etc/exports
/wordpress 172.16.0.0/24(rw,sync,no_root_squash)
[root@web-2 ~]# exportfs -rv
9,产品上线(将项目wordpress放到网站发布目录下)
[root@web-2 ~]# wget http://www.xingdiancloud.cn:92/index.php/s/WZQJHBSPnMcSyMs/download/wordpress-4.9.1-zh_CN.tar.gz
[root@web-2 ~]# tar xf wordpress-4.9.1-zh_CN.tar.gz
[root@web-2 ~]# cp -r  wordpress/*  /wordpress/
web-2重新启动nginx
注意:现在把web-1和web-2部署好,也就是说需要在wordpress正常访问的前提下在做负载均衡
10,第三台服务器部署负载均衡+代理(upstream+proxy_pass)
[root@proxy ~]#yum -y install nginx  && systemctl  start nginx

[root@proxy ~]#rm -rf   /etc/nginx/nginx.conf

[root@proxy ~]#cp  /etc/nginx/nginx.conf.default   /etc/nginx/nginx.conf

[root@proxy ~]#vim  /etc/nginx/nginx.conf

[root@proxy ~]#nginx -t

[root@proxy ~]#nginx -s  reload
在新的浏览器测试访问代理服务器IP地址192.168.222.133
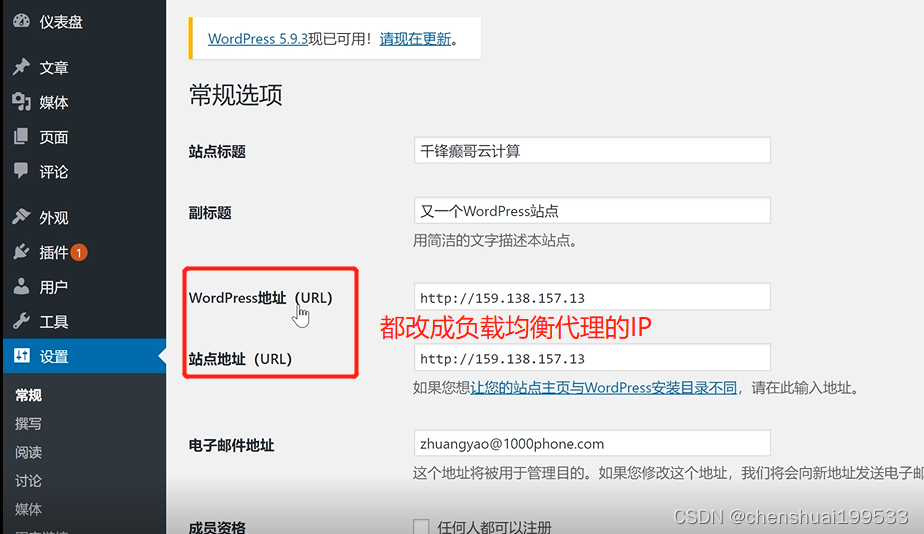
至此,该项目部署完毕!!!


 1407
1407


 被折叠的 条评论
为什么被折叠?
被折叠的 条评论
为什么被折叠?
 到【灌水乐园】发言


