1 HelloWorld示例
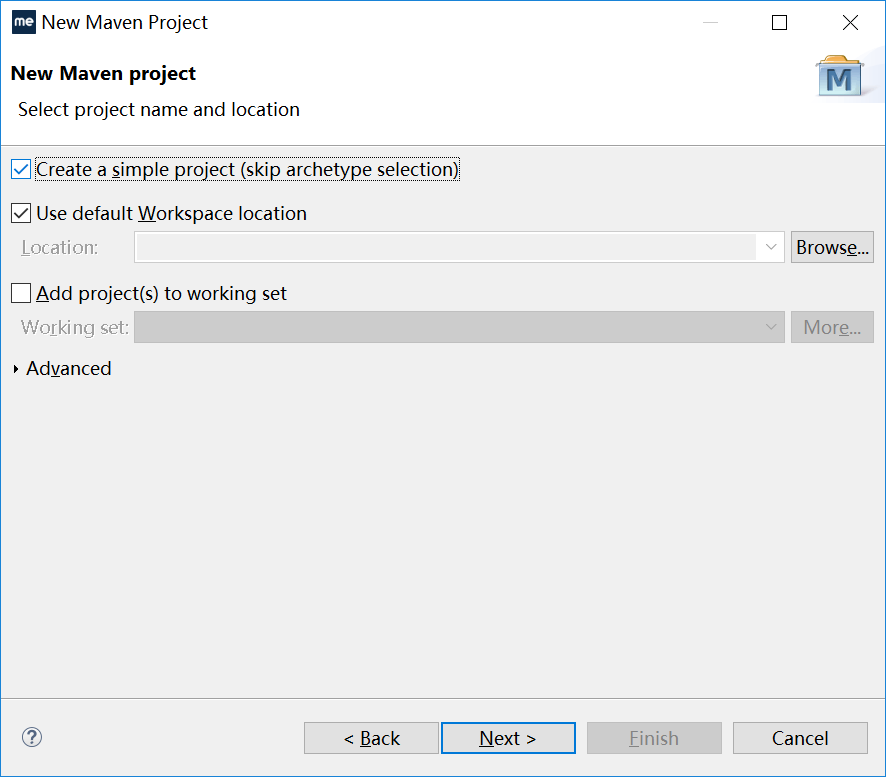
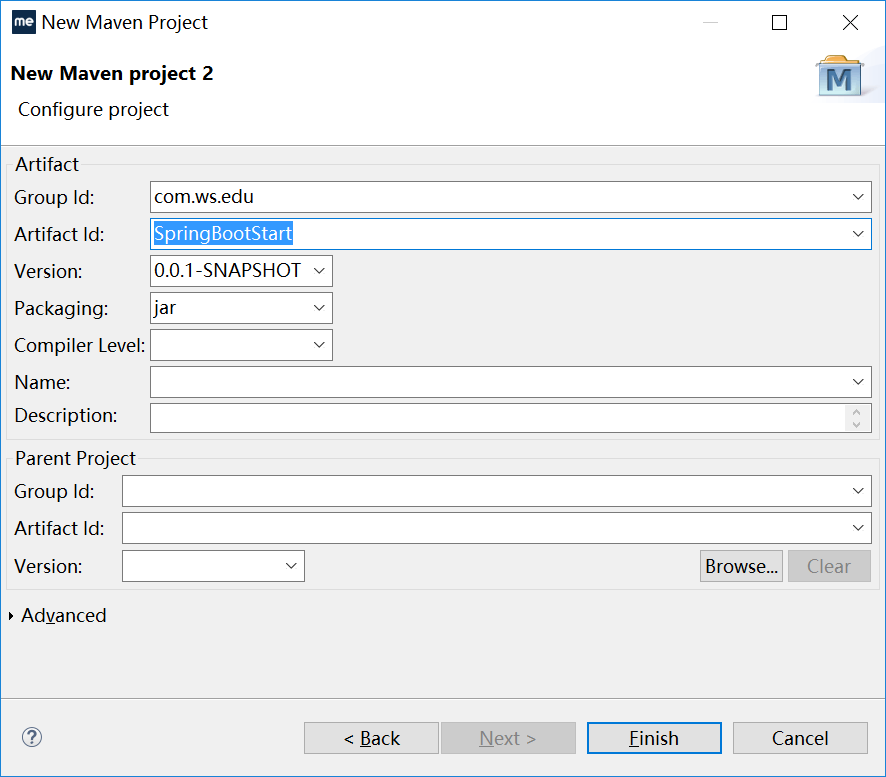
1.1 新建maven工程


1.2 编写pom文件
<project xmlns="http://maven.apache.org/POM/4.0.0" xmlns:xsi="http://www.w3.org/2001/XMLSchema-instance"
	xsi:schemaLocation="http://maven.apache.org/POM/4.0.0 http://maven.apache.org/xsd/maven-4.0.0.xsd">
	<modelVersion>4.0.0</modelVersion>
	<groupId>com.ws.edu</groupId>
	<artifactId>SpringBootStart</artifactId>
	<version>0.0.1-SNAPSHOT</version>

	<parent>
		<groupId>org.springframework.boot</groupId>
		<artifactId>spring-boot-starter-parent</artifactId>
		<version>1.5.2.RELEASE</version>
	</parent>
	<dependencies>
		<dependency>
			<groupId>org.springframework.boot</groupId>
			<artifactId>spring-boot-starter</artifactId>
		</dependency>
	</dependencies>
</project>
注意:maven工程必须是JDK1.8或以后的版本
1.3 编写User类
package com.ws.edu;

public class User {
	public void sayHello(){
		System.out.println("Hello world");
	}
}
1.4 编写SpringBoot配置类
package com.ws.edu;

import org.springframework.context.annotation.Bean;

public class MyConfig {
	@Bean
	public User createUser(){
		return new User();
	}
}
1.5 编写SpringBoot启动类
package com.ws.edu;

import org.springframework.boot.SpringApplication;
import org.springframework.context.ConfigurableApplicationContext;

public class App {

	public static void main(String[] args) {
		ConfigurableApplicationContext context = SpringApplication.run(MyConfig.class, args);
		User user = context.getBean(User.class);
		user.sayHello();
	}

}
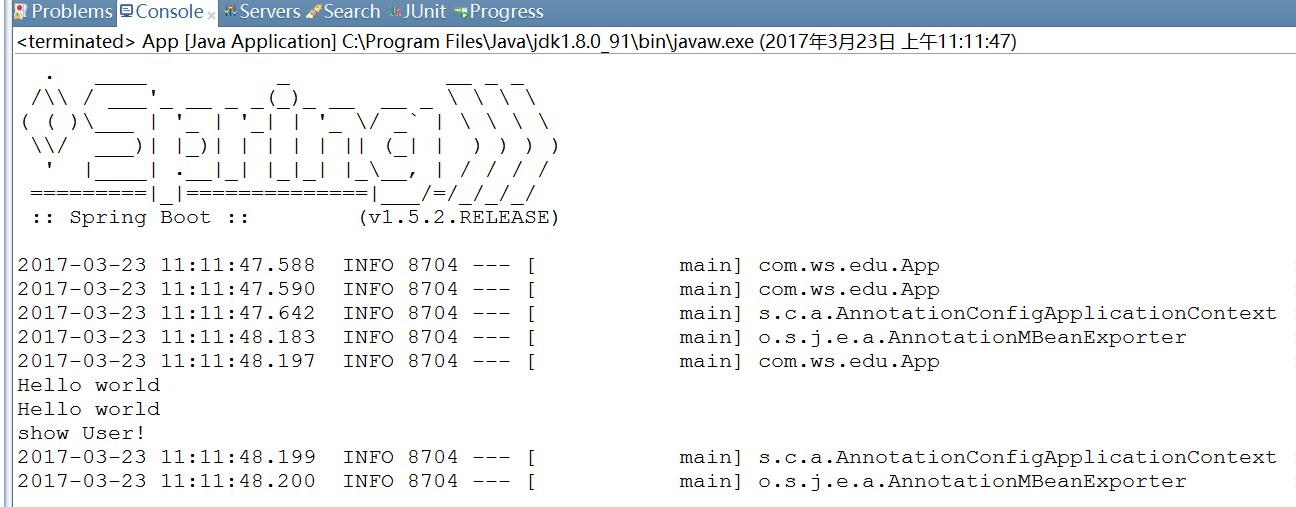
1.6 运行结果

1.7 案例分析
上述案例调用SpringApplication的run方法来运行一个配置类,并且返回ApplicationContext的子类ConfigurableApplicationContext,然后获得容器中的User,运行User的sayHello方法。
2 替换pom文件中的父工程引用
在1.2中,我们采用引用spring-boot-starter-parent父工程,我们还可以使用依赖的方式替代父工程引用,替换后的pom文件如下:
<project xmlns="http://maven.apache.org/POM/4.0.0" xmlns:xsi="http://www.w3.org/2001/XMLSchema-instance"
	xsi:schemaLocation="http://maven.apache.org/POM/4.0.0 http://maven.apache.org/xsd/maven-4.0.0.xsd">
	<modelVersion>4.0.0</modelVersion>
	<groupId>com.ws.edu</groupId>
	<artifactId>SpringBootStart</artifactId>
	<version>0.0.1-SNAPSHOT</version>

	<dependencyManagement>
		<dependencies>
			<dependency>
				<groupId>org.springframework.boot</groupId>
				<artifactId>spring-boot-dependencies</artifactId>
				<version>1.5.2.RELEASE</version>
				<scope>import</scope>
				<type>pom</type>
			</dependency>
		</dependencies>
	</dependencyManagement>

	<dependencies>
		<dependency>
			<groupId>org.springframework.boot</groupId>
			<artifactId>spring-boot-starter</artifactId>
		</dependency>
	</dependencies>
</project>
注意:import scope只能用在dependencyManagement里面,具体参考http://blog.csdn.net/mn960mn/article/details/50894022这篇文章。
3 解析springboot配置类
3.1 SpringBoot配置类就是一个Spring基于Java的配置类。
1.4中的配置类没有添加@Configuration注解,因为SpringBoot会默认把传入的类当作一个配置类。
3.2 一次传入多个SpringBoot配置类
3.2.1 新建MyConfig1配置类
package com.ws.edu;

import org.springframework.context.annotation.Bean;

public class MyConfig1 {
	@Bean
	public User createUser1(){
		return new User();
	}
}
3.2.2 修改启动类
package com.ws.edu;

import org.springframework.boot.SpringApplication;
import org.springframework.context.ConfigurableApplicationContext;

public class App {

	public static void main(String[] args) {
		ConfigurableApplicationContext context = SpringApplication.run(new Object[]{MyConfig.class,MyConfig1.class}, args);
		User user = context.getBean("createUser",User.class);
		user.sayHello();
		User user1 = context.getBean("createUser1",User.class);
		user1.sayHello();
	}

}
3.2.3 运行结果

4 使用@SpringBootApplication注解
4.1 @SpringBootApplication注解源码解析
@Target(ElementType.TYPE)
@Retention(RetentionPolicy.RUNTIME)
@Documented
@Inherited
@SpringBootConfiguration
@EnableAutoConfiguration
@ComponentScan(excludeFilters = {
		@Filter(type = FilterType.CUSTOM, classes = TypeExcludeFilter.class),
		@Filter(type = FilterType.CUSTOM, classes = AutoConfigurationExcludeFilter.class) })
public @interface SpringBootApplication {

	@AliasFor(annotation = EnableAutoConfiguration.class, attribute = "exclude")
	Class<?>[] exclude() default {};

	@AliasFor(annotation = EnableAutoConfiguration.class, attribute = "excludeName")
	String[] excludeName() default {};
	@AliasFor(annotation = ComponentScan.class, attribute = "basePackages")
	String[] scanBasePackages() default {};
	@AliasFor(annotation = ComponentScan.class, attribute = "basePackageClasses")
	Class<?>[] scanBasePackageClasses() default {};

}由源码可知,@SpringBootApplication注解实现了三个功能
(1)Spring的配置类功能,由@SpringBootConfiguration注解实现。
(2)自动化配置功能,由@EnableAutoConfiguration注解实现。
(3)自动扫描功能,由@ComponentScan注解实现
另外由源码可知,我们可以配置基础扫描包,扫描类等属性。
4.2 使用自动扫描注入Bean示例
4.2.1 编写UserService类
package com.ws.edu;

import org.springframework.stereotype.Service;

@Service
public class UserService {
	public void showUser() {
		System.out.println("show User!");
	}
}
4.2.2 给MyConfig配置类添加@SpringBootApplication注解
package com.ws.edu;

import org.springframework.boot.autoconfigure.SpringBootApplication;
import org.springframework.context.annotation.Bean;
@SpringBootApplication
public class MyConfig {
	@Bean
	public User createUser(){
		return new User();
	}
}
4.2.3 启动类获取UserService并使用
package com.ws.edu;

import org.springframework.boot.SpringApplication;
import org.springframework.context.ConfigurableApplicationContext;

public class App {

	public static void main(String[] args) {
		ConfigurableApplicationContext context = SpringApplication.run(new Object[]{MyConfig.class,MyConfig1.class}, args);
		User user = context.getBean("createUser",User.class);
		user.sayHello();
		User user1 = context.getBean("createUser1",User.class);
		user1.sayHello();
		context.getBean(UserService.class).showUser();
		context.close();
	}

}
4.2.4 运行结果

参考文章:


 2844
2844

 被折叠的 条评论
为什么被折叠?


