


一、介绍
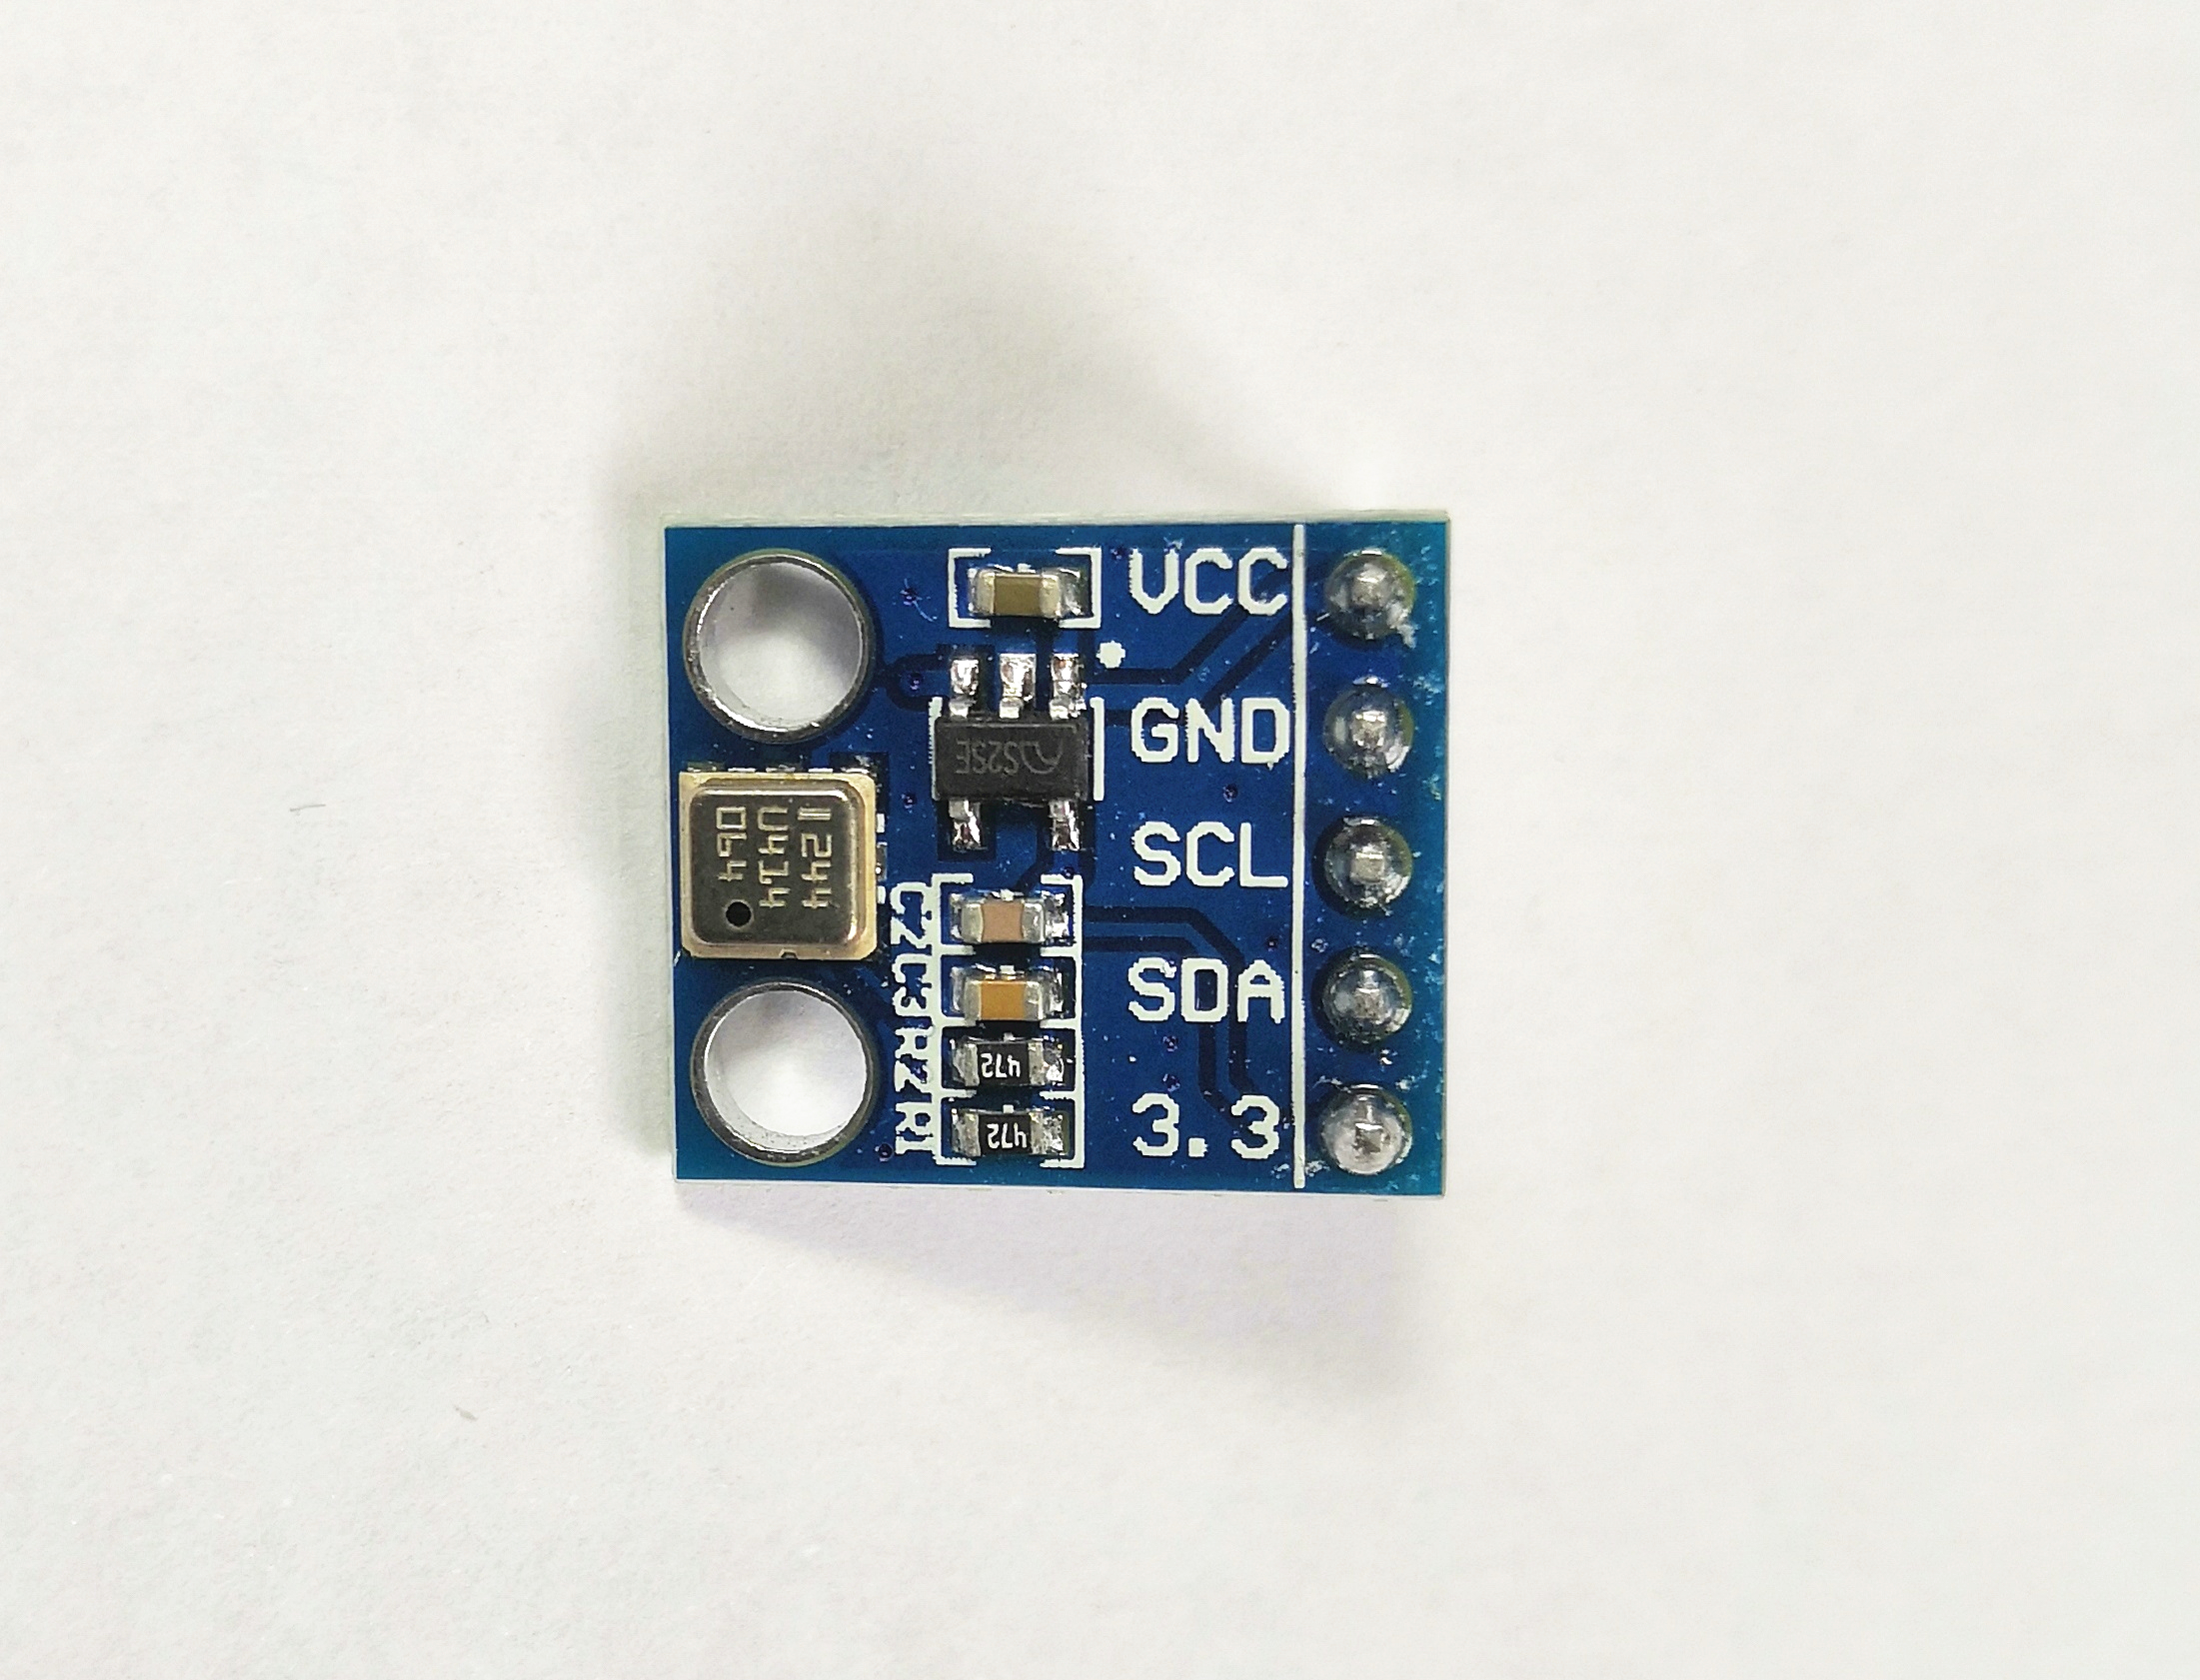
BMP180气压计是新型数字气压传感器,具有非常高的性能,可用于高级移动设备,如智能手机,平板电脑和运动设备。它兼容BMP085传感器,但是在该基础上拥有许多改进,如更小的尺寸和更多的数字接口。
BMP180不仅可以实时的测量大气压力,还能测量实时温度。同时它还具有IIC总线的接口,便于单片机进行访问。另外它的使用也很方便,不需要太多的操作就可读取到气压及测量数据。
其它I2C总线实验可以查看前面的PCF8591相关实验,如:
树莓派基础实验12:PCF8591模数转换器实验
二、组件
★Raspberry Pi 3主板*1
★树莓派电源*1
★40P软排线*1
★BMP180气压传感器模块*1
★面包板*1
★跳线若干
三、实验原理
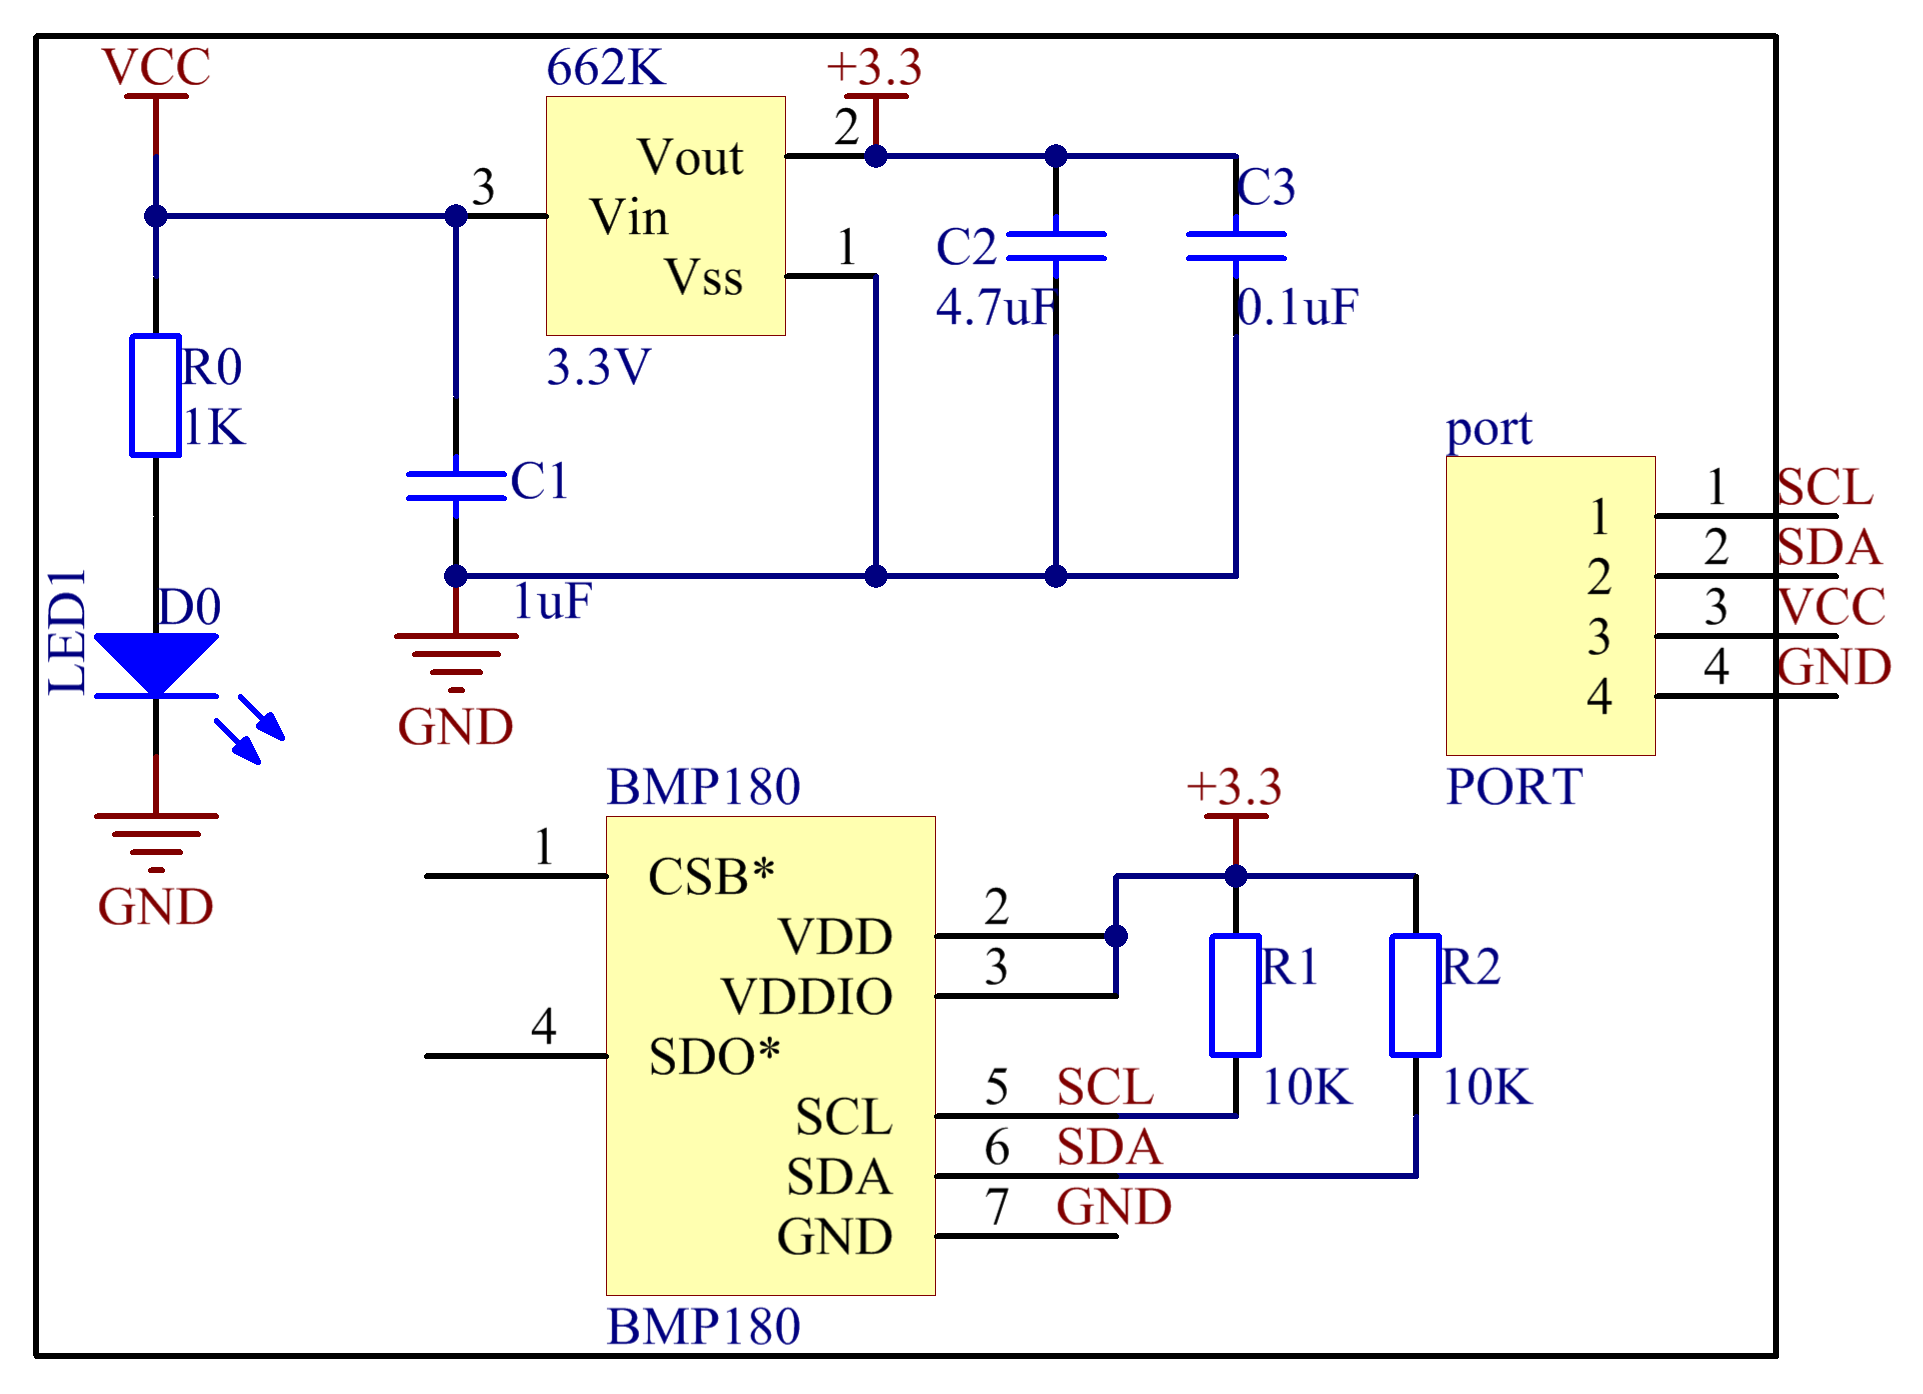
测量温度和压力
UP =压力数据(16到19位) UT =温度数据(16位)
开始测量温度值UT和压力值UP的时序图如下所示。在启动后,主机发送器件地址写入,寄存器地址和控制寄存器数据。当接收到数据时,BMP180每8个数据位发送一个确认(ACKS)。主机在最后一次ACKS后发送停止条件。
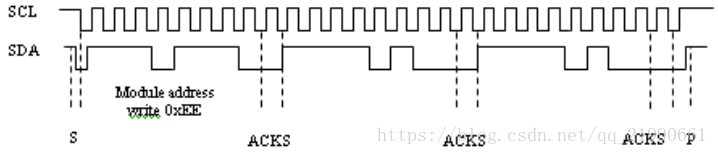
为了读出温度数据字UT(16位),压力数据字UP(16到19位)和E2PROM数据如下进行:
在启动后,主机发送模块地址写入命令和寄存器地址。寄存器地址选择读取寄存器:E2PROM数据寄存器0xAA至0xBF温度或压力值UT或UP 0xF6(MSB),0xF7(LSB),可选0xF8(XLSB)然后,主设备发送重启条件,然后读取模块地址,BMP180(ACKS)将对其进行确认。BMP180首先发送8个MSB,由主设备(ACKM)确认,然后是8个LSB。主机发送“不确认”(NACKM),最后发送停止条件。时序为:

下图显示了压力和温度测量的详细算法:

四、实验步骤
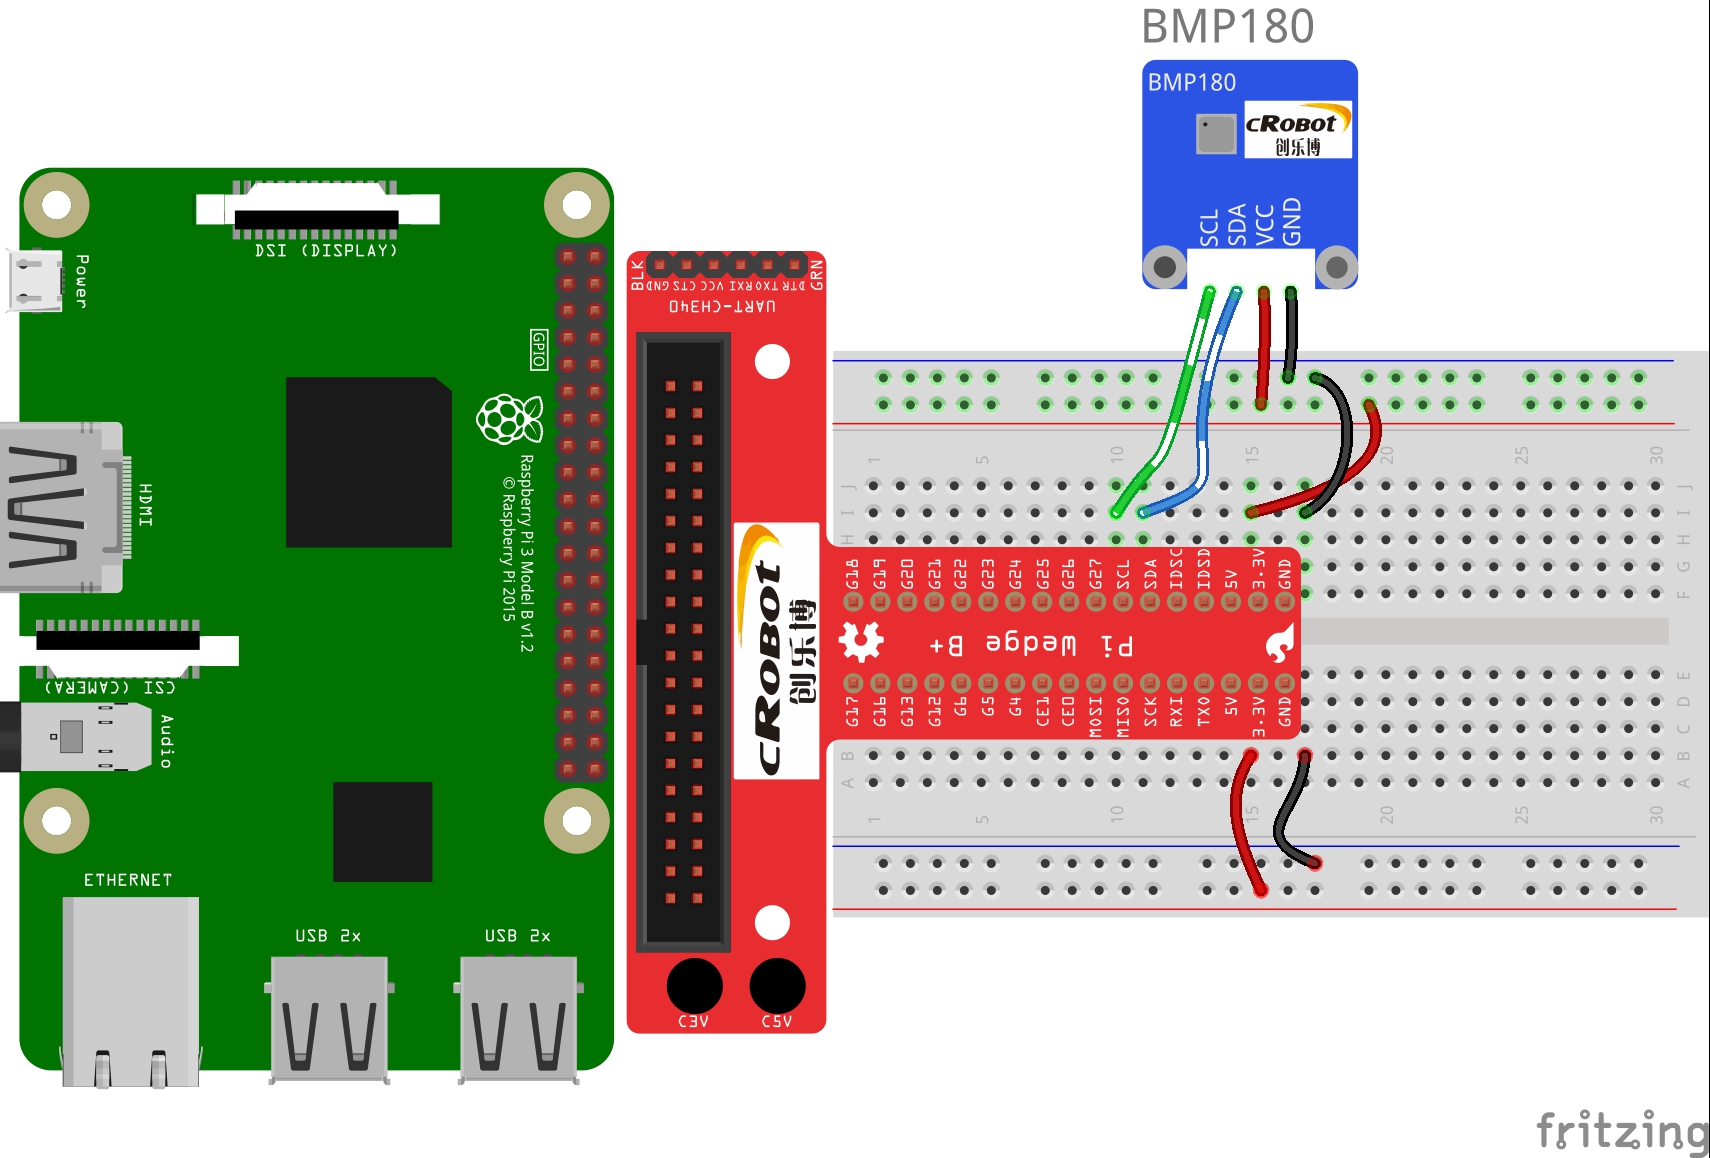
第1步: 连接电路。
| 树莓派 | T型转接板 | BMP180气压传感器 |
|---|---|---|
| SCL | SCL | SCL |
| SDA | SDA | SDA |
| 3.3V | 3.3V | VCC |
| GND | GND | GND |

第2步: PCF8591模块采用的是I2C(IIC)总线进行通信的,但是在树莓派的镜像中默认是关闭的,在使用该传感器的时候,我们必须首先允许IIC总线通信。

第3步: 查询LCD1602的地址。得出地址为0x77。
pi@raspberrypi:~ $ sudo i2cdetect -y 1
     0  1  2  3  4  5  6  7  8  9  a  b  c  d  e  f
00:          -- -- -- -- -- -- -- -- -- -- -- -- --
10: -- -- -- -- -- -- -- -- -- -- -- -- -- -- -- --
20: -- -- -- -- -- -- -- -- -- -- -- -- -- -- -- --
30: -- -- -- -- -- -- -- -- -- -- -- -- -- -- -- --
40: -- -- -- -- -- -- -- -- -- -- -- -- -- -- -- --
50: -- -- -- -- -- -- -- -- -- -- -- -- -- -- -- --
60: -- -- -- -- -- -- -- -- -- -- -- -- -- -- -- --
70: -- -- -- -- -- -- -- 77
第4步: 编写驱动程序。这里需要下载安装库函数,核心是BMP085.py文件,后面编写一个python控制程序时引入这个库文件,调用这个文件中的函数实现更复杂的功能。
该库函数来自:
https://github.com/adafruit/Adafruit_Python_BMP/
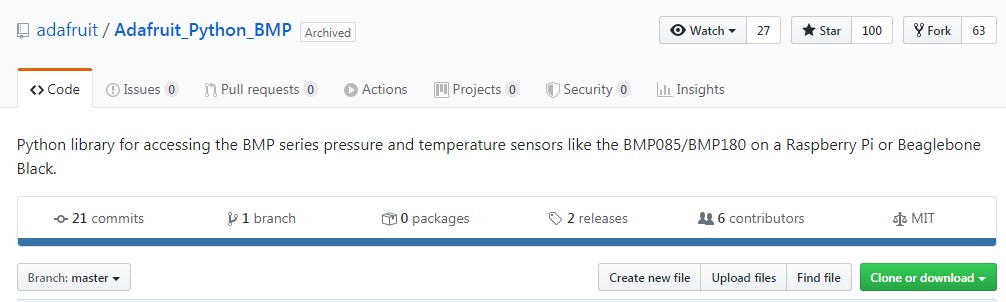
这是由Adafruit Industries公司制作的Python库,在该地址可以将整个Adafruit_Python_BMP文件夹下载使用。该公司成立于2005年,创始人是来自麻省理工学院的女工程师Limor,目标是打造一个学习电子产品相关知识和为各个年龄阶段与技能水平不等的客户设计产品的场所。总部位于美国纽约的中心区。

第5步: 安装I2C的smbus及一些实用程序。
pi@raspberrypi:~ $ sudo apt-get install python-smbus i2c-tools
pi@raspberrypi:~ $ sudo apt-get install build-essential python-dev
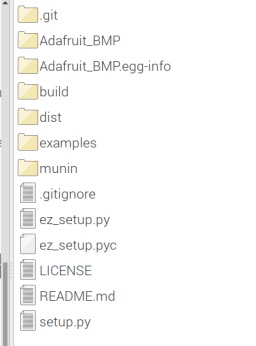
第6步: 将下载的整个Adafruit_Python_BMP文件夹复制到Pi目录下,进入Adafruit_Python_BMP目录,安装BMP的操作库:
pi@raspberrypi:~ $ cd Adafruit_Python_BMP/
pi@raspberrypi:~/Adafruit_Python_BMP $ sudo python setup.py install
该文件夹下有一些参考资料,BMP085.py文件就在第二个文件夹Adafruit_BMP里面:
下面是核心文件BMP085.py的代码,供深入研究的同学参考:
# Copyright (c) 2014 Adafruit Industries
# Author: Tony DiCola
#
# Permission is hereby granted, free of charge, to any person obtaining a copy
# of this software and associated documentation files (the "Software"), to deal
# in the Software without restriction, including without limitation the rights
# to use, copy, modify, merge, publish, distribute, sublicense, and/or sell
# copies of the Software, and to permit persons to whom the Software is
# furnished to do so, subject to the following conditions:
#
# The above copyright notice and this permission notice shall be included in
# all copies or substantial portions of the Software.
#
# THE SOFTWARE IS PROVIDED "AS IS", WITHOUT WARRANTY OF ANY KIND, EXPRESS OR
# IMPLIED, INCLUDING BUT NOT LIMITED TO THE WARRANTIES OF MERCHANTABILITY,
# FITNESS FOR A PARTICULAR PURPOSE AND NONINFRINGEMENT. IN NO EVENT SHALL THE
# AUTHORS OR COPYRIGHT HOLDERS BE LIABLE FOR ANY CLAIM, DAMAGES OR OTHER
# LIABILITY, WHETHER IN AN ACTION OF CONTRACT, TORT OR OTHERWISE, ARISING FROM,
# OUT OF OR IN CONNECTION WITH THE SOFTWARE OR THE USE OR OTHER DEALINGS IN
# THE SOFTWARE.
import logging
import time


# BMP085 default address.
BMP085_I2CADDR           = 0x77

# Operating Modes
BMP085_ULTRALOWPOWER     = 0
BMP085_STANDARD          = 1
BMP085_HIGHRES           = 2
BMP085_ULTRAHIGHRES      = 3

# BMP085 Registers
BMP085_CAL_AC1           = 0xAA  # R   Calibration data (16 bits)
BMP085_CAL_AC2           = 0xAC  # R   Calibration data (16 bits)
BMP085_CAL_AC3           = 0xAE  # R   Calibration data (16 bits)
BMP085_CAL_AC4           = 0xB0  # R   Calibration data (16 bits)
BMP085_CAL_AC5           = 0xB2  # R   Calibration data (16 bits)
BMP085_CAL_AC6           = 0xB4  # R   Calibration data (16 bits)
BMP085_CAL_B1            = 0xB6  # R   Calibration data (16 bits)
BMP085_CAL_B2            = 0xB8  # R   Calibration data (16 bits)
BMP085_CAL_MB            = 0xBA  # R   Calibration data (16 bits)
BMP085_CAL_MC            = 0xBC  # R   Calibration data (16 bits)
BMP085_CAL_MD            = 0xBE  # R   Calibration data (16 bits)
BMP085_CONTROL           = 0xF4
BMP085_TEMPDATA          = 0xF6
BMP085_PRESSUREDATA      = 0xF6

# Commands
BMP085_READTEMPCMD       = 0x2E
BMP085_READPRESSURECMD   = 0x34


class BMP085(object):
	def __init__(self, mode=BMP085_STANDARD, address=BMP085_I2CADDR, i2c=None, **kwargs):
		self._logger = logging.getLogger('Adafruit_BMP.BMP085')
		# Check that mode is valid.
		if mode not in [BMP085_ULTRALOWPOWER, BMP085_STANDARD, BMP085_HIGHRES, BMP085_ULTRAHIGHRES]:
			raise ValueError('Unexpected mode value {0}.  Set mode to one of BMP085_ULTRALOWPOWER, BMP085_STANDARD, BMP085_HIGHRES, or BMP085_ULTRAHIGHRES'.format(mode))
		self._mode = mode
		# Create I2C device.
		if i2c is None:
			import Adafruit_GPIO.I2C as I2C
			i2c = I2C
		self._device = i2c.get_i2c_device(address, **kwargs)
		# Load calibration values.
		self._load_calibration()

	def _load_calibration(self):
		self.cal_AC1 = self._device.readS16BE(BMP085_CAL_AC1)   # INT16
		self.cal_AC2 = self._device.readS16BE(BMP085_CAL_AC2)   # INT16
		self.cal_AC3 = self._device.readS16BE(BMP085_CAL_AC3)   # INT16
		self.cal_AC4 = self._device.readU16BE(BMP085_CAL_AC4)   # UINT16
		self.cal_AC5 = self._device.readU16BE(BMP085_CAL_AC5)   # UINT16
		self.cal_AC6 = self._device.readU16BE(BMP085_CAL_AC6)   # UINT16
		self.cal_B1 = self._device.readS16BE(BMP085_CAL_B1)     # INT16
		self.cal_B2 = self._device.readS16BE(BMP085_CAL_B2)     # INT16
		self.cal_MB = self._device.readS16BE(BMP085_CAL_MB)     # INT16
		self.cal_MC = self._device.readS16BE(BMP085_CAL_MC)     # INT16
		self.cal_MD = self._device.readS16BE(BMP085_CAL_MD)     # INT16
		self._logger.debug('AC1 = {0:6d}'.format(self.cal_AC1))
		self._logger.debug('AC2 = {0:6d}'.format(self.cal_AC2))
		self._logger.debug('AC3 = {0:6d}'.format(self.cal_AC3))
		self._logger.debug('AC4 = {0:6d}'.format(self.cal_AC4))
		self._logger.debug('AC5 = {0:6d}'.format(self.cal_AC5))
		self._logger.debug('AC6 = {0:6d}'.format(self.cal_AC6))
		self._logger.debug('B1 = {0:6d}'.format(self.cal_B1))
		self._logger.debug('B2 = {0:6d}'.format(self.cal_B2))
		self._logger.debug('MB = {0:6d}'.format(self.cal_MB))
		self._logger.debug('MC = {0:6d}'.format(self.cal_MC))
		self._logger.debug('MD = {0:6d}'.format(self.cal_MD))

	def _load_datasheet_calibration(self):
		# Set calibration from values in the datasheet example.  Useful for debugging the
		# temp and pressure calculation accuracy.
		self.cal_AC1 = 408
		self.cal_AC2 = -72
		self.cal_AC3 = -14383
		self.cal_AC4 = 32741
		self.cal_AC5 = 32757
		self.cal_AC6 = 23153
		self.cal_B1 = 6190
		self.cal_B2 = 4
		self.cal_MB = -32767
		self.cal_MC = -8711
		self.cal_MD = 2868

	def read_raw_temp(self):
		"""Reads the raw (uncompensated) temperature from the sensor."""
		self._device.write8(BMP085_CONTROL, BMP085_READTEMPCMD)
		time.sleep(0.005)  # Wait 5ms
		raw = self._device.readU16BE(BMP085_TEMPDATA)
		self._logger.debug('Raw temp 0x{0:X} ({1})'.format(raw & 0xFFFF, raw))
		return raw

	def read_raw_pressure(self):
		"""Reads the raw (uncompensated) pressure level from the sensor."""
		self._device.write8(BMP085_CONTROL, BMP085_READPRESSURECMD + (self._mode << 6))
		if self._mode == BMP085_ULTRALOWPOWER:
			time.sleep(0.005)
		elif self._mode == BMP085_HIGHRES:
			time.sleep(0.014)
		elif self._mode == BMP085_ULTRAHIGHRES:
			time.sleep(0.026)
		else:
			time.sleep(0.008)
		msb = self._device.readU8(BMP085_PRESSUREDATA)
		lsb = self._device.readU8(BMP085_PRESSUREDATA+1)
		xlsb = self._device.readU8(BMP085_PRESSUREDATA+2)
		raw = ((msb << 16) + (lsb << 8) + xlsb) >> (8 - self._mode)
		self._logger.debug('Raw pressure 0x{0:04X} ({1})'.format(raw & 0xFFFF, raw))
		return raw

	def read_temperature(self):
		"""Gets the compensated temperature in degrees celsius."""
		UT = self.read_raw_temp()
		# Datasheet value for debugging:
		#UT = 27898
		# Calculations below are taken straight from section 3.5 of the datasheet.
		X1 = ((UT - self.cal_AC6) * self.cal_AC5) >> 15
		X2 = (self.cal_MC << 11) / (X1 + self.cal_MD)
		B5 = X1 + X2
		temp = ((B5 + 8) >> 4) / 10.0
		self._logger.debug('Calibrated temperature {0} C'.format(temp))
		return temp

	def read_pressure(self):
		"""Gets the compensated pressure in Pascals."""
		UT = self.read_raw_temp()
		UP = self.read_raw_pressure()
		# Datasheet values for debugging:
		#UT = 27898
		#UP = 23843
		# Calculations below are taken straight from section 3.5 of the datasheet.
		# Calculate true temperature coefficient B5.
		X1 = ((UT - self.cal_AC6) * self.cal_AC5) >> 15
		X2 = (self.cal_MC << 11) / (X1 + self.cal_MD)
		B5 = X1 + X2
		self._logger.debug('B5 = {0}'.format(B5))
		# Pressure Calculations
		B6 = B5 - 4000
		self._logger.debug('B6 = {0}'.format(B6))
		X1 = (self.cal_B2 * (B6 * B6) >> 12) >> 11
		X2 = (self.cal_AC2 * B6) >> 11
		X3 = X1 + X2
		B3 = (((self.cal_AC1 * 4 + X3) << self._mode) + 2) / 4
		self._logger.debug('B3 = {0}'.format(B3))
		X1 = (self.cal_AC3 * B6) >> 13
		X2 = (self.cal_B1 * ((B6 * B6) >> 12)) >> 16
		X3 = ((X1 + X2) + 2) >> 2
		B4 = (self.cal_AC4 * (X3 + 32768)) >> 15
		self._logger.debug('B4 = {0}'.format(B4))
		B7 = (UP - B3) * (50000 >> self._mode)
		self._logger.debug('B7 = {0}'.format(B7))
		if B7 < 0x80000000:
			p = (B7 * 2) / B4
		else:
			p = (B7 / B4) * 2
		X1 = (p >> 8) * (p >> 8)
		X1 = (X1 * 3038) >> 16
		X2 = (-7357 * p) >> 16
		p = p + ((X1 + X2 + 3791) >> 4)
		self._logger.debug('Pressure {0} Pa'.format(p))
		return p

	def read_altitude(self, sealevel_pa=101325.0):
		"""Calculates the altitude in meters."""
		# Calculation taken straight from section 3.6 of the datasheet.
		pressure = float(self.read_pressure())
		altitude = 44330.0 * (1.0 - pow(pressure / sealevel_pa, (1.0/5.255)))
		self._logger.debug('Altitude {0} m'.format(altitude))
		return altitude

	def read_sealevel_pressure(self, altitude_m=0.0):
		"""Calculates the pressure at sealevel when given a known altitude in
		meters. Returns a value in Pascals."""
		pressure = float(self.read_pressure())
		p0 = pressure / pow(1.0 - altitude_m/44330.0, 5.255)
		self._logger.debug('Sealevel pressure {0} Pa'.format(p0))
		return p0
第5步: 编写控制程序。每隔一秒打印一次气压和温度数据,由于我的所在地为高海拔的拉萨,所以气压数据低一些。
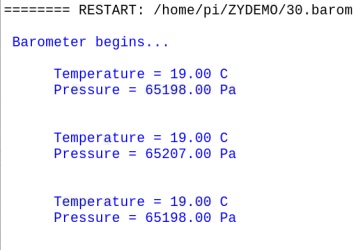
实际控制程序比较简单了,如下:
#!/usr/bin/env python
#---------------------------------------------------------
#
#		This is a program for Barometer Pressure Sensor
#	Module. It could measure the pressure and temperature.
#
#		This program depend on BMP085.py writted by
#	Adafruit.
#
#	   Barometer Module			   Pi
#			VCC ----------------- 3.3V
#			GND ------------------ GND
#			SCL ----------------- SCL1
#			SDA ----------------- SDA1
#
#---------------------------------------------------------
import Adafruit_BMP.BMP085 as BMP085
import RPi.GPIO as GPIO
import time

def setup():
	print '\n Barometer begins...'

def loop():
	while True:
		sensor = BMP085.BMP085()
		temp = sensor.read_temperature()	# Read temperature to veriable temp
		pressure = sensor.read_pressure()	# Read pressure to veriable pressure

		print ''
		print '      Temperature = {0:0.2f} C'.format(temp)		# Print temperature保留小数点后两位
		print '      Pressure = {0:0.2f} Pa'.format(pressure)	# Print pressure
		#字符串中大括号和其中的字符会被替换成传入 str.format() 的参数。
		#字段名后允许可选的 ':' 和格式指令。{0:0.2f}保留小数点后两位
		time.sleep(1)
		print ''

def destory():
	GPIO.cleanup()				# Release resource

if __name__ == '__main__':		# Program start from here
	setup()
	try:
		loop()
	except KeyboardInterrupt:  	# When 'Ctrl+C' is pressed, the child program destroy() will be  executed.
		destory()
其中使用的Python format 格式化函数详情参见:
https://www.runoob.com/python/att-string-format.html


 3893
3893

 被折叠的 条评论
为什么被折叠?
被折叠的 条评论
为什么被折叠?
 到【灌水乐园】发言


