


一、基础环境
- 虚拟机:centos 9,其他版本应该一样使用
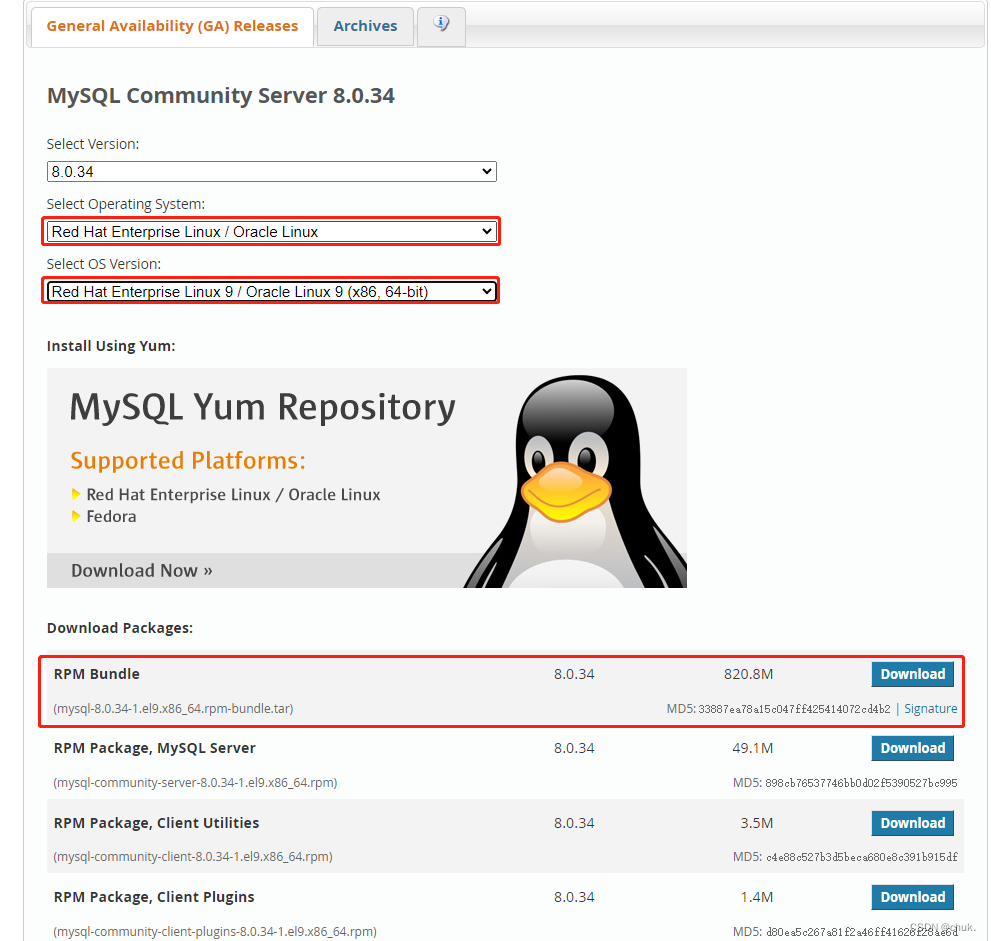
- 本教程通过RPM Bundle安装
二、下载地址
- https://dev.mysql.com/downloads/mysql/
# 查看虚拟机版本,选择对应版本
cat /proc/version 或 uname -a
三、检查环境
- 查看是否装有mysql,有则移除,见文章结尾
rpm -qa | grep -i mysql
- 查看是否安装了mariadb,有则移除
rpm -qa | grep mariadb

# 移除
ps: yum -y remove mariadb-libs-5.5.68-1.el7.x86_64
四、安装
- 解压
tar -xvf mysql-8.0.34-1.el9.x86_64.rpm-bundle.tar
- 安装
# 注意安装顺序,可以根据安装提示进行调整
# 例如提示 mysql-community-icu-data-files = 8.0.34-1.el9 被 mysql-community-server-8.0.34-1.el9.x86_64 需要
# 那就先安装 mysql-community-icu-data-files 再安装 mysql-community-server
rpm -ivh mysql-community-common-8.0.34-1.el9.x86_64.rpm

rpm -ivh mysql-community-client-plugins-8.0.34-1.el9.x86_64.rpm

rpm -ivh mysql-community-libs-8.0.34-1.el9.x86_64.rpm

rpm -ivh mysql-community-client-8.0.34-1.el9.x86_64.rpm

rpm -ivh mysql-community-icu-data-files-8.0.34-1.el9.x86_64.rpm

rpm -ivh mysql-community-server-8.0.34-1.el9.x86_64.rpm
报错
/usr/bin/perl 被 mysql-community-server-8.0.34-1.el9.x86_64 需要

# 执行
yum -y install perl.x86_64
- 安装完成后,会自动生成 /etc/my.cnf 等配置文件
- 修改配置文件
vim /etc/my.cnf
# 根据自己的需求进行配置
[mysqld]
port=3306
character-set-server=utf8mb4 # 设置编码格式
#
# Remove leading # and set to the amount of RAM for the most important data
# cache in MySQL. Start at 70% of total RAM for dedicated server, else 10%.
# innodb_buffer_pool_size = 128M
#
# Remove leading # to turn on a very important data integrity option: logging
# changes to the binary log between backups.
# log_bin
#
# Remove leading # to set options mainly useful for reporting servers.
# The server defaults are faster for transactions and fast SELECTs.
# Adjust sizes as needed, experiment to find the optimal values.
# join_buffer_size = 128M
# sort_buffer_size = 2M
# read_rnd_buffer_size = 2M
datadir=/var/lib/mysql
socket=/var/lib/mysql/mysql.sock

log-error=/var/log/mysqld.log
pid-file=/var/run/mysqld/mysqld.pid

sql-mode=ONLY_FULL_GROUP_BY,ERROR_FOR_DIVISION_BY_ZERO,NO_ENGINE_SUBSTITUTION # 严格模式
lower_case_table_names=1 # 不区分大小写

[mysql]
default-character-set=utf8mb4

[client]
default-character-set=utf8mb4
- 注:mysql8 之后 lower_case_table_names=1 一定要在初始化时设置,否则报错且无效。也就是配置了再启动。
- 启动
systemctl start mysqld	# 启动

systemctl status mysqld # 查看状态

systemctl stop mysqld # 停止

systemctl enable mysqld # 设置开机自启
# 启动失败错误日志查看
cat /var/log/mysqld.log
- 获取临时密码
# 必须启动成功,才会生成此文件
grep "password" /var/log/mysqld.log

6.登录
mysql -u root -p
五、修改密码
- 遇到的问题
mysql> alter user 'root'@'localhost' identified by 'root';
ERROR 1819 (HY000): Your password does not satisfy the current policy requirements

mysql> set global validate_password_length=1;
ERROR 1193 (HY000): Unknown system variable 'validate_password_length'

mysql> show variables like 'validate_password%';
ERROR 1820 (HY000): You must reset your password using ALTER USER statement before executing this statement.
- 解决流程
mysql> alter user 'root'@'localhost' identified by '12345678Cc!'; # 注意密码规则
Query OK, 0 rows affected (0.00 sec)


mysql> flush privileges; # 刷新权限规则
Query OK, 0 rows affected (0.00 sec)


mysql> show variables like 'validate_password%';
+-------------------------------------------------+--------+
| Variable_name                                   | Value  |
+-------------------------------------------------+--------+
| validate_password.changed_characters_percentage | 0      |
| validate_password.check_user_name               | ON     |
| validate_password.dictionary_file               |        |
| validate_password.length                        | 8      |
| validate_password.mixed_case_count              | 1      |
| validate_password.number_count                  | 1      |
| validate_password.policy                        | MEDIUM |
| validate_password.special_char_count            | 1      |
+-------------------------------------------------+--------+


mysql> set global validate_password.length=4; # 减少密码长度要求
Query OK, 0 rows affected (0.00 sec)


mysql> set global validate_password.policy=0; # 取消密码验证策略
Query OK, 0 rows affected (0.00 sec)


mysql> show variables like 'validate_password%';
+-------------------------------------------------+-------+
| Variable_name                                   | Value |
+-------------------------------------------------+-------+
| validate_password.changed_characters_percentage | 0     |
| validate_password.check_user_name               | ON    |
| validate_password.dictionary_file               |       |
| validate_password.length                        | 4     |
| validate_password.mixed_case_count              | 1     |
| validate_password.number_count                  | 1     |
| validate_password.policy                        | LOW   |
| validate_password.special_char_count            | 1     |
+-------------------------------------------------+-------+


mysql> alter user 'root'@'localhost' identified by '新密码';
Query OK, 0 rows affected (0.06 sec)


mysql> exit # 退出
Bye


mysql -u root -p # 使用新密码进行登录
六、远程登录
- 远程访问报 is not allowed to connect to this MySQL server
解决流程
mysql -u root -p # 在服务器登录

mysql> use mysql; # 切换数据库

mysql> select host from user where user='root'; #查看
+-----------+
| host      |
+-----------+
| localhost |
+-----------+
1 row in set (0.00 sec)

mysql> update user set host = '%' where user ='root'; # 修改权限
Query OK, 1 row affected (0.06 sec)

mysql> flush privileges; # 刷新权限规则
七、卸载
# 停用服务
systemctl stop mysqld

# 查看 mysql安装情况
rpm -qa | grep -i mysql
# 有则移除
ps: yum remove mysql-community-common-8.0.34-1.el9.x86_64

# 查看相关文件夹
find / -name mysql
# 有则移除
rm -rf /var/lib/mysql

# 排查是否删除干净
rpm -qa | grep -i mysql


 1959
1959


 被折叠的 条评论
为什么被折叠?
被折叠的 条评论
为什么被折叠?
 到【灌水乐园】发言


