


今天自己闲来无事,为了验证自己这几天的学习成果。决定参考MNIST数据集的格式来搭建属于自己的卷积神经网络。下面是我自己搭建的神经网络。具体是七层结构。输入层--卷积--池化--1*1 3*3 5*5三路径卷积后链接层--1*1 及池化+1*1两路径的卷积层--全连接层--输出层。 是不是看起来很复杂,其实我也这么觉得。(所以说是随便搭撘玩玩)
直接上代码:
网络结构搭建代码:
#!/usr/bin/env  python
# -*- coding:utf-8 -*-
import tensorflow as tf

#定义神经网络结构的相关参数
INPUT_NODE = 784 #图片像素矩阵的大小 根据前期的数据处理得到的图片大小的乘积来设定
OUTPUT_NODE = 10  #数字识别0-9

IMAGE_SIZE = 28 #图片的边长
NUM_CHANNELS = 1 #图片的深度1,3
NUM_LABELS = 10 #输出序列大小

#第一层卷积层尺寸和深度
CONV1_DEEP = 32
CONV1_SIZE = 5

#全连接层节点数
FC_SIZE = 512

 #定义get_variable函数来获取变量
def get_weight_variable(shape, regularizer):
    weights = tf.get_variable("weights", shape, initializer=tf.truncated_normal_initializer(stddev=0.1))

    #当给出正则生成函数时,将当前变量的正则损失加入到名为“losses”的集合
    if regularizer != None:
        tf.add_to_collection('losses', regularizer(weights))
    return weights

#定义神经网络前向传播过程 train用于区分训练和测试过程 使用到dropout方法可以防止过拟合
def inference(input_tensor,   regularizer):
    #加载slim库:可以简化cnn卷积网络的定义,使得代码更加容易阅读
    slim = tf.contrib.slim
    #定义一个默认参数设置列表,即列表中的函数将会默认使用后面得参数设置。步长为1,使用VALID不填充可以使得大小一致;或者步长2--,SAME填充使得结果尺寸一致
    with slim.arg_scope([slim.conv2d, slim.max_pool2d, slim.avg_pool2d], stride=1, padding='SAME'):
        #为每一个模块均定义一个命名空间
        #首先经历一个传统定义的卷积层.输入28*28*1矩阵  过滤器5*5*32   输出结果为28*28*32  relu1
        with tf.variable_scope('layer1-conv1'):
            conv1_weights = tf.get_variable("weight", [CONV1_SIZE, CONV1_SIZE, NUM_CHANNELS, CONV1_DEEP], initializer=tf.truncated_normal_initializer(stddev=0.1))
            conv1_biases = tf.get_variable("bias", [CONV1_DEEP], initializer=tf.constant_initializer(0.0))
            conv1 = tf.nn.conv2d(input_tensor, conv1_weights, strides=[1, 1, 1, 1], padding='SAME')
            relu1 = tf.nn.relu(tf.nn.bias_add(conv1, conv1_biases))
        #通过一个2*2的池化层  输出结果为14*14*32  pool1
        with tf.name_scope('layer2-pool1'):
            pool1 = tf.nn.max_pool(relu1, ksize=[1, 2, 2, 1], strides=[1, 2, 2, 1], padding='SAME')
        #通过第一个Inception部分,由三个过滤器卷积网络构成1*1 3*3  5*5,输出结果:14*14*192
        with tf.variable_scope('layer3-Inception1'):
            #每一个路径一个命名空间
            with tf.variable_scope('Branch1_1'):
                #实现一个1*1过滤器,深度为64的卷积层
                branch1_1 = slim.conv2d(pool1, 64, [1, 1], scope='Conv2d_3_1_1')
            with tf.variable_scope('Branch1_3'):
                branch1_3 = slim.conv2d(pool1, 64, [3, 3], scope='Conv2d_3_3_3')
            with tf.variable_scope('Branch1_5'):
                branch1_5 = slim.conv2d(pool1, 64, [5, 5], scope='Conv2d_3_5_5')
                #拼接结果矩阵
            inception1 = tf.concat([branch1_1, branch1_3, branch1_5],3)
        #通过第二个Inception部分,由一个1*1 一个经过2*2池化后的1*1卷积组成 输出结果为14*14*500
        with tf.variable_scope('layer4-Inception2'):
            with tf.variable_scope('Branch2_1'):
                branch2_1 = slim.conv2d(inception1, 244, [1, 1], scope='Conv2d_4_1_1')
            with tf.variable_scope('Branch2_2'):
                branch2_2 = slim.max_pool2d(inception1, [2, 2], scope='Maxpool_4_2_2')
                branch2_2 = slim.conv2d(branch2_2, 256, [1, 1], scope='Conv2d_pool_4_1_1')
            inception2 = tf.concat([branch2_1, branch2_2], 3)
        #通过一个2*2 步长为2的池化层  输出结果为7*7*500的矩阵
        with tf.name_scope('layer5-pool2'):
            pool2 = tf.nn.max_pool(inception2, ksize=[1, 2, 2, 1], strides=[1, 2, 2, 1], padding='SAME')

    #将第五层池化输出转化为第六层全连接的输入格式--拉成一个向量,长度为乘积
    pool_shape = pool2.get_shape().as_list()
    nodes = pool_shape[1]*pool_shape[2]*pool_shape[3]
    reshaped = tf.reshape(pool2, [pool_shape[0], nodes])

    #第六层全连接层 输入24500,输出512 引入dropout
    with tf.variable_scope('layer6-fc1'):
        fc1_weights = tf.get_variable("weight", [nodes, FC_SIZE], initializer=tf.truncated_normal_initializer(stddev=0.1))
        #权重加入正则化
        if regularizer != None:
            tf.add_to_collection('losses', regularizer(fc1_weights))
        fc1_biases = tf.get_variable("bias", [FC_SIZE], initializer=tf.constant_initializer(0.1))

        fc1 = tf.nn.relu(tf.matmul(reshaped, fc1_weights)+fc1_biases)
       # if train:fc1 = tf.nn.dropout(fc1, 0.5)

    #第七层Softmax分类结果层 512  --  10
    with tf.variable_scope('layer7-fc2'):
        fc2_weights = get_weight_variable([FC_SIZE, NUM_LABELS], regularizer)
        fc2_biases = tf.get_variable("bias", [NUM_LABELS], initializer=tf.constant_initializer(0.1))
        logit = tf.matmul(fc1, fc2_weights)+fc2_biases

    return logit
搭建好网络后,下面该进行网络的训练程序编辑。先用最原始的训练方式:
#!/usr/bin/env  python
# -*- coding:utf-8 -*-
import os
import tensorflow as tf
from tensorflow.examples.tutorials.mnist import input_data
import RJB_inference
import numpy as np

BATCH_SIZE = 100
LEARNING_RATE_BASE = 0.8
LEARNING_RATE_DECAY = 0.99
REGULARAZTION_RATE = 0.0001
TRAINING_STEPS = 30000
MOVING_AVERAGE_DECAY = 0.99

MODEL_SAVE_PATH = "/path/to/model/"
MODEL_NAME = "model.ckpt"

def train (mnist):
    x = tf.placeholder(tf.float32, [BATCH_SIZE, RJB_inference.IMAGE_SIZE, RJB_inference.IMAGE_SIZE, RJB_inference.NUM_CHANNELS], name='x-input')
    y_ = tf.placeholder(tf.float32, [None, RJB_inference.OUTPUT_NODE], name='y-input')
    regularizer = tf.contrib.layers.l2_regularizer(REGULARAZTION_RATE)
    y = RJB_inference.inference(x, regularizer)
    global_step = tf.Variable(0, trainable=False)

    variable_averages = tf.train.ExponentialMovingAverage(MOVING_AVERAGE_DECAY, global_step)
    variable_averages_op = variable_averages.apply(tf.trainable_variables())
    cross_entropy = tf.nn.sparse_softmax_cross_entropy_with_logits(logits=y, labels=tf.argmax(y_, 1))
    cross_entropy_mean = tf.reduce_mean(cross_entropy)
    loss = cross_entropy_mean+tf.add_n(tf.get_collection('losses'))
    learning_rate = tf.train.exponential_decay(LEARNING_RATE_BASE, global_step, mnist.train.num_examples/BATCH_SIZE, LEARNING_RATE_DECAY)
    train_step = tf.train.GradientDescentOptimizer(learning_rate)\
        .minimize(loss, global_step=global_step)
    with tf.control_dependencies([train_step, variable_averages_op]):
        train_op = tf.no_op(name='train')
    saver = tf.train.Saver()
    with tf.Session() as sess:
        tf.global_variables_initializer().run()

        for i in range(TRAINING_STEPS):
            xs, ys = mnist.train.next_batch(BATCH_SIZE)
            reshaped_xs = np.reshape(xs, (BATCH_SIZE, RJB_inference.IMAGE_SIZE, RJB_inference.IMAGE_SIZE, RJB_inference.NUM_CHANNELS))
            _, loss_value, step = sess.run([train_op, loss, global_step], feed_dict={x: reshaped_xs, y_: ys})
            if i%1000 == 0:
                print("After %d training step (s), loss on training""batch is %g." % (step, loss_value))
                saver.save(sess, os.path.join(MODEL_SAVE_PATH, MODEL_NAME), global_step=global_step)
def main(argv=None):
    mnist = input_data.read_data_sets("/path/to/mnist_data/mnist/", one_hot=True)
    train(mnist)
if __name__=='__main__':
    tf.app.run()
其中值得注意的是,如果报了一下的错误:
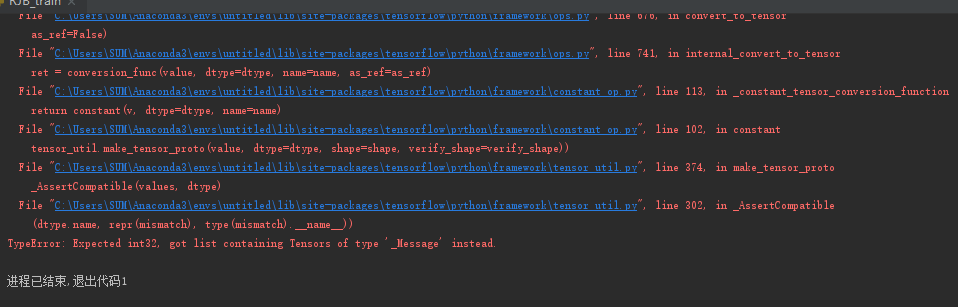
是因为连接函数concat()的参数定义顺序出了问题。查了一下,说是自1.0版本以后的Tensorflow,该函数的参数顺序就发生了改变,【】在前而数字在后。
改正错误之后就可以顺利运行了,注意必须下载MNIST的数据集,并改下程序里相应的路径就可以了。最后逇运行效果如下:
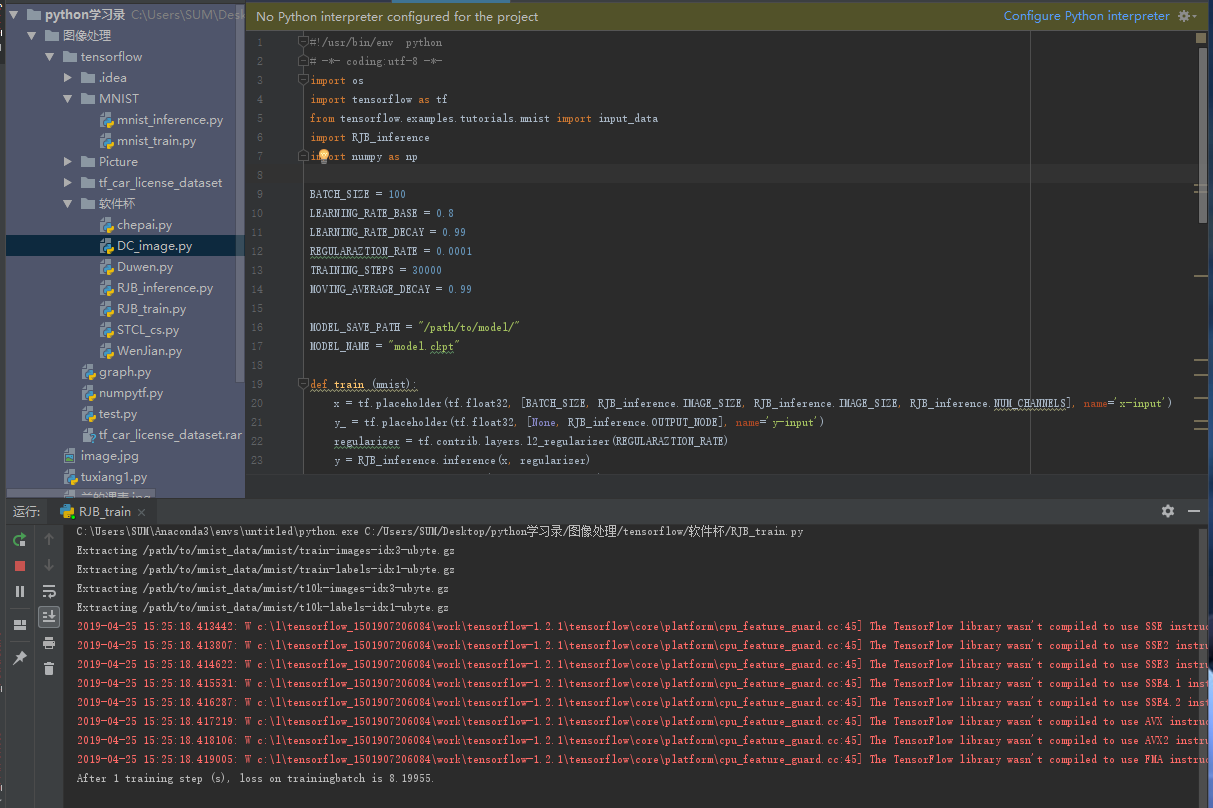
可以看出程序已经开始迭代训练了,不过似乎速度有点慢。因为网络结构搭建的过于复杂。
 %
%
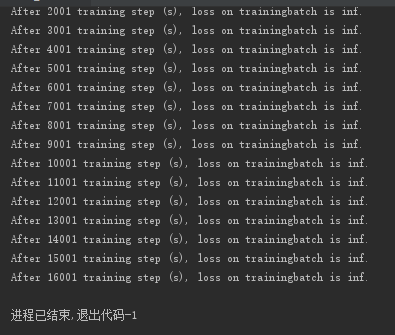
%%%等了很久,最后的结果很不满意:。而且似乎还有问题。在后面的博客中我将就此问题作出解决,同时尝试Gpu的编程使得网络的训练速度加快。或者简化网络的结构提高运算速度。


 507
507

 被折叠的 条评论
为什么被折叠?
被折叠的 条评论
为什么被折叠?
 到【灌水乐园】发言


