


单链表
上一篇文章已经讲过什么是数据结构以及数据结构的栈,队列等等,这篇文章就直接说单链表,双链表了,就不在赘述了
链表和数组一样, 可以用于存储一系列的元素, 但是链表和数组的实现机制完全不同
数组和链表的对比
数组
- 数组的创建通常需要申请一段连续的内存空间(一整块的内存), 并且大小是固定的(大多数编程语言数组都是固定的), 所以当当前数组不能满足容量需求时, 需要扩容
- 并且在数组开头或中间位置插入数据的成本很高, 需要进行大量元素的位移(尽管我们学过其他的简单的方法来帮我做这样的事,但是其底层原理是依然不变的)
链表
- 链表中的元素在内存中不必是连续的空间
- 链表的每个元素由一个存储元素本身的节点和一个指向下一个元素的引用(有些语言称为指针或者链接)组成
链表相比较于数组的优点
- 内存空间不是比是连续的. 可以充分利用计算机的内存. 实现灵活的内存动态管理
- 链表不必在创建时就确定大小, 并且大小可以无限的延伸下去
- 链表在插入和删除数据时, 时间复杂度可以达到 O(1) 相对数组效率高很多
但是链表也有一些缺点
- 链表访问任何一个位置的元素时, 都需要从头开始访问.(无法跳过第一个元素访问任何一个元素)
- 无法通过下标直接访问元素, 需要从头一个个访问, 直到找到对应的位置
链表的常用方法有以下这些
append(element):向列表尾部添加一个新的项insert(position, element):向列表的特定位置插入一个新的项remove(element):从列表中移除一项indexOf(element):返回元素在列表中的索引。如果列表中没有该元素则返回-1removeAt(position):从列表的特定位置移除一项isEmpty():如果链表中不包含任何元素,返回true,如果链表长度大于0则返回falsesize():返回链表包含的元素个数。与数组的length属性类似toString():由于列表项使用了Node类,就需要重写继承自JavaScript对象默认的toString方法,让其只输出元素的值
接下来我们就来封装一下链表常用的方法或函数吧
append() 向链表最后添加元素
<script>
	class Lnode {
		constructor(data) {
			this.data = data;
			this.next = null;
			}
	}
	class LinkList {
		constructor() {
		this.head = null;
		this.len = 0;
	}

	append(ele) {
	// 创建一个新的节点
		let newnode = new Lnode(ele);
		if (this.head == null) {
			this.head = newnode;
		} else {
			let current = this.head;
			while(current.next != null) {
			   current = current.next;
			}
			current.next = newnode;
		}
		this.len++
		}
	}
	let list = new LinkList();[''[p'[
	console.log(list);
	list.append(0);
	list.append(1);
	list.append(7);
	console.log(list);
</script>
结果
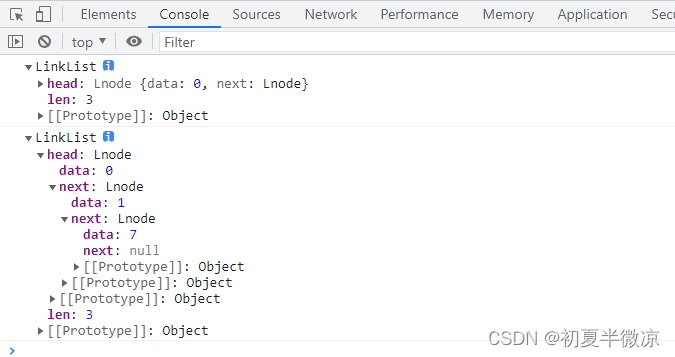
这就已经封装好了,需要向链表末尾添加元素的时候,直接调用就好了
insert() 向指定位置插入元素
insert(指定为位置,插入的元素)
Lnode LinkList 我就不在写了,都是一样的,下面的封装我会直接用
insert(position, ele) {
	if (position < 0 || position > this.len || !Number.isInteger(position)) {
        return false;
    }
   let newnode = new Lnode(ele);
   //  在头部位置插入
   if (position == 0) {
       // 如果链表没有,head=null,那就直接创建节点
       if (this.head == null) {
           this.head == newnode;

       } else {
           // 如果head有,那么让head等于head的下一个节点
           newnode.next = this.head;
           // 让创建的节点等于head就可以了
           this.head = newnode;
       }
       this.len++;

       // 尾部插入
   } else if (position == this.len) {
       // 直接在尾部加一个节点上去就好
       this.append(ele);
   } else {
       // 任意位置插入
       // 让插入元素等于头结点
       let current = this.head;
       // 下标设为0
       let index = 0;
       // 前一个节点,position-1的位置节点
       while (index < position - 1) {
           // 插入元素的下一个节点等于插入元素
           current = current.next;
           // 下标加一
           index++
       }
       // current就是前一个节点
       // 让插入元素的下一个节点等于现在元素的下一个节点
       newnode.next = current.next;
       // 现在元素等于插入元素的下一个节点
       current.next = newnode;
       // 插入过后长度加一
       this.len++
   }
let list = new LinkList();
console.log(list);
list.append(0);
list.append(1);
list.append(7);
console.log(list);

list.insert(1,100)
list.insert(2,200)
list.insert(4,300)
list.insert(0,"new")
console.log(list);            }
结果

移除指定位置元素
removeAt(position) {
// 先判断位置是否合法,不合法就直接返回false
if (position < 0 || position > this.len || !Number.isInteger(position)) {
return false;
}
// 判断链接里是否有值,没有就不需要移除,直接返回
if (this.head == null) {
return
} else {
if (position == 0) {
//头移除,直接让head的下一个节点等于head就移除了
this.head = this.head.next
} else {
// 其他位置移除
// 让移除位置的等于头节点
let current = this.head,
// 设置下标为0
index = 0;
// 如果下标小于位置减一的话
while (index < position - 1) {
// 就让移除元素的下一个元素等于移除元素
current = current.next;
// 并且下标加一
index++
}
// 让移除元素的下下一个等于下一个即可
current.next = current.next.next;
}
// 移除过后长度减一
this.len--;
}
}
let list = new LinkList();
console.log(list);
list.append(0);
list.append(1);
list.append(7);
console.log(list);
list.insert(1,100)
list.insert(2,200)
list.insert(4,300)
list.insert(0.1,"new")
console.log(list);
list.removeAt(0)
list.removeAt(2)
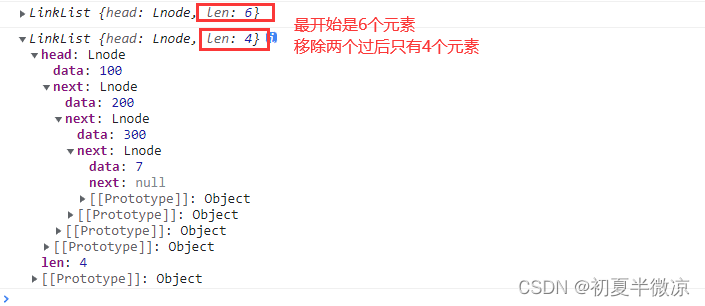
console.log(list);
结果
查找元素位置,返回下标
下标只是为了方便理解,链表是没有下标的哦
indexOf(ele) {
let current = this.head,
index = 0;
while (index < this.len) {
if (current.data == ele) {
return index
} else {
// 继续找
current = current.next;
index++;
}
}
// 遍历完都没找到就返回-1
return -1;
}
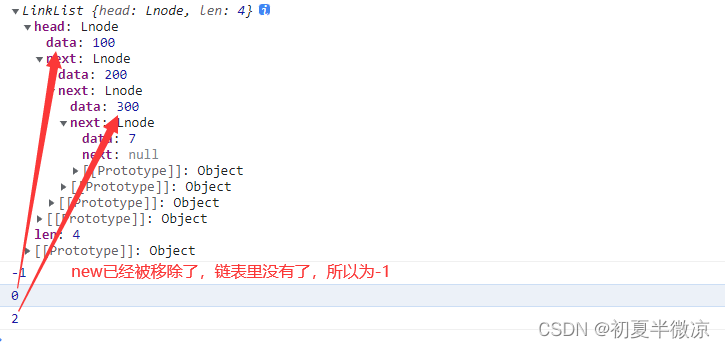
console.log(list.indexOf("new"));
console.log(list.indexOf(100));
console.log(list.indexOf(300));
结果
将链表里面的转为字符串
toString() {
let current = this.head,
index = 0,
res = "";
while (index < this.len) {
res += "-" + current.data;
current = current.next;
index++;
}
return res.slice(1)
}
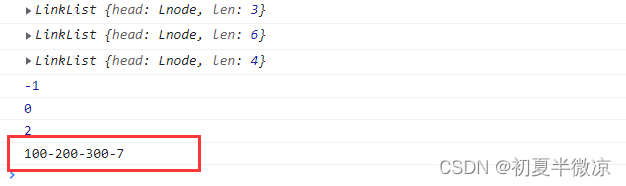
console.log(list.toString());
结果
双向链表
双向链表与单向链表对比
单向链表
- 只能从头遍历到尾或者从尾遍历到头(一般从头到尾)
- 也就是链表相连的过程是单向的.,实现的原理是上一个链表中有一个指向下一个的引用
- 单向链表有一个比较明显的缺点
我们可以轻松的到达下一个节点, 但是回到前一个节点是很难的, 但是在实际开发中, 经常会遇到需要回到上一个节点的情况
所以这个时候就有了双向链表
双向链表
- 既可以从头遍历到尾, 又可以从尾遍历到头
- 即链表相连的过程是双向的
- 一个节点既有向前连接的引用, 也有一个向后连接的引用
- 双向链表可以有效的解决单向链表中提到的问题
但是双向链表依旧有一些缺点
- 每次在插入或删除某个节点时, 需要处理四个节点的引用, 而不是两个. 也就是实现起来要困难一些
- 并且相对于单向链表, 必然占用内存空间更大一些,但是这些缺点和我们使用起来的方便程度相比, 是微不足道的
双向链接常用的方法和单向链表差不多,这里就不在赘述了,就直接封装双向链表的方法了
append() 向链表后面添加元素
<script>
	class Dnode {
       constructor(data) {
           this.prev = null;
           this.data = data;
           this.next = null;
     }
   }
   class DoubleLinkList {
       constructor() {
           this.head = null;
           this.tail = null;
           this.len = 0
       }

       append(ele){
           let newnode = new Dnode(ele);
           if(this.len == 0){
               this.head = newnode;
               this.tail = newnode;
           } else {
               newnode.prev = this.tail;
               this.tail.next = newnode;
               this.tail = newnode
           }
           this.len++
       }
   }
   let dlist = new DoubleLinkList();
   dlist.append("new");
   dlist.append(100);
   dlist.append(200);
   dlist.append(300);
   console.log(dlist);
</script>
结果
Dnode DoubleLinkList 我也不重复写啦,后面一样的直接用
insert() 插入元素
insert(position, ele) {
if (position < 0 || position > this.len || !Number.isInteger(position)) {
return false;
}
let newnode = new Dnode(ele);
if (position == 0) {
if (this.len == 0) {
this.head = newnode;
this.tail = newnode;
} else {
newnode.next = this.head;
this.head.prev = newnode;
this.head = newnode
}
this.len++
} else if (position == this.len) {
this.append(ele);
} else {
let current = this.head,
index = 0;
while (index < position - 1) {
current = current.next
index++
}
newnode.prev = current;
newnode.next = current.next;
current.next = newnode;
current.next.prev = newnode;
this.len++
}
}
let dlist = new DoubleLinkList();
dlist.append("new");
dlist.append(100);
dlist.append(200);
dlist.append(300);
console.log(dlist);
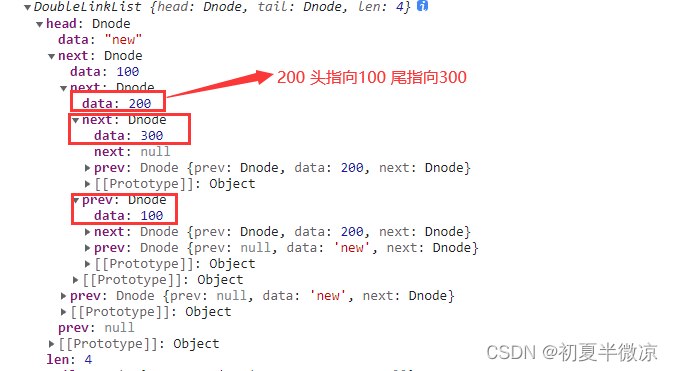
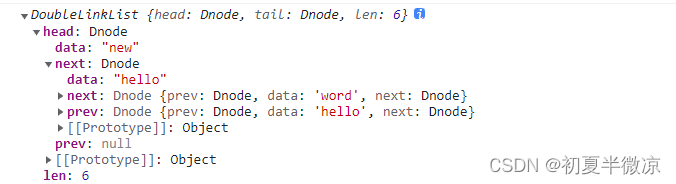
dlist.insert(1,"hello")
dlist.insert(2,"word")
console.log(dlist);
结果
移除指定元素
removeAt(position) {
if (position < 0 || position > this.len - 1 || !Number.isInteger(position)) {
return false
}
if (this.len == 0) {
return
} else {
if (position == 0) {
if (this.len == 1) {
this.head = null;
this.tail = null;
} else {
this.head = this.head.next;
this.head.prev = null;
}
} else if (position == this.len - 1) {
this.tail = this.tail.prev;
this.tail.next = null;
} else {
let current = this.head,
index = 0;
while (index < position - 1) {
current = current.next;
index++
}
current.next = current.next.next;
current.next.prev = current
}
this.len--
}
}
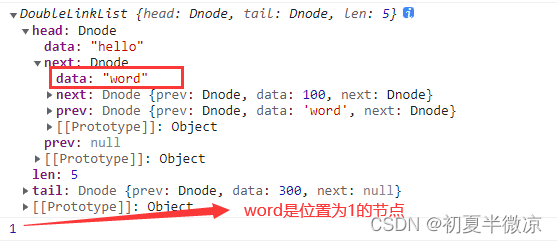
dlist.removeAt(0)
console.log(dlist);
结果

查找指定元素的位置
indexOf(ele) {
      let current = this.head,
           index = 0;
       while (index < this.len) {
           if (current.data == ele) {
               return index
           } else {
               current = current.next;
               index++;
           }
       }
       return -1
    }
console.log(dlist.indexOf("word"));
console.log(dlist);
结果
正反向遍历链表
// 正向遍历
 toAfterString() {
    let current = this.head,
        index = 0,
        res = "";
    while (index < this.len) {
        res += "-" + current.data;
        current = current.next;
        index++;
    }
    return res.slice(1)
}

// 反向遍历
toBeforeString() {
    let current = this.tail,
        index = this.len - 1,
        res = "";
    while (index >= 0) {
        res += "-" + current.data;
        current = current.prev;
        index--;
    }
    return res.slice(1)
}
结果

单向链表和双向链表的常用方法就已经封装完啦


 176
176


 被折叠的 条评论
为什么被折叠?
被折叠的 条评论
为什么被折叠?
 到【灌水乐园】发言


