


0. Statement 🫡
In this blog, the author, summarizing what he has learned, has built a CNN model to solve the CIFAR-10 photo classification problem (without using nonlinear activation functions) using DataLoader, SummaryWriter, torchvision, and torch.nn, torch.optim, etc. If there are any errors, please feel free to correct them. 🏫
1. Planning 🧐
- Evaluating the dataset(shape, training set, testing set, etc).
- Building CIFAR 10 Neural Networks.
- Selecting loss functions and optimizers.
- Constructing the accuracy function.
- Visualization with tensorboard.
- Adjusting parameters according to the final effect.
2. What is the CIFAR-10 Photo dataset? 🤔
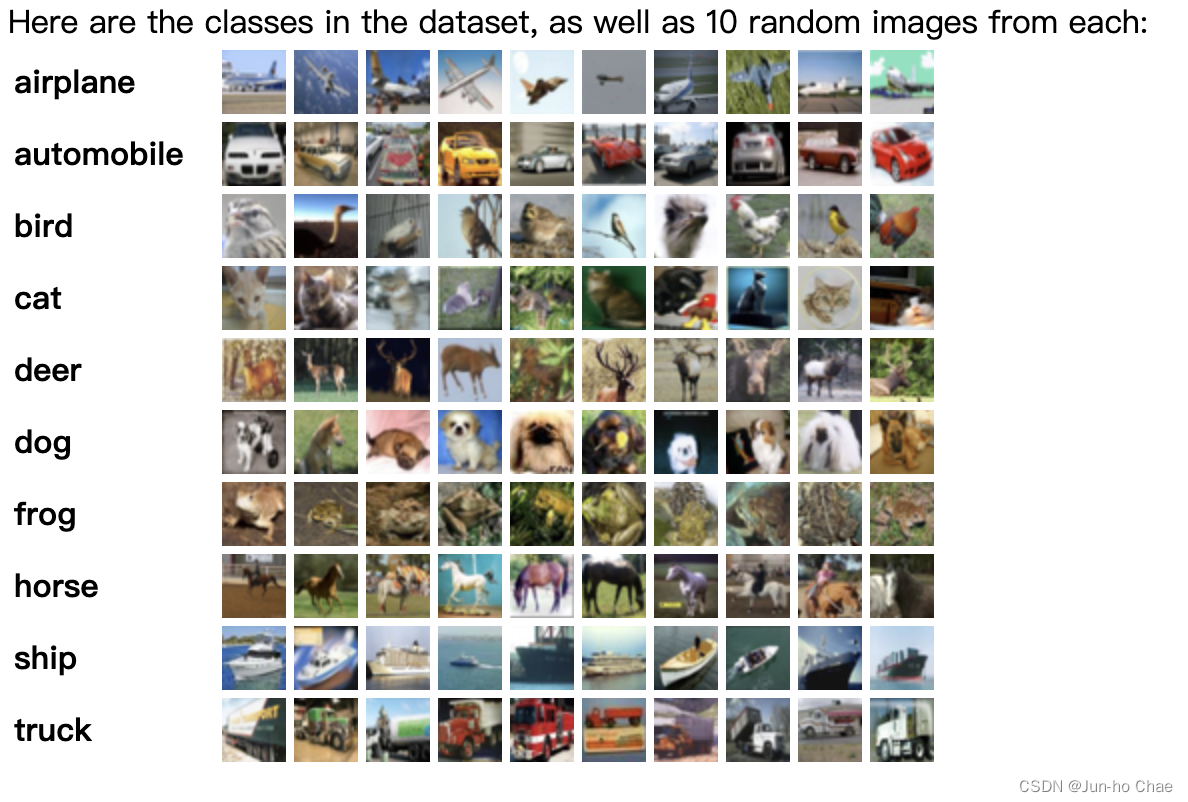
Which is from here.
2.1 The shape of the dataset. 🤗
I have used torchvision to get the CIFAR10 dataset.🤩
import torchvision
from torch.utils.data import DataLoader

dataset = torchvision.datasets.CIFAR10('data', train=True, transform=torchvision.transforms.ToTensor(),
                                       download=True)
dataloader = DataLoader(dataset, batch_size=64)
for data in dataloader:
    imgs, targets = data
    print(imgs.shape)

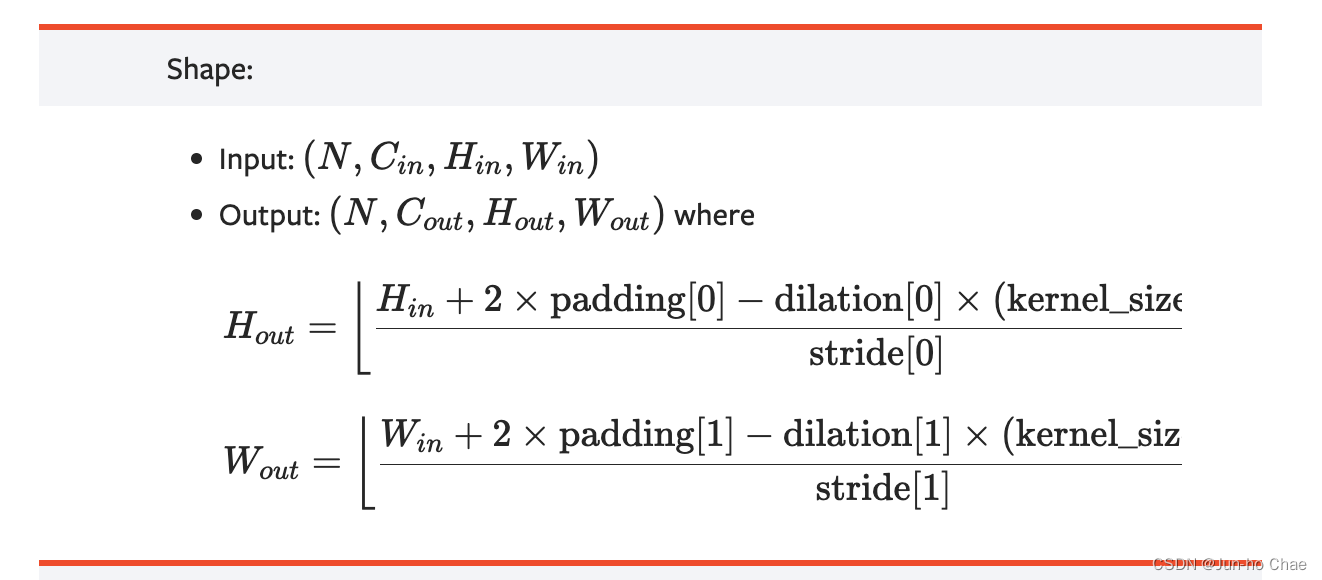
As you can see, the batch_size is 64, there are 3 channels, the height is 32, and the width is also 32. I can be so sure about the meaning of each number because of the introduction of Shape in Conv2 on the PyTorch website.
2.2 Training set & Testing set. 🤠
 # dataset
training_data = torchvision.datasets.CIFAR10("root=data", train=True, transform=torchvision.transforms.ToTensor(),
                                          download=True)

testing_data = torchvision.datasets.CIFAR10(root="data", train=False, transform=torchvision.transforms.ToTensor(),
                                         download=True)

# length
training_data_size = len(training_data)
print("The length of training_data is",training_data_size)
testing_data_size = len(testing_data)
print("The length of testing_data is",testing_data_size)

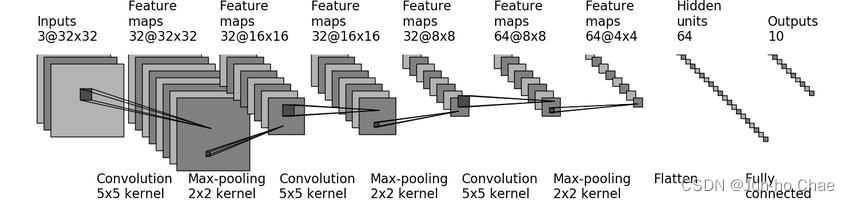
3. How do I build a CNN neural network?
Since this blog is mainly about learning how to build CNNs with PyTorch, I followed along online to learn a neural network to build it, From here.
import torch
from torch import nn

class Net(nn.Module):
    def __init__(self):
        super().__init__()
        self.model = nn.Sequential(
            nn.Conv2d(in_channels=3, out_channels=32, kernel_size=5, stride=1, padding=2),
            nn.MaxPool2d(kernel_size=2),
            nn.Conv2d(in_channels=32, out_channels=32, kernel_size=5, stride=1, padding=2),
            nn.MaxPool2d(kernel_size=2),
            nn.Conv2d(in_channels=32, out_channels=64, kernel_size=5, stride=1, padding=2),
            nn.MaxPool2d(2),
            nn.Flatten(),
            nn.Linear(in_features=64*4*4, out_features=64),
            nn.Linear(in_features=64, out_features=10)
        )

    def forward(self, x):
        x = self.model(x)
        return x
3. Selecting loss functions and optimizers. 😎
# Loss_function
loss_fn = nn.CrossEntropyLoss()

# Optimizer
optimizer = torch.optim.SGD(net.parameters(), lr=Learning_rate)
4. Constructing the accuracy function. 😊
accuracy = (outputs.argmax(1) == targets).sum()
total_accuracy = total_accuracy + accuracy
writer.add_scalar("test_accuracy", total_accuracy/testing_data_size, total_testing_step)
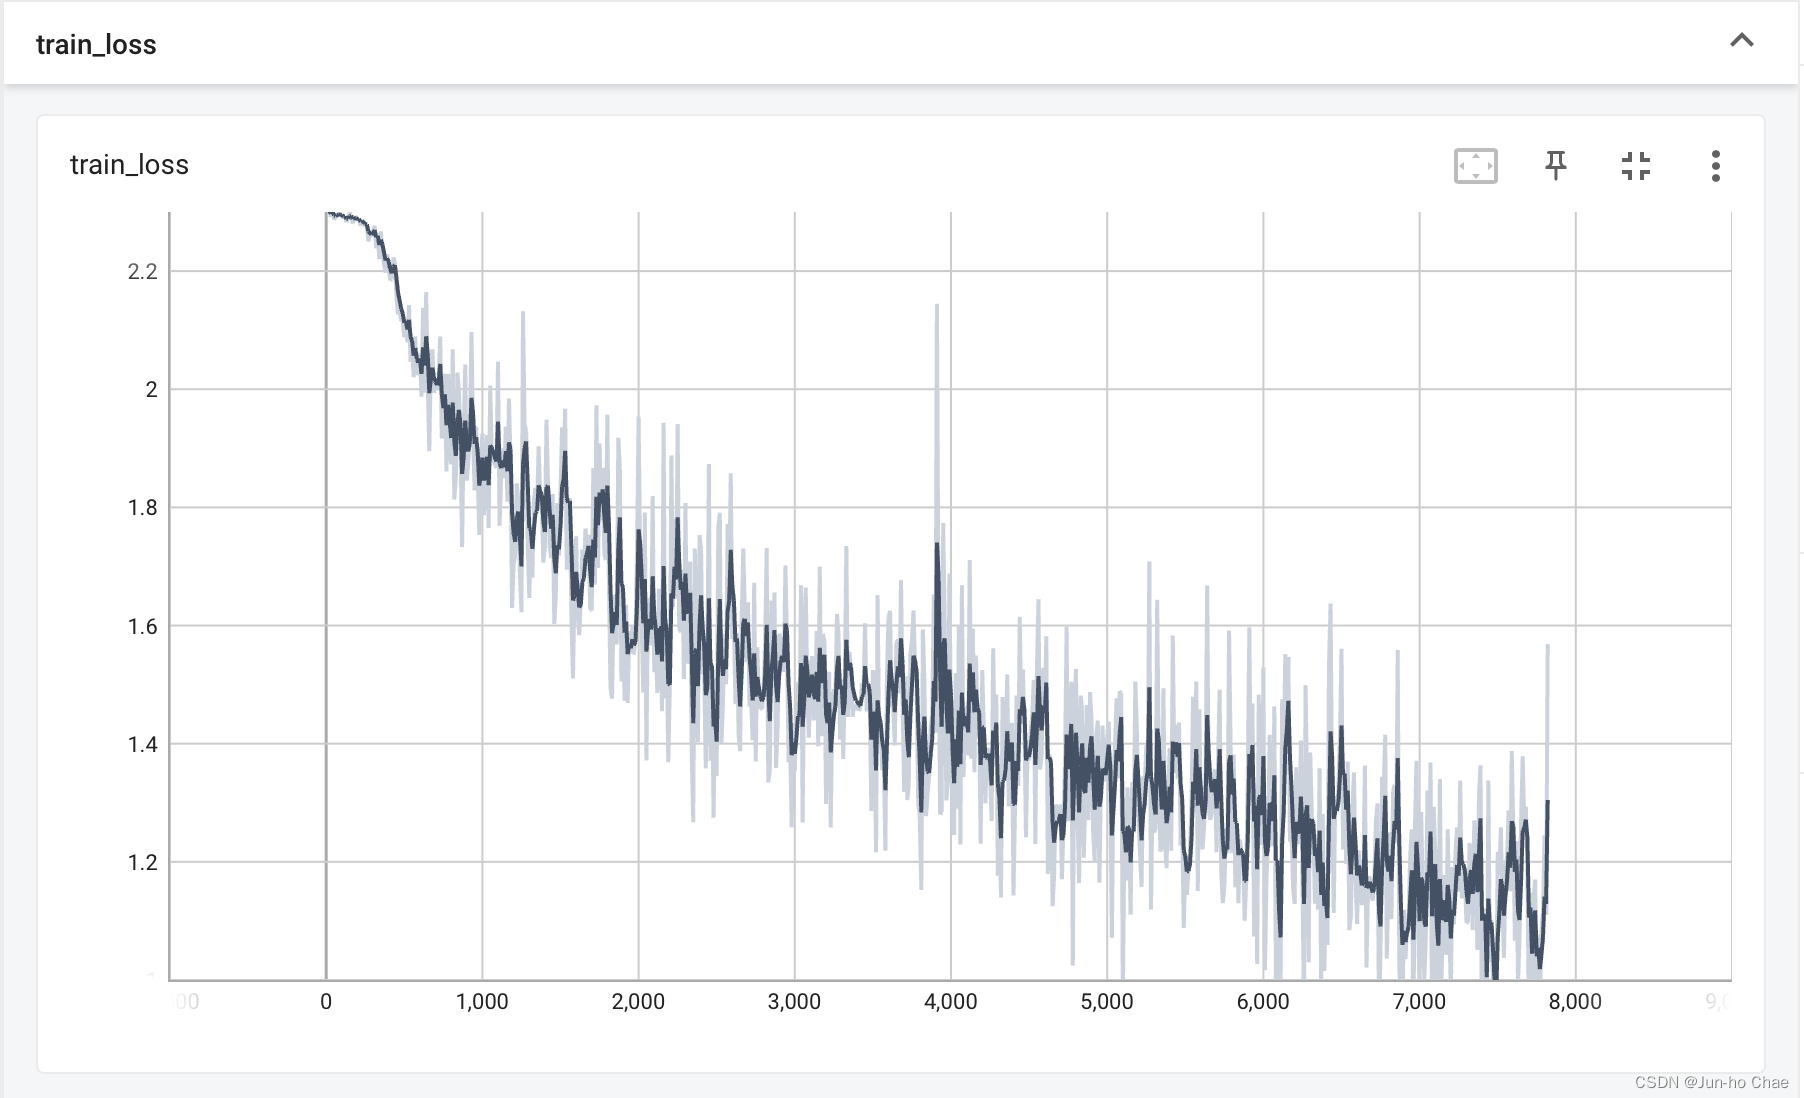
5. Visualization with tensorboard. 🤓
- conda activate XXXX
- tensorboard --logdir=/AD/DR/ES/S --load_fast=true
- TensorBoard 2.11.0 at http://localhost:6006/ (Press CTRL+C to quit)
6. Adjusting parameters according to the final effect.
Because I am using a CPU to train this neural network, it takes too long. Please use GPU to learn if the condition allows. 🤓
model.py
import torch
from torch import nn


# 搭建神经网络
class Net(nn.Module):
    def __init__(self):
        super().__init__()
        self.model = nn.Sequential(
            nn.Conv2d(in_channels=3, out_channels=32, kernel_size=5, stride=1, padding=2),
            nn.MaxPool2d(kernel_size=2),
            nn.Conv2d(in_channels=32, out_channels=32, kernel_size=5, stride=1, padding=2),
            nn.MaxPool2d(kernel_size=2),
            nn.Conv2d(in_channels=32, out_channels=64, kernel_size=5, stride=1, padding=2),
            nn.MaxPool2d(2),
            nn.Flatten(),
            nn.Linear(in_features=64*4*4, out_features=64),
            nn.Linear(in_features=64, out_features=10)
        )

    def forward(self, x):
        x = self.model(x)
        return x
train.py
import torch.optim
import torchvision
from torch import nn
from torch.utils.data import DataLoader
from torch.utils.tensorboard import SummaryWriter
from model import *
import os
os.environ['TF_CPP_MIN_LOG_LEVEL'] = '2'
# 设置训练网络的一些参数
# 记录训练的次数
total_training_step = 0
# 记录测试的次数
total_testing_step = 0
# 训练的轮数
epoch = 10
# 1e-2 = 1 * (10)^(-2) = 1 /100 = 0.01
Learning_rate = 1e-2
# 添加tensorboard
writer = SummaryWriter("logs_train")
# 准备数据集
training_data = torchvision.datasets.CIFAR10("root=data", train=True, transform=torchvision.transforms.ToTensor(),
download=True)
testing_data = torchvision.datasets.CIFAR10(root="data", train=False, transform=torchvision.transforms.ToTensor(),
download=True)
# length 长度
training_data_size = len(training_data)
print("The length of training_data is",training_data_size)
testing_data_size = len(testing_data)
print("The length of testing_data is",testing_data_size)
# 利用 DataLoader 来加载数据集
training_dataloader = DataLoader(training_data, batch_size=64)
testing_dataloader = DataLoader(testing_data, batch_size=64)
# 创建网络模型
net = Net()
# 创建损失函数
loss_fn = nn.CrossEntropyLoss()
# 优化器
optimizer = torch.optim.SGD(net.parameters(), lr=Learning_rate)
for i in range(epoch):
print(f"-------第{i+1}轮训练开始-------")
# 训练步骤开始
net.train()
for data in training_dataloader:
imgs, targets = data
outputs = net(imgs)
loss = loss_fn(outputs, targets)
# 优化器优化模型
optimizer.zero_grad()
loss.backward()
optimizer.step()
total_training_step += 1
if total_training_step % 10 == 0:
print(f"训练次数: {total_training_step}, Loss: {loss.item()}")
writer.add_scalar("train_loss", loss.item(), total_training_step)
# 测试步骤开始
net.eval()
total_testing_loss = 0
total_accuracy = 0
with torch.no_grad():
for data in testing_dataloader:
imgs, targets = data
outputs = net(imgs)
loss = loss_fn(outputs, targets)
total_testing_loss = total_testing_loss + loss.item()
accuracy = (outputs.argmax(1) == targets).sum()
total_accuracy = total_accuracy + accuracy
print(f"整体测试集上的Loss: {total_testing_loss}")
print(f"整体测试集上的正确率: {total_accuracy/testing_data_size}")
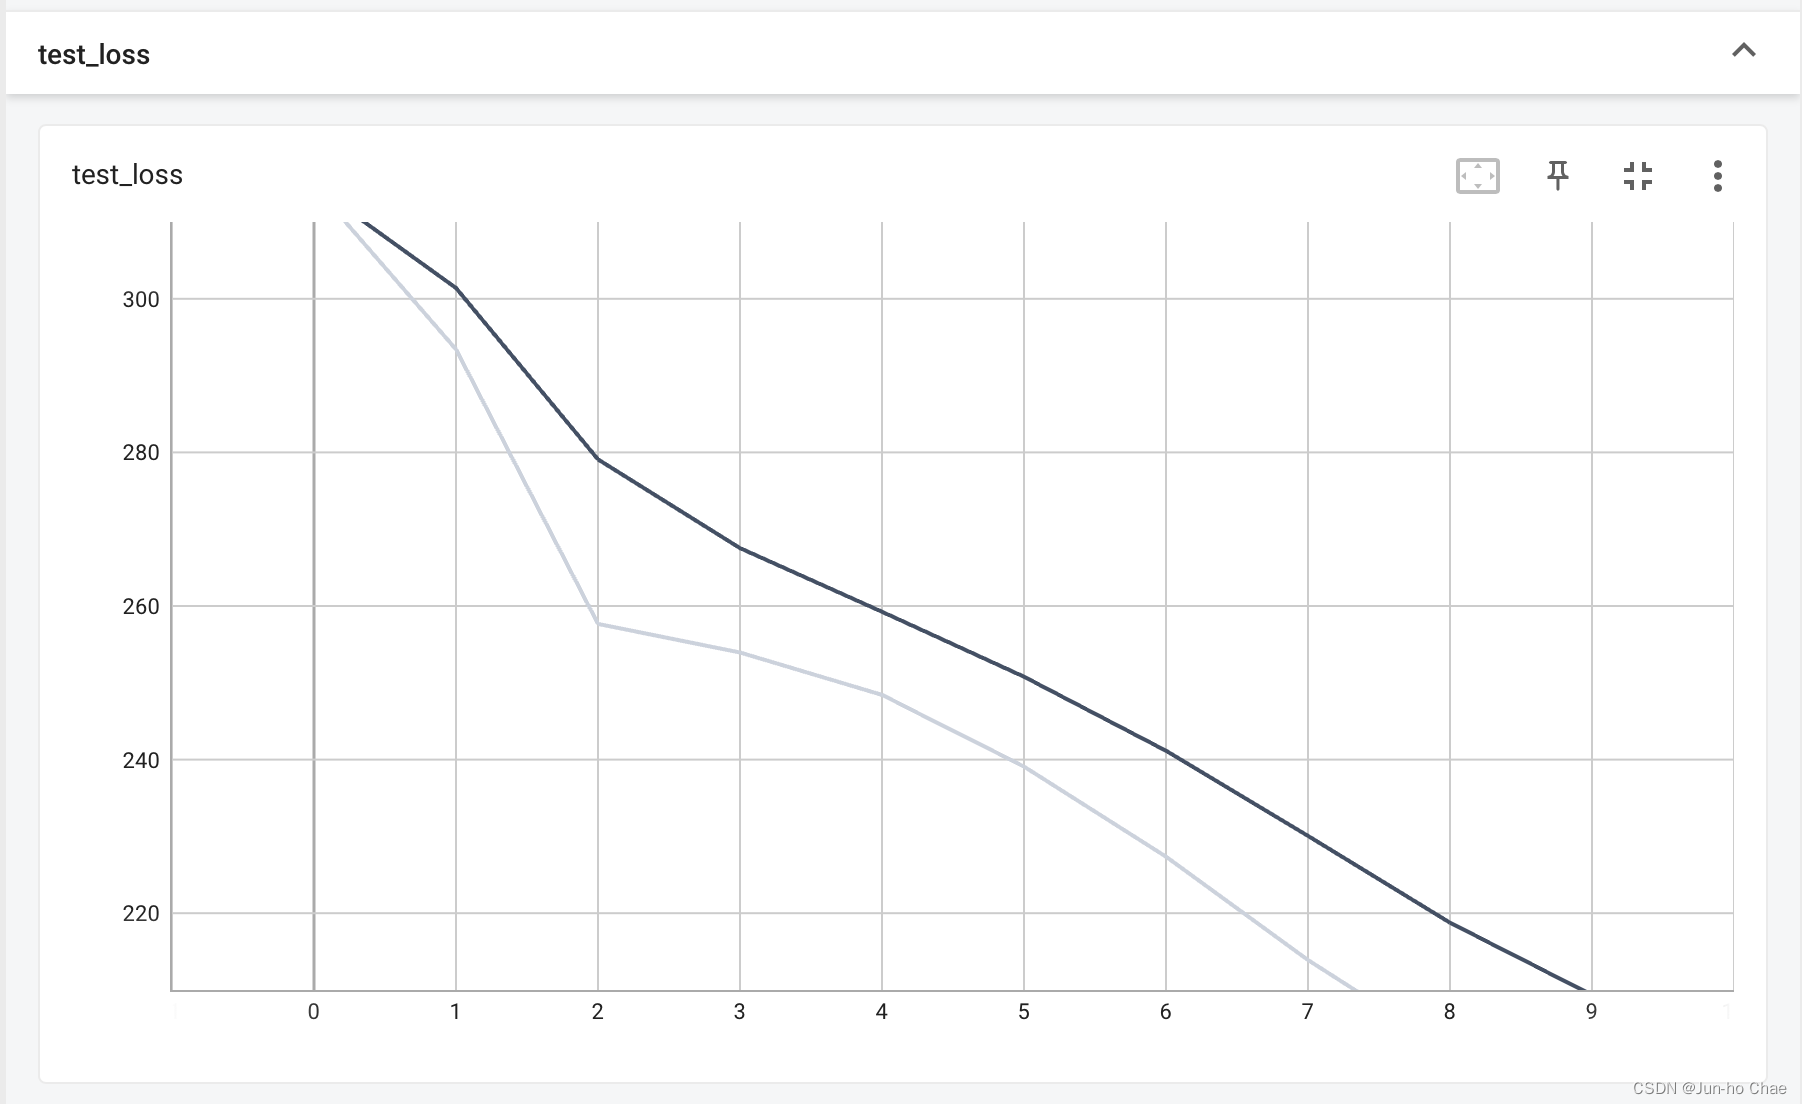
writer.add_scalar("test_loss", total_testing_loss, total_testing_step)
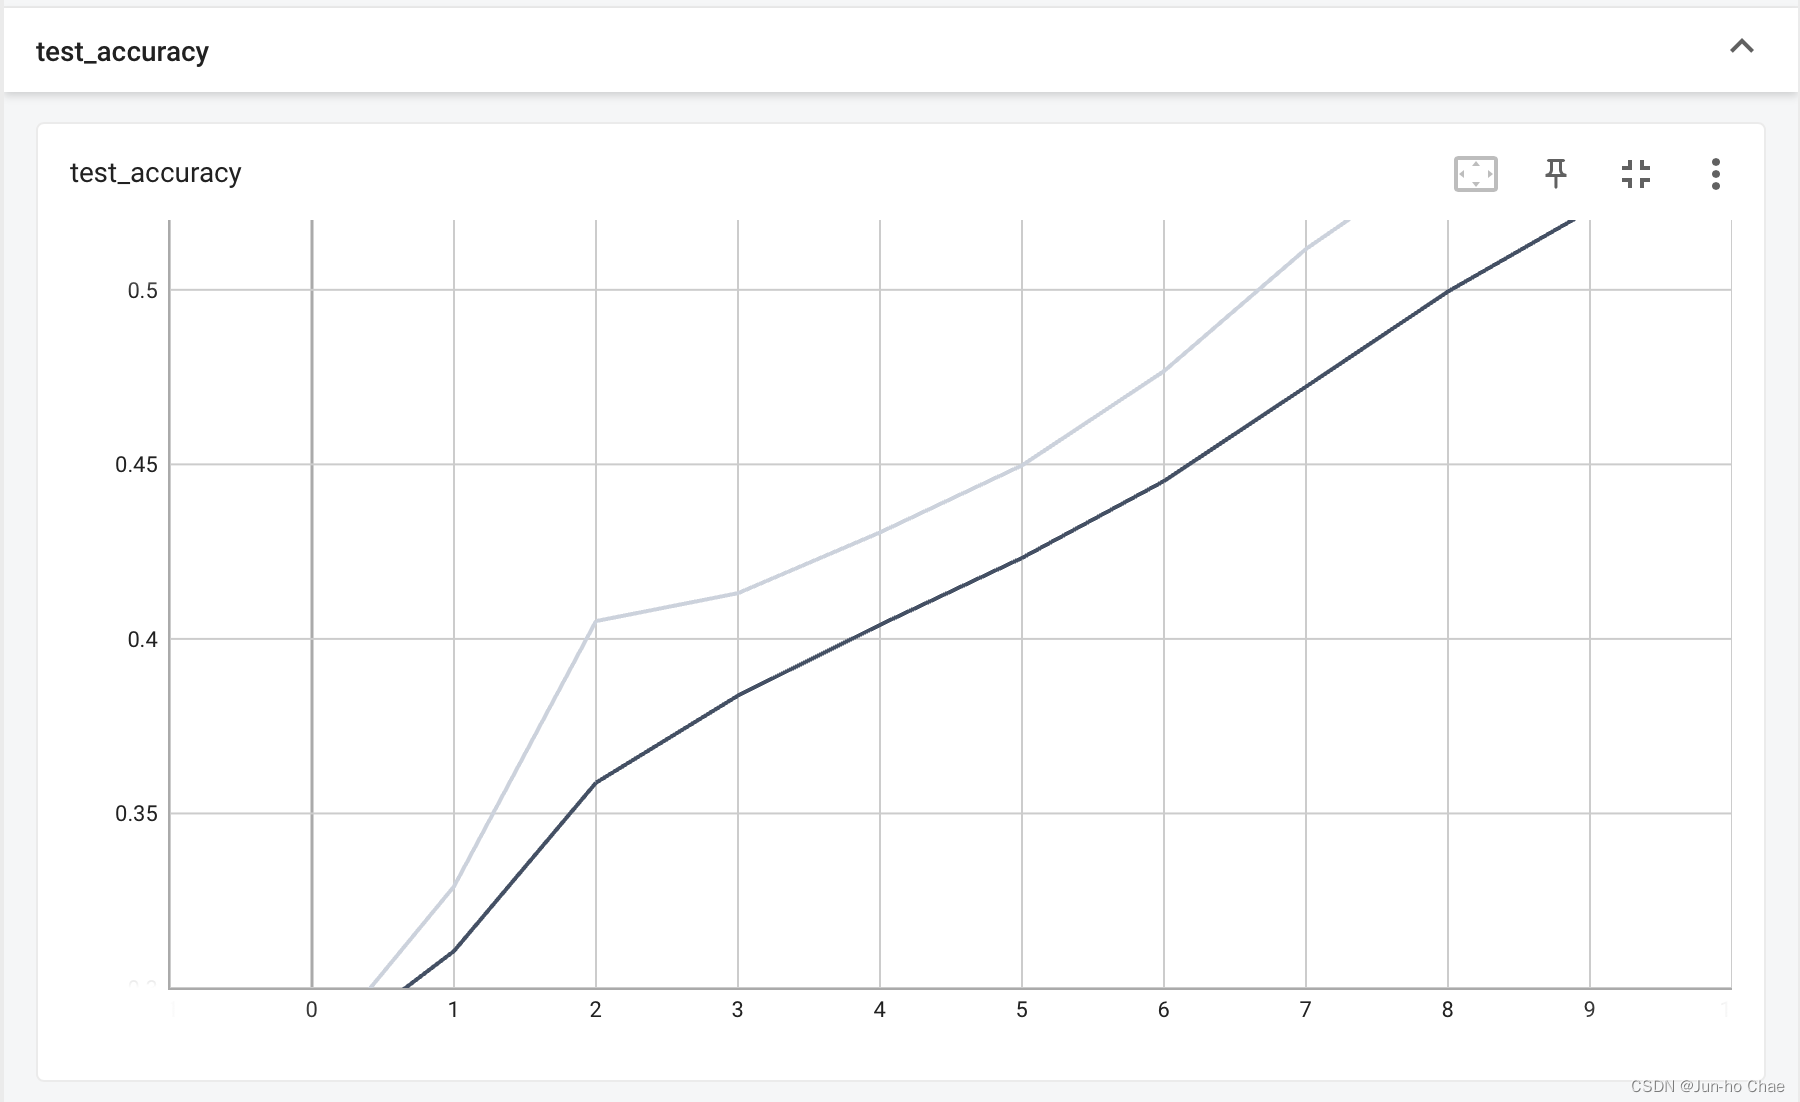
writer.add_scalar("test_accuracy", total_accuracy/testing_data_size, total_testing_step)
total_testing_step += 1
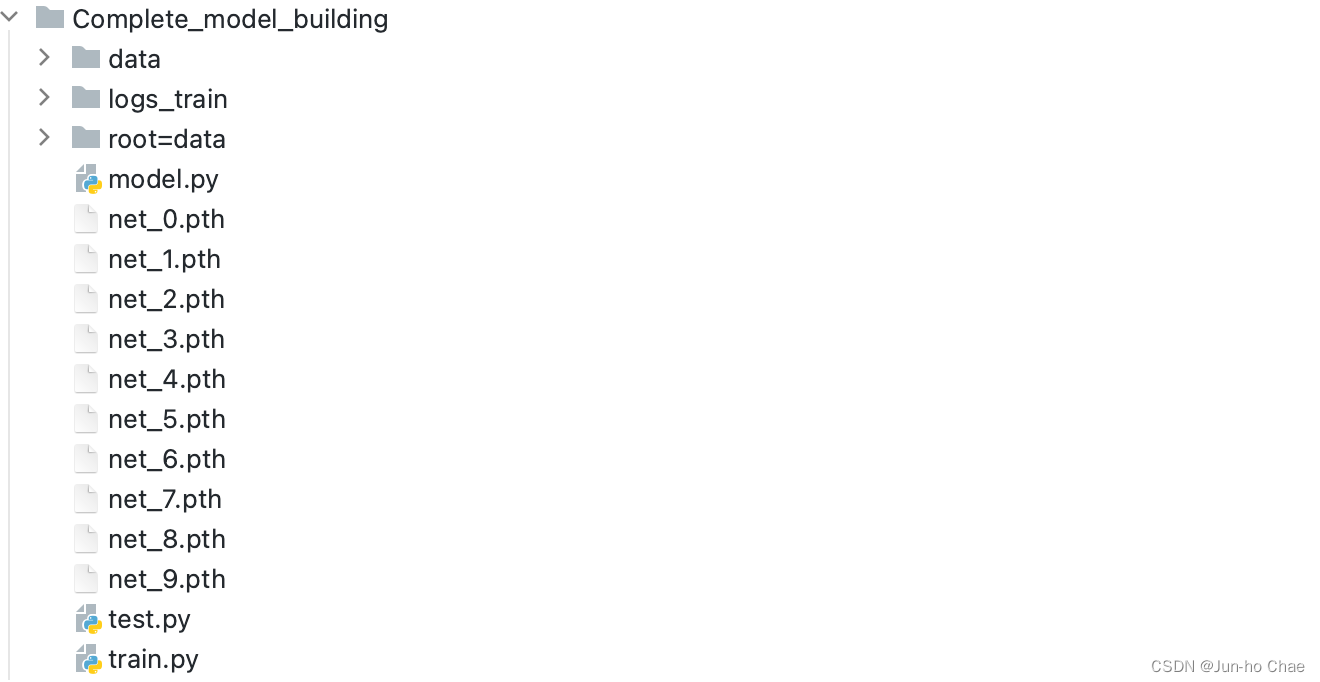
torch.save(net, f"net_{i}.pth")
# torch.save(net.state_dict(), f"net_{i}.pth")
print("模型已保存")
writer.close()
Here is the complete file path
Finally 🤩
Thank you for the current age of knowledge sharing and the people willing to share it, thank you! The knowledge on this blog is what I’ve learned on this site, thanks for the support! 😇


 被折叠的 条评论
为什么被折叠?
被折叠的 条评论
为什么被折叠?
 到【灌水乐园】发言


