


在上一篇笔记中:Vuex源码学习笔记(一)
我们从Github上找到了Vuex的源码,并clone了到本地,接着大致了解了每个文件夹的所存放的代码的作用,Vuex项目的架构也十分的整洁清晰,一目了然。最后我们使用npm run dev命令运行起了Vuex的项目。
今天我们将从npm run dev命令开始,来探究Vuex的开发的流程
注意:我们需要切换到4.0分支,本期主要分析Vuex4源码,也就是Vue3配套使用的Vuex。
首先我们可以从package.json文件看到:
"scripts": {
	"dev": "node examples/server.js",
	...
}
npm run dev命令实际就是使用node运行了examples文件夹下的server.js文件
我们先来看server.js文件:
const express = require('express')
const webpack = require('webpack')
const webpackDevMiddleware = require('webpack-dev-middleware')
const webpackHotMiddleware = require('webpack-hot-middleware')
const WebpackConfig = require('./webpack.config')

const app = express()
const compiler = webpack(WebpackConfig)

app.use(webpackDevMiddleware(compiler, {
  publicPath: '/__build__/', // 发布目录
  stats: {
    colors: true, // 是否以不同的颜色输出
    chunks: false // 是否添加关于chunk的信息。设置为false更少输出。
  }
}))

app.use(webpackHotMiddleware(compiler))

// Step1: 设置当前目录为静态目录
app.use(express.static(__dirname))

// Step2: 如果没有匹配到静态文件则跳转到首页
app.use((req, res, next) => {
  res.redirect('/')
})

const port = process.env.PORT || 8080
module.exports = app.listen(port, () => {
  console.log(`Server listening on http://localhost:${port}, Ctrl+C to stop`)
})
注意,此webpack使用的版本为4.x版本,现在最新的webpack为5.x版本。
webpack主要有三种开发模式,分别为:
- webpack的watch模式
- webpack-dev-server
- webpack-dev-middleware
这个server.js文件使用的就是webpack的webpack-dev-middleware开发模式。
然后使用express启动一个本地服务器,访问http://localhost:8080,将会打开根目录的examples文件夹下的index.html文件,打开http://localhost:8080/composition/counter,将会打开composition/counter下的index.html文件。
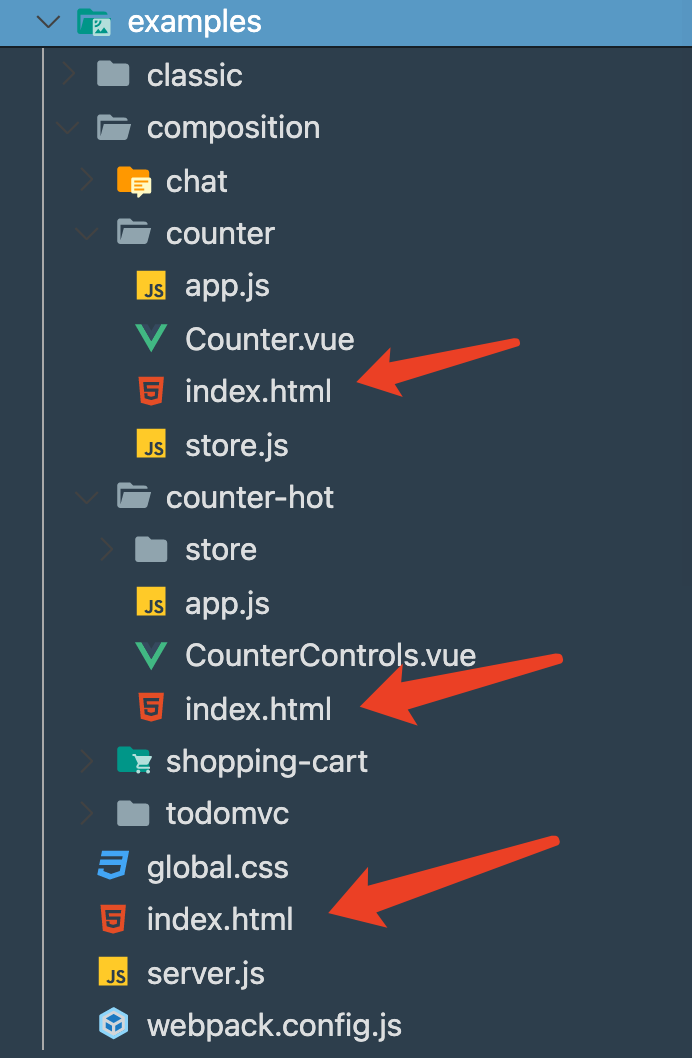
然后我们打开composition/counter下的index.html文件可以看到:
<!DOCTYPE html>
<html lang="en">
  <head>
    <meta charset="utf-8">
    <title>vuex counter example</title>
    <link rel="stylesheet" href="/global.css">
  </head>
  <body>
    <div id="app"></div>
    <script src="/__build__/shared.js"></script>
    <script src="/__build__/composition/counter.js"></script>
  </body>
</html>
下面script引入的两个的JS文件,我们发现项目中并没有/__build__/文件夹,因为它是webpack帮我我们编译出来的。
下面我们要来看下webpack的配置文件webpack.config.js:
const fs = require('fs')
const path = require('path')
const webpack = require('webpack')
const { VueLoaderPlugin } = require('vue-loader')

// Step1:用来构建多个入口文件,因为examples文件下有多个例子
// 输出的数据格式如下:
/**{
  'classic/chat': [
    'webpack-hot-middleware/client',
    '/vuex/examples/classic/chat/app.js'
  ],
  'classic/counter': [
    'webpack-hot-middleware/client',
    '/vuex/examples/classic/counter/app.js'
  ],
  ...
}}**/
function buildEntry (dirname) {
  const lookupDir = path.join(__dirname, dirname)

  return fs.readdirSync(lookupDir).reduce((entries, dir) => {
    const fullDir = path.join(lookupDir, dir)
    const entry = path.join(fullDir, 'app.js')
    if (fs.statSync(fullDir).isDirectory() && fs.existsSync(entry)) {
      entries[`${dirname}/${dir}`] = ['webpack-hot-middleware/client', entry]
    }

    return entries
  }, {})
}

module.exports = {
  mode: 'development',

  entry: {
    ...buildEntry('classic'),
    ...buildEntry('composition')
  },

  output: {
    path: path.join(__dirname, '__build__'),
    filename: '[name].js',
    chunkFilename: '[id].chunk.js',
    publicPath: '/__build__/'
  },

  module: {
    rules: [
      { test: /\.js$/, exclude: /node_modules/, use: ['babel-loader'] },
      { test: /\.vue$/, use: ['vue-loader'] },
      { test: /\.css$/, use: ['vue-style-loader', 'css-loader'] }
    ]
  },

  resolve: {
    alias: {
      // Step2: 创建了一个vuex的别名,实际会引入../src/index.js文件
      vuex: path.resolve(__dirname, '../src/index.js')
    }
  },

  optimization: {
    splitChunks: {
      cacheGroups: {
        vendors: {
          name: 'shared',
          filename: 'shared.js',
          chunks: 'initial'
        }
      }
    }
  },

  plugins: [
    new VueLoaderPlugin(),
    new webpack.HotModuleReplacementPlugin(),
    new webpack.NoEmitOnErrorsPlugin(),
    new webpack.DefinePlugin({
      __DEV__: JSON.stringify(true),
      'process.env': {
        NODE_ENV: JSON.stringify(process.env.NODE_ENV)
      }
    })
  ]
}
上面的webpack配置文件没什么太多可讲的东西,大家去查查文档就可以了解。主要有两个点:
- Step1,这里构造了多个入口文件的配置,因为examples文件夹下有classic和composition两个文件夹,两个文件夹下又分别有多个例子,所以要给每个例子配置一个入口。
- Step2,创建了一个vuex的别名,实际会引入
../src/index.js文件,这样在项目中引入的import 'vuex’时,就会找到src下的index.js文件。
下面我们来看第一个例子:http://localhost:8080/composition/counter/
主要看三个文件app.js、store.js、Counter.vue。
app.js,非常基础的Vue3的写法,使用use函数来注入vuex的store。
import { createApp } from 'vue'
import Counter from './Counter.vue'
import store from './store'

const app = createApp(Counter)

app.use(store)

app.mount('#app')
store.js
import { createStore } from 'vuex'

// root state object.
// each Vuex instance is just a single state tree.
const state = {
  count: 0
}

// mutations are operations that actually mutate the state.
// each mutation handler gets the entire state tree as the
// first argument, followed by additional payload arguments.
// mutations must be synchronous and can be recorded by plugins
// for debugging purposes.
const mutations = {
  increment (state) {
    state.count++
  },
  decrement (state) {
    state.count--
  }
}

// actions are functions that cause side effects and can involve
// asynchronous operations.
const actions = {
  increment: ({ commit }) => commit('increment'),
  decrement: ({ commit }) => commit('decrement'),
  incrementIfOdd ({ commit, state }) {
    if ((state.count + 1) % 2 === 0) {
      commit('increment')
    }
  },
  incrementAsync ({ commit }) {
    return new Promise((resolve, reject) => {
      setTimeout(() => {
        commit('increment')
        resolve()
      }, 1000)
    })
  }
}

// getters are functions.
const getters = {
  evenOrOdd: state => state.count % 2 === 0 ? 'even' : 'odd'
}

// A Vuex instance is created by combining the state, mutations, actions,
// and getters.
export default createStore({
  state,
  getters,
  actions,
  mutations
})
通过引入Vuex中的createStore函数,来创建全局的state状态,getters、mutations和actions。
Counter.vue
<template>
  <div id="app">
    Clicked: {{ count }} times, count is {{ evenOrOdd }}.
    <button @click="increment">+</button>
    <button @click="decrement">-</button>
    <button @click="incrementIfOdd">Increment if odd</button>
    <button @click="incrementAsync">Increment async</button>
  </div>
</template>

<script>
import { computed } from 'vue'
import { useStore } from 'vuex'

export default {
  setup () {
    const store = useStore()

    return {
      count: computed(() => store.state.count),
      evenOrOdd: computed(() => store.getters.evenOrOdd),
      increment: () => store.dispatch('increment'),
      decrement: () => store.dispatch('decrement'),
      incrementIfOdd: () => store.dispatch('incrementIfOdd'),
      incrementAsync: () => store.dispatch('incrementAsync')
    }
  }
}
</script>
最后,在页面中使用Vuex,首先引入useStore函数,获取store对象,然后将state放入computed函数中,然后通过dispatch函数来操作state的变更。
走到这里,我们还没有去查看Vuex的源代码,接下来我们就去看一看Vuex的代码究竟长什么样
上面我们第一个使用到Vuex是这句代码
import { createStore } from 'vuex'
通过上面的webpack我们知道vuex对应的就是src/index.js文件。
打开src/index.js文件:
import { Store, createStore } from './store'
import { storeKey, useStore } from './injectKey'
import { mapState, mapMutations, mapGetters, mapActions, createNamespacedHelpers } from './helpers'
import { createLogger } from './plugins/logger'

export default {
  version: '__VERSION__',
  Store,
  storeKey,
  createStore,
  useStore,
  mapState,
  mapMutations,
  mapGetters,
  mapActions,
  createNamespacedHelpers,
  createLogger
}

export {
  Store,
  storeKey,
  createStore,
  useStore,
  mapState,
  mapMutations,
  mapGetters,
  mapActions,
  createNamespacedHelpers,
  createLogger
}
index.js文件主要用来集中的导出一些方法。
可以看到我们上面用到的createStore方法在./store.js文件中
打开store.js
//...
export function createStore (options) {
  return new Store(options)
}
//...
可以看到createStore函数返回一个Store类的一个实例。
我们可以通过debug的方式一步步的查看代码的走向
//...
export function createStore (options) {
	debugger // 添加断点
  return new Store(options)
}
//...
然后我们需要修改下webpack.config.js文件
module.exports = {
  mode: 'development',

  // 新增source-map
  devtool: 'source-map',
  //...
}
通过添加source-map,我们可以在浏览器的断点调试中,查看到代码的原貌,而不是编译后的代码。
然后我们打开浏览器,并打开控制台,然后刷新页面。

可以发现,成功的进入到了断点,我们可以一步一步的向下分析。
明天我们接着正式进入Vuex的源码,今天到到这里。
一起学习更多前端知识,微信搜索【小帅的编程笔记】,每天更新


 5939
5939


 被折叠的 条评论
为什么被折叠?
被折叠的 条评论
为什么被折叠?
 到【灌水乐园】发言


