一.基础环境

centos7.4

docker v20.10.24

二.php镜像dockerfile编写并构建

1.将需要COPY或ADD到镜像的文件放到/root/Dockerfile/php目录

wget -O /etc/yum.repos.d/CentOS-Base.repo https://mirrors.aliyun.com/repo/Centos-7.repo
mkdir -p /root/Dockerfile/php
cd /root/Dockerfile/php
cp /etc/yum.repos.d/CentOS-Base.repo .
cp php.ini /root/Dockerfile/php
  • 1.
  • 2.
  • 3.
  • 4.
  • 5.

php.ini的下载地址 https://cloud.189.cn/t/zIzIZjNrAZBn (访问码:bo0x)

2.编写php的dockerfile

vim /root/Dockerfile/php/Dockerfile
FROM centos:7
MAINTAINER alibaby007
RUN gzip /etc/yum.repos.d/CentOS-*
COPY CentOS-Base.repo /etc/yum.repos.d/
RUN yum install -y wget gcc gcc-c++ make gd-devel libxml2-devel libcurl-devel libjpeg-devel libpng-devel openssl-devel
ENV PHP_DOWNLOAD_URL=https://www.php.net/distributions/php-5.6.31.tar.gz
RUN wget -P /tmp $PHP_DOWNLOAD_URL
WORKDIR /tmp
RUN tar xf php-5.6.31.tar.gz
RUN cd /tmp/php-5.6.31 && \
    ./configure --prefix=/usr/local/php \
    --with-config-file-path=/usr/local/php/etc \
    --with-mysql --with-mysqli \
    --with-openssl --with-zlib --with-curl --with-gd \
    --with-jpeg-dir --with-png-dir --with-iconv \
    --enable-fpm --enable-zip --enable-mbstring && \
    make -j 4 && \
    make install && \
    cp /usr/local/php/etc/php-fpm.conf.default /usr/local/php/etc/php-fpm.conf && \
    sed -i "s/127.0.0.1/0.0.0.0/" /usr/local/php/etc/php-fpm.conf && \
    sed -i "21a \daemonize = no" /usr/local/php/etc/php-fpm.conf
COPY php.ini /usr/local/php/etc
RUN rm -rf /tmp/php-5.6.31* && yum clean all
WORKDIR /usr/local/php
EXPOSE 9000
CMD ["./sbin/php-fpm", "-c", "/usr/local/php/etc/php-fpm.conf"]
  • 1.
  • 2.
  • 3.
  • 4.
  • 5.
  • 6.
  • 7.
  • 8.
  • 9.
  • 10.
  • 11.
  • 12.
  • 13.
  • 14.
  • 15.
  • 16.
  • 17.
  • 18.
  • 19.
  • 20.
  • 21.
  • 22.
  • 23.
  • 24.
  • 25.
  • 26.
  • 27.

3.构建php镜像

cd /root/Dockerfile/php
docker build -t php:v5.6 .
  • 1.
  • 2.

4.运行php容器

#创建自定义网络类型和本地存储目录
docker  network create lnmp
mkdir -p /app/wwwroot
#运行php容器
docker run -itd \
--name lnmp_php \
--net lnmp \
--mount type=bind,src=/app/wwwroot/,dst=/usr/local/nginx/html \
php:v5.6
  • 1.
  • 2.
  • 3.
  • 4.
  • 5.
  • 6.
  • 7.
  • 8.
  • 9.

三.nginx镜像dockerfile编写并构建

1.将需要COPY或ADD到镜像的文件放到/root/Dockerfile/nginx目录

mkdir -p /root/Dockerfile/nginx
cd /root/Dockerfile/nginx
cp /etc/yum.repos.d/CentOS-Base.repo .
cp nginx.conf /root/Dockerfile/nginx
  • 1.
  • 2.
  • 3.
  • 4.

nginx.conf的下载地址 https://cloud.189.cn/t/7NnMF3BNBbIv (访问码:md5w),nginx.conf的内容如下

cat nginx.conf
pid        logs/nginx.pid;
events {
    use epoll;
}
http {
    include       mime.types;
    default_type  application/octet-stream;
    log_format  main '$remote_addr - $remote_user [$time_local] "$request" '
                      '$status $body_bytes_sent "$http_referer" '
                      '"$http_user_agent" "$http_x_forwarded_for"';
    access_log logs/access.log main;
    sendfile        on;
    keepalive_timeout  65;
    server {
        listen 80;
        server_name localhost;
        root html;
        index index.html index.php;
        location ~ \.php$ {
            root html;
            fastcgi_pass lnmp_php:9000;
            fastcgi_param SCRIPT_FILENAME $document_root$fastcgi_script_name;
            include fastcgi_params;
        }
    }
}
  • 1.
  • 2.
  • 3.
  • 4.
  • 5.
  • 6.
  • 7.
  • 8.
  • 9.
  • 10.
  • 11.
  • 12.
  • 13.
  • 14.
  • 15.
  • 16.
  • 17.
  • 18.
  • 19.
  • 20.
  • 21.
  • 22.
  • 23.
  • 24.
  • 25.
  • 26.
  • 27.

2.编写nginx的dockerfile

vim /root/Dockerfile/nginx/Dockerfile
FROM centos:7
MAINTAINER alibaby007
RUN gzip /etc/yum.repos.d/CentOS-*
COPY CentOS-Base.repo /etc/yum.repos.d/
RUN yum install -y wget gcc gcc-c++ make openssl-devel pcre-devel
ENV NGINX_DOWNLOAD_URL=https://nginx.org/download/nginx-1.14.2.tar.gz
RUN wget -P /tmp $NGINX_DOWNLOAD_URL
WORKDIR /tmp
RUN tar xf nginx-1.14.2.tar.gz
RUN cd /tmp/nginx-1.14.2 && \
    ./configure --prefix=/usr/local/nginx && \
    make -j 4 && \
    make install
RUN rm -rf /tmp/nginx-1.14.2* && yum clean all
COPY nginx.conf /usr/local/nginx/conf
WORKDIR /usr/local/nginx
EXPOSE 80
CMD ["./sbin/nginx", "-g", "daemon off;"]
  • 1.
  • 2.
  • 3.
  • 4.
  • 5.
  • 6.
  • 7.
  • 8.
  • 9.
  • 10.
  • 11.
  • 12.
  • 13.
  • 14.
  • 15.
  • 16.
  • 17.
  • 18.
  • 19.

3.构建nginx镜像

cd /root/Dockerfile/nginx
docker build -t nginx:v1.14 .
  • 1.
  • 2.

4.运行nginx容器

#运行nginx容器
docker run -itd \
--name lnmp_nginx \
--net lnmp \
-p 8880:80 \
--mount type=bind,src=/app/wwwroot/,dst=/usr/local/nginx/html \
nginx:v1.14
  • 1.
  • 2.
  • 3.
  • 4.
  • 5.
  • 6.
  • 7.

5.测试

#或添加规则
iptables -I INPUT -p tcp -s 0.0.0.0/0 --dport 8880 -j ACCEPT
  • 1.
  • 2.
cd /app/wwwroot
echo "<?php phpinfo();?>" >index.php
#浏览器输入http://ip:8880/index.php
  • 1.
  • 2.
  • 3.

四.运行mysql容器,没用dockerfile

#运行mysql容器
docker run -itd \
--name lnmp_mysql \
--net lnmp \
-p 3306:3306 \
--mount src=mysql-vol,dst=/var/lib/mysql \
-e MYSQL_ROOT_PASSWORD=123456 \
mysql:5.7 \
--character-set-server=utf8 \
--collation-server=utf8_general_ci
#创建wp数据库
docker exec lnmp_mysql sh -c 'exec mysql -uroot -p"$MYSQL_ROOT_PASSWORD" -e "create database wp"'
  • 1.
  • 2.
  • 3.
  • 4.
  • 5.
  • 6.
  • 7.
  • 8.
  • 9.
  • 10.
  • 11.
  • 12.

五.wordpress下载安装

1.下载

#下载
wget -P /app/wwwroot https://wordpress.org/wordpress-5.0.22.tar.gz
#解压到/app/wwwroot目录
tar xf wordpress-5.0.22.tar.gz
  • 1.
  • 2.
  • 3.
  • 4.

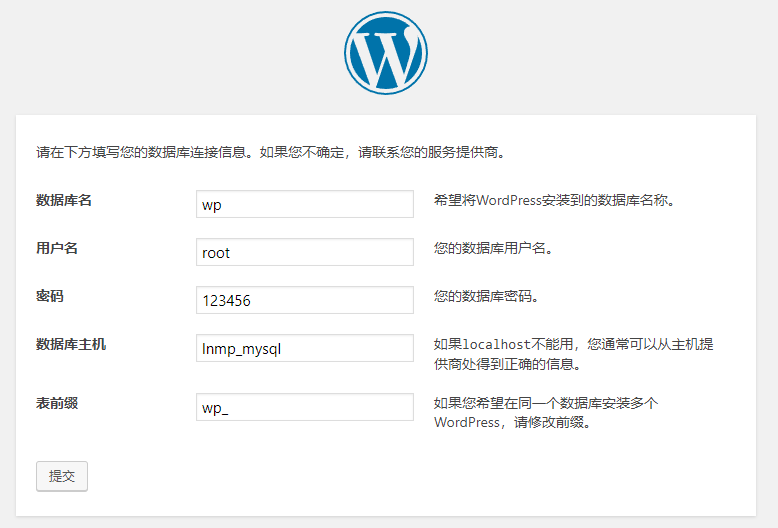
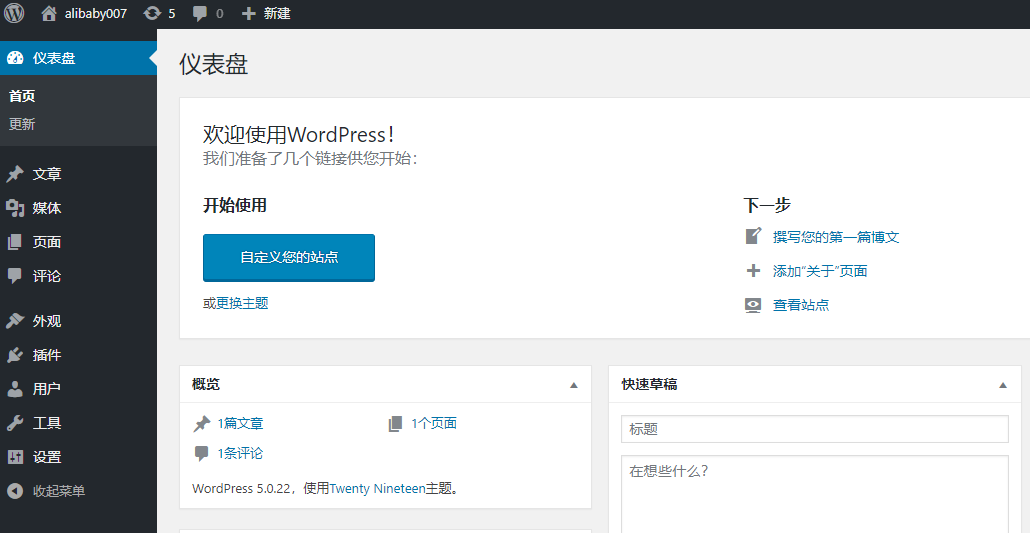
2.安装wordpress  浏览器输入http://ip:8880/wordpress/

dockerfile构建镜像搭建lnmp环境_docker

dockerfile构建镜像搭建lnmp环境_dockerfile_02

六.排错

1.访问http://ip:8880/index.php,只能下载index.php,没有解析出phpinfo的内容,

dockerfile构建镜像搭建lnmp环境_docker_03

制作dockfile时没有复制到镜像,需要加入。

COPY nginx.conf /usr/local/nginx/conf
  • 1.

2.php容器还未运行,先运行nginx容器,出现如下报错

查看nginx日志报错host not found in upstream "lnmp_php" in /usr/local/nginx/conf/nginx.conf:34

[root@doker nginx]# docker logs -f --tail 100 cc2
nginx: [emerg] host not found in upstream "lnmp_php" in /usr/local/nginx/conf/nginx.conf:34
  • 1.
  • 2.

解决,运行php容器后,重新启动nginx容器

docker restart lnmp_nginx
  • 1.

3.其他可能会用到命令

#查看自定义网络类型
docker network ls
#创建自定义网络类型
docker network create lnmp
#删除自定义网络类型
docker network create lnmp

#查看逻辑卷
docker volume ls
#创建自定义逻辑卷
docker volume create mysql-vol
#删除自定义逻辑卷
docker volume rm mysql-vol
  • 1.
  • 2.
  • 3.
  • 4.
  • 5.
  • 6.
  • 7.
  • 8.
  • 9.
  • 10.
  • 11.
  • 12.
  • 13.