


页面定义如下:
<html>
<body>
<form action="spring/cpf.do">
	<input type="text" name="username">
	<input type="text" name="password">
	<input type="submit" value="submit">
</form>
</body>
</html>
1.通过HttpServletRequest
@Controller
@RequestMapping("/spring")
public class HelloWorldController
{
	//表示对应的路径是/cpf.do
	@RequestMapping(value="/cpf.do")
	public String say(HttpServletRequest request, HttpServletResponse response)
	{
		String name = request.getParameter("username");
		String password = request.getParameter("password");
		System.out.println(name);
		System.out.println(password);

		return "cpf";
	}
}2.通过和参数名相同的入参
@RequestMapping(value="/cpf.do")
public String say( String username,
String password, Model model)
{
<span style="white-space:pre">	</span>System.out.println(name);
	System.out.println(password);

	return "cpf";
}
3.通过别名,并指定默认值
@RequestMapping(value="/cpf.do")
public String say(@RequestParam(value="username",defaultValue="tom") String name,
@RequestParam(value="password",defaultValue="123")String password, Model model)
{
<span style="white-space:pre">	</span>System.out.println(name);
	System.out.println(password);
	model.addAttribute("hello", name);

	return "cpf";
}
4.通过对象( 最常用 )
页面定义如下:
<html>
<body>
<h2>${hello}</h2>
<form action="cpf.do">
	<input type="text" name="username"><br/>
	<input type="text" name="password"><br/>
	<input type="checkbox" name="hobby" value="dota"> dota
	<input type="checkbox" name="hobby" value="travel"> travle<br/>
	<input type="submit" value="submit">
</form>
</body>
</html>
定义对应的对象:
public class User {
	private String username;
	private String password;
	private String[] hobby;
	public String getUsername() {
		return username;
	}
	public void setUsername(String username) {
		this.username = username;
	}
	public String getPassword() {
		return password;
	}
	public void setPassword(String password) {
		this.password = password;
	}
	public String[] getHobby() {
		return hobby;
	}
	public void setHobby(String[] hobby) {
		this.hobby = hobby;
	}
}
@Controller
public class HelloWorldController
{
@RequestMapping(value="/cpf.do")
public String say(User user)
{
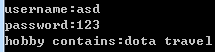
System.out.println("username:"+user.getUsername());
System.out.println("password:"+user.getPassword());
System.out.print("hobby contains:");
for (String s : user.getHobby()) {
System.out.print(s+" ");
}
return "cpf";
}
}
注意:复选框使用String[]来存储所有的值
5.参数类型转换
有时我们需要进行类型转换。如页面需要传入生日,但是传入的是字符串形式,而我们的Controller需要接收Date类型的数据,这个时候,就可以使用类型转化器了
@Controller
public class HelloWorldController
{
	@InitBinder
	public void initBinder(ServletRequestDataBinder bin)
	{
		SimpleDateFormat sdf = new SimpleDateFormat("yyyy-MM-dd HH:mm:ss");
		CustomDateEditor dateEditor = new CustomDateEditor(sdf, true);

		bin.registerCustomEditor(Date.class, dateEditor);
	}

	@RequestMapping(value="/cpf.do")
	public String say(Date birthday)
	{
		System.out.println("birthday:"+birthday);

		return "cpf";
	}
}<html>
<body>
<h2>${hello}</h2>
<form action="cpf.do">
<input type="text" name="birthday"><br/>
<input type="submit" value="submit">
</form>
</body>
</html>
结果为:


 1万+
1万+


 被折叠的 条评论
为什么被折叠?
被折叠的 条评论
为什么被折叠?
 到【灌水乐园】发言


