


Real-ESRGAN-x4plus 是一种图像超分辨率模型,旨在将低分辨率图像放大四倍,同时保持高质量和细节。该模型基于 ESRGAN 架构,通过生成对抗网络(GAN)技术,有效去除图像噪声并恢复细微细节,使得放大的图像更加清晰和自然。Real-ESRGAN-x4plus 特别适用于老照片修复、图像增强、高分辨率图像生成等应用场景,并且经过优化,可以在 Qualcomm设备上高效运行,充分利用硬件加速器(如 CPU、GPU 和 HTP)。
原始模型下载后大多数情况下不能直接使用,因此需要QNN SDK中的库及工具将其转换方可使用。本文主要介绍 Real-ESRGAN-x4plus模型的快捷使用方法,Webui使用方式以及模型转换等多种使用方法。
前置条件
- 高通 Windows on Snapdragon
- Linux设备或VMware ubuntu虚拟机
- 各平台账号,包括:Github、高通 Software Center
操作方法及步骤
1. 快捷使用Real-ESRGAN-x4plus
- 执行前准备
确保在设备中已经搭建好对应的Python及QNN环境,具体方法请参考:AI-Engine-Direct-Helper 快速上手及环境配置
- 打开powershell终端,在Python虚拟环境中执行以下命令:
python real_esrgan_x4plus\real_esrgan_x4plus.py
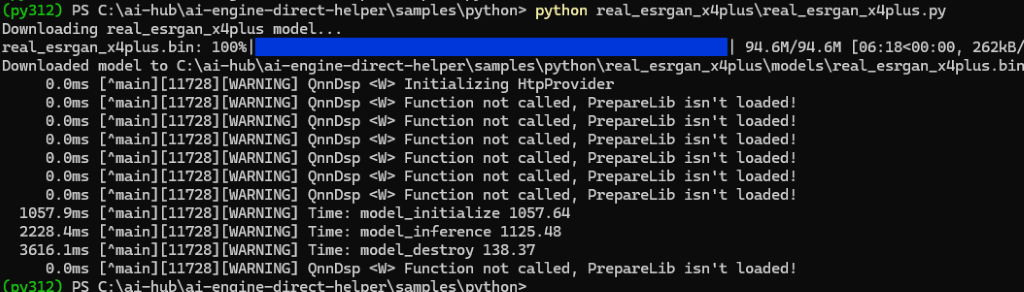
- 运行结果
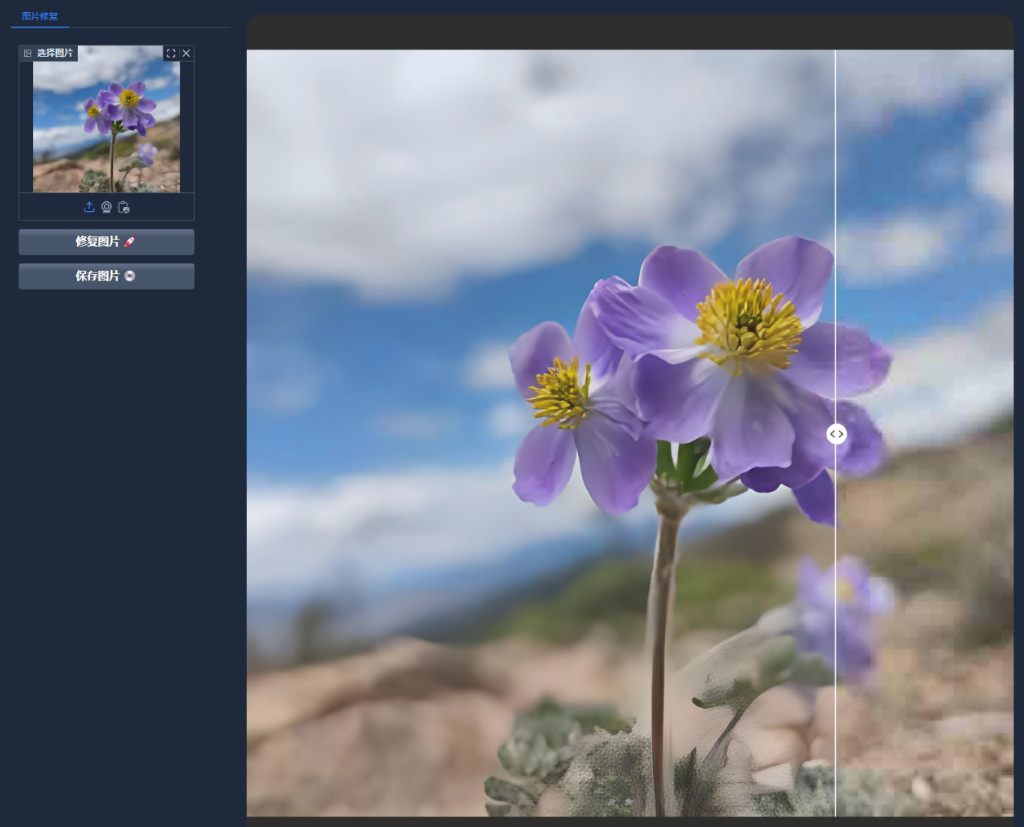
2. Webui方式
- 同样确保在设备中已经配置好对应的Python及QNN环境
- 打开powershell终端,在Python虚拟环境中执行以下命令,安装gradio包:
pip install gradio
- 进入到ai-engine-direct-helper\samples\webui目录下:
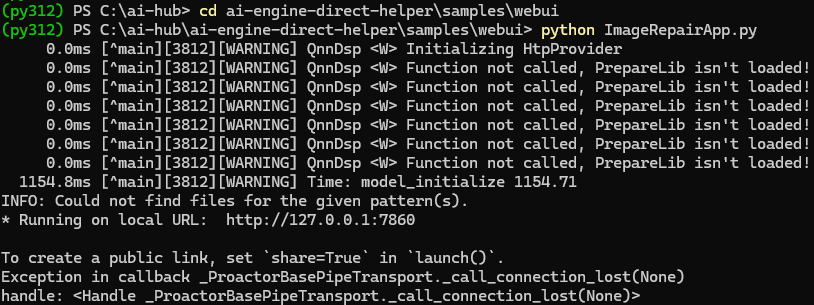
cd ai-engine-direct-helper\samples\webui
- 运行以下命令来启动web应用程序:
python ImageRepairApp.py
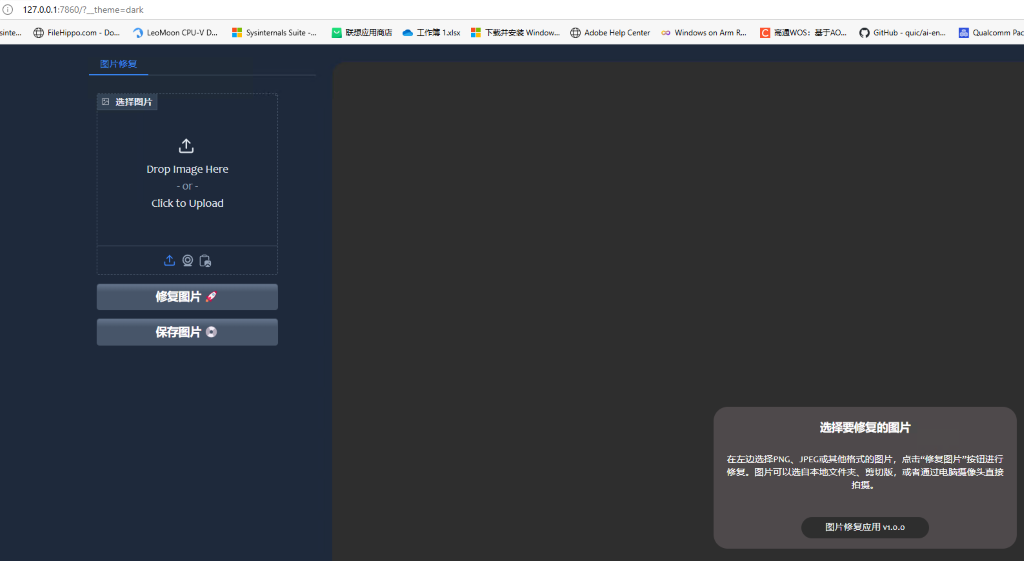
- 选择图片进行修复
选择需要修复的图片,点击修复图片按钮后,可以拖动滑块来查看修复前后的对比效果;
点击保存图片可以将修复好的图片保存到本地。
3. 原始模型的转换和使用
-
模型下载
模型下载链接:https://huggingface.co/qualcomm/Real-ESRGAN-x4plus
-
QNN模型转换
1)环境准备
打开linux 终端:
Python
配置好环境变量、虚拟环境以及所需要的依赖库,本文linux中使用的是python 3.10
QNN SDK
安装并配置QNN环境
按照QNN SDK对应版本的说明文档进行配置,本文以2.28.0版本为例:
/opt/qcom/aistack/qairt/2.28.0.241029/docs/QNN/index.html,具体地址以个人配置为准
2)模型尺寸修改
本文使用的是onnx格式的模型,因此在配置QNN环境时需要安装好onnx库及其依赖项。
由于量化的 real_esrgan_x4plus QNN 模型的输入分辨率为 128x128,输入分辨率太小,因此我们需要将模型尺寸修改成512x512。打开linux 终端,可以通过以下代码实现:
import onnx
from onnx import helper
from onnxsim import simplify
# 加载模型
model = onnx.load("real_esrgan_x4plus.onnx")
# 修改输入尺寸为动态尺寸
input_tensor = model.graph.input[0]
input_tensor.type.tensor_type.shape.dim[2].dim_param = 'height'
input_tensor.type.tensor_type.shape.dim[3].dim_param = 'width'
# 保存修改后的模型
onnx.save(model, "real_esrgan_x4plus.onnx")
# 简化模型并指定新的输入尺寸
model_simp, check = simplify(model, overwrite_input_shapes={'image': [1, 3, 512, 512]})
# 检查简化是否成功
assert check, "Simplified ONNX model could not be validated"
# 保存简化后的模型
onnx.save(model_simp, "real_esrgan_x4plus.onnx")
3)转换模型(onnx -> qnn)
使用qnn-onnx-converter工具可以将onnx格式的模型转换成qnn格式,得到real_esrgan_x4plus.bin、real_esrgan_x4plus.cpp、real_esrgan_x4plus_net.json三个文件,打开linux 终端,执行命令如下:
qnn-onnx-converter --input_network real_esrgan_x4plus.onnx --output_path real_esrgan_x4plus.cpp


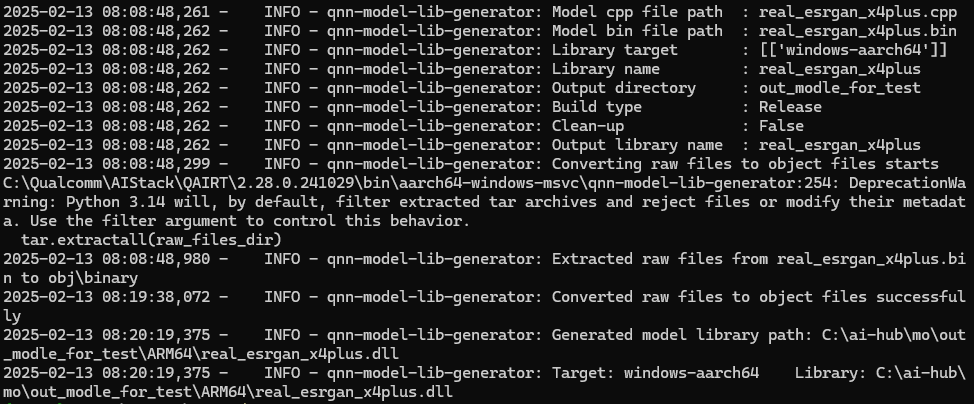
4)编译模型
打开WOS设备,将上面生成的三个文件拷贝到WOS设备中,并同样配置好python及QNN环境(详细步骤请参考AI-Engine-Direct-Helper 快速上手及环境配置)。本文使用的是ARM64架构的WOS设备,因此在使用QNN工具时均选择ARM64工具包。在准备好的QNN目录中找到:
“C:\Qualcomm\AIStack\QAIRT\2.28.0.241029\lib\aarch64-windows-msvc”
“C:\Qualcomm\AIStack\QAIRT\2.28.0.241029\lib\hexagon-v73\unsigned”
“C:\Qualcomm\AIStack\QAIRT\2.28.0.241029\bin\aarch64-windows-msvc”
将三个目录下的所有文件和real_esrgan_x4plus.bin、real_esrgan_x4plus.cpp、real_esrgan_x4plus_net.json三个文件放在同一目录下。打开powershell终端,并执行以下命令对模型进行编译:
python qnn-model-lib-generator -c real_esrgan_x4plus.cpp -b real_esrgan_x4plus.bin -o ".\out_modle_for_test" -t windows-aarch64
![]()
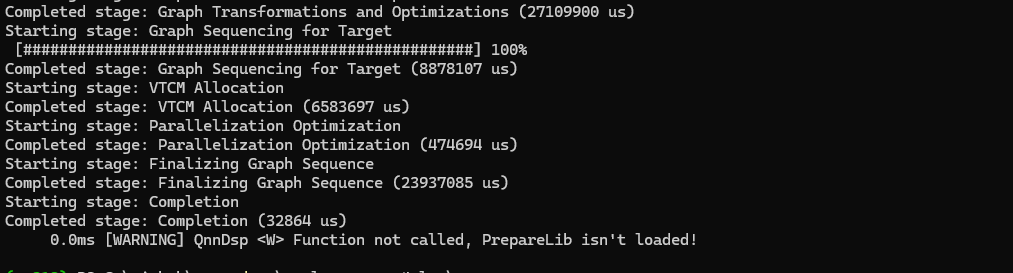
5) 生成 QNN上下文二进制文件
得到生成的dll文件后,执行以下命令将模型转换成上下文二进制文件:
./qnn-context-binary-generator.exe --model real_esrgan_x4plus.dll --backend QnnHtp.dll --binary_file real_esrgan_x4plus

最终生成的模型文件在output目录下:
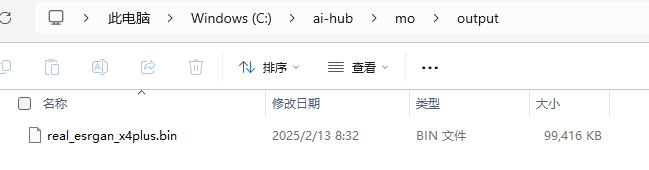
-
模型运行
1)配置运行库
分别创建models、qai_libs两个目录。models目录用来存放模型;而qai_libs目录用来存放QNN运行库文件。
将模型放到models中;并且在QNN目录中找到”C:\Qualcomm\AIStack\QAIRT\2.28.0.241029\lib\aarch64-windows-msvc“、”C:\Qualcomm\AIStack\QAIRT\2.28.0.241029\lib\hexagon-v73\unsigned“,将文件放到qai_libs中。
2)准备数据图像
在real_esrgan_x4plus中找到input.jpg文件并下载到本地,拷贝到工作路径下。
3)创建运行脚本
real_esrgan_x4plus中的脚本是完整运行流程的代码,是包括了下载模型的步骤,下载的模型不需要处理即可直接使用。而我们本地想要运行自己转换的模型,还需要对脚本做一些改动,可在工作路径下创建新的python脚本,并通过以下代码实现:
import sys

import os

sys.path.append(".")

sys.path.append("..")

import cv2

import numpy as np

import torch

from torchvision.transforms import ToTensor, ToPILImage

import torchvision.transforms as transforms

from PIL import Image

from PIL.Image import fromarray as ImageFromArray

from qai_appbuilder import (QNNContext, Runtime, LogLevel, ProfilingLevel, PerfProfile, QNNConfig)


MODEL_NAME = "real_esrgan_x4plus"

IMAGE_SIZE = 512

execution_ws = os.getcwd()

qnn_dir = execution_ws + "\\qai_libs"

model_dir = execution_ws + "\\models"

madel_path = model_dir + "\\" + MODEL_NAME + ".bin"

image_buffer = None

realesrgan = None


def preprocess_PIL_image(image: Image) -> torch.Tensor:

    image = ToTensor()(image).unsqueeze(0)

    image = image.permute(0, 2, 3, 1)

    return image


def torch_tensor_to_PIL_image(data: torch.Tensor) -> Image:

    image = data.squeeze(0).clamp(0, 1)

    image = ToPILImage()(image)

    return image


class RealESRGan(QNNContext):

    def Inference(self, input_data):

        input_datas = [input_data]

        output_data = super().Inference(input_datas)[0]

        return output_data


def Init():

    global realesrgan

    QNNConfig.Config(qnn_dir, Runtime.HTP, LogLevel.WARN, ProfilingLevel.BASIC)

    realesrgan = RealESRGan("realesrgan", madel_path)


def Inference(input_image_path, output_image_path):

    global image_buffer

    image = Image.open(input_image_path)

    image = preprocess_PIL_image(image).numpy()

    PerfProfile.SetPerfProfileGlobal(PerfProfile.BURST)  # Burst the HTP.

    output_image = realesrgan.Inference([image])  # Run the inference.

    PerfProfile.RelPerfProfileGlobal()  # Reset the HTP.

    output_image = torch.from_numpy(output_image)

    output_image = output_image.reshape(1, 3, IMAGE_SIZE*4, IMAGE_SIZE*4)  # Ensure correct shape

    output_image = torch_tensor_to_PIL_image(output_image)

    output_image.save(output_image_path)

    output_image.show()


def Release():

    global realesrgan

    del(realesrgan)


Init()

Inference(execution_ws + "\\input.jpg", execution_ws + "\\output.jpg")

Release()
4)运行与结果
以上准备工作完成后可以得到的目录结构如下:
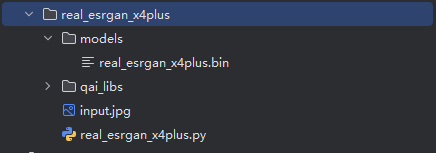
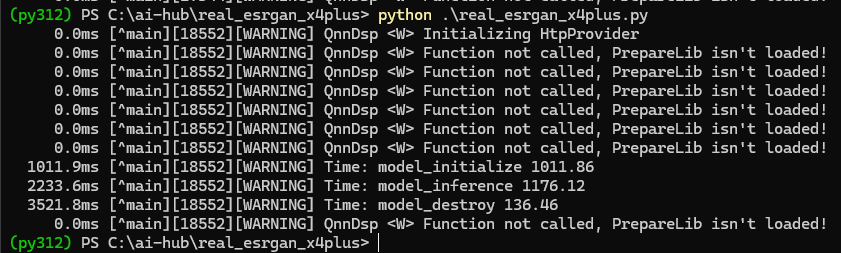
打开powershell终端,在配置好的python虚拟环境中运行脚本real_esrgan_x4plus.py并得到结果:
python .\real_esrgan_x4plus.py
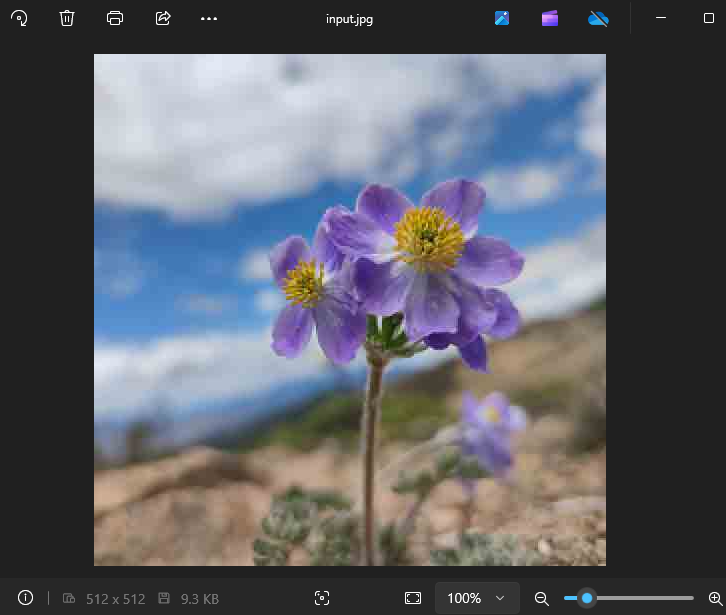
原始图像:
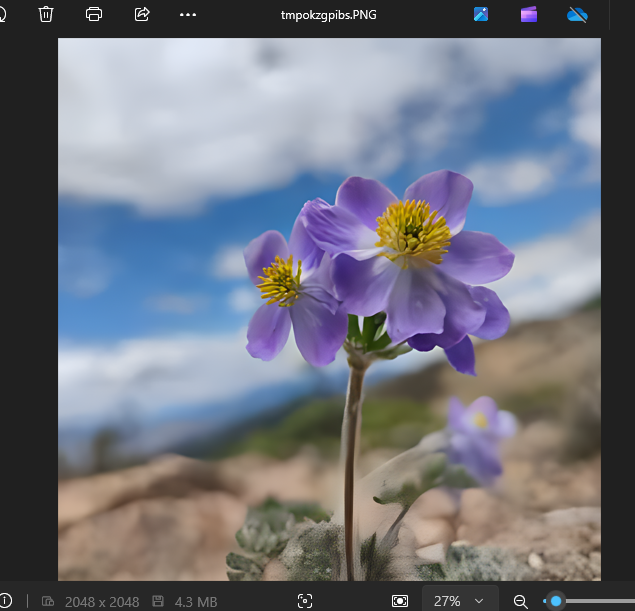
处理后的图像:
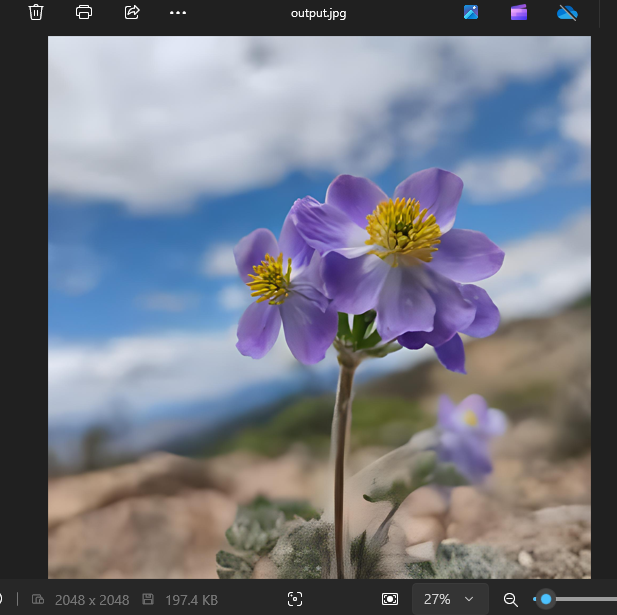
经过模型处理后的图像从512x512变成了2048x2048的分辨率,且变得非常清晰。
作者:
赵世朝(Shizhao Zhao),高通工程师


 1087
1087

 被折叠的 条评论
为什么被折叠?
被折叠的 条评论
为什么被折叠?
 到【灌水乐园】发言


