


一、前提条件
JDK1.7+
Hadoop 2.5.0+Zookeeper 3.4.5+
下面介绍一下Zookeeper的安装:
(1)到Zookeeper官网下载Zookeeper最新安装包,
下载地址:http://mirrors.shu.edu.cn/apache/zookeeper/zookeeper-3.4.11/zookeeper-3.4.11.tar.gz
(2)下载完成后使用命令 tar -zxvf zookeeper-3.4.11.tar.gz进行解压
(3)然后切换到其conf目录下

使用vim zoo.cfg新建一个配置文件。内容如下:
# The number of milliseconds of each tick
tickTime=2000
# The number of ticks that the initial
# synchronization phase can take
initLimit=10
# The number of ticks that can pass between
# sending a request and getting an acknowledgement
syncLimit=5
# the directory where the snapshot is stored.
# do not use /tmp for storage, /tmp here is just
# example sakes.
dataDir=/home/chenjie/zookeeper-3.4.11/tmp
# the port at which the clients will connect
clientPort=2181
# the maximum number of client connections.
# increase this if you need to handle more clients
#maxClientCnxns=60
#
# Be sure to read the maintenance section of the
# administrator guide before turning on autopurge.
#
# http://zookeeper.apache.org/doc/current/zookeeperAdmin.html#sc_maintenance
#
# The number of snapshots to retain in dataDir
#autopurge.snapRetainCount=3
# Purge task interval in hours
# Set to "0" to disable auto purge feature
#autopurge.purgeInterval=1
server.1=pc2:2888:3888
server.2=pc3:2888:3888
server.3=pc4:2888:3888
其中的主要配置项有
dataDir=/home/chenjie/zookeeper-3.4.11/tmpserver.1=pc2:2888:3888
server.2=pc3:2888:3888
server.3=pc4:2888:3888dataDir是指定zookeeper的数据目录,在此我设置在了zookeeper根目录下的tmp目录下(此目录不存在,需要使用mkdir tmp创建)
类似于
server.1=pc2:2888:3888是配置zookeeper的节点,有多少个节点就配置多少个server,依次为server.1、server.2。。。pc2、pc3、pc4为各节点的主机名。
(4)配置完成后,切换到刚才配置的dataDir下,在此目录下新建一个myid文件(使用命令 vim myid)
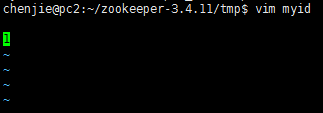
进入vim后按i进入编辑模式,输入当前节点的编号(server.1的编号为1,依次类推),按esc推出编辑模式,输入shift + : 然后输入wq回车保存退出。
(5)使用命令scp -r zookeeper-3.4.11 chenjie@pc3:/home/chenjie将刚才配置好的zookeeper发送到另外两个节点上。
【然后修改另外两台节点上的dataDir/myid中的id为它们各自的id】
(6)切换到bin目录下,使用命令启动zookeeper

如果出现启动不了的情况,记得关闭防火墙
因为防火墙没有关闭。关闭防火墙:
#查看防火墙状态
sudo service iptables status
#关闭防火墙
sudo service iptables stop
#查看防火墙开机启动状态
sudo chkconfig iptables --list
#关闭防火墙开机启动
sudo chkconfig iptables off
二、安装HBase
(1)下载HBase安装包并解压
https://mirrors.tuna.tsinghua.edu.cn/apache/hbase/1.2.6/hbase-1.2.6-bin.tar.gz
tar -zxvf hbase-1.2.6-bin.tar.gz
(2)进入该目录下的conf目录

向hbase-env.sh中添加:
export JAVA_HOME=/usr/lib/jvm/java-8-oracle
export HBASE_MANAGES_ZK=false
修改hbase-site.xml为
<configuration>
        <property>
    <name>hbase.zookeeper.quorum</name>
    <value>pc2,pc3,pc4</value>
    <description>The directory shared by RegionServers.
    </description>
  </property>

  <property>
    <name>hbase.rootdir</name>
    <value>hdfs://pc2:9000/hbase</value>
    <description>The directory shared by RegionServers.
    </description>
  </property>
  <property>
    <name>hbase.cluster.distributed</name>
    <value>true</value>
    <description>The mode the cluster will be in. Possible values are
      false: standalone and pseudo-distributed setups with managed Zookeeper
      true: fully-distributed with unmanaged Zookeeper Quorum (see hbase-env.sh)
    </description>
  </property>
    <property>
<name>hbase.master.info.port</name>
<value>60010</value>
</property>
</configuration>
其中,
hbase.zookeeper.quorum为zookeeper的节点主机名hbase.rootdir为hbase的存储根目录,设为hadoopHDFS根目录下的hbase修改regionservers为(regionserver为从结点)
pc3
pc4
使用scp -r hbase-1.2.6 chenjie@pc3:/home/chenjie
scp -r hbase-1.2.6 chenjie@pc4:/home/chenjie
将pc2上配置好的hbase发送到pc3、pc4上
(3)切换到bin目录下使用./start-hbase.sh启动hbase
(4)使用hbase shell进入hbase的命令行窗口
使用命令create 'test1', {NAME=>'cf',VERSIONS=>3,COMPRESSION=>'gz'}创建一张表
分别执行
put 'test1','rowkey1','cf:q1','r1-v1'
put 'test1','rowkey1','cf:q2','r1-v2'
put 'test1','rowkey2','cf:q1','r2-v1'
put 'test1','rowkey2','cf:q2','r2-v2'
put 'test1','rowkey2','cf:q3','r2-v3'
插入四条记录
使用命令scan 'test1'查看表数据
(5)登录master的web管理界面
http://192.168.1.112:60010


 1万+
1万+


 被折叠的 条评论
为什么被折叠?
被折叠的 条评论
为什么被折叠?
 到【灌水乐园】发言


