


sass入门

This is the updated version of an article originally published on March 1, 2013. Changes include: updated information, fixed broken links, code syntax highlighting, added featured image.
这是最初于2013年3月1日发布的文章的更新版本。更改包括:更新的信息,固定的断开链接,代码语法突出显示,添加的特色图片。
As websites and pages have become more complex, CSS quickly buckles under the weight. It’s still a thousand times better than tables for layout but it could present some limitations for those working with it.
随着网站和页面变得越来越复杂,CSS很快就崩溃了。 它仍然比表格的布局好一千倍,但是对于使用它的人可能会带来一些限制。
This is where CSS preprocessors come in. They add a new layer of awesome on top of a syntax we already know and love. There are many CSS preprocessors out there, but I’m going to focus on the one that captured my heart: Sass.
这就是CSS预处理程序进入的地方。它们在我们已经知道和喜欢的语法之上添加了一层很棒的新功能。 有很多CSS预处理器,但我将重点关注吸引我的心的一个: Sass 。
You’re going to learn about the difference between Sass indented syntax and .scss syntax, the range of tools you can choose from to work with Sass, fundamental language features and syntax, and some great Sass extensions that will make styling webpages quicker and fun.
您将学习Sass缩进语法和.scss语法之间的区别,可以选择与Sass一起使用的工具范围,基本的语言功能和语法,以及一些出色的Sass扩展名,这些扩展名将使网页样式设计更快,更有趣。 。
Sass:快速定义 (Sass: A Quick Definition)
Sass is a a CSS preprocessor. This is a piece of software that adds a nifty new feature-set to CSS like variables, nesting and mixins. You write in a slightly modified CSS-like syntax which is then processed into plain-ol’-CSS. This processing can either happen on your development environment as you’re coding or as a part of your deployment process.
Sass是一个CSS预处理器。 这是一款向CSS添加了漂亮的新功能集的软件,例如变量,嵌套和混合。 您使用稍微修改过的类似CSS的语法编写代码,然后将其处理为plain-ol'-CSS。 此过程既可以在编写代码时在开发环境中进行,也可以在部署过程中进行。
My prefered method — as I’m not a server nerd and get scared by deployment scripts — is to have my preprocessing done right in my development workflow. (More on this later.)
我更喜欢的方法(因为我不是服务器狂人,并且对部署脚本感到害怕)是在开发工作流中正确完成预处理。 (稍后对此有更多介绍。)
为什么萨斯 (Why Sass)
This is the big question, and there is no single answer. For me, Sass provides the right tools, syntax and extensions. Sass has a huge community behind it and is constantly growing and evolving. There are loads of excellent add-ons and extensions which make Sass even better. Sass also gives you two writing style options.
这是个大问题,没有一个答案。 对我来说,Sass提供了正确的工具,语法和扩展。 Sass背后有一个庞大的社区,并且正在不断发展和发展。 有许多出色的附加组件和扩展程序,这些使Sass变得更好。 Sass还为您提供了两种写作风格选择。
Sass缩进语法 (Sass Indented Syntax)
This is like the crazy, wise uncle of CSS: quirky, kinda funny looking, but ultimately quite smart. This syntax looks nothing like CSS — its goal is brevity. Instead of brackets and semicolons, it uses the indentation of lines to specify blocks. Where you’d use a semicolon to separate statements, it uses new lines.
这就像是CSS的疯狂明智的叔叔:古怪,有点滑稽的样子,但最终还是很聪明的。 这种语法看起来不像CSS,其目标是简洁。 代替括号和分号,它使用行的缩进来指定块。 在要用分号分隔语句的地方,它使用换行符。
#main
  color: blue
  font-size: 0.3em

  a
    font:
      weight: bold
      family: serif
    &:hover
      background-color: #eee
.scss (.scss)
.scss is essentially a subset of the CSS3 syntax. This means that every valid CSS3 stylesheet is valid.scss as well.
.scss本质上是CSS3语法的子集。 这意味着每个有效CSS3样式表也都是有效的.scss 。
#main {
  color: blue;
  font-size: 0.3em;

  a {
    font: {
      weight: bold;
      family: serif;
    }
    &:hover {
      background-color: #eee;
    }
  }
}
This is my preferred syntax and what I’ll be using to show examples throughout this article. So without further ado, let’s get cracking.
这是我的首选语法,在本文中我将使用它来显示示例。 因此,事不宜迟,让我们开始吧。
Sass工作流程和工具 (Sass Workflow and Tools)
Sass工作流程 (Sass Workflow)
There is a slight shift in paradigm required to get into the Sass way. The main point being that you will never ever edit or commit your .css files. The only way to change the CSS is through the .scss files. Once you save your .scss file, the magic of the preprocessor will convert it to regular CSS. The moment you start editing your .css files is the moment the sky starts to fill with black holes…
进入Sass方式所需的范式略有变化。 要点是,您永远不会编辑或提交.css文件 。 更改CSS的唯一方法是通过.scss文件。 保存.scss文件后,预处理器的魔力将其转换为常规CSS。 开始编辑.css文件的时刻是天空开始充满黑洞的时刻…
There are two common ways to roll the preprocessor into your workflow. The first is to do it at build time. This will require some setup on your development and live environments using a parser for the programming language you choose. Rails 3.1 and up ships with Sass. If you use PHP, .NET or Java you’re in luck, as there are ports for those platforms. You could also roll it into a GRUNT/Gulp task or get Webpack to run the procressing on build.
有两种常见的方法可以将预处理器引入工作流程。 首先是在构建时进行。 这将需要使用您选择的编程语言的解析器在开发和实际环境中进行一些设置。 Rails 3.1及更高版本随Sass一起提供。 如果使用PHP,.NET或Java,那么运气不错,因为这些平台都有端口。 您也可以将其滚动到GRUNT / Gulp任务中,或者使 Webpack在构建时运行该procressing。
If none of this makes sense to you, don’t be afraid! The second option is much more beginner-friendly: use a simple GUI on your development machine and compile as you go. You will need one of the following tools.
如果这对您没有意义,请不要害怕! 第二个选项对初学者更友好:在开发计算机上使用简单的GUI并随身进行编译。 您将需要以下工具之一。
Sass工作流程的GUI(图形用户界面)工具 (GUI (Graphical User Interface) Tools for a Sass Workflow)
LiveReload (LiveReload)
This magical tool does a whole array of cool things, one of which is compiling Sass. LiveReload monitors changes in the file system. As soon as you save a file, it is preprocessed as needed, and the browser is refreshed. This is a great speedy kick to your web dev workflow
这个神奇的工具可以完成很多很酷的事情,其中之一就是编译Sass。 LiveReload监视文件系统中的更改。 保存文件后,将根据需要对其进行预处理,并刷新浏览器。 这是您Web开发工作流程的快速启动
代码包 (CodeKit)
This is a Mac-only app very similar to LiveReload and includes script minification, image compression and code hinting. This is the software I’ve opted for and love dearly
这是一个仅限Mac的应用程序,与LiveReload非常相似,并包括脚本缩小,图像压缩和代码提示。 这是我选择并深爱的软件
专业人士 (Prepros)
This is a cross-platform (Linux, Mac, and Windows) GUI tool for compiling Sass and other preprocessor languages. It’s really feature rich and at the time of writing it’s available for free unlimited trial.
这是用于编译Sass和其他预处理程序语言的跨平台(Linux,Mac和Windows)GUI工具。 它的功能确实很丰富,在撰写本文时可免费获得无限试用。
让我们开始编码Sass,已经! (Let’s Start Coding Sass, Already!)
Sass嵌套 (Sass Nesting)
This is probably the most fun but also the most dangerous part of Sass. Let’s consider the following two examples.
这可能是Sass最有趣但也是最危险的部分。 让我们考虑以下两个示例。
示例1 —良好的嵌套 (Example 1 — Good nesting)
#navbar {
  width: 80%;
  height: 23px;

  ul { list-style-type: none; }
  li {
    float: left;
    a { font-weight: bold; }
  }
}
示例2 –错误的嵌套 (Example 2 — Bad nesting)
div#main {
  #sidebar {
    #navbar {
      width: 80%;
      height: 23px;

      aside {
        div {
          ul {
            list-style-type: none;

            li {
              float: left;
              a {
                font-weight: bold;
              }
            }
          }
        }
      }
    }
  }
}
The reason Example 2 is bad is because the resulting CSS will have far too specific selectors:
示例2不好的原因是因为生成CSS将具有过于具体的选择器:
div#main #sidebar #navbar {}
div#main #sidebar #navbar aside div ul {}
div#main #sidebar #navbar aside div ul li {}
div#main #sidebar #navbar aside div ul li a {}
Let’s all agree that’s a nightmare.
我们都同意这是一场噩梦。
One of the guiding principles of modern CSS should be the principle of modular code, that is to say, bits of code that you can reuse without having to rely on the structure of your markup. For more information on this idea, look into OOCSS and SMACSS.
现代CSS的指导原则之一应该是模块化代码的原则,也就是说,无需依赖标记结构即可重用的代码段。 有关此想法的更多信息,请查看OOCSS和SMACSS 。
There’s a de facto rule called The Inception Rule that simply states you should never nest more than four selectors deep.
有一个事实上的规则,称为“初始规则” , 该规则简单地规定您不应嵌套超过四个选择器。
Sass变量 (Sass Variables)
$site_max_width: 960px;
$font_color: $333;
$link_color: $00c;
$font_family: Arial, sans-serif;
$font_size: 16px;
$line_height: percentage(20px / $font_size);

body {
  color: $font_color;
  font {
    size: $font_size;
    family: $font_family;
  }
  line-height: $line_height;
}

#main {
  width: 100%;
  max-width: $site_max_width;
}
We’re all familiar with variables and use them in our JavaScript, etc. This is the exact same idea, but with CSS. Now, when a client asks you to change that blue to a slightly more greeny-blue (with more pop), you can simply go to your variables and update that one instance. You can also use built-in Sass functions and operators as well as reference other variables in the declarations.
我们都熟悉变量,并在我们JavaScript等中使用它们。这是完全相同的想法,但使用CSS。 现在,当客户要求您将蓝色更改为更蓝绿色(弹出更多)时,您只需转到变量并更新一个实例即可。 您还可以使用内置的Sass函数和运算符,以及在声明中引用其他变量。
Sass函数和运算符 (Sass Functions and Operators)
Like any programming language, Sass comes with a suite of functions and standard operators. There are many functions that will help you deal with number, text and colors. And numbers (including those with units) have all the math operators you’ll ever need: +, -, *, / and %.
像任何编程语言一样,Sass带有一组功能和标准运算符。 有许多功能可以帮助您处理数字,文本和颜色。 数字(包括带单位的数字)具有您将需要的所有数学运算符: + , - , * , /和% 。
Have a look at the documentation to see the list of goodness available.
查看文档以查看可用的善良列表。
无礼的混蛋 (Sass Mixins)
Mixins are one of the most powerful parts of Sass and really allow you to get creative. A mixin is a collection of of re-usable styles, properties and selectors. You could think of a mixin as a macro or snippet for regular re-use.
Mixins是Sass最强大的部分之一,确实可以让您发挥创造力。 mixin是可重复使用的样式,属性和选择器的集合。 您可以将mixin视为可定期重用的宏或代码段。
A good example of a mixin is one that can handle those annoying vendor prefixes, like the one below:
mixin的一个很好的例子是可以处理那些令人讨厌的供应商前缀的mixin,如下所示:
@mixin box-shadow($shadow) {
  -webkit-box-shadow: $shadow;
     -moz-box-shadow: $shadow;
          box-shadow: $shadow;
}
Or for hiding text (often used with image replacement techniques):
或用于隐藏文本(通常与图像替换技术一起使用):
@mixin hide-text {
  font: 0/0 a;
  color: transparent;
  text-shadow: none;
  background-color: transparent;
  border: 0;
}
Needless to say, you’ll be spending a lot of time coming up with your own personal arsenal of mixins to use on all your projects.
不用说,您将花费大量的时间来准备自己的mixins个人库,以用于所有项目。
您的第一个Sass项目 (Your First Sass Project)
The beauty of using Sass is that you can make as many small .scss files as you see fit because they will all be combined into one master .css file during the preprocessing stage. Consider the following style.scss file:
使用Sass的好处在于,您可以根据需要制作尽可能多的小.scss文件,因为它们会在预处理阶段全部组合成一个主.css文件。 考虑以下style.scss文件:
@import "global/mixins";
@import "global/variables";
@import "global/normalize";

@import "content/links";
@import "content/lists";
@import "content/mediaObjects";
@import "content/panels";
@import "content/spacingOverrides";
@import "content/typography";
@import "content/textUtilities";

@import "layout/border";
@import "layout/grid";
@import "layout/scaffolding";

@import "navigation/breadcrumbs";
@import "navigation/master";
@import "navigation/leftnav";
@import "navigation/topnav";
@import "navigation/pagination";
@import "navigation/tabs";
@import "navigation/footer";

@import "forms/buttons";
@import "forms/forms";

@import "tables/tables";
@import "tables/forum";
Each of those @import statements includes a new .scss file. When naming these component .scss files, make sure you use an underscore (_) character at the start of the file name.
这些@import语句每个都包含一个新的.scss文件。 命名这些.scss组件文件时,请确保在文件名的开头使用下划线( _ )字符。
Example: _variables.scss, _normalize.scss. The Sass compiler will interpret these files as snippets and won’t actually preprocess them individually. Only the files you want the preprocessor to compile should be named without an underscore, e.g., style.scss, special-page-override.scss.
示例: _variables.scss , _normalize.scss 。 Sass编译器会将这些文件解释为片段,并且实际上不会单独对其进行预处理。 仅应命名要预处理器编译的文件,且不带下划线,例如, style.scss , special-page-override.scss.
When you import the snippet files into your main style file, there’s no need to include the underscore of the file extension because Sass knows you’re working with .scss files.
将摘要文件导入到主样式文件时,无需包含文件扩展名的下划线,因为Sass知道您正在使用.scss文件。
As you might have guessed, it makes total sense to organize your Sass files into folders for easy separation of logic and structure — you can get as complex as you need, but remember that everything you do will need to make some sort of sense six months down the line when you come back to modify stuff. Don’t make it more difficult for your future self (or a different developer).
您可能已经猜到了,将Sass文件组织到文件夹中以便于逻辑和结构的轻松分离是完全有意义的—您可以根据需要将其变得复杂,但是请记住,您所做的每一件事都需要六个月的意义当您回来修改东西时,请顺便下线。 不要为将来的自己(或其他开发人员)感到困难。
扩展无礼 (Extending Sass)
There are a number of excellent add-ons or frameworks built on top of Sass. But I’m going to talk about just one — the almighty Compass.
在Sass之上构建了许多出色的附加组件或框架。 但是,我只谈论其中一个-全能的指南针 。
罗盘 (Compass)
Working with Sass and Compass makes me smile. In actual fact, I’m smiling as I write about Compass and I’m hoping you will be too when you’re done with this article. Compass is a full-featured framework built on top of Sass that includes reusable patterns, sprite generation, typographic rhythms and all the CSS3 mixins you’ll ever need.
与Sass和Compass一起工作使我微笑。 实际上,我在撰写Compass时微笑着,希望您在完成本文时也能如愿。 Compass是在Sass之上构建的功能齐全的框架,其中包括可重复使用的模式,子画面生成,印刷节奏以及所有您需要CSS3 mixin。
The compiling software I mentioned above will all be able to deal with Compass, so getting started with Compass is a very simple process.
我上面提到的编译软件都将能够处理Compass,因此Compass入门非常简单。
Create a file in the root of your web project called config.rb. This file will tell Sass that you’ll be using Compass for your project. The code below is the very minimun you require to get Compass going:
在您的Web项目的根目录中创建一个名为config.rb 。 该文件将告诉Sass您将在项目中使用Compass。 下面的代码是使Compass运行所需的最低限度的代码:
http_path = "/"
css_dir = "css"
sass_dir = .scss"
images_dir = "images"
javascripts_dir = "js"
fonts_dir = "fonts"

output_style = :expanded
environment = :development
Check out this Gist for an example of config.rb file.
查看此要点以获取config.rb文件的示例。
The next step is to import Compass into your main style file. You can either import the entire Compass framework or parts of it as and when you need them:
下一步是将Compass导入到主样式文件中。 您可以在需要时导入整个Compass框架或其中的一部分:
@import "compass";

@import "global/mixins";
Or…
要么…
@import "compass/utilities";
@import "compass/css3";
@import "compass/typography/vertical_rhythm";

@import "global/mixins";
I could blow another 5,000 words waxing lyrical about Compass as there is so much to it, but instead I’m going to dig into one of its most powerful features …
关于Compass的更多信息,我可能还会再增加5,000个词来抒情,但我将继续挖掘其最强大的功能之一……
指南针的精灵生成 (Sprite Generation with Compass)
Sprites have quickly become the default standard for delivering images on the web using CSS. In short, you create one big image containing all the smaller images your page needs, thereby reducing HTTP server requests, which is good for website performance. If you’re unfamiliar with the concept, then I suggest you have a quick read about it.
Sprite已Swift成为使用CSS在网络上传递图像的默认标准。 简而言之,您将创建一个大图像,其中包含页面需要的所有较小图像,从而减少了HTTP服务器请求,这对网站性能很有帮助。 如果您不熟悉该概念,那么建议您快速阅读一下 。
Sprites are great for the web but they can very quickly become painful to maintain. I often find I have to update my sprites as a project progresses and this becomes a chore as you not only have to update your main sprite sheet but you also have to update your CSS (and potentially HTML, too).
Sprite非常适合网络使用,但是维护起来很快就会很痛苦。 我经常发现我必须随着项目的进行而更新我的Sprites,这变得很麻烦,因为您不仅必须更新主Sprite表,而且还必须更新CSS(也可能更新HTML)。
Over the years, there have been some great tools introduced to help make this process easier, but nothing has quite sat right with me. Until now.
多年来,已经引入了一些很棒的工具来帮助简化此过程,但我感到非常沮丧。 到现在。
The main idea here is that you should create single images as you would have in the olden days. The important thing is to keep your images organised into folders, as illustrated below.
这里的主要思想是您应该像以前那样创建单个图像。 重要的是将图像整理到文件夹中,如下图所示。
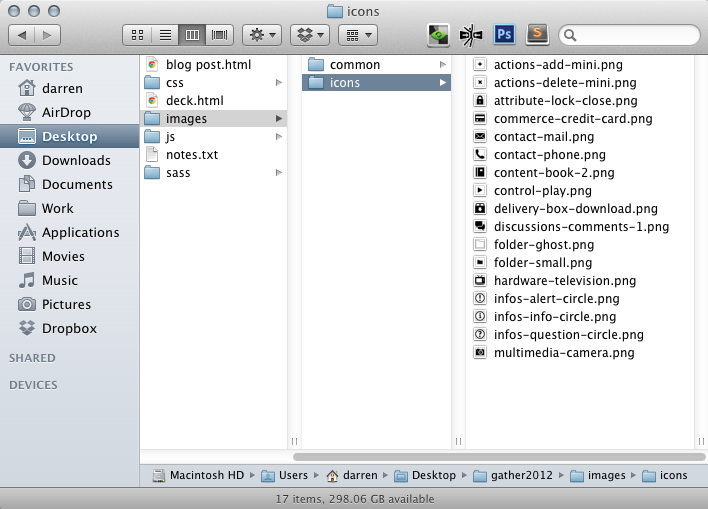
The next step is to include the required compass mixins and utils and import your images. In the following examples, I’ll be illustrating how this might work when using the images/icons folder:
下一步是包括所需的指南针mixins和utils并导入图像。 在以下示例中,我将说明在使用images/icons文件夹时这可能如何工作:
// include the compass spite utility if not already included
@import "compass/utilities/sprites";

// import your images
// note: compass already knows my images live in the /images/ folder
@import "icons/*png";

// automagically generate class names
@include all-icons-sprites;
I’ll walk you through what’s happening in the snippet above.
我将向您介绍以上代码段中的情况。
- The first import is importing the correct Compass sprite utils 第一次导入是导入正确的Compass sprite utils
- The next import is telling Compass where the images are that you’d like to use as a sprite 下一个导入是告诉Compass您要将图像用作精灵的位置
- The include line is where some magic occurs. This line will auto-generate a bunch of class names based on the name of the image folder and the name of the PNGs therein. 包含行是发生某些魔术的地方。 该行将基于图像文件夹的名称和其中的PNG的名称自动生成一堆类名称。
The generated CSS is below:
生成CSS如下:
.icons-actions-add-mini,
.icons-actions-delete-mini,
[...]
.icons-multimedia-camera {
  background: url('/images/icons-s34fe0604ab.png') no-repeat;
}

.icons-actions-add-mini {background-position: 0 0;}
.icons-actions-delete-mini {background-position: 0 -16px;}
[...]
.icons-multimedia-camera { background-position: 0 -96; }
Now, you could just walk away and happily use those generated classes wherever you wanted. Job done. Thanks, Compass!
现在,您可以走开并在任何需要的地方快乐地使用这些生成的类。 任务完成。 谢谢,指南针!
However, I often find I’ll need to add my own class names — based on nested elements, perhaps. No worries. Compass allows us to do this.
但是,我经常发现我需要添加自己的类名-也许基于嵌套元素。 别担心。 指南针允许我们执行此操作。
Note: With the following examples, the param passed into those icons-sprite-*() utils are the names of the .png files in your images/icons folder.
注意: 在以下示例中,传递到那些icons-sprite-*() utils中的参数是images/icons文件夹中.png文件的名称。
@import "icons/*.png";

.actions {
  .add    { @include icons-sprite(actions-add-mini); }
  .delete { @include icons-sprite(actions-delete-mini); }
}

.contact {
  .mail  { @include icons-sprite(contact-mail); }
  .phone { @include icons-sprite(contact-phone); }
}

.some-random-class-name { @include icons-sprite(hardware-television); }
For a detailed walk-through of building sprites with Compass, head over to George Martsoukos’s article here on SitePoint.
有关使用Compass构建精灵的详细演练 ,请转到SitePoint上George Martsoukos的文章 。
Compass lets you make quite a few other customizations. This next example is one I find myself using quite a bit:
指南针使您可以进行许多其他自定义。 下一个示例是我发现自己经常使用的一个示例:
// making use of width/height magic selectors
.icon-giant-killer-bear {
  $width: icons-sprite-width(giant-killer-bear);
  $height: icons-sprite-height(giant-killer-bear);
  @include icons-sprite(giant-killer-bear);
  @include size($width, $height);
  margin: 0 4px 0 0;
  vertical-align: text-bottom;
}
The above example illustrates how quick it is to get the image dimensions of a particular image from your sprite.
上面的示例说明了从Sprite获取特定图像的图像尺寸有多快。
I haven’t dug too deeply into all of the sprite utils, but check the Compass website for the full sprite documentation as I’m sure there are lots of other awesome things out there.
我还没有对所有Sprite utils进行过深入的研究,但请查看Compass网站以获取完整的Sprite文档,因为我敢肯定还有很多其他很棒的东西。
总结一下 (To Sum Up)
There is an exciting world of front-end code out there and this is just a very small part of it. Start using Sass now! It’s made my code writing more efficient and it’s made writing CSS a lot more enjoyable.
那里有令人兴奋的前端代码世界,这只是其中很小的一部分。 立即开始使用Sass! 这使我的代码编写效率更高,并使编写CSS更加有趣。
下一步 (Next Steps)


sass入门


 9439
9439


 被折叠的 条评论
为什么被折叠?
被折叠的 条评论
为什么被折叠?
 到【灌水乐园】发言


