


fa fa-user
This article was peer reviewed by Christopher Thomas. Thanks to all of SitePoint’s peer reviewers for making SitePoint content the best it can be!
本文由Christopher Thomas进行了同行评审。 感谢所有SitePoint的同行评审人员使SitePoint内容达到最佳状态!
While everyone is concerned about their application’s security, few take it seriously and take the plunge. The first thing you’ll notice when learning about this is that two factor authentication (2FA) is the go-to solution as a first step.
尽管每个人都在关注其应用程序的安全性,但很少有人认真对待它并付诸东流。 当您了解到这一点时,您会注意到的第一件事是第一步要采用的是两因素认证 (2FA)。
Although there have been some serious problems with using text messages as a second factor, it’s definitely safer than a plain username and password combination, given that many users tend to use popular and easy to guess passwords for critical services such as payments, chat, emails, etc. In this article, we’re going to build two factor authentication into a Laravel application using Twilio SMS as the second factor.
尽管使用文本消息作为第二个因素存在一些严重的问题,但是它绝对比普通的用户名和密码组合更安全,因为许多用户倾向于将流行且容易猜到的密码用于诸如付款,聊天,电子邮件等关键服务等等。在本文中,我们将使用Twilio SMS作为第二个因素在Laravel应用程序中构建两个因素的身份验证。

我们正在建设 (What We’re Building)
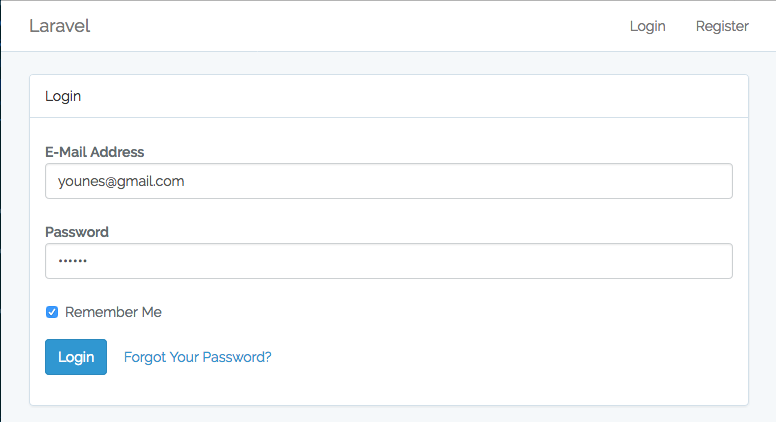
There’s a great chance that you’re already familiar with the 2FA flow:
您很有可能已经熟悉2FA流程:
User visits the login page.
用户访问登录页面。
He types in an email and a password.
他输入电子邮件和密码。
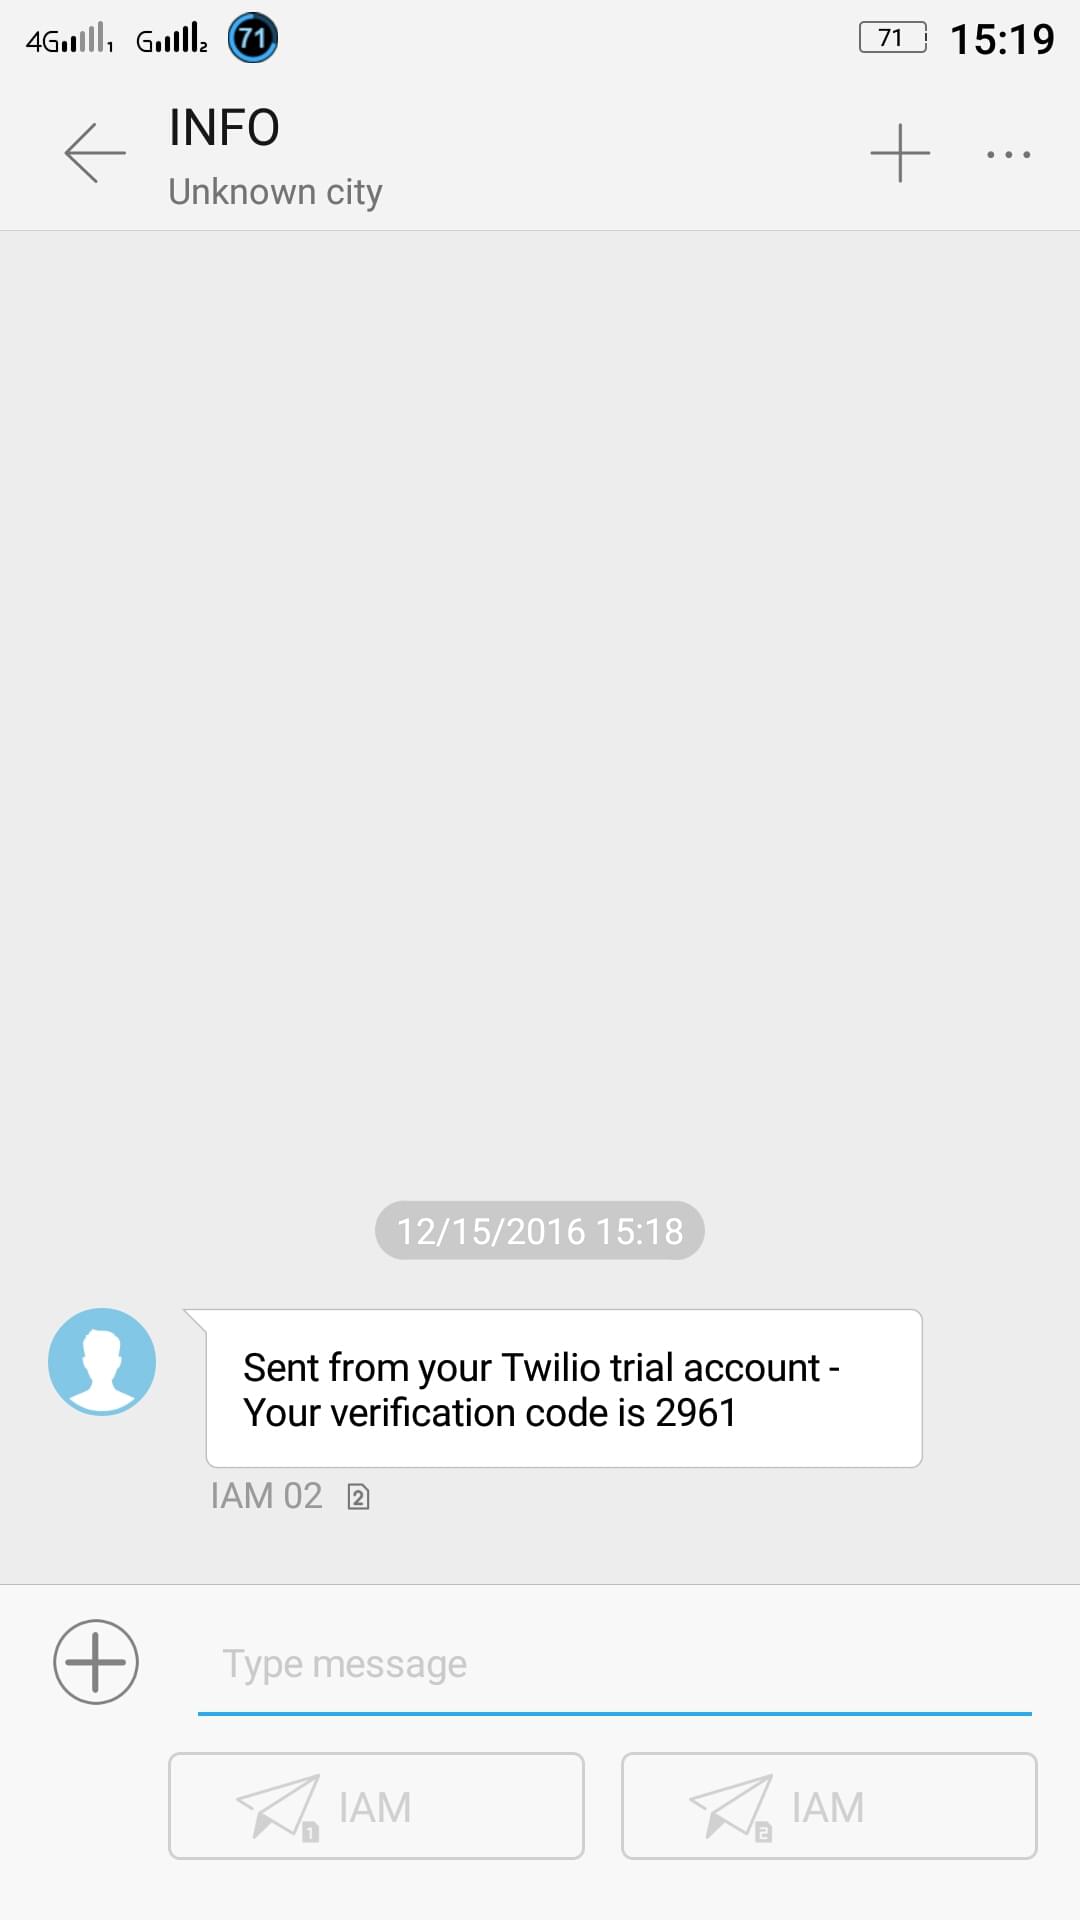
We send a verification code using the phone number.
我们使用电话号码发送验证码。
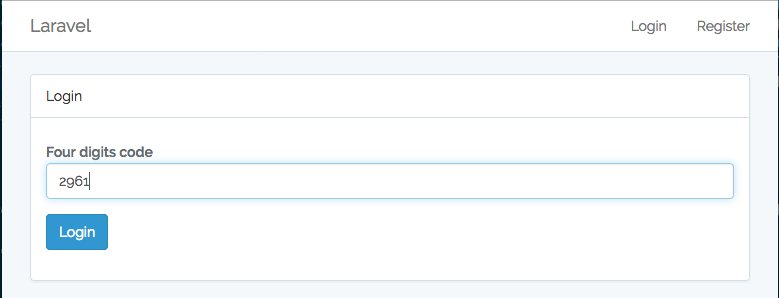
User must type in the received code.
用户必须输入收到的代码。
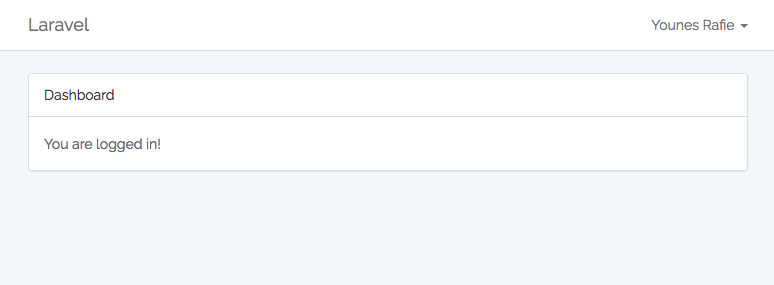
If the code is correct, we log them in. Otherwise, we give them another chance to try logging in.
如果代码正确,我们将其登录。否则,我们将为他们提供再次尝试登录的机会。
The final demo application is up on GitHub.
最终的演示应用程序位于GitHub上 。
安装 (Installation)
I assume you have your development environment already set up. If not, we recommend Homestead Improved for an easy start.
我假设您已经设置了开发环境。 如果没有,我们建议您进行Homestead Improvement,以便轻松上手。
Go ahead and create a new Laravel project using the Laravel installer or via Composer.
继续使用Laravel安装程序或通过Composer创建一个新的Laravel项目。
laravel new demoOr
要么
composer create-project --prefer-dist laravel/laravel demoEdit the .env file and add your database credentials.
编辑.env文件并添加数据库凭据。
DB_CONNECTION=mysql
DB_HOST=127.0.0.1
DB_PORT=3306
DB_DATABASE=homestead
DB_USERNAME=root
DB_PASSWORD=root
脚手架认证 (Scaffolding Authentication)
Before creating our migrations, keep in mind that Laravel has a command to help us scaffold our authentication flow. It generates the following:
在创建迁移之前,请记住,Laravel有一个命令可以帮助我们搭建身份验证流程。 它生成以下内容:
- Login, register and reset password views and controllers. 登录,注册和重置密码视图和控制器。
- The necessary routes. 必要的路线。
Go ahead and run php artisan make:auth from the command line.
继续并从命令行运行php artisan make:auth 。
创建迁移 (Creating Migrations)
Update the users migration class and add a country_code and phone fields.
更新users迁移类,并添加country_code和phone字段。
// database/migrations/2014_10_12_000000_create_users_table.php

class CreateUsersTable extends Migration
{
    /**
     * Run the migrations.
     *
     * @return void
     */
    public function up()
    {
        Schema::create('users', function (Blueprint $table) {
            $table->increments('id');
            $table->string('name');
            $table->string('email')->unique();
            $table->string('password');
            $table->string('country_code', 4)->nullable();
            $table->string('phone')->nullable();
            $table->rememberToken();
            $table->timestamps();
        });
    }

    /**
     * Reverse the migrations.
     *
     * @return void
     */
    public function down()
    {
        Schema::dropIfExists('users');
    }
}
Every user has a list of tokens (verification codes) that they generated. Run the php artisan make:model Token -m command to generate the model and migration file. The table schema will look like this:
每个用户都有他们生成的令牌(验证码)列表。 运行php artisan make:model Token -m命令以生成模型和迁移文件。 表模式将如下所示:
// database/migrations/2016_12_14_105000_create_tokens_table.php

class CreateTokensTable extends Migration
{
    /**
     * Run the migrations.
     *
     * @return void
     */
    public function up()
    {
        Schema::create('tokens', function (Blueprint $table) {
            $table->increments('id');
            $table->string('code', 4);
            $table->integer('user_id')->unsigned();
            $table->boolean('used')->default(false);
            $table->timestamps();
        });
    }

    /**
     * Reverse the migrations.
     *
     * @return void
     */
    public function down()
    {
        Schema::dropIfExists('tokens');
    }
}
I limited the verification code to four digits, but you can make it harder to guess by increasing it. We will get back to this point later. Let’s run php artisan migrate to create our database.
我将验证码限制为四位数,但是您可以通过增加它来使其更难猜测。 稍后我们将回到这一点。 让我们运行php artisan migrate创建我们的数据库。
更新模型 (Updating Models)
The models are already there and should only be updated accordingly:
这些模型已经存在,应仅进行相应的更新:
// app/User.php

class User extends Authenticatable
{
    use Notifiable;

    /**
     * The attributes that are mass assignable.
     *
     * @var array
     */
    protected $fillable = [
        'name',
        'email',
        'password',
        'country_code',
        'phone'
    ];

    /**
     * The attributes that should be hidden for arrays.
     *
     * @var array
     */
    protected $hidden = [
        'password',
        'remember_token',
    ];

    /**
     * User tokens relation
     *
     * @return \Illuminate\Database\Eloquent\Relations\HasMany
     */
    public function tokens()
    {
        return $this->hasMany(Token::class);
    }

    /**
     * Return the country code and phone number concatenated
     *
     * @return string
     */
    public function getPhoneNumber()
    {
        return $this->country_code.$this->phone;
    }
}
There’s nothing special here, we just added the users -> tokens relation and added the getPhoneNumber helper method to get the full phone number of a user.
这里没有什么特别的,我们只是添加了users -> tokens关系,并添加了getPhoneNumber helper方法来获取用户的完整电话号码。
// app/Token.php

class Token extends Model
{
    const EXPIRATION_TIME = 15; // minutes

    protected $fillable = [
        'code',
        'user_id',
        'used'
    ];

    public function __construct(array $attributes = [])
    {
        if (! isset($attributes['code'])) {
            $attributes['code'] = $this->generateCode();
        }

        parent::__construct($attributes);
    }

    /**
     * Generate a six digits code
     *
     * @param int $codeLength
     * @return string
     */
    public function generateCode($codeLength = 4)
    {
        $min = pow(10, $codeLength);
        $max = $min * 10 - 1;
        $code = mt_rand($min, $max);

        return $code;
    }

    /**
     * User tokens relation
     *
     * @return \Illuminate\Database\Eloquent\Relations\BelongsTo
     */
    public function user()
    {
        return $this->belongsTo(User::class);
    }

    /**
     * True if the token is not used nor expired
     *
     * @return bool
     */
    public function isValid()
    {
        return ! $this->isUsed() && ! $this->isExpired();
    }

    /**
     * Is the current token used
     *
     * @return bool
     */
    public function isUsed()
    {
        return $this->used;
    }

    /**
     * Is the current token expired
     *
     * @return bool
     */
    public function isExpired()
    {
        return $this->created_at->diffInMinutes(Carbon::now()) > static::EXPIRATION_TIME;
    }
}
Besides setting the relations methods and updating the fillable attributes, we’ve added:
除了设置关系方法和更新可填充属性外,我们还添加了:
- a constructor to set the code property on creation. 在创建时设置code属性的构造函数。
a
generateCodemethod to generate random digits depending on the code length parameter.一个
generateCode方法,用于根据代码长度参数生成随机数字。the
isExpiredmethod to see if the link has expired using theEXPIRATION_TIMEconstant.isExpired方法,使用EXPIRATION_TIME常量查看链接是否已过期。the
isValidmethod to see if the link is neither expired nor used.使用
isValid方法查看链接是否未过期或未使用。
创建视图 (Creating Views)
The register view file should be updated to include a country code and a phone field.
register视图文件应更新为包括国家代码和电话字段。
// resources/views/auth/register.blade.php

@extends('layouts.app')

@section('content')
<div class="container">
    <div class="row">
        <div class="col-md-8 col-md-offset-2">
            <div class="panel panel-default">
                <div class="panel-heading">Register</div>
                <div class="panel-body">
                    @include("partials.errors")

                    <form class="form-horizontal" role="form" method="POST" action="{{ url('/register') }}">
                        // ...

                        <div class="form-group">
                            <label for="phone" class="col-md-4 control-label">Phone</label>

                            <div class="col-md-6">

                                <div class="input-group">
                                    <div class="input-group-addon">
                                        <select name="country_code" style="width: 150px;">
                                            <option value="+1">(+1) US</option>
                                            <option value="+212">(+212) Morocco</option>
                                        </select>
                                    </div>
                                    <input id="phone" type="text" class="form-control" name="phone" required>

                                    @if ($errors->has('country_code'))
                                        <span class="help-block">
                                        <strong>{{ $errors->first('country_code') }}</strong>
                                    </span>
                                    @endif
                                    @if ($errors->has('phone'))
                                        <span class="help-block">
                                        <strong>{{ $errors->first('phone') }}</strong>
                                    </span>
                                    @endif
                                </div>
                            </div>
                        </div>

                        // ...
                    </form>
                </div>
            </div>
        </div>
    </div>
</div>
@endsection
Then, we create a new view for the user to type the verification code in.
然后,我们为用户创建一个新视图以输入验证码。
// resources/views/auth/code.blade.php

@extends('layouts.app')

@section('content')
    <div class="container">
        <div class="row">
            <div class="col-md-8 col-md-offset-2">
                <div class="panel panel-default">
                    <div class="panel-heading">Login</div>
                    <div class="panel-body">
                        @include("partials.errors")

                        <form class="form-horizontal" role="form" method="POST" action="{{ url('/code') }}">
                            {{ csrf_field() }}

                            <div class="form-group">
                                <label for="code" class="col-md-4 control-label">Four digits code</label>

                                <div class="col-md-6">
                                    <input id="code" type="text" class="form-control" name="code" value="{{ old('code') }}" required autofocus>

                                    @if ($errors->has('code'))
                                        <span class="help-block">
                                        <strong>{{ $errors->first('code') }}</strong>
                                    </span>
                                    @endif
                                </div>
                            </div>

                            <div class="form-group">
                                <div class="col-md-8 col-md-offset-4">
                                    <button type="submit" class="btn btn-primary">
                                        Login
                                    </button>
                                </div>
                            </div>
                        </form>
                    </div>
                </div>
            </div>
        </div>
    </div>
@endsection
The errors.blade.php partial will print the list of validation errors.
errors.blade.php部分将打印验证错误列表。
// resources/views/errors.blade.php
@if (count($errors) > 0)
<div class="alert alert-danger ">
<button type="button" class="close" data-dismiss="alert" aria-label="Close">
<span aria-hidden="true">×</span></button>
<ul>
@foreach ($errors->all() as $error)
<li>{{ $error }}</li>
@endforeach
</ul>
</div>
@endif创建控制器 (Creating Controllers)
Instead of creating new controllers, why not reuse the auth controllers? There isn’t much to add, after all!
为何不重用auth控制器,而不是创建新的控制器? 毕竟没什么可添加的!
The RegisterController@register method is called when the user posts the form, and if you open the file you’ll find that it calls a registered method after the user has been created.
用户发布表单时将调用RegisterController@register方法,如果您打开文件,您会发现在创建用户后它将调用已registered方法。
// app/Http/Controllers/RegisterController.php

class RegisterController extends Controller
{

    // ...
    protected function registered(Request $request, $user)
    {
        $user->country_code = $request->country_code;
        $user->phone = $request->phone;
        $user->save();
    }
}
We also need to update the request validation and make the country code and phone fields required.
我们还需要更新请求验证,并填写国家代码和电话字段。
// app/Http/Controllers/RegisterController.php

class RegisterController extends Controller
{

    // ...
    protected function validator(array $data)
    {
        return Validator::make($data, [
            'name'         => 'required|max:255',
            'email'        => 'required|email|max:255|unique:users',
            'password'     => 'required|min:6|confirmed',
            'country_code' => 'required',
            'phone'        => 'required'
        ]);
    }
}
Now we need to update the LoginController and override the login method.
现在,我们需要更新LoginController并覆盖login方法。
// app/Http/Controllers/LoginController.php

class LoginController extends Controller
{

    // ...
    public function login(Request $request)
    {
        $this->validateLogin($request);

        //retrieveByCredentials
        if ($user = app('auth')->getProvider()->retrieveByCredentials($request->only('email', 'password'))) {
            $token = Token::create([
                'user_id' => $user->id
            ]);

            if ($token->sendCode()) {
                session()->set("token_id", $token->id);
                session()->set("user_id", $user->id);
                session()->set("remember", $request->get('remember'));

                return redirect("code");
            }

            $token->delete();// delete token because it can't be sent
            return redirect('/login')->withErrors([
                "Unable to send verification code"
            ]);
        }

        return redirect()->back()
            ->withInputs()
            ->withErrors([
                $this->username() => Lang::get('auth.failed')
            ]);
    }
}
After validating the request, we try to retrieve a user using the email and password. If the user exists, we create a new token for this user, then we send the code, set the necessary session details, and redirect to the code page.
验证请求后,我们尝试使用电子邮件和密码来检索用户。 如果该用户存在,我们将为此用户创建一个新令牌,然后发送代码,设置必要的会话详细信息,然后重定向到代码页。
Ooh wait! We didn’t define a sendCode method inside the Token model?
哦,等等! 我们没有在Token模型内定义sendCode方法吗?
添加Twilio (Adding Twilio)
Before sending the code to the user via SMS, we need to configure Twilio for the job. We need to create a new trial account.
在通过SMS将代码发送给用户之前,我们需要为该作业配置Twilio。 我们需要创建一个新的试用帐户 。
After that, go to the Twilio Console page and copy your account ID and auth token. The last part is to create a new phone number for sending SMSes. Go to the Console’s Phone Numbers Page and create a new one.
之后,转到Twilio控制台页面并复制您的帐户ID和身份验证令牌。 最后一部分是创建用于发送SMS的新电话号码。 转到控制台的“电话号码”页面并创建一个新的页面 。
TWILIO_SID=XXXXXXXXXXX
TWILIO_TOKEN=XXXXXXXXXXXX
TWILIO_NUMBER=+XXXXXXXXXX
Twilio has an official PHP package that we can use.
Twilio有一个可以使用的官方PHP软件包。
composer require twilio/sdkTo use the Twilio package, we’re going to create a new provider and bind it to the container:
要使用Twilio包,我们将创建一个新的提供程序并将其绑定到容器:
pgp artisan make:provider TwilioProvider// app/Providers/TwilioProvider.php
use Illuminate\Support\ServiceProvider;
use Twilio\Rest\Client;
class TwilioProvider extends ServiceProvider
{
/**
* Bootstrap the application services.
*
* @return void
*/
public function boot()
{}
/**
* Register the application services.
*
* @return void
*/
public function register()
{
$this->app->bind('twilio', function() {
return new Client(env('TWILIO_SID'), env('TWILIO_TOKEN'));
});
}
}Now, we can finally go back to our sendCode method:
现在,我们终于可以返回到sendCode方法:
// app/Token.php

class Token extends Model
{
    //...
    public function sendCode()
    {
        if (! $this->user) {
            throw new \Exception("No user attached to this token.");
        }

        if (! $this->code) {
            $this->code = $this->generateCode();
        }

        try {
            app('twilio')->messages->create($this->user->getPhoneNumber(),
                ['from' => env('TWILIO_NUMBER'), 'body' => "Your verification code is {$this->code}"]);
        } catch (\Exception $ex) {
            return false; //enable to send SMS
        }

        return true;
    }
}
If the current token is not attached to a user, the function will throw an exception. Otherwise, it will try to send them an SMS.
如果当前令牌未附加到用户,则该函数将引发异常。 否则,它将尝试向他们发送短信。
Finally, the application is ready. We test things out by registering a new user and trying to log in. Here is a quick demo:
最后,应用程序准备就绪。 我们通过注册新用户并尝试登录来进行测试。这是一个快速演示:

有用的2FA相关链接 (Useful 2FA-related Links)
https://www.wired.com/2016/06/hey-stop-using-texts-two-factor-authentication/
https://www.wired.com/2016/06/hey-stop-using-texts-two-factor-authentication/
https://techcrunch.com/2016/06/10/how-activist-deray-mckessons-twitter-account-was-hacked/
https://techcrunch.com/2016/06/10/how-activist-deray-mckessons-twitter-account-was-hacked/
https://www.sitepoint.com/2fa-in-laravel-with-google-authenticator-get-secure/
https://www.sitepoint.com/2fa-in-laravel-with-google-authenticator-get-secure/
结论 (Conclusion)
This article was a quick introduction to integrating two factor authentication with Twilio with a Laravel application. You can also take this demo further by giving the users the ability to enable and disable two factor authentication, and you may also want to offer a call instead of an SMS!
本文是对使用Laravel应用程序将两要素身份验证与Twilio集成的快速介绍。 您还可以通过为用户提供启用和禁用两因素身份验证的功能来进一步演示该演示,并且您可能还希望提供呼叫而不是SMS!
Have you ever implemented 2FA for an application? What are the challenges you’ve faced? Was it a good experience for your users?
您是否曾经为应用程序实施2FA? 您面临的挑战是什么? 对您的用户来说,这是一种很好的体验吗?
If you have any question or comments about 2FA or Laravel, you can post them below!
如果您对2FA或Laravel有任何疑问或意见,可以在下面发布!
翻译自: https://www.sitepoint.com/secure-laravel-apps-2fa-via-sms/
fa fa-user


 1321
1321

 被折叠的 条评论
为什么被折叠?
被折叠的 条评论
为什么被折叠?
 到【灌水乐园】发言


