


aws+wordpress
This tutorial is aimed at WordPress developers who want to add a Google+ login to their WordPress theme. For themes built for eCommerce, forums and other sites that require users to login, providing the option for a Google+ login button makes the registration and login process both faster and easier for users as they don’t have to complete a form.
本教程针对想要将Google+登录名添加到其WordPress主题的WordPress开发人员。 对于为电子商务,论坛和其他需要用户登录的网站而构建的主题,提供Google+登录按钮选项可以使用户不必填写表格即可更快,更轻松地完成注册和登录过程。
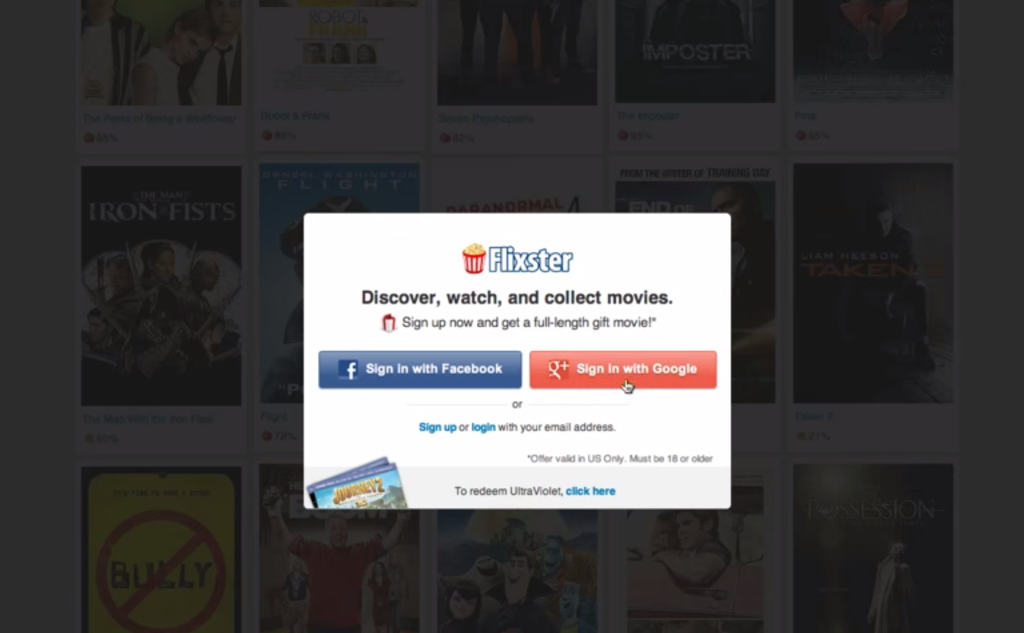
Google+ Sign-In example on Flixster
Flixster上的Google+登录示例
Google+ OAuth WordPress库 (The Google+ OAuth WordPress Library)
I have created a Google+ OAuth library for WordPress which handles all of the tough tasks of the Google+ OAuth login.
我已经为WordPress创建了Google+ OAuth库,该库可以处理Google+ OAuth登录的所有艰巨任务。
This library also creates the necessary REST API URLs required for Google+ login (official Google documentation refers to this as the Google+ Sign-In).
该库还会创建Google+登录所需的必要REST API URL(Google的官方文档将其称为Google+登录 )。
Once you’ve downloaded the zip file above, extract the contents into your theme folder. Now you will have an /inc directory in your theme folder which has all necessary files for a Google+ login.
下载完上面的zip文件后,将内容提取到主题文件夹中。 现在,您的主题文件夹中将有一个/inc目录,其中包含用于Google+登录的所有必需文件。
加载Google+ OAuth WordPress库 (Loading the Google+ OAuth WordPress Library)
Now you need to load the library into WordPress. Inside your theme’s functions.php file, just include the following:
现在您需要将库加载到WordPress中。 在主题的functions.php文件中,只需包含以下内容:
require_once("inc/googleplusoauth.php");重定向用户 (Redirecting Users)
Next, when user clicks on the ‘Sign In with Google+’ button, you need to redirect user:
接下来,当用户点击“使用Google+登录”按钮时,您需要重定向用户:
site_url() . "/wp-admin/admin-ajax.php?action=googleplus_oauth_redirect"This URL will handle all of the core functionality of ‘Sign In with Google+’. Once the user has been logged in, the user will be redirected to the homepage of the website.
该网址将处理“使用Google+登录”的所有核心功能。 一旦用户登录,该用户将被重定向到网站的主页。
创建和安装Google+应用 (Creating and Installing a Google+ App)
Users who install your theme need to create a Google Developer Project and enable Google+ API.
安装主题的用户需要创建一个Google Developer Project并启用Google+ API。
When enabling Google+ API, it asks for a callback URL. Users will have to use the following as the callback URL:
启用Google+ API时,它将要求提供回调URL。 用户将必须使用以下内容作为回调URL:
get_site_url() . "/wp-admin/admin-ajax.php?action=googleplus_oauth_callback"Once they have enabled the Google+ API, they need to copy the Project name, API key and Secret Key from the project dashboard and store them as WordPress options.
启用Google+ API后,他们需要从项目信息中心复制项目名称,API密钥和秘密密钥,并将其存储为WordPress选项。
You can use the following option names to store the options values:
您可以使用以下选项名称来存储选项值:
update_option("googleplus_client_id", $client_id_variable);
update_option("googleplus_client_secret", $client_secret_variable);
update_option("googleplus_app_name", $app_name_variable);
This is all you need to do to have a Google+ login button integrated with your theme.
这是将主题集成到Google+登录按钮所需要做的一切。
Now let’s create a Google+ Login widget which displays a Google+ login button.
现在,让我们创建一个显示Google+登录按钮的Google+登录小部件。
创建一个Google+登录小部件 (Creating a Google+ Login Widget)
In this section, I’ll list the code for creating a Google+ login widget. You can also put this code inside a plugin if you wish. You’ll just need to make sure that you include the Google+ OAuth WordPress library with your plugin.
在本部分中,我将列出用于创建Google+登录小部件的代码。 您也可以根据需要将此代码放入插件中。 您只需要确保插件中包含Google+ OAuth WordPress库即可。
<?php

require_once("inc/googleplusoauth.php");

class Google_Plus_Login_Widget extends WP_Widget
{
    public function __construct()
    {
        parent::__construct("Google_Plus_login_widget", "Google Plus Login", array("description" => __("Display a Google+ Login Button")));
    }

    public function form( $instance )
    {
        // Check values
        if($instance)
        {
            $title = esc_attr($instance['title']);
            $api_key = $instance['api_key'];
            $secret_key = $instance['secret_key'];
            $googleplus_app_name = $instance['googleplus_app_name'];
        }
        else
        {
            $title = '';
            $api_key = '';
            $secret_key = '';
            $googleplus_app_name = '';
        }
        ?>

        <p>
            <label for="<?php echo $this->get_field_id('title'); ?>"><?php echo "Title"; ?></label>
            <input class="widefat" id="<?php echo $this->get_field_id('title'); ?>" name="<?php echo $this->get_field_name('title'); ?>" type="text" value="<?php echo $title; ?>" />
        </p>

        <p>
            <label for="<?php echo $this->get_field_id('api_key'); ?>"><?php echo "Client Id"; ?></label>
            <input type="text" class="widefat" id="<?php echo $this->get_field_id('api_key'); ?>" name="<?php echo $this->get_field_name('api_key'); ?>" value="<?php echo $api_key; ?>" />
        </p>

        <p>
            <label for="<?php echo $this->get_field_id('secret_key'); ?>"><?php echo "Client Secret"; ?></label>
            <input type="text" class="widefat" id="<?php echo $this->get_field_id('secret_key'); ?>" name="<?php echo $this->get_field_name('secret_key'); ?>" value="<?php echo $secret_key; ?>" />
        </p>

        <p>
            <label for="<?php echo $this->get_field_id('googleplus_app_name'); ?>"><?php echo "App Name"; ?></label>
            <input type="text" class="widefat" id="<?php echo $this->get_field_id('googleplus_app_name'); ?>" name="<?php echo $this->get_field_name('googleplus_app_name'); ?>" value="<?php echo $googleplus_app_name; ?>" />
        </p>

        <p>
            While creating a Twitter app use "<?php echo get_site_url() . '/wp-admin/admin-ajax.php?action=googleplus_oauth_callback'  ?>" as callback URL.
        </p>

        <?php
    }

    public function update( $new_instance, $old_instance )
    {
        $instance = $old_instance;
        $instance['title'] = strip_tags($new_instance['title']);
        $instance['api_key'] = strip_tags($new_instance['api_key']);
        $instance['secret_key'] = strip_tags($new_instance['secret_key']);
        $instance['googleplus_app_name'] = strip_tags($new_instance['googleplus_app_name']);
        update_option("googleplus_client_id", $new_instance['api_key']);
        update_option("googleplus_client_secret", $new_instance['secret_key']);
        update_option("googleplus_app_name", $new_instance['googleplus_app_name']);
        return $instance;
    }

    public function widget( $args, $instance )
    {
        extract($args);

        $title = apply_filters('widget_title', $instance['title']);
        echo $before_widget;

        if($title)
        {
            echo $before_title . $title . $after_title ;
        }

        if(is_user_logged_in())
        {
            ?>
                <a href="<?php echo wp_logout_url( get_permalink() ); ?>" title="Logout"><input type="button" value="Logout" /></a>
            <?php
        }
        else
        {
            ?>
                <a href="<?php echo site_url() . '/wp-admin/admin-ajax.php?action=googleplus_oauth_redirect'; ?>"><input type="button" value="Login Using Google+" /></a>
            <?php
        }
        echo $after_widget;
    }
}
register_widget("Google_Plus_Login_Widget");
Let’s look at how the above code works:
让我们看一下上面的代码是如何工作的:
- We first included the Google+ OAuth library 我们首先包含了Google+ OAuth库
- Then we created a widget that displays a login button on the front-end and displays the keys input boxes on backend 然后,我们创建了一个小部件,该小部件在前端显示一个登录按钮,并在后端显示键输入框
- When users submit the widget form on the backend the values are saved as WordPress options 当用户在后端提交窗口小部件表单时,值将另存为WordPress选项
- When someone clicks on the Google+ login button on the front-end of the widget, the users are redirected to the ‘Redirect URL’ as mentioned above 当有人点击窗口小部件前端的Google+登录按钮时,用户将被重定向到如上所述的“重定向URL”
- The redirected URL handles all the login task 重定向的URL处理所有登录任务
进行Google+ REST API调用 (Making Google+ REST API Calls)
Once you have a user logged in you will get an access token which acts as a permission to post and retrieve a user’s data in Google+.
登录用户后,您将获得访问令牌,该访问令牌可作为在Google+中发布和检索用户数据的权限。
The access token is unique to every user, therefore this library stores it as user metadata. You can retrieve it by using the following:
访问令牌对于每个用户都是唯一的,因此该库将其存储为用户元数据。 您可以使用以下方法检索它:
get_user_meta(get_current_user_id(), "googleplus_access_token", true)Now you can make Google+ REST API calls by passing this token in HTTP Authorization request header.
现在,您可以通过在HTTP授权请求标头中传递此令牌来进行Google+ REST API调用。
令牌到期 (Token Expiration)
Access tokens have a limited lifetime and can become invalid due to several reasons. If you’re receiving an invalid access token error while making REST API calls then you’ll need to get a new access token by making the user login again.
访问令牌的寿命有限,由于多种原因可能会变得无效。 如果在进行REST API调用时收到无效的访问令牌错误,则需要通过再次登录用户来获取新的访问令牌。
结论 (Conclusion)
We’ve learned how to create a Google+ login button. If you integrate it in your theme then you can place this button anywhere, but if it’s in a plugin then you’ll need to put in a widget.
我们已经了解了如何创建Google+登录按钮。 如果将其集成到主题中,则可以将该按钮放置在任何位置,但是如果它在插件中,则需要放入小部件。
If you’re interested in more information on the topic, here are some other helpful resources:
如果您对有关该主题的更多信息感兴趣,请参见以下其他有用资源:
If you have any feedback, or use the above method or something similar in a project yourself, please let me know by commenting below.
如果您有任何反馈意见,或者您自己在项目中使用了上述方法或类似方法,请在下面评论中告知我。
翻译自: https://www.sitepoint.com/adding-a-google-sign-in-to-wordpress/
aws+wordpress


 3458
3458


 被折叠的 条评论
为什么被折叠?
被折叠的 条评论
为什么被折叠?
 到【灌水乐园】发言


