


Displaying a list of posts in a blog with the most number of shares is a good way to improve a site’s user navigation. In the case of WordPress, a widget is the ideal place for this. Users who wouldn’t otherwise know where to go after reading the current post might check out and hopefully participate in your blog’s most shared posts. These are commonly also the ones which have the most page views, and are likely to be of interest to more readers.
在共享最多的博客中显示帖子列表是改善网站用户导航的好方法。 在WordPress的情况下,小部件是理想的选择。 在阅读当前帖子后不知道要去哪里的用户可以签出并希望参与您博客中共享次数最多的帖子。 这些页面通常也是页面浏览量最多的页面,并且可能会让更多的读者感兴趣。
In this tutorial we’ll create a basic plugin to display the most shared posts in a widget. Although there are lots of plugins available for this purpose, many of them tend to be overwhelming and also don’t support caching. In this article, the plugin we’ll build will be lightweight and will cache the top ten most shared posts for the past six hours.
在本教程中,我们将创建一个基本插件,以在窗口小部件中显示共享最多的帖子。 尽管有许多可用于此目的的插件,但其中许多插件往往不堪重负,也不支持缓存。 在本文中,我们将构建的插件将是轻量级的,并且将缓存过去六个小时内共享次数最多的十大帖子。
插件目录和文件 (Plugin Directory and Files)
To start with the plugin development, in your wp-content/plugins directory create a directory called most-shared-widget, and then create a file called most-shared-widget.php inside it.
要开始插件开发,请在wp-content / plugins目录中创建一个名为most-shared-widget的目录,然后在其中创建一个名为most-shared-widget.php的文件。
In the most-shared-widget.php file, add the following text to make the plugin installable.
在most-shared-widget.php文件中,添加以下文本以使插件可安装。
<?php

/*
Plugin Name: Most Shared Posts Widget
Plugin URI: https://www.sitepoint.com
Description: Displays most shared posts in an widget
Author: Narayan Prusty
*/
如何查找总股数? (How to Find Total Shares?)
For the sake of this plugin we will only retrieve total shares of a post in Twitter and Facebook. Twitter and Facebook provide URLs which we can make a GET request to by passing a URL to find its total shares.
为了这个插件,我们将只检索Twitter和Facebook中帖子的总份额。 Twitter和Facebook提供了URL,我们可以通过传递URL以查找其总份额来发出GET请求。
The URL to find total shares on Facebook is: https://api.facebook.com/method/links.getStats?format=json&urls=https://www.sitepoint.com
在Facebook上查找总份额的URL为: https : //api.facebook.com/method/links.getStats?format=json&urls=https : //www.sitepoint.com
And the URL to find total shares on Twitter is: http://urls.api.twitter.com/1/urls/count.json?url=https://www.sitepoint.com
在Twitter上查找总份额的URL是: http : //urls.api.twitter.com/1/urls/count.json? url= https : //www.sitepoint.com
Both of these requests send back data in JSON format. Here is an example of the response to the Facebook request:
这两个请求都以JSON格式发送回数据。 这是对Facebook请求的响应示例:
[{"url":"http:\/\/sitepoint.com","normalized_url":"http:\/\/www.sitepoint.com\/","share_count":1343,"like_count":1632,"comment_count":207,"total_count":3182,"click_count":138,"comments_fbid":"501562723433","commentsbox_count":0}]Similarly, Twitter’s response looks like this:
同样,Twitter的响应如下所示:
{"count":72,"url":"http:\/\/sitepoint.com\/"}检索和存储总股份 (Retrieving and Storing Total Shares)
We can make HTTP requests to the Facebook and Twitter URLs using the WordPress HTTP API. And then store the retrieved post counts as post meta data.
我们可以使用WordPress HTTP API向Facebook和Twitter URL发出HTTP请求。 然后将检索到的帖子计数存储为帖子元数据。
To be friendly with the Facebook and Twitter API servers we won’t be retrieving the total share count of all the posts at a time, rather we will retrieve them as individual posts are viewed by users. We will also make sure that we only retrieve total shares of a post once in a 6 hour period because it’s unlikely that the share count will have changed much in this time.
为了与Facebook和Twitter API服务器友好,我们不会一次检索所有帖子的总共享数,而是在用户查看单个帖子时检索它们。 我们还将确保在6小时内仅检索一次帖子的总份额,因为这次份额的数量不太可能发生太大变化。
Here is the code which is responsible for deciding when to retrieve and store total shares count of each post. Place this code in your most-shared-widget.php file.
这是负责确定何时检索和存储每个帖子的总股数的代码。 将此代码放在您最共享的widget.php文件中。
function msp_is_post()
{
  if(is_single() && !is_attachment())
  {
    global $post;

    $last_update = get_post_meta($post->ID, "msp_last_update", true);

    if($last_update)
    {
      if(time() - 21600 > $last_update)
      {
        msp_update($post->ID);
      }
    }
    else
    {
      msp_update($post->ID);
    }
  }
}

add_action("wp", "msp_is_post");
This is how the above code works:
上面的代码是这样工作的:
First we registered a callback for the
wpaction.首先,我们为
wp操作注册了一个回调。- Then we check if a post is being viewed or not. If yes, then we proceed. 然后我们检查是否正在查看帖子。 如果是,那么我们继续。
Next, we retrieve the total share count of that post. If it’s not present then we simply call the
msp_updatefunction which is responsible for retrieving and storing total shares of each post. And if it is present then we check when it was last retrieved; if it was retrieved over 6 hours ago then we update it again, otherwise we simply retain the current value by returning the function.接下来,我们检索该帖子的总共享数。 如果不存在,那么我们只需调用
msp_update函数,该函数负责检索和存储每个帖子的总份额。 如果存在,则我们检查它的最后检索时间。 如果它是在6个小时前检索到的,那么我们将再次对其进行更新,否则我们只需通过返回函数来保留当前值。
Here is the implementation of the msp_update function which is responsible for retrieving the total shares count of posts and storing them as post meta data:
这是msp_update函数的实现,该函数负责检索帖子的总份额计数并将其存储为帖子元数据:
function msp_update($id)
{
  $url = get_permalink($id);

  //facebook shares
  $response = wp_remote_get("https://api.facebook.com/method/links.getStats?format=json&urls=" . $url);
  $body = $response["body"];
  $body = json_decode($body);

  if($body[0]->share_count)
  {
    $facebook_count = $body[0]->share_count;
  }
  else
  {
    $facebook_count = 0;
  }


  //twitter shares
  $response = wp_remote_get("http://urls.api.twitter.com/1/urls/count.json?url=" . $url);
  $body = $response["body"];
  $body = json_decode($body);

  if($body->count)
  {
    $twitter_count = $body->count;
  }
  else
  {
    $twitter_count = 0;
  }

  $total = $facebook_count + $twitter_count;

  update_post_meta($id, "msp_share_count", $total);
  update_post_meta($id, "msp_last_update", time());
}
We first resolved the post ID to post URL using the get_permalink() function provided by WordPress.
我们首先使用WordPress提供的get_permalink()函数解析了发布ID以发布URL。
We then retrieve and parse the total shares of a post using the WordPress HTTP API. Lastly, we add the total share count of Facebook and Twitter and store them as metadata, along with the current time which represents the last update time.
然后,我们使用WordPress HTTP API检索并解析帖子的总份额。 最后,我们添加Facebook和Twitter的总份额数,并将它们存储为元数据,以及代表最后更新时间的当前时间。
创建小部件 (Creating a Widget)
We will use a widget to display the top 10 shared posts. We’ll find the data using the get_posts() function provided by WordPress and then cache the result for six hours using WordPress Transients API.
我们将使用小部件显示前10个共享帖子。 我们将使用WordPress提供的get_posts()函数查找数据,然后使用WordPress Transients API将结果缓存六个小时。
Here is the code to create a simple widget which just displays the widget title. Place this code in the most-shared-widget.php file.
这是创建简单小部件的代码,该小部件仅显示小部件标题。 将此代码放在most-shared-widget.php文件中。
class Most_Shared_Post_Widget extends WP_Widget
{
    public function __construct()
    {
        parent::__construct("Most_Shared_Post_Widget", "Display Most Shared Posts", array("description" => __("This plugin displays ten most shared posts in an widget")));
    }

    public function form($instance)
    {
        if($instance)
        {
            $title = esc_attr($instance["title"]);
        }
        else
        {
            $title = "";
        }
        ?>

        <p>
            <label for="<?php echo $this->get_field_id('title'); ?>"><?php echo "Title"; ?></label>
            <input class="widefat" id="<?php echo $this->get_field_id('title'); ?>" name="<?php echo $this->get_field_name('title'); ?>" type="text" value="<?php echo $title; ?>" />
        </p>

        <?php
    }

    public function update($new_instance, $old_instance)
    {
        $instance = $old_instance;
        $instance['title'] = strip_tags($new_instance['title']);
        return $instance;
    }

    public function widget($args, $instance)
    {
        extract($args);
        $title = apply_filters('widget_title', $instance['title']);
        echo $before_widget;

        if($title)
        {
            echo $before_title . $title . $after_title;
        }

        msp_display_widget();

        echo $after_widget;
    }
}

function msp_register_most_shared_widget()
{
  register_widget("Most_Shared_Post_Widget");
}

add_action("widgets_init", "msp_register_most_shared_widget");
Here we created a widget by extending the class WP_Widget and registered it using the register_widget function.
在这里,我们通过扩展类WP_Widget创建了一个小部件,并使用register_widget函数对其进行了register_widget 。
After displaying the widget title we call the msp_display_widget function which is responsible for retrieving the top 10 posts and displaying them as a list.
显示小部件标题后,我们调用msp_display_widget函数,该函数负责检索前10个帖子并将它们显示为列表。
Here is the implementation of the msp_display_widget function:
这是msp_display_widget函数的实现:
function msp_display_widget()
{
  $posts = get_transient("msp");
  if($posts === false)
  {
    $args = array("posts_per_page" => 10, "meta_key" => "msp_share_count", "orderby" => "meta_value");
    $posts = get_posts($args);
    $json_posts = json_encode($posts);

    echo "<ul>";

    foreach($posts as $post)
    {
      echo "<li><a href='" . get_permalink($post->ID) . "'>" . $post->post_title . "</a></li>";
    }

    echo "</ul>";

    if(count($posts) >= 10)
    {
      set_transient("msp", $json_posts, 21600);
    }
  }
  else
  {
    $posts = json_decode($posts);

    echo "<ul>";

    foreach($posts as $post)
    {
      echo "<li><a href='" . get_permalink($post->ID) . "'>" . $post->post_title . "</a></li>";
    }

    echo "</ul>";
  }
}
The msp_display_widget function first checks to see if the top ten posts are stored as a transient, i.e. it looks in the cache. If it finds the posts in the cache then it simply parses them and displays them as an unordered list. Otherwise it retrieves the top 10 posts using the get_posts function and displays it. After displaying it, it stores the result in the cache by setting an expiration time of 6 hours.
msp_display_widget函数首先检查看是否将前十个帖子存储为瞬态,即它在缓存中查找。 如果它在缓存中找到了帖子,那么它将简单地解析它们并将它们显示为无序列表。 否则,它将使用get_posts函数检索前10个帖子并显示它。 显示后,它通过设置6小时的到期时间将结果存储在缓存中。
You may be wondering what’s the point of caching the result? Well, get_posts is using the MySQL orderby parameter which sorts the total share count of posts and retrieves the top 10 which is an expensive MySQL operation, therefore for performance reasons it’s better to not perform the operation every time the widget is displayed.
您可能想知道缓存结果的意义是什么? 好吧, get_posts使用的是MySQL orderby参数,该参数对帖子的总共享数量进行排序,并检索前十名,这是一项昂贵MySQL操作,因此出于性能方面的考虑,最好不要在每次显示小部件时都执行该操作。
We are only caching the result if there are more than 10 posts with share count meta data. This is done to prevent the widget from displaying nothing for the first 6 hours after installing the plugin as at least 10 posts might not have been requested by users at the time the widget is first displayed.
仅当包含共享计数元数据的帖子超过10个时,我们才缓存结果。 这样做是为了防止在安装插件后的最初6个小时内小部件什么都不显示,因为在首次显示小部件时,用户可能没有请求至少10个帖子。
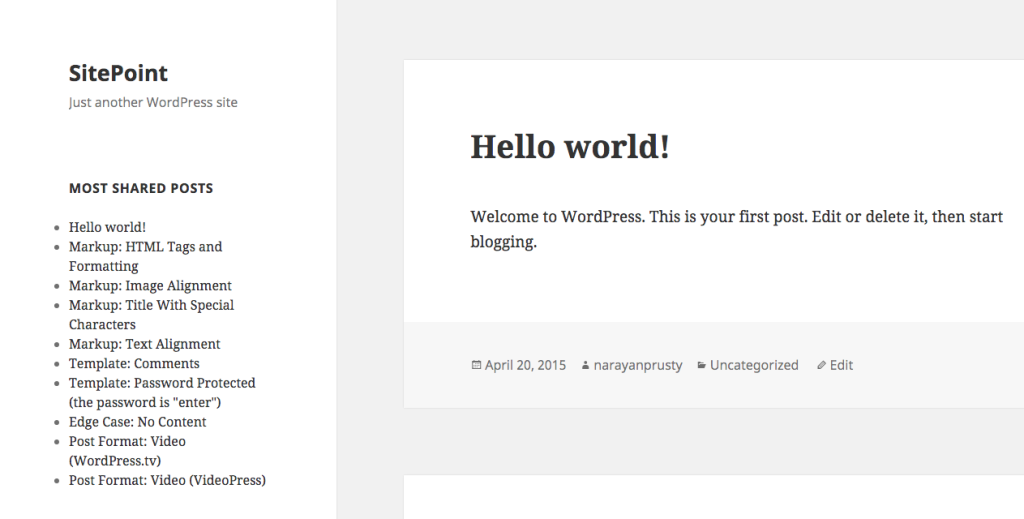
Here is how the widget looks in the Twenty Fifteen Theme:
这是“二十五个十五”主题中的小部件外观:
结论 (Conclusion)
In this article I’ve shown you how to easily build your own Most Shared Posts plugin for WordPress. You can now go ahead and expand on this to display images and add more information.
在本文中,我向您展示了如何轻松地为WordPress构建自己的“最共享帖子”插件。 现在,您可以继续进行扩展,以显示图像并添加更多信息。
You can get a complete copy of the plugin here.
Please share your experiences with your own plugins below.
请在下面与您自己的插件分享您的经验。
翻译自: https://www.sitepoint.com/create-a-most-shared-posts-plugin-for-wordpress/


 1076
1076

 被折叠的 条评论
为什么被折叠?
被折叠的 条评论
为什么被折叠?
 到【灌水乐园】发言


