


fcn从头开始
In this article, we’ll complete our foray into building a WordPress theme from scratch, focusing on refining our templates, adding meta information, post thumbnails, sidebars, user-friendly controls and more.
在本文中,我们将完成从零开始构建WordPress主题的工作,重点在于完善模板,添加元信息,发布缩略图,侧边栏,用户友好的控件等。
This is the third and last part of the WordPress series on building a WordPress theme. Part 1 introduced WordPress theming, and in part 2 we built a basic theme. We utilized the Clean Blog template by StartBootstrap to add style to our WordPress theme. The code we’ve written so far is available on GitHub.
这是构建WordPress主题的WordPress系列文章的第三部分也是最后一部分。 第1部分介绍了WordPress主题,第2部分则建立了一个基本主题 。 我们利用StartBootstrap的Clean Blog模板为WordPress主题添加样式。 到目前为止,我们已经编写的代码可以在GitHub上找到 。
We have added single.php, page.php, archive.php and index.php templates so far, but we left the task of finalizing it for this part of the task. We introduced functions.php — a file that WordPress uses to automatically include functionalities particular to our theme, and we added functions to it. We added a dynamic header function to our header.php, and we separated that functionality into our functions.php. Ideally, this should be organized into a separate file — possibly in an inc folder inside our theme — to keep things clean.
到目前为止,我们已经添加了single.php , page.php , archive.php和index.php模板,但在本部分任务中,我们要完成对其的定稿工作。 我们引入了functions.php -WordPress用于自动包含特定于我们主题的functions.php的文件,并在其中添加了功能。 我们在header.php添加了动态标头函数,并将该功能拆分为我们的functions.php 。 理想情况下,应将其组织到一个单独的文件中(可能在主题内的inc文件夹中),以保持环境整洁。
In part 2, we also introduced partials — footer.php and header.php.
在第2部分中,我们还介绍了局部footer.php和header.php 。
完善模板 (Refining the Templates)
In the previous article, we separated our <body> tag — the opening one — into header.php, and we added <?php body_class(); ?> to it. This adds some semantic classes to the body that tell us whether we are on a page, post, whether we’re logged in, or not, and so on — enabling us to style different elements of our website depending on pages visited, and other things.
在上一篇文章中,我们将<body>标记(即开头的标记)分离到header.php ,并添加了<?php body_class(); ?> <?php body_class(); ?> 。 这会在body中添加一些语义类,告诉我们是否在page , post ,是否登录,等等,从而使我们能够根据访问的页面和其他页面为网站的不同元素设置样式东西。
If we visit the home page and open the browser console to inspect these classes, we’ll see that we lack the current template information among these classes:
如果访问主页并打开浏览器控制台来检查这些类,则会发现在这些类中缺少当前的模板信息:
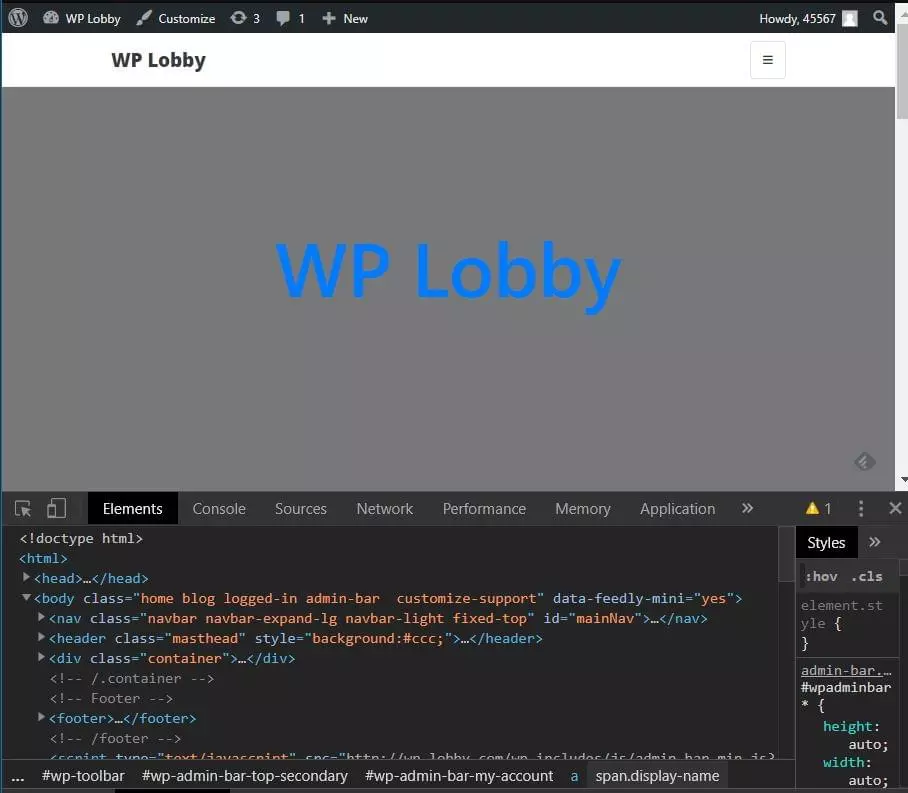
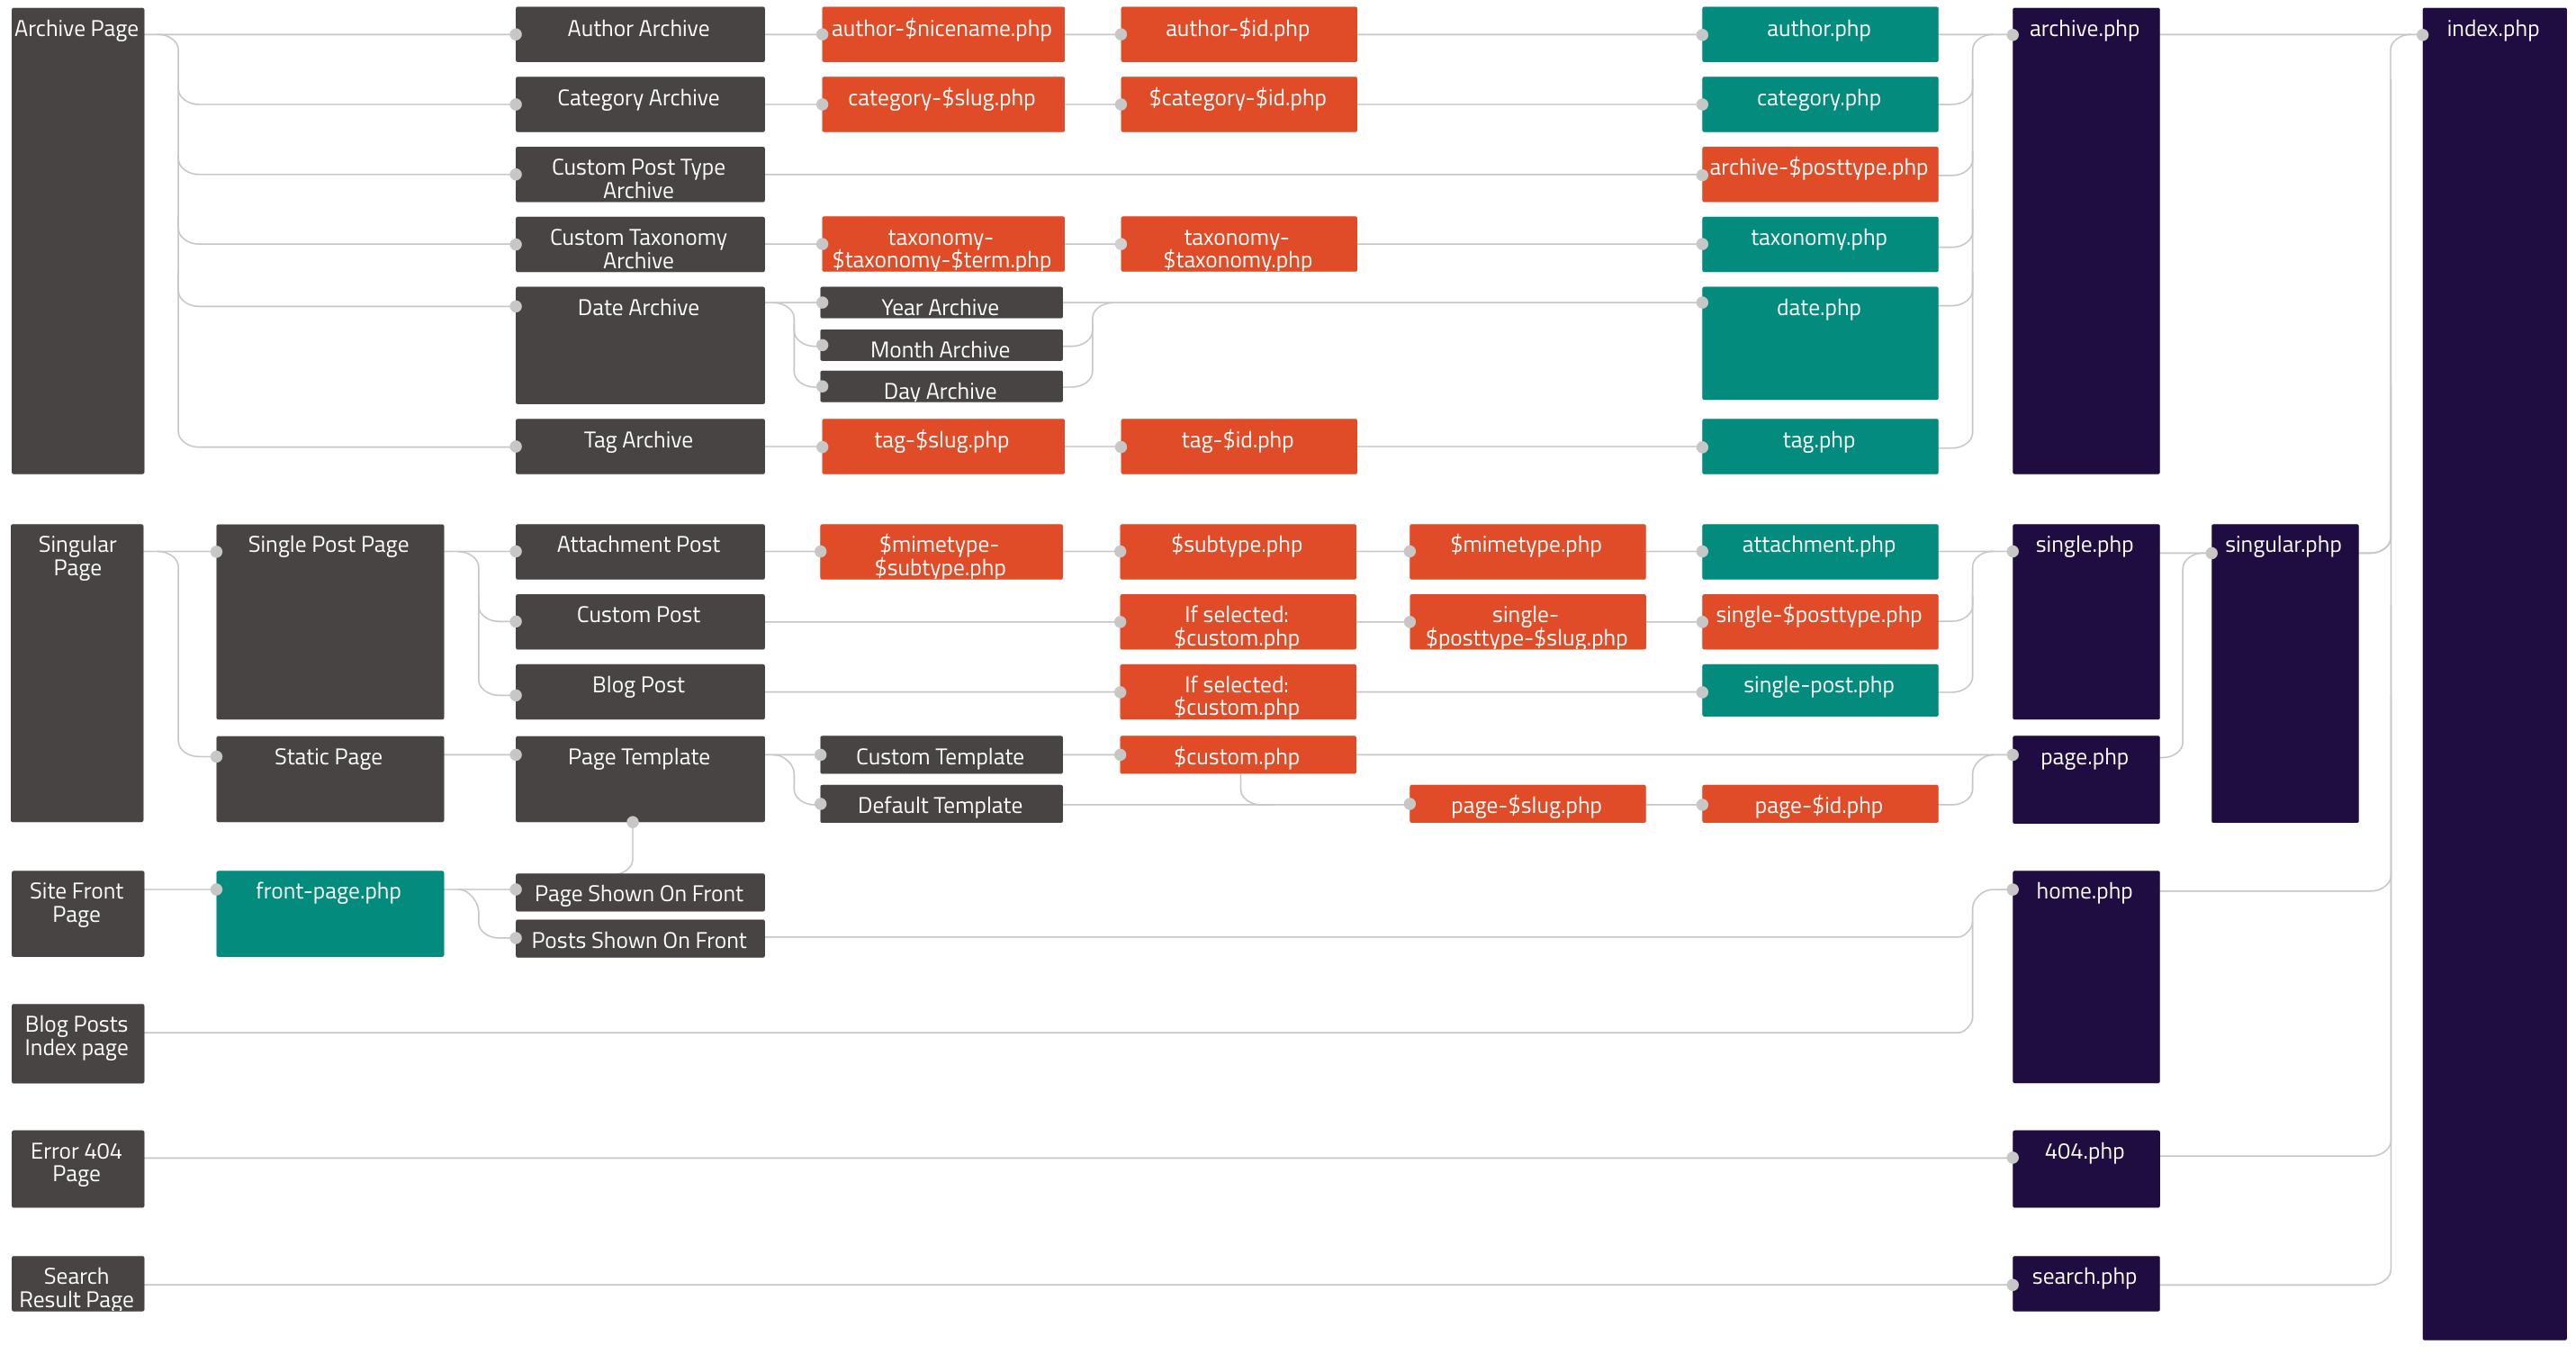
To be able to change the things WordPress displays, we need to know what file is being used. In our case, index.php is used as a default fallback template. This infographic shows the hierarchy of templates used. It can come very handy when overriding or creating themes.
为了能够更改WordPress显示的内容,我们需要知道正在使用哪个文件。 在我们的例子中, index.php被用作默认的后备模板。 此信息图显示了所使用模板的层次结构。 覆盖或创建主题时,它会非常方便。
In the previous article, we started refining the archive.php loop, adding meta information and post thumbnails to outputed articles. We’ll separate that loop into a separate file, include it in archive.php and index.php, and finish refining it.
在上一篇文章中,我们开始完善archive.php循环,添加元信息并将缩略图发布到输出的文章中。 我们将把该循环分成一个单独的文件,将其包含在archive.php和index.php ,并完成完善。
Firstly, we’ll replace the content in both files between while and endwhile with a single line that requests the partial file, so index.php will look something like this:
首先,我们将在while和endwhile之间将两个文件中的内容替换为请求部分文件的一行,因此index.php将如下所示:
<?php
/**
 * @package Botega_Scratch_Theme
 */

get_header(); ?>

    <?php
    if ( have_posts() ) : while ( have_posts() ): the_post();

                get_template_part( 'partials/content', get_post_type() );

        endwhile;
    endif;
    ?>

<?php get_footer(); ?>
Once we’ve done that, we’ll place the content we have replaced in archive.php into the partials/content.php file:
完成此操作后,我们会将在archive.php替换的内容放入partials/content.php文件中:
<div <?php post_class( 'post-preview' ); ?> id="post-<?php the_ID(); ?>">

<header class="entry-header">
    <?php
    if ( is_singular() ) :
        the_title( '<h1 class="entry-title">', '</h1>' );
    else :
        the_title( '<h2 class="entry-title"><a href="' . esc_url( get_permalink() ) . '" rel="bookmark">', '</a></h2>' );
    endif;

    if ( 'post' === get_post_type() ) :
        ?>
        <div class="entry-meta">
            <?php
            bsimple_posted_on();
            bsimple_posted_by();
            ?>
        </div><!-- .entry-meta -->
    <?php endif; ?>
</header><!-- .entry-header -->

        <a class="post-thumbnail" href="<?php the_permalink(); ?>" aria-hidden="true" tabindex="-1">
            <?php
            the_post_thumbnail( 'post-thumbnail', array(

            ) );
            ?>
        </a>

        <?php the_excerpt(); ?>

</div>
Once we upload these changes to the server, we’ll see that our front page now, in each post in the post list, has meta information — date and author links:
将这些更改上传到服务器后,我们将在帖子列表中的每个帖子中看到我们的首页现在具有元信息-日期和作者链接:
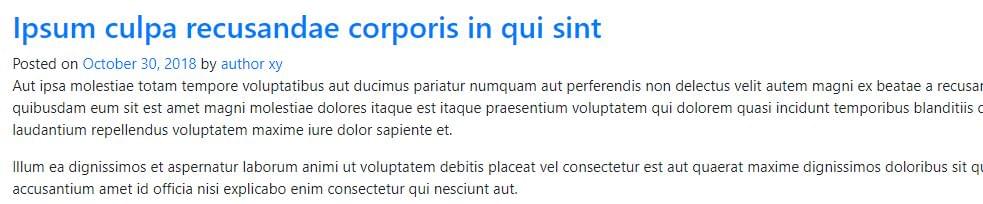
This means that our partial works.
这意味着我们的部分工作。
帖子缩略图 (Posts Thumbnails)
We can see that none of our fake posts have any images in general, and no featured images specifically. If we go to the WordPress dashboard and try to add the featured image to our post/page, we’ll see that there’s no file upload field in the rightmost sidebar. (For those unfamiliar with WordPress, more about this feature can be read here.)
我们可以看到,我们的虚假帖子总体上没有任何图像,也没有专门的特色图像 。 如果我们转到WordPress仪表板并尝试将特色图片添加到我们的帖子/页面,我们将看到最右侧的侧栏中没有文件上传字段。 (对于那些不熟悉WordPress的人,可以在这里阅读有关此功能的更多信息。)
Post thumbnails aren’t enabled by default in WordPress themes. It’s a feature that needs to be turned on specifically in new themes. Most themes have it enabled.
默认情况下,WordPress主题中未启用发布缩略图。 此功能需要在新主题中专门启用。 大多数主题都启用了它。
To do this, we include add_theme_support( 'post-thumbnails' ); line to our functions.php.
为此,我们包含add_theme_support( 'post-thumbnails' ); 符合我们的functions.php 。
Now thumbnails are enabled.
现在启用了缩略图。
Now we can empty our WordPress installation of all the content by using the wp-cli command wp site empty --allow-root (or we can do it manually from the WordPress dashboard), and repopulate it with FakerPress. It should fill posts and pages with featured images it grabs from the Internet. (We’ll need to recreate the Top Menu like before, and assign pages and posts to it.)
现在,我们可以通过使用wp-cli命令wp site empty --allow-root (或者我们可以从WordPress仪表板手动完成)来清空WordPress安装的所有内容,并使用FakerPress重新填充它。 它应该在帖子和页面上填充从互联网上抓取的特色图片。 (我们需要像以前一样重新创建“顶部菜单”,并为其分配页面和帖子。)
One tip: if we’re building themes for sale, or generally themes that will be released to a wider audience, we may want to use theme unit test data provided by Automattic, as it may provide content for testing a wider scope of cases and theme details.
提示:如果我们要构建要出售的主题,或者通常将主题发布给更广泛的受众,则我们可能希望使用Automattic提供的主题单元测试数据 ,因为它可以提供测试更广泛案例和内容的内容。主题详细信息。
We can specify image sizes to FakerPress, but it will in all likelihood still result in a messy look.
我们可以为FakerPress指定图像大小,但是很可能仍然会导致外观混乱。
When we build a theme, one of the techniques used to achieve a polished, standardized look is to specify thumbnail sizes. These are standard sizes WordPress will resize all uploaded image to fit. We’ll use the WordPress add_image_size() function to add several image sizes that our theme will use:
构建主题时,用于获得优美的标准化外观的一种技术是指定缩略图大小 。 这些是标准尺寸WordPress将调整所有上载图像的尺寸以适合。 我们将使用WordPress的add_image_size()函数添加主题将使用的几种图像尺寸:
add_image_size( 'list-thumb-1', 730, 400, true);
add_image_size( 'small-list-thumb-1', 400, 200, true);
add_image_size( 'small-list-thumb-2', 300, 200, true);
add_image_size( 'small-list-thumb-3', 220, 140, true);
Then we’ll output any of the formatted images by using the_post_thumbnail() in our content.php:
然后,我们将在content.php使用the_post_thumbnail()输出任何格式的图像:
<a class="post-thumbnail" href="<?php the_permalink(); ?>" aria-hidden="true" tabindex="-1">
    <?php
    the_post_thumbnail( 'small-list-thumb-1');
    ?>
</a>
To achieve a nicely formatted excerpt in our archive or blog list, we’ll increase font size, but to do this, we’ll reduce the number of words outputted by the_excerpt():
为了在存档或博客列表中获得格式正确的摘录 ,我们将增加字体大小,但要这样做,我们将减少the_excerpt()输出的单词数:
# functions.php
function custom_excerpt_length( $length ) {
    return 40;
}
add_filter( 'excerpt_length', 'custom_excerpt_length', 999 );
To be able to float image (thumbnail we just mentioned) and excerpt, we add the following to the parent element selector in our css:
为了能够浮动图像(我们刚刚提到的缩略图)并摘录,我们将以下内容添加到css中的父元素选择器中:
.home .post-preview.post {
    overflow: hidden;
}
(We don’t cover here the smaller styling adjustments that aren’t crucial to the theme itself.)
(我们不在此介绍对主题本身并不重要的较小的样式调整。)
Now, we can increase our font size, and have the excerpt float around the image, by floating the image (along with the a parent element):
现在,我们可以增加字体大小和图像周围,浮动图像(与沿具有摘录浮动a父元素):
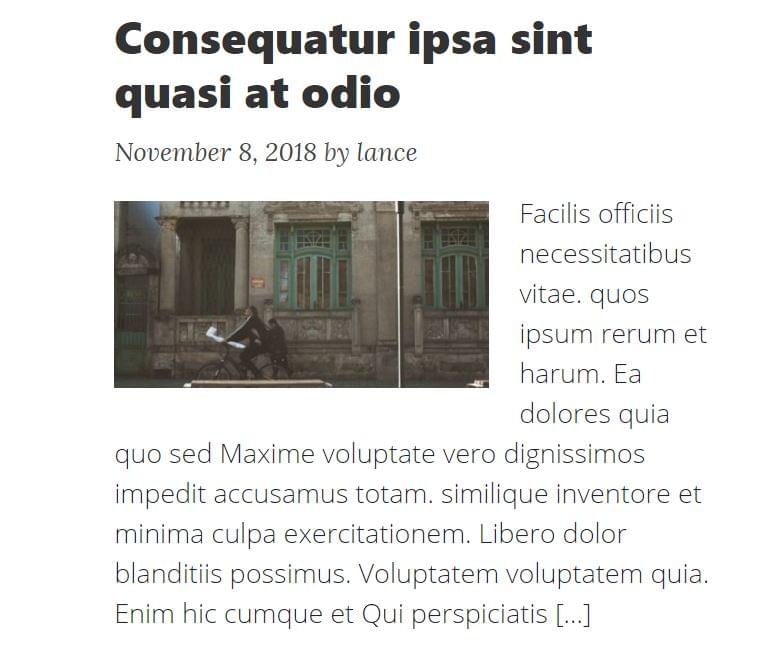
We’ll also use post_thumbnails later, on single posts/pages.
稍后,我们还将在单个帖子/页面上使用post_thumbnails 。
主题侧栏 (Theme Sidebars)
Theme Sidebars are widgetized areas in the theme. They need to be registered in the WordPress system so that we can place different widgets to these areas. Once we do that, we print — or output — these widgets in our template files.
主题侧栏是主题中的窗口小部件区域。 它们需要在WordPress系统中注册,以便我们可以在这些区域放置不同的小部件。 一旦这样做,我们就在模板文件中打印(或输出)这些小部件。
We’ll register a number of sidebars in our theme, which can be seen in the GitHub repository of the theme. We do this by adding the following code to our functions.php:
我们将在主题中注册许多侧边栏,可以在主题的GitHub存储库中看到。 为此,我们将以下代码添加到我们的functions.php :
// Register custom sidebars
function sidebar_register() {

    $args = array(
        'name'          => __( 'home_header', 'bsimple' ),
        'description'   => __( 'home_header', 'bsimple' ),
        'id'            => 'h_h',
        'class'         => 'home_header',
        'before_widget' => ' <div class="dyn-sidebar side sidebar">',
        'after_widget'  => '</div>',
        'before_title'  => '<h2 class="widgettitle">',
        'after_title'   => '</h2>',
    );
    register_sidebar($args);

    $args = array(
        'name'          => __( 'archive_sidebar_1', 'bsimple' ),
        'description'   => __( 'Archive Sidebar no 1', 'bsimple' ),
        'id'            => 'a_s_1',
        'class'         => 'archive_sidebar_1',
        'before_widget' => ' <div class="dyn-sidebar side sidebar">',
        'after_widget'  => '</div>',
        'before_title'  => '<h2 class="widgettitle">',
        'after_title'   => '</h2>',
    );
    register_sidebar($args);

    $args = array(
        'name'          => __( 'bottom_center_sidebar', 'bsimple' ),
        'description'   => __( 'Bottom Center Sidebar', 'bsimple' ),
        'id'            => 'b_c_s',
        'class'         => 'bottom_center_sidebar',
        'before_widget' => '<div id="bottom-center-sidebar">',
        'after_widget'  => '</div>',
        'before_title'  => '<h2 class="widgettitle">',
        'after_title'   => '</h2>',
    );
    register_sidebar($args);

}
add_action( 'widgets_init', 'sidebar_register' );
Here, we show how to register two sidebars. Further details on the register_sidebar() function can be found at wordpress.org.
在这里,我们展示了如何注册两个侧边栏。 有关register_sidebar()函数的更多详细信息,请访问wordpress.org 。
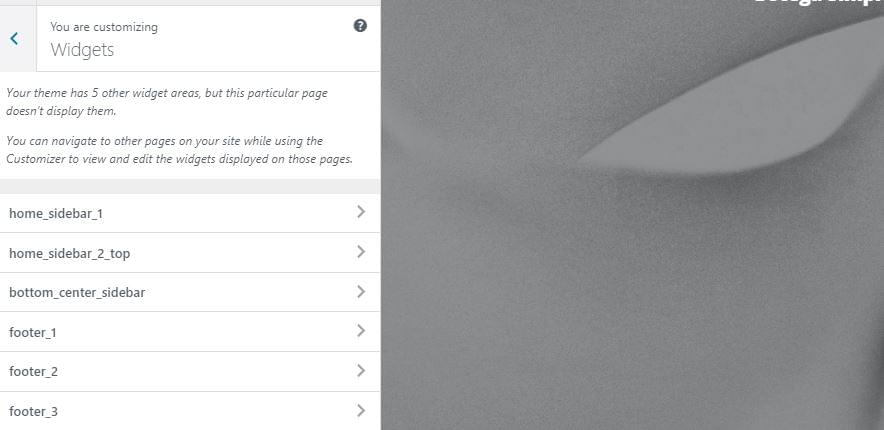
We register eleven sidebars, but we don’t need to output all of these in all page templates or website locations. If they’re outputed in the currently customized page, they’re accessible in the Customizer under widgets:
我们注册了11个侧边栏,但不需要在所有页面模板或网站位置中输出所有这些侧边栏。 如果在当前定制的页面中输出它们,则可以在“ 定制器 ”中的小部件下对其进行访问:
Here’s an example of actual output of the sidebar or widget area in the footer.php — which means it can be displayed globally:
这是footer.php侧边栏或小部件区域的实际输出示例,这意味着它可以全局显示:
<?php if ( is_active_sidebar( 'b_c_s' ) ) : ?>
    <div class="row b_c_s"><div class="col-lg-8 mx-auto  top-widget col-md-10 ">
<?php    get_sidebar( 'BottomCenterSidebar' ); ?>
    </div></div>
<?php endif; ?>
Here we use a sidebar ID we used in the register_sidebar function for the bottom_center_sidebar above.
在这里,我们使用在register_sidebar函数中用于上方bottom_center_sidebar的边栏ID。
We also conditioned the width of the central content container on the home page dependent on whether there are sidebars with active widgets ( is_active_sidebar()):
我们还根据是否有带有活动小部件的侧边栏( is_active_sidebar() )来调节主页上中央内容容器的宽度:
# index.php
<div class="row">
        <?php if ( (is_home() && is_active_sidebar( 'h_s_1' )) || (is_archive() && is_active_sidebar( 'archive_sidebar_1' )) ) { ?>
            <div class="col-lg-7 col-md-9">
        <?php } else { ?>
            <div class="col-lg-12 col-md-10 mx-auto">
        <?php } ?>


            <?php
            if ( have_posts() ) : while ( have_posts() ): the_post();
                        get_template_part( 'partials/content', get_post_type() );
                endwhile;
            endif;
            ?>

        </div>

            <?php if ( (is_home() && is_active_sidebar( 'h_s_1' )) || (is_archive() && is_active_sidebar( 'archive_sidebar_1' )) ) { ?>
                <div class="col-lg-4 offset-lg-1 col-md-10 col-sm-12 arch- sidebar-side-cont">

            <?php }

            if ( is_home() ) :
            get_sidebar( 'HomeSidebar1' );
            elseif ( is_archive() ) :
                get_sidebar( 'ArchiveSidebar1' );
            endif;
            ?>

            <?php if ( (is_home() && is_active_sidebar( 'h_s_1' )) || (is_archive() && is_active_sidebar( 'archive_sidebar_1' )) ) { ?>
            </div>
            <?php } ?>

    </div>
We output Bootstrap classes dependent on these conditions, making sure the theme won’t look empty if we omit setting up widgets for pages such as home.
我们根据这些条件输出Bootstrap类,以确保如果我们省略为诸如home之类的页面设置窗口小部件的情况,主题将不会为空。
After we fill these widget areas with widgets and images, this is what we get:
在用小部件和图像填充这些小部件区域之后,我们得到的是:

Theme is shaping up nicely. Readers will, of course, adapt the styling to their liking.
主题很好地塑造了。 读者当然会根据自己的喜好调整样式。
定制程序API (Customizer API)
When we talk about styling, we’ll mention the customizer API, and show how to use it to give user-friendly control of the background images for the headers.
在谈论样式时,我们将提到定制程序API,并展示如何使用它来为标题提供背景友好的用户友好控制。
Here’s an example of how we create new panel, section and control in our theme (functions.php again):
这是一个示例,说明如何在主题中创建新的panel , section和control (再次是functions.php ):
function register_customizer_controls( $wp_customize ) {
    // Create custom panel.
    $wp_customize->add_panel( 'basic_stylings', array(
        'priority'       => 70,
        'theme_supports' => '',
        'title'          => __( 'Basic Stylings', 'bsimple' ),
        'description'    => __( 'Set main website headers.', 'bsimple' ),
    ) );


    // Add section
    $wp_customize->add_section( 'frontpage_settings' , array(
        'title'      => __( 'Frontpage Settings','bsimple' ),
        'panel'      => 'basic_stylings',
        'priority'   => 20,
    ) );


    // Add setting.
    $wp_customize->add_setting( 'frontpage_header_bg_img', array(
        'default'     => get_stylesheet_directory_uri() . '/images/basic_header_bg.jpg',
    ) );

    // Add control.
    $wp_customize->add_control( new WP_Customize_Image_Control(
        $wp_customize, 'frontpage_background_image', array(
              'label'      => __( 'Add Home Header Background Image Here, the width should be approx 1900px', 'bsimple' ),
              'section'    => 'frontpage_settings',
              'settings'   => 'frontpage_header_bg_img',
              )
    ) );

}

add_action( 'customize_register', 'register_customizer_controls' );
The main thing here is the customize_register hook, and the order of $wp_customize methods (add_panel, add_section, add_setting, add_control. Order matters. The WordPress Codex has a detailed reference of Customizer API.
这里最主要的是customize_register钩子,以及$wp_customize方法的顺序( add_panel , add_section , add_setting , add_control 。顺序很重要add_control Codex有Customizer API的详细参考 。
Once we add our settings and controls in functions.php, we add the following code to the bottom of the bsimple_scripts() function we created to enqueue our scripts and styles:
一旦在functions.php添加了设置和控件, bsimple_scripts()以下代码添加到我们创建的bsimple_scripts()函数的底部,以bsimple_scripts()脚本和样式入队:
$css = '';
$home_header_bg_image = get_theme_mod( 'home_header_bg_img' , get_stylesheet_directory_uri() . '/images/basic_header_bg.jpg'  );
$frontpage_header_bg_image = get_theme_mod( 'frontpage_header_bg_img' , get_stylesheet_directory_uri() . '/images/basic_header_bg.jpg'  );
$global_header_bg_image = get_theme_mod( 'global_header_bg_img' , get_stylesheet_directory_uri() . '/images/basic_header_bg.jpg'  );

$css .= ( !empty($home_header_bg_image) ) ? sprintf('
#main_header.phome {
    background: url(%s) no-repeat center;
}
', $home_header_bg_image ) : '';

$css .= ( !empty($frontpage_header_bg_image) ) ? sprintf('
#main_header.pfront {
    background: url(%s) no-repeat center;
}
', $frontpage_header_bg_image ) : '';

$css .= ( !empty($global_header_bg_image) ) ? sprintf('
#main_header.pglobal {
    background: url(%s) no-repeat center;
}
', $global_header_bg_image ) : '';

if ( $css ) {
    wp_add_inline_style( "bsimple-style"  , $css );
}
We’ve added phome, pfront and pglobal classes to our header containers. Now we use wp_add_inline_style() and the bsimple-style handle we used to enqueue our base theme style at the beginning — to output customizer settings we just created. We use get_theme_mod() to get each setting we registered.
我们已经将phome , pfront和pglobal类添加到了标头容器中。 现在,我们使用wp_add_inline_style()和bsimple-style句柄,该句柄在开始时用于排队基本主题样式-输出我们刚刚创建的定制程序设置。 我们使用get_theme_mod()获取我们注册的每个设置。
This way, we can set images for the headers that we separated into the dynamic_header() function in part 2 of the guide:
这样,我们可以为指南的第2部分中分隔为dynamic_header()函数的标题设置图像:
if(!function_exists('dynamic_header')){

function dynamic_header(){

    global $post;

    ?>

    <?php if (is_home()){ ?>

        <header class="masthead phome" id="main_header">
            <div class="overlay"></div>
            <div class="container">
                <div class="row">
                    <div class="col-lg-8 col-md-10 mx-auto">
                        <div class="site-heading">
                        <h1 class="site-title"><?php bloginfo( 'name' ); ?></h1>
                        <span class="subheading"><?php bloginfo( 'description', 'raw' );?></span>
                        </div>
                    </div>
                </div>
            </div>
        </header>
        <!-- etc. -->
单页和帖子 (Single Pages and Posts)
The WordPress template hierarchy helps us to target the exact URL and post that’s loaded upon visit, so that we can atomically design the HTML output for each of these. Many times, we won’t need to create all the templates.
WordPress模板层次结构可帮助我们定位确切的URL,并在访问时加载该URL,以便我们可以为每个URL原子地设计HTML输出。 很多时候,我们不需要创建所有模板。
Adding a generic background image for all posts or pages wouldn’t make much sense. So our Customizer strategy will work for archives, for blog list of posts, for the front page, and even for terms maybe. But for specific pages and posts, we’ll probably want to set the images individually.
为所有帖子或页面添加通用背景图像没有多大意义。 因此,我们的“定制程序”策略将适用于档案,帖子的博客列表,首页甚至术语。 但是对于特定的页面和帖子,我们可能要单独设置图像。
How do we do this?
我们如何做到这一点?
In our dynamic_header() function, we have pinpointed the header for pages, so now we’ll use an inline style and the get_the_post_thumbnail_url() function to set the pages’ featured image as a header background:
在我们的dynamic_header()函数中,我们已经精确定位了页面的标题,因此现在我们将使用内联样式和get_the_post_thumbnail_url()函数将页面的特色图像设置为标题背景:
<?php } else if (is_page()){

    ?>

    <header class="masthead ppage" id="main_header" style="background-image:url(<?php echo get_the_post_thumbnail_url($post, "full" ); ?>)">
        <div class="overlay"></div>
        <div class="container">
            <div class="row">
                <div class="col-lg-8 col-md-10 mx-auto">
                    <div class="site-heading">
                    <h1 class="site-title"><?php the_title() ?></h1>
                    <span class="subheading"><?php echo get_post_meta($post->ID, "subtitle_", true);?></span>
                    </div>
                </div>
            </div>
        </div>
    </header>
Now the user can set a header image for every single page. We can do the same thing for the is_single() case, which will apply the same solution for all posts — including custom post types.
现在,用户可以为每个页面设置标题图像。 对于is_single()情况,我们可以做相同的事情,它将对所有帖子(包括自定义帖子类型is_single()应用相同的解决方案。
This line will allow users to add a custom field to every page, named subtitle_, and it will be outputted to page header:
此行允许用户向每个页面添加一个名为subtitle_的自定义字段,并将其输出到页面标题:
<span class="subheading"><?php echo get_post_meta($post->ID, "subtitle_", true);?></span>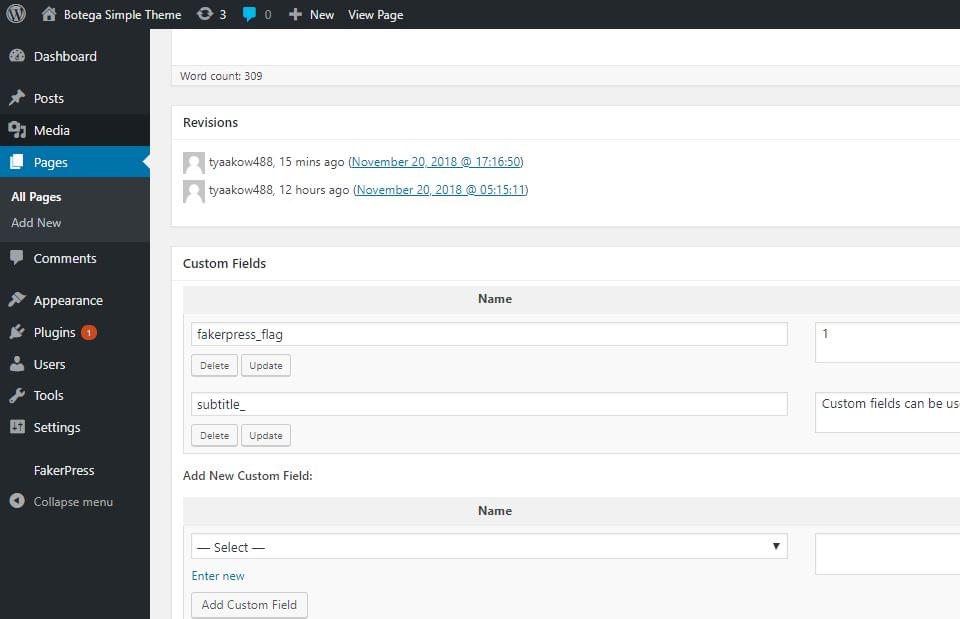
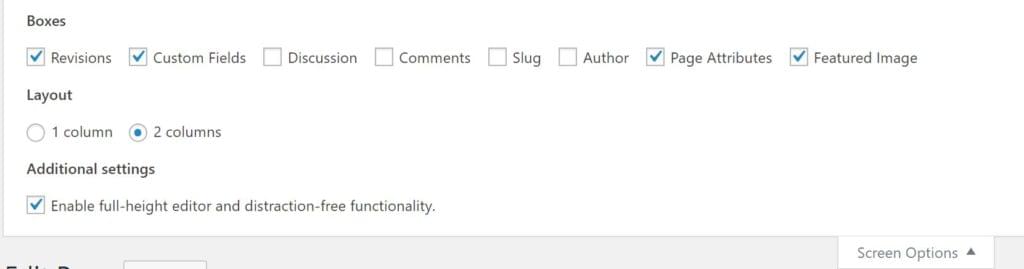
If we don’t see the Custom Fields section, we can enable it through the Screen Options in the to right corner of the edit screen:
如果没有看到“自定义字段”部分,则可以通过编辑屏幕右上角的“ 屏幕选项”启用它:
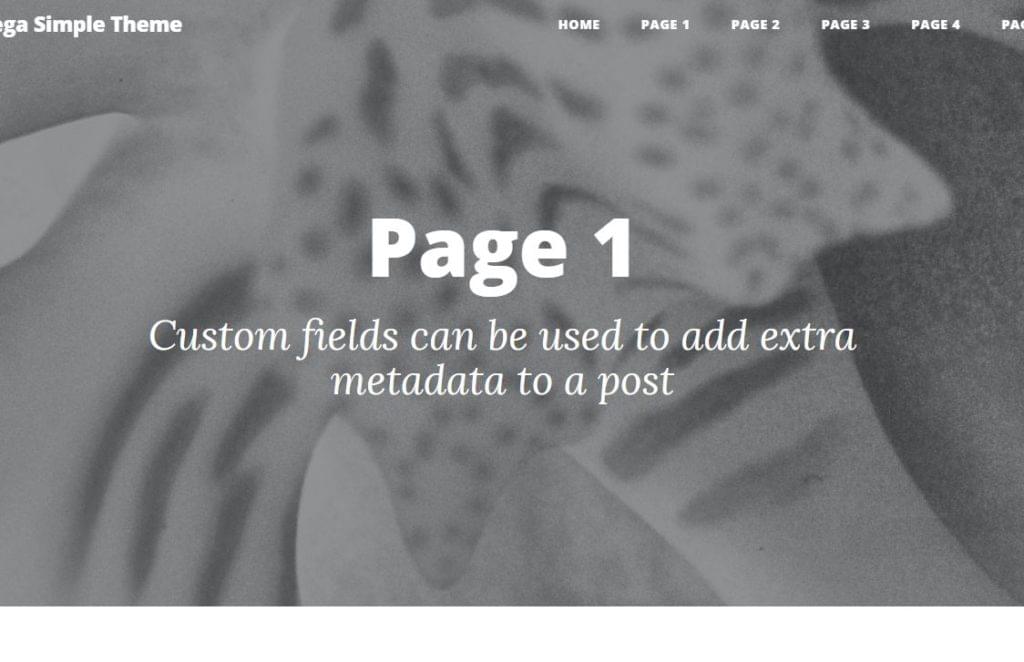
After this is done, we’ll see our subtitle_ meta field showing below the page title on singular pages:
完成此操作后,我们将在单个页面的页面标题下方看到我们的subtitle_ meta字段:
All these things — and styles — can be applied to posts as well.
所有这些内容和样式也可以应用于帖子 。
We now need to format the output in single.php and page.php too.
现在,我们还需要将输出格式化为single.php和page.php 。
Due to the space constraints of this guide, we’ll create the content we’ll use in both of these templates, but the structure will allow the readers to adapt and customize these templates more specifically if needed:
由于本指南的篇幅所限,我们将创建将在这两个模板中使用的内容,但是该结构将允许读者在需要时更具体地适应和定制这些模板:
<?php
/**
 *
 * @package Botega Simple Theme
 */

get_header(); ?>

    <div class="col-lg-10 mx-auto col-md-10 col-md-offset-1 single-container">

<?php if ( have_posts() ) : ?>

<?php while ( have_posts() ) : the_post(); ?>

<?php get_template_part( 'partials/content', 'single' ); ?>

<?php endwhile; // End of the loop. ?>

<?php endif; ?>

</div>
<!-- /.col-lg-8.col-lg-offset-2.col-md-10.col-md-offset-1 -->

<?php get_footer(); ?>
Here we’re using a single-column layout, 10/12 wide, centered with mx-auto class. We use the partial content-single.php to output the actual content.
在这里,我们使用以mx-auto类为中心的10/12宽的单列布局。 我们使用partial content-single.php输出实际内容。
In this partial, we use the_content() and wp_link_pages():
在本部分中,我们使用the_content()和wp_link_pages() :
<?php
/**
 * Template part for displaying single posts.
 *
 * @package Botega Simple Theme
 */

?>

<?php

the_content();

wp_link_pages();

?>
Now we have basic minimum for single pages and posts, but more can be added using WordPress functions. We can automatically specify what details we want WordPress to output in a single post, single page, and pages belonging to specific categories etc.
现在,我们对单个页面和帖子有了基本的最低要求,但是可以使用WordPress函数添加更多内容。 我们可以自动指定希望WordPress在单个帖子,单个页面以及属于特定类别的页面等中输出的详细信息。
全球小部件和页脚 (Global Widgets and Footer)
We’ve created three widget (sidebar) areas for our footer, and we added the output to footer.php. We also added a section — or widget area — just above the footer tag. These widgets are not specific to the home page, or pages, or archives, but they are rather global. Once we assign widgets to them, they’ll display site-wide:
我们为页脚创建了三个小部件(侧栏)区域,并将输出添加到footer.php 。 我们还在footer标记上方添加了一个部分(或小部件区域)。 这些小部件不是特定于主页,页面或档案的,而是相当全局的。 将窗口小部件分配给它们后,它们将在整个网站范围内显示:
<?php
/**
 * Footer template partial
 *
 * @package Botega_Scratch_Theme
 *
 */

?>

    <?php if ( is_active_sidebar( 'b_c_s' ) ) : ?>
     <div class="row b_c_s"><div class="col-lg-8 mx-auto  top-widget col-md-10 ">
    <?php    get_sidebar( 'BottomCenterSidebar' ); ?>
     </div></div>
    <?php endif; ?>

  </div>
  <!-- /.container -->

  <!-- Footer -->
  <footer id="footer">
    <div class="container">
      <div class="row">
     <div class="col-lg-4 col-sm-12" id="f_1">  <?php  get_sidebar( 'Footer1' ); ?> </div>
     <div class="col-lg-4 col-sm-12" id="f_2">  <?php  get_sidebar( 'Footer2' ); ?> </div>
     <div class="col-lg-4 col-sm-12" id="f_3">  <?php  get_sidebar( 'Footer3' ); ?> </div>

      </div><!-- /.row -->
    </div><!-- /.container -->
  </footer><!-- /footer -->

<?php wp_footer(); ?>

</body>
</html>
What we get is a simple bottom and footer area we can populate with widgets:
我们得到的是一个简单的底部和页脚区域,可以使用小部件填充该区域:
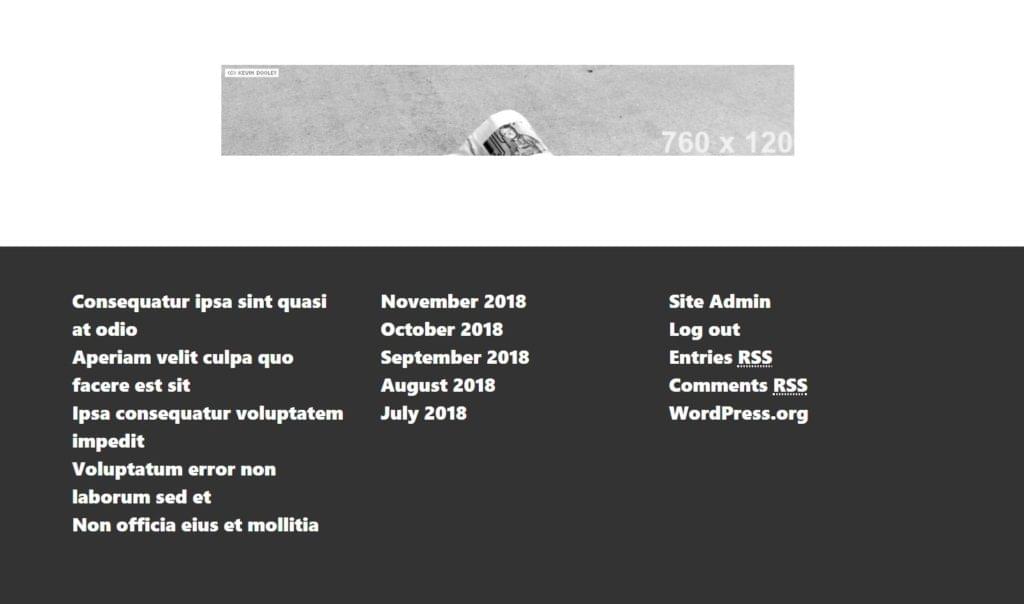
We now have a minimal but functional theme we can use to display content.
现在,我们有了一个最小但实用的主题,可以用来显示内容。
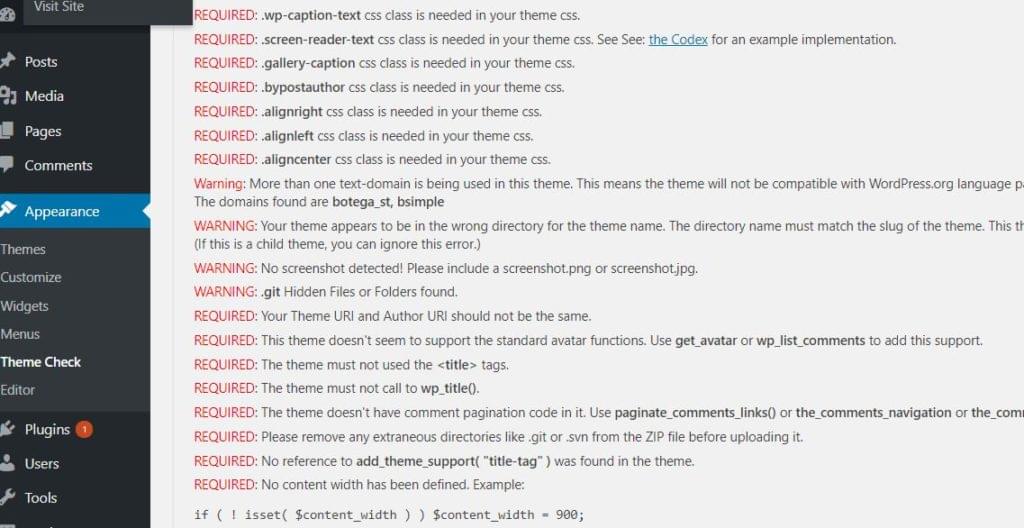
This guide will stop here, but next thing a prospective theme builder may want to do is to make sure that all use cases are covered, and that the theme is 100% full-featured. to do so, install the Theme Check plugin, among other tools, to inspect what our theme is lacking, and make sure everything is up to standards:
本指南将在此处停止,但是潜在的主题构建者可能要做的下一件事是确保覆盖所有用例,并且该主题是100%全功能的。 为此,请安装Theme Check插件以及其他工具,以检查我们缺少的主题,并确保所有内容均符合标准:
结论 (Conclusion)
This guide has aimed to be a thorough introduction to WordPress theme building. It’s hopefully introduced all the fundamental WordPress theme building concepts, and demonstrated how they come together.
本指南旨在对WordPress主题构建进行全面介绍。 希望它介绍了所有基本的WordPress主题构建概念,并演示了它们如何组合在一起。
But there are still things to learn — like comments partials, author templates, 404 pages and many other little details that should be covered if we wanted to go more professional with this theme.
但是仍然有很多东西需要学习,例如注释部分,作者模板,404页和许多其他小细节,如果我们想使这个主题变得更加专业,则应该涵盖。
The initial code for this series is available at GitHub here, and the final version of the theme we built in this guide is available here.
该系列的初始代码可以在GitHub上找到 ,而我们在本指南中构建的主题的最终版本可以在这里找到 。
On these foundations a lot more can be built, with the help of the comprehensive WordPress Codex.
在这些基础上,借助全面的WordPress Codex可以构建更多的东西。
There are three articles in this series on building a WordPress theme from scratch:
本系列中的三篇文章从头开始构建WordPress主题:
refining the theme
完善主题
翻译自: https://www.sitepoint.com/build-wordpress-theme-from-scratch-final/
fcn从头开始


 1373
1373

 被折叠的 条评论
为什么被折叠?
被折叠的 条评论
为什么被折叠?
 到【灌水乐园】发言


