


jquery 注释
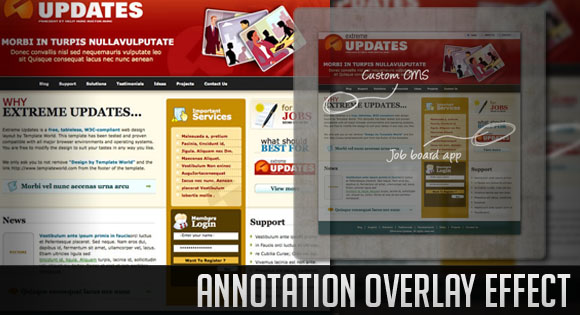
Today we will create a simple overlay effect to display annotations in e.g. portfolio items of a web designers portfolio. We got the idea from the wonderful portfolio of www.rareview.com where Flash is used to create the effect. We will use jQuery.
今天,我们将创建一个简单的叠加效果,以在Web设计器产品组合的产品组合项目中显示注释。 我们从www.rareview.com的精彩作品集中获得了这个想法,其中使用Flash来创造效果。 我们将使用jQuery。
The Website Templates that we will be using for the annotated screenshots were found via the great Honkiat.com post 60 High Quality Free Web Templates and Layouts
我们将在带注释的屏幕截图中使用的网站模板是通过Honkiat.com上的60大高质量免费Web模板和布局找到的
So, let’s start with the markup!
因此,让我们从标记开始!
标记 (The Markup)
The HTML is pretty simple: we have a main “portfolio” wrapper where we add the “portfolio_item” elements. Each of the elements has an “image_wrap” with the screenshot of the website, and a “zoom_overlay” with an image of the website notes inside:
HTML非常简单:我们有一个主要的“ portfolio”包装器,在其中添加了“ portfolio_item”元素。 每个元素都有一个带有网站屏幕快照的“ image_wrap”和一个带有网站注释图像的“ zoom_overlay”:
<div class="portfolio">
	<div class="portfolio_item">
		<div class="image_wrap">
			<img src="images/website1.jpg" alt="Website1"/>
		</div>
		<div class="zoom_overlay">
			<img src="images/website1_notes.png" alt="Website1Notes"/>
		</div>
	</div>
	...
</div>
Let’s style the whole thing.
让我们对整个事情进行样式化。
CSS (The CSS)
We will start by styling the big portfolio wrapper:
我们将从样式大的包装器样式开始:
.portfolio{
	width:500px;
	margin:0 auto;
	position:relative;
}
The portfolio items will have the following style:
投资组合项目将具有以下样式:
.portfolio_item{
	position:relative;
	margin:30px auto;
}
The image_wrap div that contains the screenshot that we see initially, will have a table-cell display because we want to center the image inside vertically:
包含我们最初看到的屏幕截图的image_wrap div将具有表格单元显示,因为我们想将图像垂直居中放置:
.image_wrap{
	width:500px;
	height:500px;
	display:table-cell;
	text-align:center;
	vertical-align:middle;
	position:relative;
	cursor:pointer;
}
We will center the image horizontally by saying text-align:center. This works because an image has a default display of “inline”.
我们将通过说text-align:center将图像水平居中。 之所以可行,是因为图像的默认显示为“嵌入式”。
We will add a nice shadow around the image:
我们将在图像周围添加一个漂亮的阴影:
.image_wrap > img{
	vertical-align:middle;
	margin:0 auto;
	position:relative;
	-moz-box-shadow:1px 1px 7px #000;
	-webkit-box-shadow:1px 1px 7px #000;
	box-shadow:1px 1px 7px #000;
}
For our jQuery effect, we will want to animate the width of the image. The horizontal alignment should make the image be in the middle but the text-align property is not enough. We also need to add the auto margins to the sides to make the animation work.
对于我们的jQuery效果,我们将希望对图像的宽度进行动画处理。 水平对齐方式应使图像位于中间,但text-align属性不够。 我们还需要在两侧添加自动边距以使动画生效。
The overlay div will be place absolutely, since we want it to appear on top of the image. To center it, we will apply the 50% negative margins trick:
overlay div将绝对放置,因为我们希望它出现在图像的顶部。 为了使其居中,我们将应用50%的负边距技巧:
.zoom_overlay{
	width:400px;
	height:400px;
	margin:-200px 0px 0px -200px;
	background:transparent url(../images/overlay.png) repeat top left;
	position:absolute;
	top:50%;
	left:50%;
	display:none;
	opacity:0;
	-moz-border-radius:10px;
	-webkit-border-radius:10px;
	border-radius:10px;
	cursor:pointer;
	filter:progid:DXImageTransform.Microsoft.Alpha(opacity=0);
}
The opacity is set to 0 because we will want to animate it when we show it.
将不透明度设置为0,因为在显示时将要对其进行动画处理。
The image with the notes will be hidden initially:
带有注释的图像最初将被隐藏:
.zoom_overlay img{
	display:none;
}
And that’s the style! Let’s add the magic!
这就是风格! 让我们添加魔法!
JavaScript (The JavaScript)
The main idea behind the effect is to make the screenshot smaller and make an overlay with the annotations appear on top of it. In our jQuery function we will first store the main div in a variable:
效果背后的主要思想是缩小屏幕截图,并在其顶部显示带有注释的覆盖图。 在我们的jQuery函数中,我们将首先将主div存储在一个变量中:
var $portfolio = $('#portfolio');
Then we define what happens when we click on the screenshot. We will animate the image’s height and width and make the overlay appear. The overlay will animate in opacity, width, height and in margins since we want it to be centered. Remember, we were positioning it absolutely with a top and left of 50%:
然后,我们定义单击屏幕快照时发生的情况。 我们将对图像的高度和宽度进行动画处理,并显示叠加层。 因为我们希望将其居中,所以叠加层将以不透明度,宽度,高度和边距为动画。 请记住,我们将其绝对定位为顶部和底部分别为50%:
$portfolio.find('.image_wrap').bind('click',function(){
	var $elem	= $(this);
	var $image	= $elem.find('img:first');
	$image.stop(true)
		  .animate({
			'width'	:'400px',
			'height':'400px'
		  },250);

	//the overlay is the next element
	var opacity	= '1';
	if($.browser.msie)
		opacity	= '0.5'
	$elem.next()
		 .stop(true)
		 .animate({
			'width'		:'500px',
			'height'	:'500px',
			'marginTop'	:'-250px',
			'marginLeft':'-250px',
			'opacity'	:opacity
		},250,function(){
			//fade in the annotations
			$(this).find('img').fadeIn();
		});
});
Now, we will define what happens when we click on the overlay. We will want it to disappear and make the image animate back to its initial size:
现在,我们将定义单击叠加层时发生的情况。 我们将希望它消失,并使图像重新恢复其初始大小:
$portfolio.find('.zoom_overlay').bind('click',function(){
	var $elem	= $(this);
	var $image	= $elem.prev()
					   .find('img:first');
	//hide overlay
	$elem.find('img')
		 .hide()
		 .end()
		 .stop(true)
		 .animate({
			'width'		:'400px',
			'height'	:'400px',
			'marginTop'	:'-200px',
			'marginLeft':'-200px',
			'opacity'	:'0'
		 },125,function(){
			//hide overlay
			$(this).hide();
		 });

	//show image
	$image.stop(true)
		  .animate({
			'width':'500px',
			'height':'500px'
		  },250);
});
And that’s it! To integrate this into your portfolio you need to make some transparent image with some notes that fits on the smaller sized image.
就是这样! 要将其集成到您的投资组合中,您需要制作一些透明的图像,并带有适合较小尺寸图像的注释。
We hope you enjoyed this effect and found it useful!
我们希望您喜欢此效果并发现它有用!
翻译自: https://tympanus.net/codrops/2010/10/12/annotation-overlay-effect/
jquery 注释


 3791
3791


 被折叠的 条评论
为什么被折叠?
被折叠的 条评论
为什么被折叠?
 到【灌水乐园】发言


