
linux 终端多任务
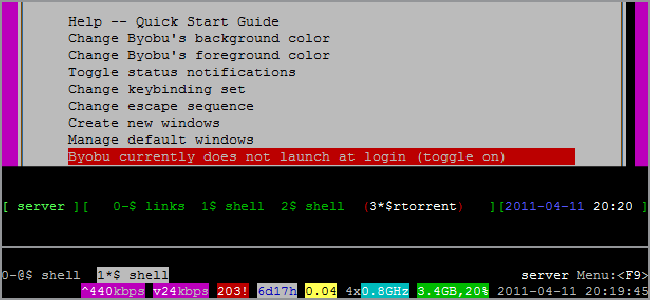
Multitasking on the command-line can be really confusing for beginners who use Screen. Using Byobu puts a host of system stats available at a glance while making it easy for newbies to work without memorizing hard-to-remember keybindings.
对于使用Screen的初学者而言,命令行上的多任务处理确实会造成混乱。 使用Byobu可使您一目了然地获得大量系统统计信息,同时使新手可以轻松地工作而无需记住难以记住的键绑定。
GNU Screen is a godsend for most people who are working in terminal. It allows you to spawn multiple instances and let’s you disconnect from them and return to them later. It’s also pretty notorious for having a high learning curve. Enter Byobu.
对于大多数在终端工作的人来说,GNU Screen是一个天赐之物。 它允许您生成多个实例,并让它们与它们断开连接,然后稍后再返回 。 学习曲线也很臭。 输入Byobu。
屏幕vs Byobu (Screen vs Byobu)
Byobu is an enhancement that connects to and uses Screen, but offers useful statistics and easy-to-use hotkeys for the basic commands. For reference, here’s Screen:
Byobu是一种连接到并使用Screen的增强功能,但是为基本命令提供了有用的统计信息和易于使用的热键。 供参考,以下是屏幕:
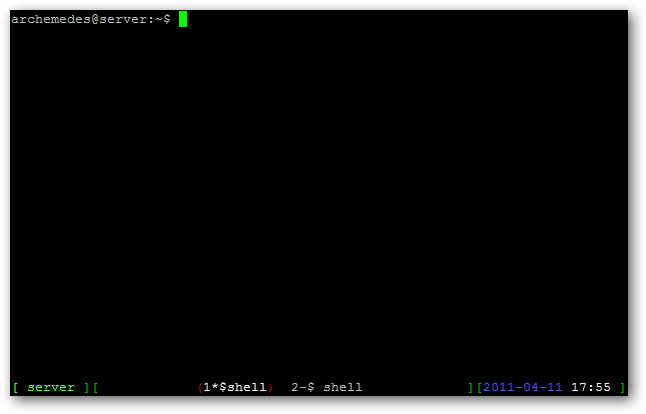
GNU Screen by default doesn’t give you anything to find your bearing, but by editing the .screenrc file, you can add a “hardstatus” line like in the above screenshot. You can see the machine name in the bottom left, and some date and time on the bottom right. The middle shows you how many shells are open and which is active.
默认情况下,GNU Screen无法为您提供任何帮助,但是通过编辑.screenrc文件,您可以像上面的屏幕截图一样添加“ hardstatus”行。 您可以在左下方看到计算机名称,并在右下方看到一些日期和时间。 中间显示了打开了多少个外壳,哪些处于活动状态。
On the other hand, here’s the default Byobu screen:
另一方面,这是默认的Byobu屏幕:
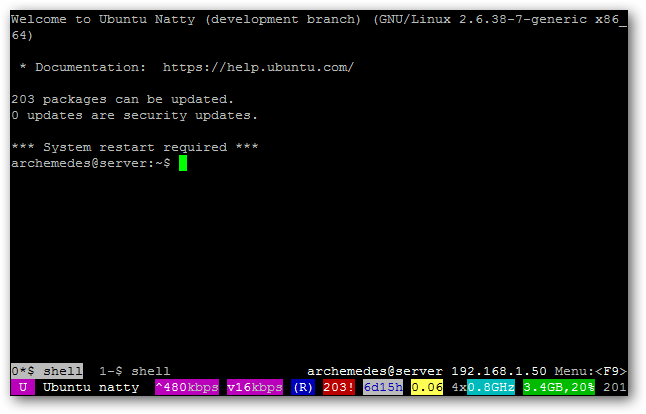
And yes, that’s the default. You’ll see the open shells and a host of other stats, such as uptime, core clock speed, CPU load, memory use, network speeds, packages in need of updating, and so on. You can change the colors you want and the options you like, too.
是的,这是默认设置。 您将看到开放的外壳程序以及许多其他统计信息,例如正常运行时间,核心时钟速度,CPU负载,内存使用,网络速度,需要更新的软件包等等。 您也可以更改所需的颜色和所需的选项。
安装和定制 (Installation and Customization)
In order to use Byobu, you also need to install Screen. We can use a simple terminal command to install both.
为了使用Byobu,您还需要安装Screen。 我们可以使用一个简单的终端命令来安装两者。
sudo apt-get install screen byobu
sudo apt-get安装屏幕byobu
Enter your password and hit “y” if prompted for confirmation. Next, it’s time for easy customization.
输入密码,如果提示确认,请单击“ y”。 接下来,是时候轻松进行自定义了。
You launch Byobu by just typing it into the command line.
您只需在命令行中键入即可启动Byobu。
byobu
o
If you want to use options for Screen, you can just plug them in and it’ll pass them along. Here, we’ll use the –S (capital ‘S’) option to give the session a title.
如果您想使用“屏幕”选项,则只需将其插入,它就会传递它们。 在这里,我们将使用–S(大写的“ S”)选项为会话命名。
byobu –S session_title
byobu –S session_title
You can also resume sessions by using the –r flag.
您也可以使用–r标志来恢复会话。
byobu –r
byobu –r
Or you can resume by name:
或者,您可以按名称恢复:
byobu –r session_title
byobu –r session_title
You’ll see the default screen. To begin customizing, hit the F9 key.
您会看到默认屏幕。 要开始自定义,请按F9键。
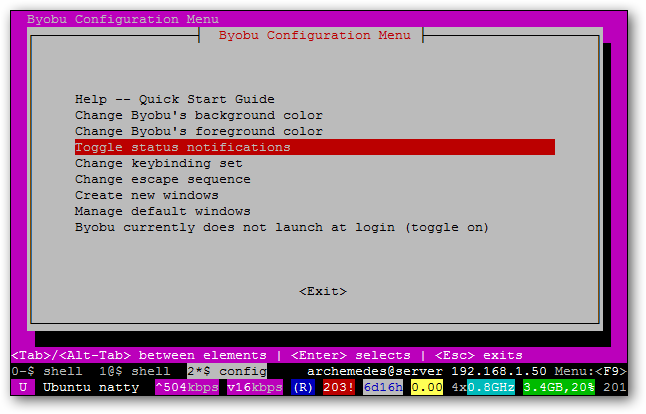
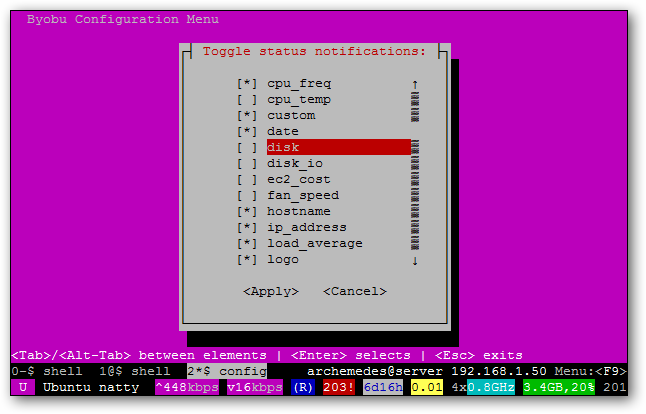
Jump down to “Toggle status notifications” to change what shows up at the bottom.
跳至“切换状态通知”以更改底部显示的内容。
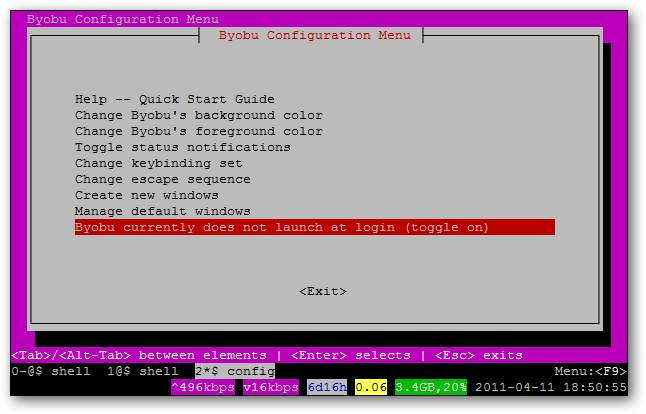
You can also make Byobu launch by default whenever you connect/login.
您也可以在每次连接/登录时默认启动Byobu。
You can also change the background and foreground colors if you like.
您也可以根据需要更改背景和前景色。
热键 (Hotkeys)
You can use all of Screen’s default hotkeys without a second glance. However, Byobu has easier keybindings that utilize the function keys:
您无需再次浏览即可使用屏幕的所有默认热键。 但是,Byobu具有使用功能键的更简单的键绑定:
F2: Create a new window
F2 :创建一个新窗口
F3: Move to previous window
F3 :移至上一个窗口
F4: Move to next window
F4 :移至下一个窗口
F5: Reload profile
F5 :重新加载配置文件
F6: Detach from this session
F6 :离开本次会议
F7: Enter copy/scrollback mode
F7 :进入复制/回滚模式
F8: Re-title a window
F8 :重新命名窗口
F9: Configuration Menu, can also be summoned by Ctrl+a, Ctrl+@
F9 :配置菜单,也可以通过Ctrl + a,Ctrl + @召唤
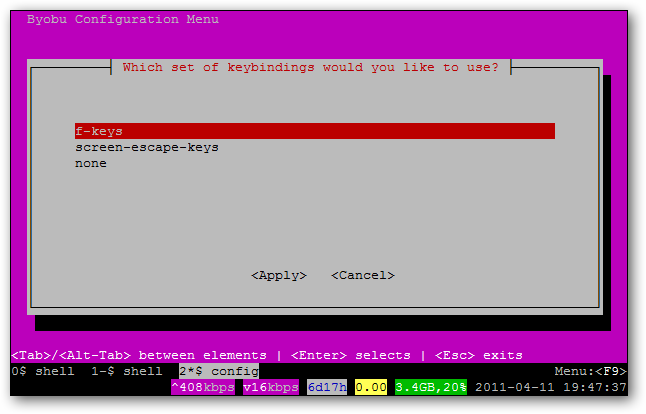
As you can see, this is much easier than using Screen’s Ctrl+a,Ctrl sequences. If you prefer Screen’s keybinding set or if they interfere with another program (like Midnight Commander), then you can switch from using the function keys to Screen-style keys in the menu, or hit by hitting the following key sequence:
如您所见,这比使用Screen的Ctrl + a,Ctrl序列要容易得多。 如果您更喜欢Screen的键绑定集,或者它们干扰了另一个程序(例如Midnight Commander),则可以从使用功能键切换到菜单中的Screen样式键,或者按以下键序列进行击键:
Ctrl+a, ctrl+!
Ctrl + a,Ctrl +!
油灰 (PuTTY)
If you’re using PuTTY or KiTTY, then there’s just one last step you’ll need to take. The F keys may not work properly at first, but it’s an easy fix.
如果您使用的是PuTTY或KiTTY,则只需采取最后一步。 F键起初可能无法正常工作,但这很容易解决。
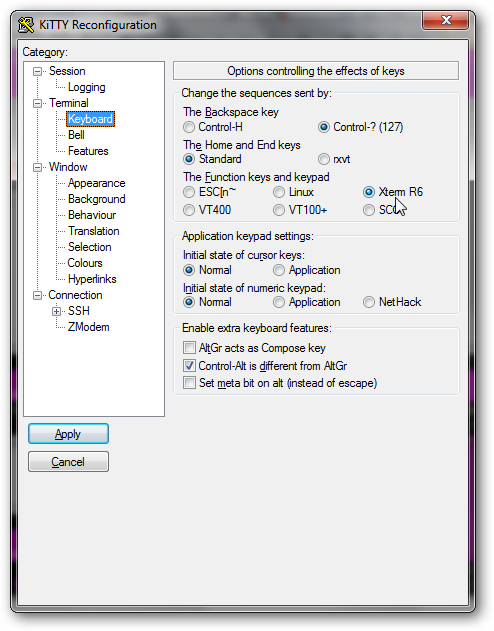
Under the Keyboard options, you’ll have to change the Function keypad settings to “Xterm R6.” Now you’re set to enjoy Byobu via SSH!
在键盘选项下,您必须将功能键盘设置更改为“ Xterm R6”。 现在您可以通过SSH享受Byobu了!
翻译自: https://www.howtogeek.com/58487/how-to-easily-multitask-in-a-linux-terminal-with-byobu/
linux 终端多任务


 4632
4632

 被折叠的 条评论
为什么被折叠?


