


Adding pictures to your PowerPoint presentation can make it more visually appealing. However, when you first add a new image, it covers up whatever else is on the slide, including text. Here’s how to move pictures and other objects backward and forward to create the layering you want.
将图片添加到PowerPoint演示文稿中可以使其在视觉上更具吸引力。 但是,当您第一次添加新图像时,它会掩盖幻灯片上的所有其他内容,包括文本。 以下介绍了如何前后移动图片和其他对象以创建所需的分层。
在文本后面发送图像 (Sending an Image Behind Text)
If you haven’t already, go ahead and open the PowerPoint presentation you’ll be working with and hop over to the slide with the text and image.
如果还没有,请继续并打开要使用的PowerPoint演示文稿,然后跳至带有文本和图像的幻灯片。
We’ll go over layering images in a bit, but right now we will just be working with a single image and some text.
我们将略微对图像进行分层,但是现在我们将只处理单个图像和一些文本。

As you can see in the image above, The Geek image is covering the “How-To Geek” text. To put the image behind the text, first, click the image to select it and then go to the “Format” tab.
如上图所示,The Geek图片覆盖了“ How-To Geek”文本。 要将图像放在文本后面,请先单击图像以将其选中,然后转到“格式”选项卡。
Over at the “Arrange” section, click the “Send Backward” button. A drop-down menu will appear with two options.
在“安排”部分的上方,单击“向后发送”按钮。 将出现一个带有两个选项的下拉菜单。

“Send Backward” sends the image back one level. “Send to Back” places the object behind all other objects on the slide. For now, select “Send Backward” (we’ll talk about layering image more in a bit).
“向后发送”将图像发送回一级。 “发送回”将对象放置在幻灯片上所有其他对象的后面。 现在,选择“向后发送”(我们将进一步讨论如何对图像进行分层)。
Now, your image will be behind the text.
现在,您的图像将位于文本后面。

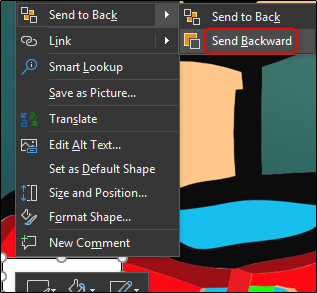
Alternatively, you could right-click the object, click the arrow next to “Send to Back,” and then select “Send Backward.”
或者,您可以右键单击该对象,单击“发送至后退”旁边的箭头,然后选择“向后发送”。

The “Bring Forward” and “Bring to Front” options you’ll see on the Format tab and the context menu work much the same way. You’d use these options to move an object in front of another. So, in this example, we also could have selected the text and brought it forward to accomplish the same effect.
您将在“格式”选项卡和上下文菜单上看到的“前移”和“前移”选项的工作方式几乎相同。 您将使用这些选项将一个对象移动到另一个对象的前面。 因此,在此示例中,我们还可以选择文本并将其提出来实现相同的效果。
对象分层 (Object Layering)
Now let’s say we have three objects, and we want to layer them in a way that all of them serve their purpose. As an example, let’s give The Geek a name tag. We’ll be using three objects:
现在假设我们有三个对象,并且我们希望它们以它们都能满足其目的的方式进行分层。 例如,让我们给The Geek一个name标签。 我们将使用三个对象:
- A picture of the How-To Geek logo How-To Geek徽标图片
- A solid white rectangle 白色实心矩形
- A text box with black text that reads “The Geek” 黑色文本的文本框显示为“ The Geek”
What we want is for the image to be in the back, the white rectangle to be in front of the image, and then the text to be in front of the white rectangle. However, we created our text and white rectangle first and then inserted our image, so the image is now in front of everything else.
我们想要的是图像在图像的后面,白色矩形在图像的前面,然后文本在白色矩形的前面。 但是,我们先创建了文本和白色矩形,然后插入了图像,因此图像现在位于所有其他图像的前面。
Note: Yes, we know that we could just type text into the white rectangle shape to make things easier, but we’re doing it this way for an easy example of layering.
注意:是的,我们知道我们可以将文本键入白色矩形形状来简化操作,但是我们这样做是为了作为一个简单的分层示例。
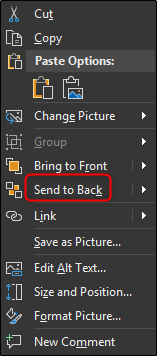
First, we want to select the picture logo and send it to the very back since we want all the other objects to appear in front of it. Select the image, right-click it, and then select “Send to Back” (or use the button on the “Format” tab).
首先,我们希望选择图片徽标并将其发送到最后面,因为我们希望所有其他对象都出现在徽标的前面。 选择图像,右键单击它,然后选择“发送回”(或使用“格式”选项卡上的按钮)。
This sends the image The Geek to the very back layer, as you can see below.
这会将图像The Geek发送到最底层,如下所示。
However, as you can see in the above image, our text is hidden behind the white rectangle. Next, select the white box, right-click it, and this time select “Send Backward” from the “Send to Back” options.
但是,如上图所示,我们的文本隐藏在白色矩形的后面。 接下来,选择白色框,右键单击它,这次从“发送到背面”选项中选择“向后发送”。
Note that if you select “Send to Back,” your white rectangle will disappear behind The Geek.
请注意,如果选择“ Send to Back”,则白色矩形将消失在The Geek后面。
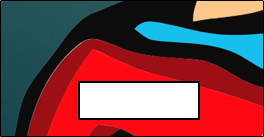
Here’s what we have now.
这就是我们现在所拥有的。

Now, from back to front, we have the image, the white rectangle, and then the black text box in front. That’s the order we were after.
现在,从后到前,我们在前面有图像,白色矩形和黑色文本框。 那就是我们追求的顺序。
While the odds of you needing to give a name tag to a logo in a presentation are pretty slim, image layering is an important part of working with more complex slides.
虽然在演示文稿中需要给徽标加上名称标签的可能性很小,但图像分层是使用更复杂的幻灯片的重要组成部分。
翻译自: https://www.howtogeek.com/399721/how-to-get-a-picture-behind-text-in-powerpoint/


 792
792

 被折叠的 条评论
为什么被折叠?
被折叠的 条评论
为什么被折叠?
 到【灌水乐园】发言


