
Use the Nexus Root Toolkit to quickly root your Nexus devices, whether you’ve got a Nexus 7, Galaxy Nexus, or even a Nexus S. Rooting allows you to use powerful apps that don’t work in Android’s default sandbox.
无论您有Nexus 7,Galaxy Nexus甚至是Nexus S,都可以使用Nexus Root Toolkit快速启动Nexus设备。通过Rooting,您可以使用功能强大的应用程序,这些应用程序无法在Android的默认沙箱中运行。
We’ve covered rooting Android before, and the method provided didn’t work for many users – it’s hard to give instructions that will work with all the Android devices out there. This method should work perfectly, but only with Nexus devices.
之前我们已经介绍了如何扎根Android ,并且提供的方法不适用于许多用户-很难给出适用于所有Android设备的说明。 此方法应该可以完美运行,但仅适用于Nexus设备。
This process will wipe the data from your Nexus device, so you’ll have to back up and restore your data during the process. You’ll also unlock the Nexus device’s bootloader during this process, allowing the installation of custom ROMs.
此过程将清除Nexus设备上的数据,因此您必须在此过程中备份和还原数据。 在此过程中,您还将解锁Nexus设备的引导加载程序,从而可以安装自定义ROM。
安装Nexus Root工具包 (Install the Nexus Root Toolkit)
You can download the Nexus Root Toolkit, developed by WugFresh, here. Run the .exe file after downloading it to install it. The Nexus Root Toolkit will launch automatically after you install it. Select the device model and Android version you’re using.
您可以在此处下载由WugFresh开发的Nexus Root工具包。 下载后运行.exe文件进行安装。 Nexus Root Toolkit安装后将自动启动。 选择您使用的设备型号和Android版本。

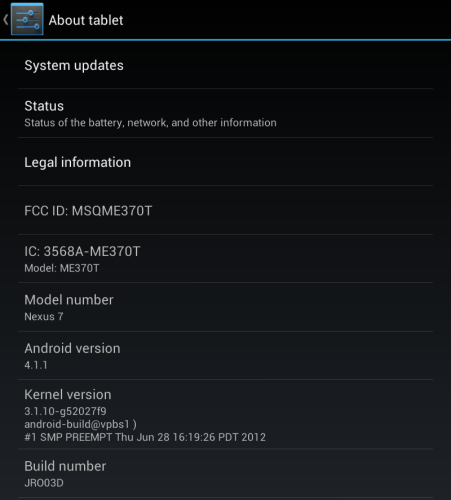
If you’re not entirely sure of the device you’re using, open the Settings screen on your device and select About Tablet or About Phone.
如果您不确定所使用的设备,请打开设备上的“设置”屏幕,然后选择“关于平板电脑”或“关于手机”。
驱动安装 (Driver Installation)
Ensuring your computer has the correct drivers so it can communicate with your Nexus can be one of the most complicated parts of rooting. The Nexus Root Toolkit includes automatic driver configuration – if that fails, it can walk you through the process of setting up drivers manually.
确保计算机具有正确的驱动程序,使其能够与Nexus通讯,这可能是植根最复杂的部分之一。 Nexus Root Toolkit包含自动驱动程序配置-如果失败,它将引导您完成手动设置驱动程序的过程。
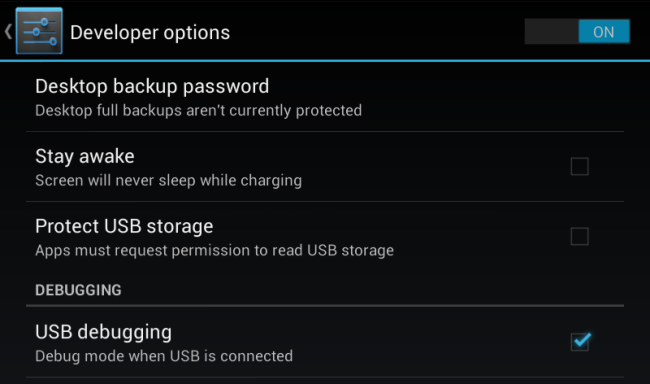
You’ll need USB debugging enabled on your Nexus to unlock and root it. Open the Settings screen, select Developer Options, set the slider at the top of the Developer Options screen to On and enable the USB debugging checkbox.
您需要在Nexus上启用USB调试才能解锁和将其启动。 打开“设置”屏幕,选择“开发人员选项”,将“开发人员选项”屏幕顶部的滑块设置为“开”,并启用USB调试复选框。
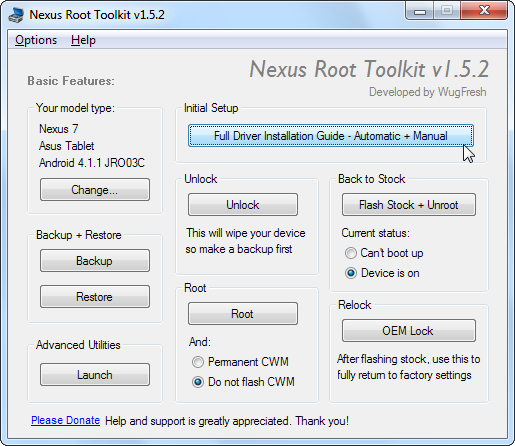
Click the Full Driver Installation Guide – Automatic + Manual button in the Nexus Root Toolkit window to get started.
点击Nexus Root Toolkit窗口中的“ 完整驱动程序安装指南–自动+手动”按钮以开始使用。
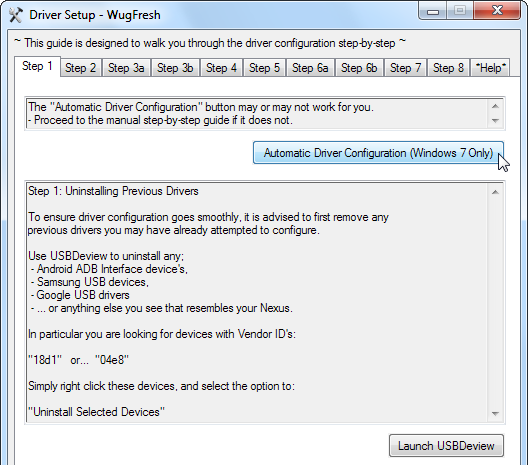
Try the Automatic Driver Configuration button, assuming you’re using Windows 7 – ideally, this will take care of everything for you.
假设您使用的是Windows 7,请尝试使用“ 自动驱动程序配置”按钮-理想情况下,这将为您解决所有问题。
Connect your Nexus to your computer with its included USB cable when you’re prompted. After Windows finishes installing the drivers, click OK.
出现提示时,请使用随附的USB电缆将Nexus连接到计算机。 Windows完成驱动程序的安装后,单击“确定”。
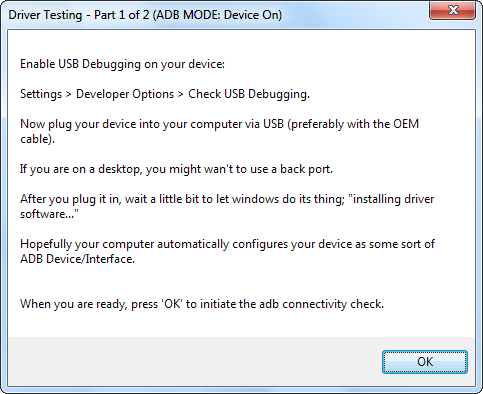
If this didn’t work, you’ll have to follow the steps in the Driver Setup window to configure your drivers manually. Complete each step in order, following the instructions – they’ll walk you through the process. Personally, I had to complete the manual driver setup, installing the Samsung drivers (the Nexus 7 is an ASUS device, but the Samsung drivers worked for me).
如果这不起作用,则必须按照“驱动程序设置”窗口中的步骤手动配置驱动程序。 按照说明依次完成每个步骤-他们将引导您完成该过程。 就个人而言,我必须完成手动驱动程序设置,安装三星驱动程序(Nexus 7是ASUS设备,但三星驱动程序对我有用)。
备份 (Back Up)
This process will wipe your device, so you’ll probably want to back it up first. Click the Backup button to back up your device.
此过程将擦除您的设备,因此您可能需要先对其进行备份。 单击备份按钮以备份您的设备。
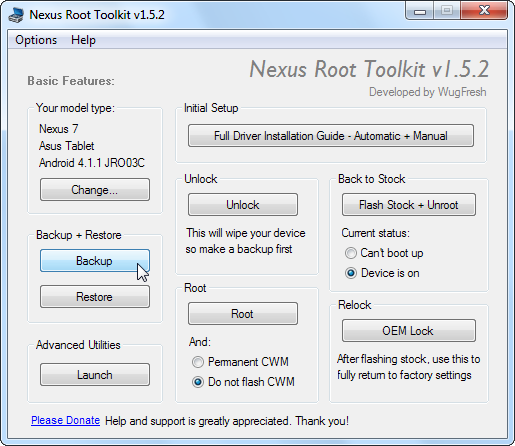
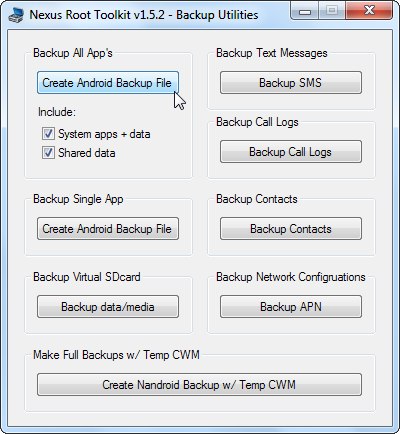
Click the Create Android Backup File button to create a backup file containing your apps and data. Tap the Back up button that appears on your device’s screen to continue.
单击创建Android备份文件按钮以创建包含您的应用程序和数据的备份文件。 点按设备屏幕上显示的“备份”按钮以继续。
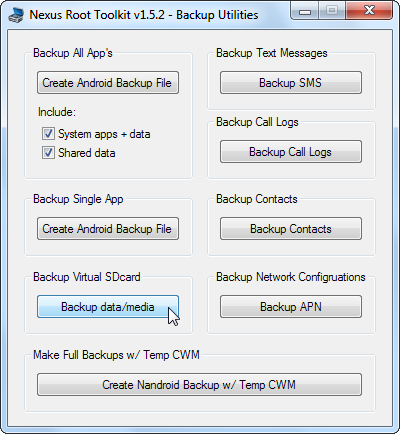
You should also use the Backup data/media option to back up your device’s media files.
您还应该使用“备份数据/媒体”选项来备份设备的媒体文件。
解锁并扎根 (Unlock & Root)
Once your Nexus is backed up, use the Unlock button to unlock your device. The unlock process wipes your device, so ensure you’re backed up before continuing!
备份Nexus后,请使用“解锁”按钮来解锁设备。 解锁过程会擦除您的设备,因此请确保已备份,然后再继续!

You’ll be prompted on the Nexus to unlock the bootloader. After you agree, your bootloader will be unlocked and your Nexus will be wiped and reset to its factory state. You’ll have to go through the setup process on your Nexus and enable USB debugging mode again before continuing.
会在Nexus上提示您解锁引导加载程序。 在您同意后,您的引导程序将被解锁,并且Nexus将被擦除并恢复为出厂状态。 您必须先在Nexus上完成设置过程,然后再次启用USB调试模式,然后才能继续。
After you have, select Do not flash CWM unless you also want to flash ClockworkMod to your device, and then click the Root button.
完成后,选择“不刷新CWM”,除非您还希望将ClockworkMod刷新到设备,然后单击“根”按钮。
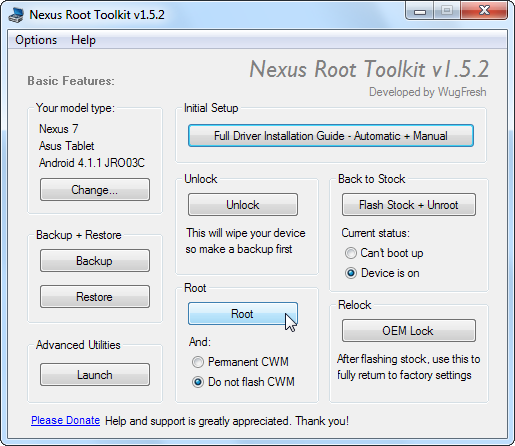
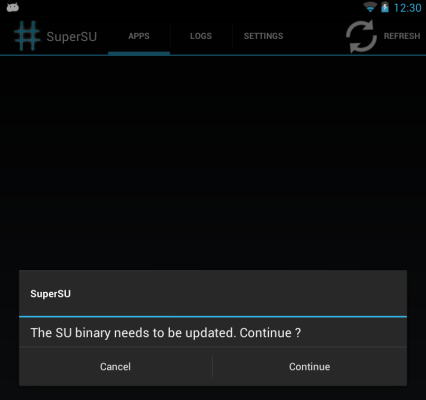
Once the Root process completes, open the SuperSU app on your Nexus and update the SU binary.
根进程完成后,在Nexus上打开SuperSU应用并更新SU二进制文件。
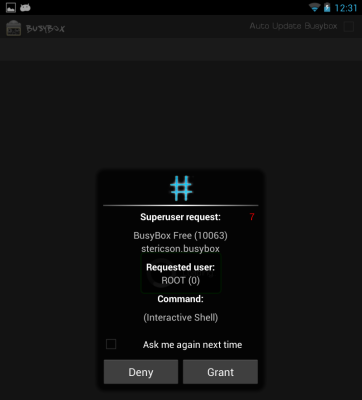
Launch the BusyBox app, grant it root permissions, and tap the Install button. You’re now successfully rooted!
启动BusyBox应用程序,为其授予根权限,然后点击“安装”按钮。 您现在已经成功扎根!
从备份还原 (Restore from Backup)
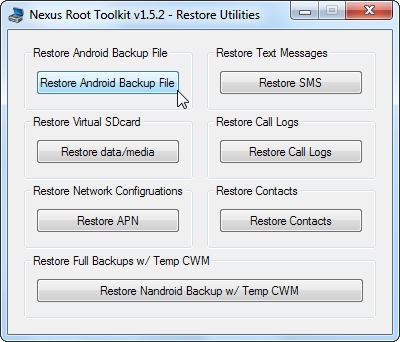
You’ll now probably want to restore your Nexus from the backups you took earlier. Click the Restore button.
现在,您可能想要从之前进行的备份中还原Nexus。 单击还原按钮。
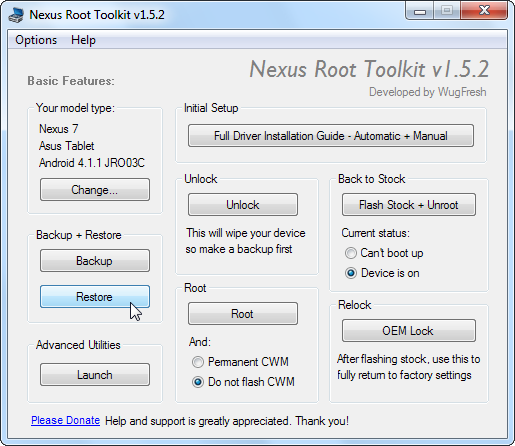
Use the Restore Android Backup File and Restore data/media buttons, selecting the backup files you created earlier.
使用“还原Android备份文件”和“还原数据/媒体”按钮,选择您之前创建的备份文件。
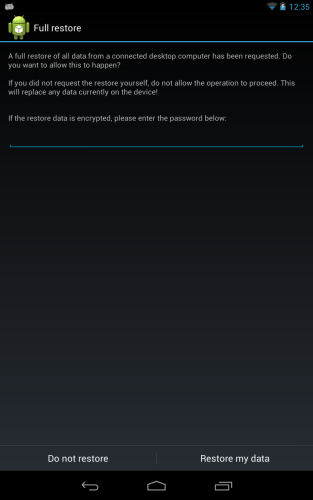
Tap the Restore my data button when the Full restore screen appears on your device. Agree and your apps and data will be restored.
当设备上出现“完全还原”屏幕时,点击“还原我的数据”按钮。 同意,您的应用程序和数据将被恢复。
翻译自: https://www.howtogeek.com/120482/how-to-root-the-nexus-7-galaxy-nexus-or-nexus-s/


 3903
3903

 被折叠的 条评论
为什么被折叠?


