In our previous article, we showed you the fastest way to go from a simple list of users to their creation in Active Directory. However, you’ll frequently get a list of users that will have extra data fields. Since we can’t write a script ahead of time for every possible scenario, we’ll show you how to take our user creation PowerShell script and modify it to suit your purpose.
在上一篇文章中 ,我们向您展示了从简单的用户列表到在Active Directory中创建用户的最快方法。 但是,您会经常获得具有额外数据字段的用户列表。 由于无法针对每种可能的情况提前编写脚本,因此我们将向您展示如何获取用户创建的PowerShell脚本并对其进行修改以适合您的目的。
In this case, we’ve been given the Office attribute for our new users, so we’ll want to make sure that’s added in each of our new users account on creation.
在这种情况下,我们已经为新用户提供了Office属性,因此我们希望确保在创建时将其添加到我们的每个新用户帐户中。
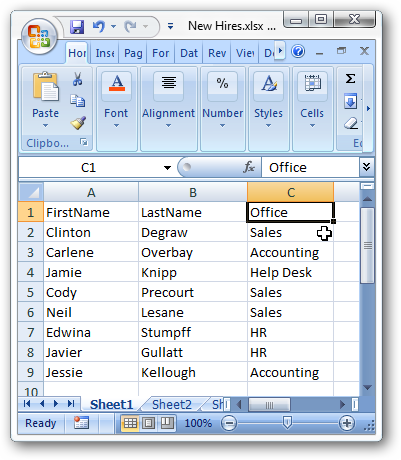
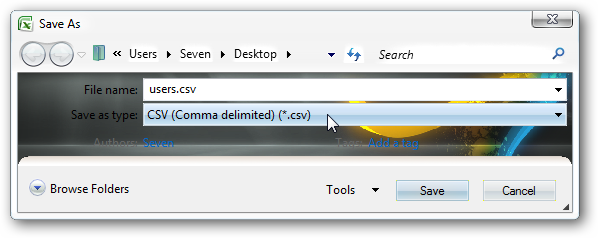
The first thing we do is to save the excel file as a .csv file.
我们要做的第一件事是将excel文件另存为.csv文件。
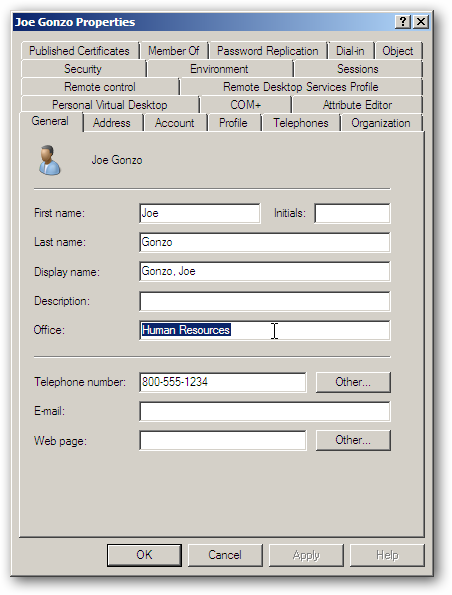
Next we open up the Active Directory Users and Computers snap-in. We need to find out what is the actual attribute name for the Office field, so we’ll open the properties of one of our current users by double-clicking on them.
接下来,我们打开“ Active Directory用户和计算机”管理单元。 我们需要找出Office字段的实际属性名称是什么,因此我们将通过双击当前用户之一来打开它们的属性。

We can see that this user has Human Resources filled in for his Office attribute on the General tab.
我们可以看到该用户在“ 常规”选项卡上为其Office属性填写了“人力资源”。
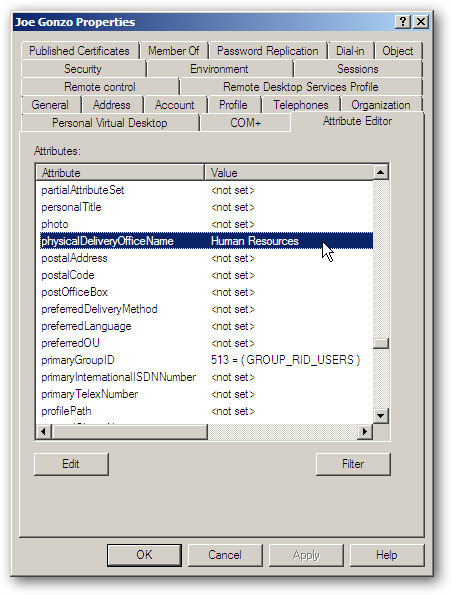
We’ll click on the Atribute Editor tab to find out the technical name for that Office field, because we are going to need this to enter into PowerShell in a minute. It shows that the Attribute name for the Office field is physicalDeliveryOfficeName. Since the Attribute name is not always the same as the Field name in the other tabs, it can be a little difficult sometimes to find what you are looking for. If you can’t seem to find the field you need, you can always create a dummy user and modify just that specific field to something unique, then go to the Attribute Editor tab and scroll down until you find it.
我们将单击“ 属性编辑器”选项卡以找到该Office字段的技术名称,因为我们将需要它在几分钟内输入PowerShell。 它显示Office字段的属性名称是physicalDeliveryOfficeName。 由于属性名称并不总是与其他选项卡中的字段名称相同,因此有时很难找到所需的内容。 如果您似乎找不到所需的字段,则可以始终创建一个虚拟用户并将该特定字段修改为唯一的内容,然后转到“ 属性编辑器”选项卡并向下滚动直到找到它。
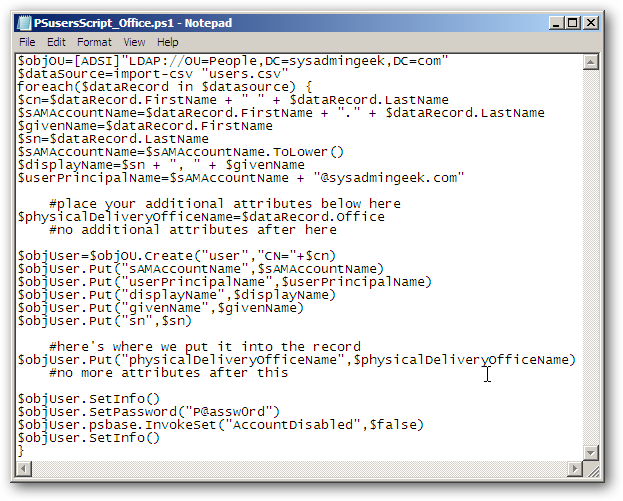
Now we’ll need to edit our PowerShell script to reflect this new field. The format for this will be “AttributeName=dataRecord”. We want to make sure that we enter the field name correctly from our .csv file after the “$dataRecord.” entry. This section will pull the data from our users file:
现在,我们需要编辑PowerShell脚本以反映此新字段。 格式为“ AttributeName = dataRecord”。 我们要确保在“ $ dataRecord”之后从.csv文件中正确输入字段名称。 条目。 本部分将从我们的用户文件中提取数据:
$physicalDeliveryOfficeName=$dataRecord.Office
$ physicalDeliveryOfficeName = $ dataRecord.Office
and this section of the script will put it into the new user objects:
脚本的这一部分会将其放入新的用户对象中:
$objUser.Put(“physicalDeliveryOfficeName”,$physicalDeliveryOfficeName)
$ objUser.Put(“ physicalDeliveryOfficeName”,$ physicalDeliveryOfficeName)
The finished script will look like this:
完成的脚本如下所示:
Make sure to save the script as a .ps1 file.
确保将脚本另存为.ps1文件。

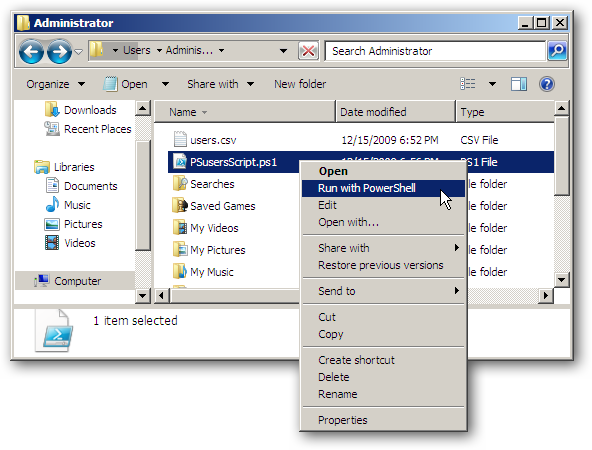
With our users list and our script in the C:UsersAdministrator folder, we right-click the script and choose Run with PowerShell.
使用我们的用户列表和C:UsersAdministrator文件夹中的脚本,我们右键单击该脚本,然后选择“使用PowerShell运行”。
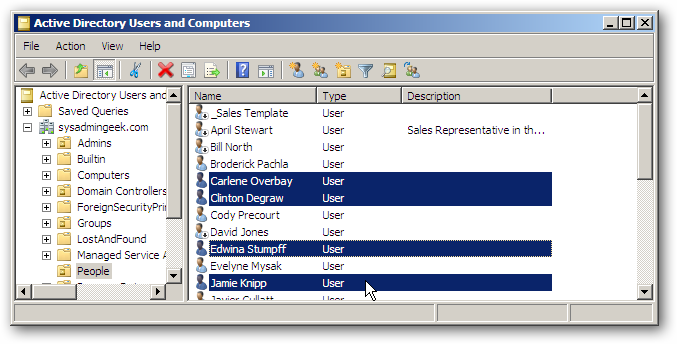
When we jump back over to AD Users and Computers, we can see out new users created.
当我们跳回“ AD用户和计算机”时,可以看到创建的新用户。
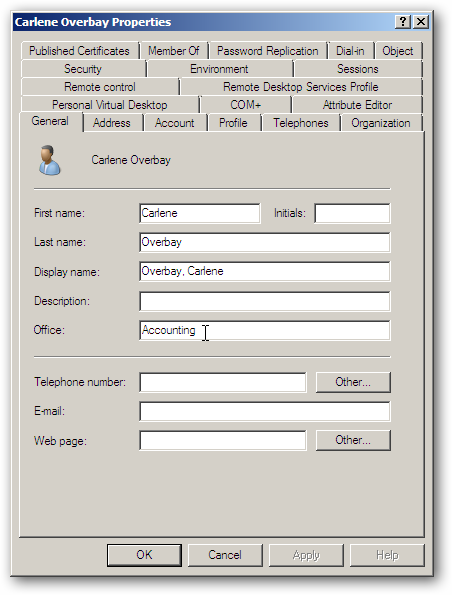
Opening up one of our newly created users will show that the Office field is filled out with the data from our original users list.
打开我们新创建的用户之一,将显示Office字段已填充有我们原始用户列表中的数据。
Creating multiple users with PowerShell is a very easy task, and with this knowledge at your fingertips, you’ll never sweat it again.
使用PowerShell创建多个用户是一项非常简单的任务,并且只要您掌握了这些知识,您就不会再费心。
翻译自: https://www.howtogeek.com/50205/adding-more-fields-to-user-creation-with-powershell/


 被折叠的 条评论
为什么被折叠?


