


linux读取日志

Linux system logging changed with the introduction of systemd. Learn how to use the journalctl command to read and filter system log messages.
Linux系统日志记录随着systemd的引入而改变。 了解如何使用journalctl命令读取和过滤系统日志消息。
集中记录 (Centralized Logging)
No stranger to controversy, the systemd system and service manager introduced a significant change in the way system logs are gathered. Logs used to be located at different places in the file system according to the service or daemon that was creating them. But they all had one thing in common. They were plain text files.
毫无争议的是, systemd系统和服务管理器对收集系统日志的方式进行了重大更改。 根据创建日志的服务或守护程序,日志曾经位于文件系统中的不同位置。 但是他们都有一个共同点。 它们是纯文本文件。
With systemd all the system, boot, and kernel log files are collected and managed by a central, dedicated logging solution. The format they are stored in is a binary one. One thing this facilitates is being able to extract the data in different formats, such as JSON, as we shall see.
使用systemd所有系统日志,引导日志和内核日志文件均由中央专用日志记录解决方案收集和管理。 它们存储的格式是二进制格式。 正如我们将看到的,这促进了一件事情,就是能够提取不同格式的数据,例如JSON 。
it can also make it easier to cross-reference related information that would have previously been recorded in separate log files. Because the data is now held in a single journal, the data from several sources of interest can be selected and displayed in a single interwoven list of entries.
它还可以更容易地交叉引用以前在单独的日志文件中记录的相关信息。 由于数据现在保存在单个日记中,因此可以选择多个感兴趣的来源的数据并将其显示在单个交织的条目列表中。
journalctl is the tool used to work with the journal.
journalctl是用于处理日记的工具。
没有多余的装饰 (journalctl With No Frills)
You can invoke journalctl with no command line parameters:
您可以不使用命令行参数来调用journalctl :
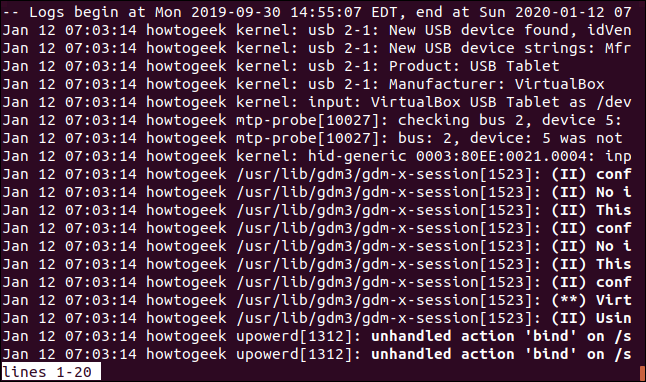
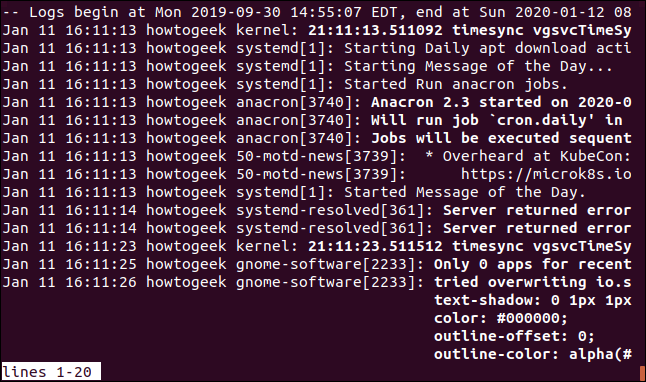
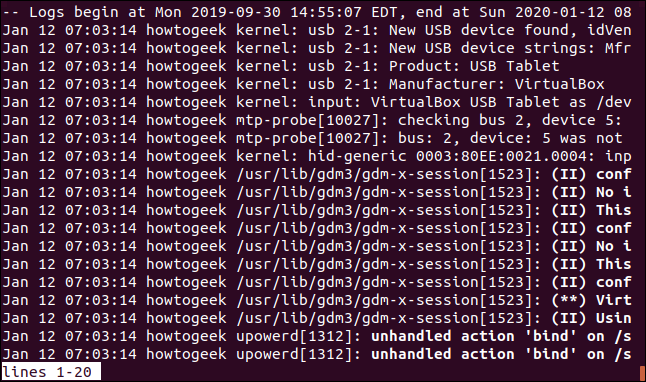
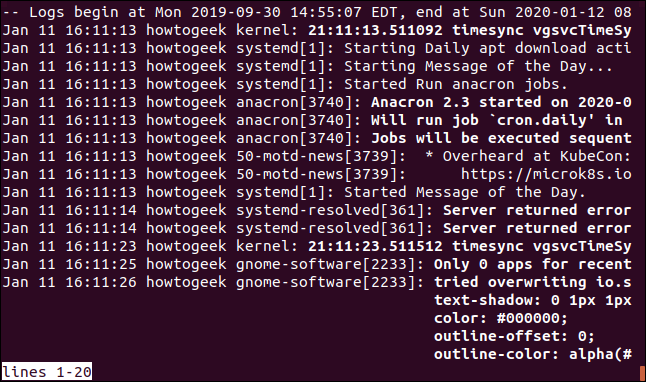
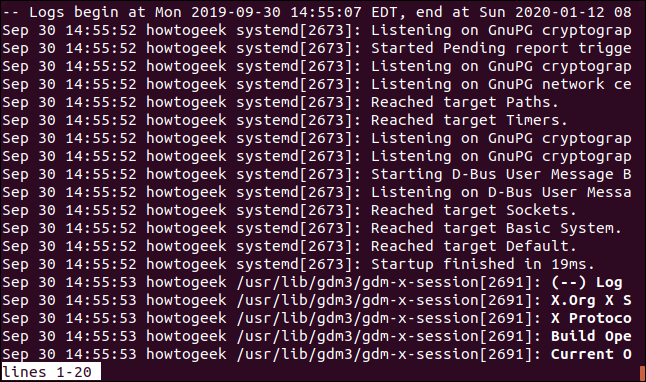
journalctl

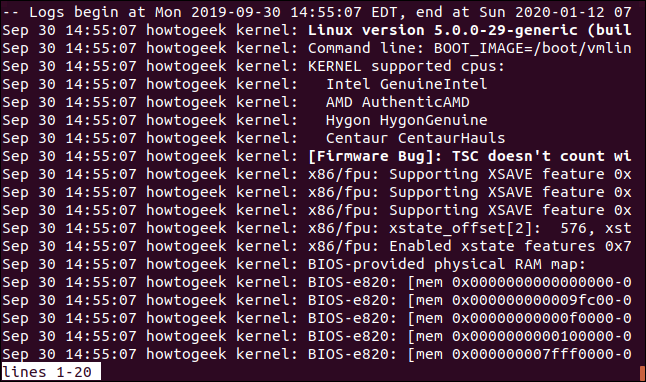
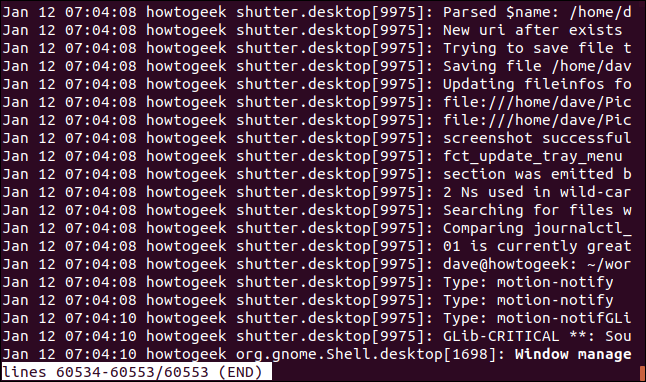
journalctl displays the entire journal, with the oldest entries at the top of the list. The list is displayed in less, allowing you to page and search using the usual navigation features of less. You can also use the Left Arrow and Right Arrow keys to scroll sideways to read wide log entries.
journalctl显示整个日记,最旧的条目在列表顶部。 该列表显示为less ,使您可以使用less的常规导航功能进行页面和搜索。 您还可以使用Left Arrow和Right Arrow键横向滚动以读取宽日志条目。
Pressing the End key will hop straight to the bottom of the list, and the newest log entries.
按End键将直接跳到列表的底部,以及最新的日志条目。
Press Ctrl+C to exit.
按Ctrl+C退出。
Although journalctl can be called without using sudo, you will ensure you see all the detail within the log if you do use sudo.
尽管可以在不使用sudo情况下调用journalctl , 但是如果您确实使用sudo ,则可以确保在日志中看到所有详细信息 。
sudo journalctl

If you need to, you can make journalctl send its output to the terminal window instead of to less, by using the --no-pager option.
如果需要,可以使用--no-pager选项,使journalctl将其输出发送到终端窗口,而不是发送到less 。
sudo journalctl --no-pager

The output scrolls quickly through the terminal window, and you are returned to the command prompt.
输出在终端窗口中快速滚动,您将返回到命令提示符。
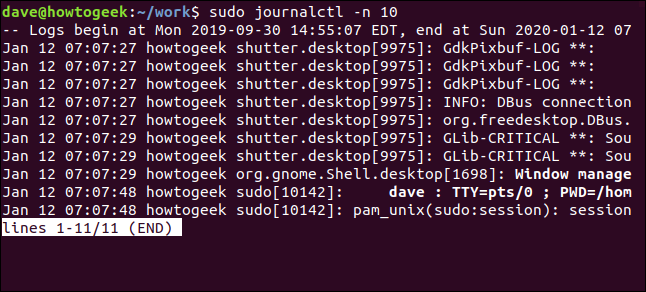
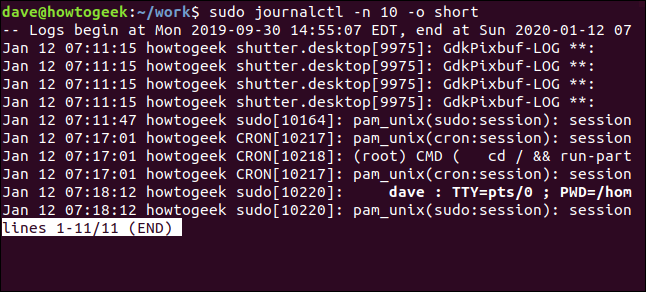
To limit the number of lines that journalctl returns, use the -n (lines) option. Let’s ask for ten lines of output:
要限制journalctl返回的行数,请使用-n (行)选项。 让我们要求十行输出:
sudo journalctl -n 10
跟随日记更新 (Following Journal Updates)
To make journalctl display the newest entries as they arrive in the journal, use the -f (follow) option.
要使journalctl在到达journalctl显示最新的条目,请使用-f (跟随)选项。
sudo journalctl -f

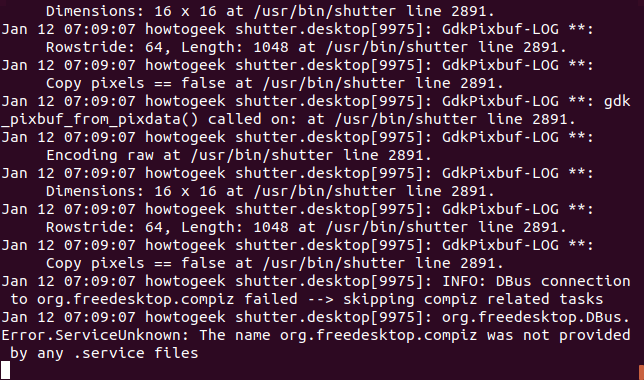
The newest entry has a timestamp of 07:09:07. As new activity takes place, the new entries are appended to the bottom of the display. Near real-time updates—cool!
最新条目的时间戳为07:09:07。 随着新活动的进行,新条目将添加到显示的底部。 近实时更新-太酷了!
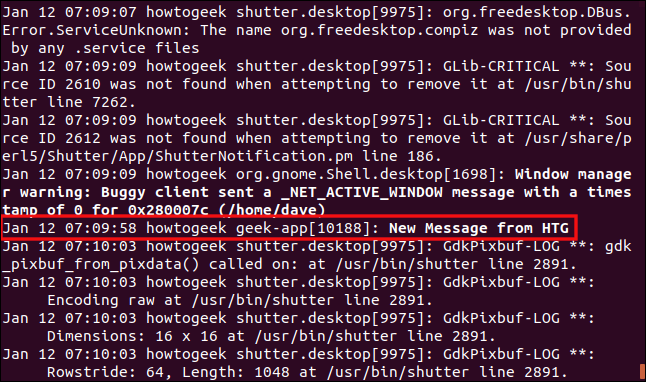
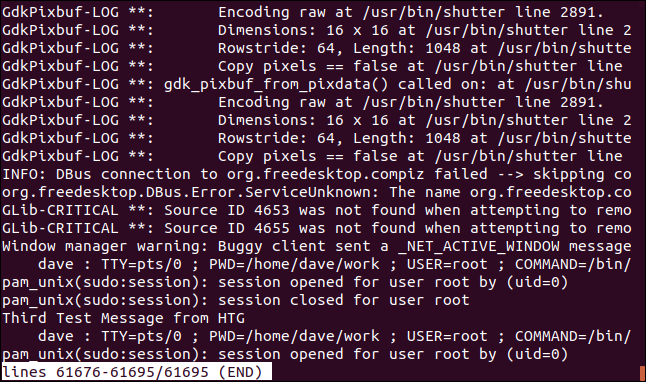
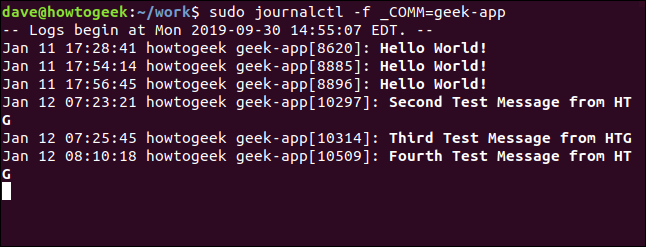
At 07:09:59 an application called geek-app injected a log entry into the journal that said, “New Message from HTG.”
在07:09:59,名为geek-app在日志中注入了一个日志条目,内容为“来自HTG的新消息”。
更改显示格式 (Changing the Display Format)
Because the journal is a binary file, the data in it needs to be translated or parsed into text before it can be displayed to you. With different parsers, different output formats can be created from the same binary source data. There are several different formats that journalctl can use.
由于日记是二进制文件,因此必须先将日记中的数据转换或解析为文本,然后才能显示给您。 使用不同的解析器,可以从相同的二进制源数据创建不同的输出格式。 journalctl可以使用几种不同的格式。
The default output is the short format, which is very similar to the classic system log format. To explicitly request the short format, use the -o (output) option with the short modifier.
默认输出是短格式,这与经典系统日志格式非常相似。 要显式请求短格式,请使用-o (输出)选项和short修饰符。
sudo journalctl -n 10 -o short-full
From left to right, the fields are:
从左到右,这些字段是:
- The time the message was created, in local time. 消息的创建时间,以本地时间表示。
- The hostname. 主机名。
- The process name. This is the process that generated the message. 进程名称。 这是生成消息的过程。
- The log message. 日志消息。
To obtain a complete date and time stamp use the short-full modifier:
要获取完整的日期和时间戳,请使用short-full修饰符:
sudo journalctl -n 10 -o short-full
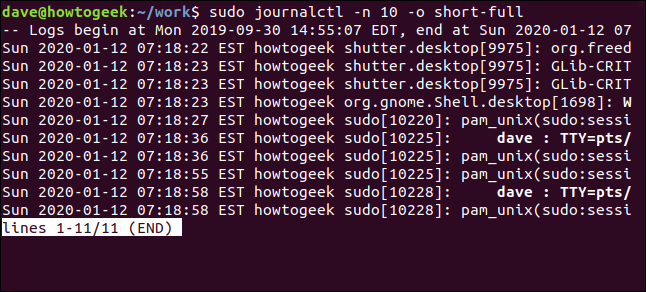
The date and time formats in this output are the format in which you need to provide dates and times when you are selecting log messages by period, as we shall see shortly.
此输出中的日期和时间格式是在按时间段选择日志消息时需要提供日期和时间的格式,我们将很快看到。
To see all the metadata that accompanies each log message, use the verbose modifier.
要查看每个日志消息附带的所有元数据,请使用verbose修饰符。
sudo journalctl -n 10 -o verbose

There are many possible fields, but it is rare for all fields to be present in a message.
有很多可能的字段 ,但是很少有所有字段都出现在消息中。
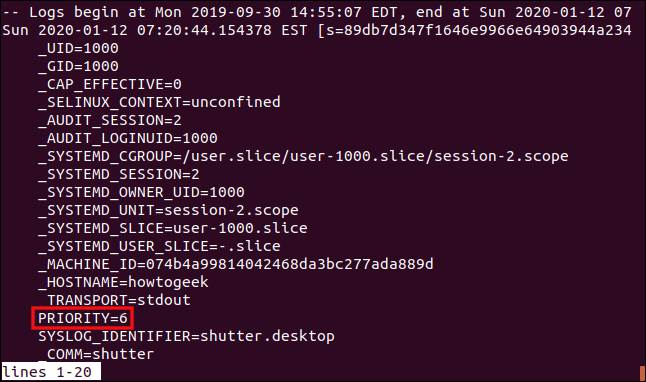
One field worth discussing is the Priority field. In this example, it has a value of 6. The value represents the importance of the message:
值得讨论的一个领域是Priority领域。 在此示例中,其值为6。该值表示消息的重要性:
0: Emergency. The system is unusable.
0 :紧急。 该系统无法使用。
1: Alert. A condition has been flagged that should be corrected immediately.
1 :警报。 已标记条件,应立即更正。
2: Critical. This covers crashes, coredumps, and significant failures in primary applications.
2 :严重。 这涵盖了崩溃,核心转储以及主要应用程序中的重大故障。
3: Error. An error has been reported, but it is not considered severe.
3 :错误。 已经报告了一个错误,但是认为不严重。
4: Warning. Brings a condition to your attention that, if ignored, may become an error.
4 :警告。 请注意,如果忽略该条件,可能会导致错误。
5: Notice. Used to report events that are unusual, but not errors.
5 :注意。 用于报告异常事件,但不报告错误。
6: Information. Regular operational messages. These do not require action.
6 :信息。 定期的操作信息。 这些不需要采取措施。
7: Debug. Messages put into applications to make it easier for them to debug them.
7 :调试。 将消息放入应用程序中以使其更易于调试。
If you want the output to be presented as properly formed JavaScript Object Notation (JSON) objects, use the json modifier:
如果希望将输出显示为格式正确的JavaScript对象表示法 (JSON)对象,请使用json修饰符:
sudo journalctl -n 10 -o json
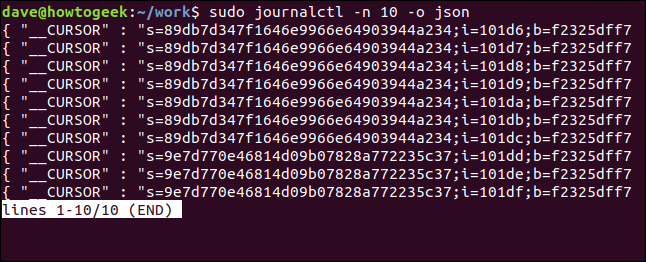
Each message is properly wrapped as a well-formed JSON object, and displayed one message per line of output.
每条消息都正确包装为格式良好的JSON对象,并在每行输出中显示一条消息。
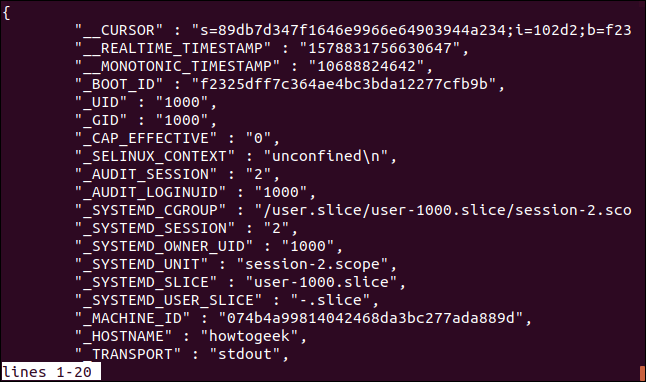
To have the JSON output pretty-printed, use the json-pretty modifier.
要漂亮地打印 JSON输出,请使用json-pretty修饰符。
sudo journalctl -n 10 -o json-pretty

Each JSON object is split across multiple lines, with each name-value pair on a new line.
每个JSON对象均分为多行,每对名称/值对位于新行上。
To only see the log entry messages, without time stamps or other metadata, use the cat modifier:
要仅查看日志条目消息,而没有时间戳或其他元数据,请使用cat修饰符:
sudo journalctl -n 10 -o cat

This display format can make it difficult to identify which process raised the log event, although some messages do contain a clue.
尽管某些消息确实包含线索,但这种显示格式可能很难确定哪个进程引发了日志事件。
按时间段选择日志消息 (Selecting Log Messages By Time Period)
To limit the output from journalctl to a time period you’re interested in, use the -S (since) and -U (until) options.
要将journalctl的输出限制为您感兴趣的时间段,请使用-S (自从)和-U (直到)选项。
To see the log entries since a particular time and date, use this command:
要查看自特定时间和日期以来的日志条目,请使用以下命令:
sudo journalctl -S "2020-91-12 07:00:00"

The display contains only messages that arrived after the date and time in the command.
该显示仅包含命令中日期和时间之后到达的消息。
To define a time period you wish to report on, use both the -S (since) and -U (until) options together. This command looks at log messages from a 15 minute time period.:
要定义您要报告的时间段,请同时使用-S (自)和-U (直到)选项。 此命令查看15分钟内的日志消息。
sudo journalctl -S "2020-91-12 07:00:00" -U "2020-91-12 07:15:00"

This is a great combination use if you know something odd happened on your system, and roughly when it happened.
如果您知道系统中发生了奇怪的事情,并且大概是在什么时候发生的,这是一个很好的组合用法。
使用相对时间段 (Using Relative Time Periods)
You can use relative addressing when you select your time periods. That means you can say things like “show me all events from one day ago up until now.” This is just what this command means. The “d” stands for “day”, and the “-1” means one day in the past.
选择时间段时,可以使用相对寻址。 这意味着您可以说“向我显示从一天之前到现在的所有事件”之类的话。 这就是该命令的含义。 “ d”代表“天”,“-1”代表过去的一天。
sudo journalctl -S -1d

The log messages are listed from 00:00:00 yesterday, up until “now.”
日志消息的列出时间为昨天的00:00:00,直到“现在”。
If you want to investigate something that happened in the recent past, you can specify a relative time period measured in hours. Here we’re reviewing log messages from the last hour:
如果要调查最近发生的事情,可以指定以小时为单位的相对时间段。 在这里,我们正在查看最近一小时的日志消息:
sudo journalctl -S -1h

The messages from the last hour are displayed for you. You can also use “m” to set relative time periods measured in minutes, and “w” for weeks.
显示上一小时的消息。 您还可以使用“ m”来设置以分钟为单位的相对时间段,并使用“ w”来表示几周。
journalctl understands today, yesterday, and tomorrow. These modifiers provide a handy way to specify common time periods. To see all the events that happened yesterday, use this command:
journalctl了解today , yesterday和tomorrow 。 这些修饰符提供了方便的方法来指定常见时间段。 要查看昨天发生的所有事件,请使用以下命令:
sudo journalctl -S yesterday

All journal log events that happened yesterday, up to midnight 00:00:00, are retrieved and displayed for you.
检索并显示昨天至午夜00:00:00之前发生的所有日记日志事件。
To see all the log messages received today so far, use this command:
要查看到目前为止收到的所有日志消息,请使用以下命令:
sudo journalctl -S today

Everything from 00:00:00 up until the time the command is issued, are displayed.
显示从00:00:00到发出命令为止的所有内容。
You’re able to mix the different time period modifiers. To see everything from two days ago up until the start of today, use this command:
您可以混合使用不同的时间段修饰符。 要查看从两天前到今天开始的所有内容,请使用以下命令:
sudo journalctl -S -2d -U today

Everything since the day before yesterday up until today is retrieved and displayed.
检索并显示从前天到今天的所有内容。

通过数据字段选择日志消息 (Selecting Log Messages By Data Fields)
You can search for log messages that match a wide range of journal fields. These searches try to find matches in the metadata attached to each message. It is recommended that you refer to the list of fields and choose the ones that will be most useful to you.
您可以搜索与各种日记帐字段匹配的日志消息。 这些搜索尝试在每个消息附带的元数据中找到匹配项。 建议您参考字段列表,然后选择对您最有用的字段 。
Bear in mind, whether an application completes every field or not is entirely up to the authors of the application. You can’t guarantee every field will be populated.
请记住,应用程序是否完成每个字段都完全取决于应用程序的作者。 您不能保证每个字段都会被填充。
All of the journal field modifiers are used in the same way. We’ll use a few in our examples below. To look for log messages from a specific application, use the _COMM (command) modifier. If you also use the -f (follow) option, journalctl will track new messages from this application as they arrive.
所有日记帐字段修饰符都以相同的方式使用。 在下面的示例中,我们将使用一些示例。 要从特定应用程序查找日志消息,请使用_COMM (命令)修饰符。 如果您还使用-f (跟随)选项,则journalctl将在此应用程序到达时跟踪它们发出的新消息。
sudo journalctl -f _COMM=geek-app
You can search for log entries using the process ID of the process that generated the log message. Use the ps command to find the process id of the daemon or application you’re going to search for.
您可以使用生成日志消息的进程的进程ID搜索日志条目。 使用ps命令找到要搜索的守护程序或应用程序的进程ID 。
sudo journalctl _PID=751

On the machine used to research this article, the SSH daemon is process 751.
在用于研究本文的机器上, SSH守护进程为进程751。

You can also search by user Id. This is the user ID fo the person who launched the application or command, or who owns the process.
您还可以按用户ID搜索。 这是启动应用程序或命令的人或拥有流程的人的用户ID。
sudo journalctl _UID=1000

All messages associated with any other user ID’s are filtered out. Only messages related to user 1000 are shown:
与其他任何用户ID关联的所有消息均被过滤掉。 仅显示与用户1000相关的消息:
Another way to search for log messages related to a specific application is to provide the path to the executable.
搜索与特定应用程序相关的日志消息的另一种方法是提供可执行文件的路径。
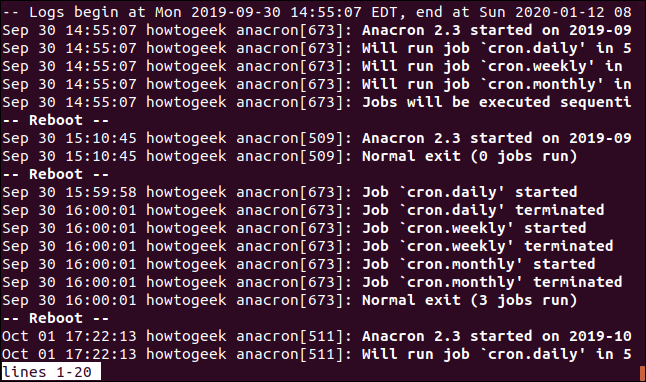
sudo journalctl /usr/bin/anacron

All of the anacron scheduler log messages are retrieved and displayed.
To make searching easier, we can ask journalctl to list all the values it holds, for any of the journal fields.
为了使搜索更容易,我们可以要求journalctl列出任何日记字段的所有值。
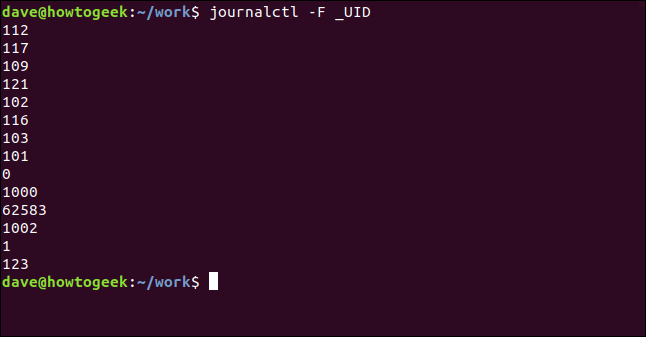
To see the user ID’s that journalctl has recorded log messages for, use the -F (fields) option, and pass the _UID field identifier.
要查看journalctl为其记录日志消息的用户ID,请使用-F (字段)选项,并传递_UID字段标识符。
journalctl -F _UID
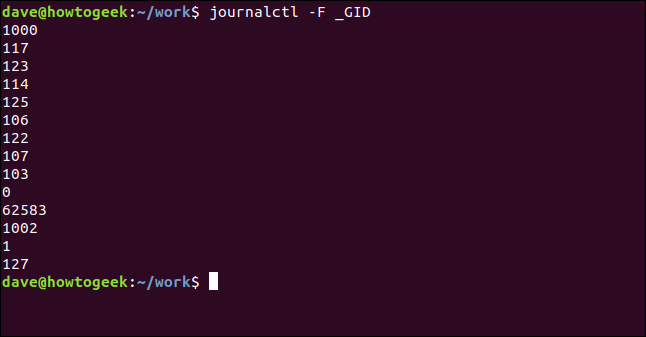
Let’s do that again and look at the group IDs (GID’s):
让我们再做一次,查看组ID (GID):
journalctl -F _GID
You can do this with any of the journal field identifiers.
您可以使用任何日记帐字段标识符执行此操作。
列出内核消息 (Listing Kernel Messages)
There’s a built-in way to isolate kernel messages quickly. You don’t need to search and isolate them yourself. The -k (kernel) option removes all other messages and gives you an instant view of the kernel log entries.
有一种内置的方法可以快速隔离内核消息。 您不需要自己搜索和隔离它们。 -k (内核)选项将除去所有其他消息,并为您提供内核日志条目的即时视图。
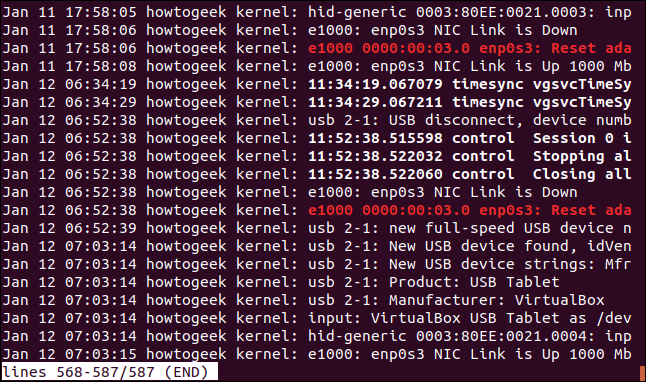
sudo journalctl -k

The highlighting reflects the importance of the message, according to the values in the Priority field.
根据“ Priority字段中的值,突出显示该消息的重要性。
查看引导消息 (Reviewing Boot Messages)
If you’ve got an issue related to booting that you wish to investigate, journalctl has you covered. Perhaps you’ve added new hardware, and it isn’t responding, or a previously working hardware component no longer works after your last system upgrade.
如果您想调查与引导相关的问题,请覆盖journalctl 。 也许您已经添加了新硬件,但它没有响应,或者在上次系统升级后,以前可以工作的硬件组件不再起作用。
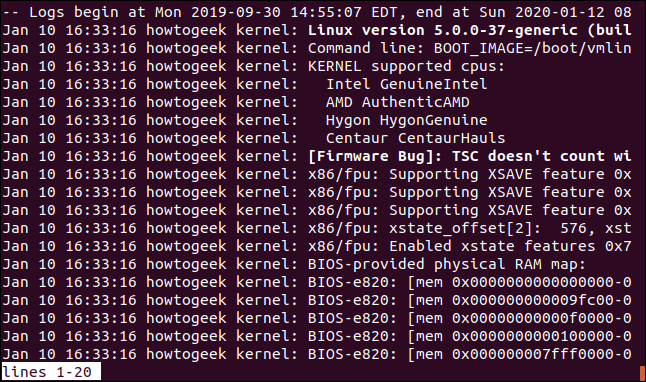
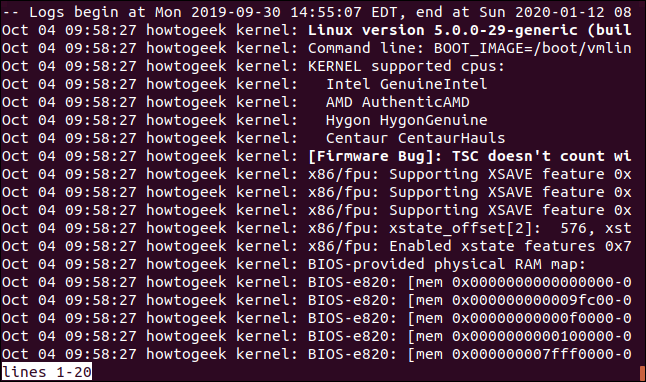
To see the log entries related to your last boot, use the -b (boot) option:
要查看与上次引导相关的日志条目,请使用-b (引导)选项:
journalctl -b

The log entries for the last boot are shown for you.
将显示最后一次引导的日志条目。
When we say “last boot,” we mean the boot process that brought your computer to life for your current logged-in session. To see previous boots, you can use a number to tell journalctl which boot you’re interested in. To see the third previous boot, use this command:
当我们说“上次启动”时,是指使您的计算机在当前登录会话中恢复活力的启动过程。 要查看以前的引导,可以使用数字告诉journalctl您感兴趣的引导。要查看第三个引导,请使用以下命令:
journalctl -b 3

Generally, if you’ve had a problem and had to reboot your machine, it is a previous boot sequence you’re interested in. So this is a common command form.
通常,如果您遇到问题并且必须重新引导计算机,则这是您感兴趣的以前的引导顺序。因此,这是一种常见的命令形式。

It is easy to get mixed up with the sequence of boots. To help, we can ask journalctl to list the boots that it has recorded in its journal, using the --list-boots option.
很容易混淆靴子的顺序。 为了提供帮助,我们可以使用--list-boots选项,要求journalctl列出其已记录在日记中--list-boots 。
journalctl --list-boots
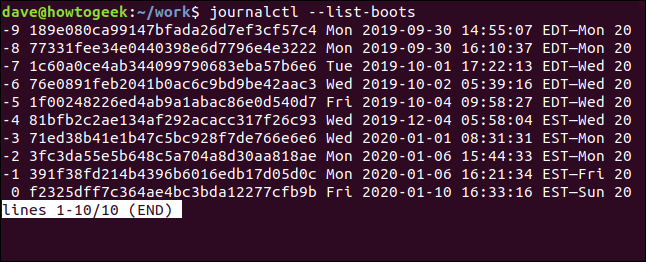
You can identify the boot you wish to see messages for from the date and time stamp, and then use the number in the left-hand column to obtain the log messages for that boot sequence. You can also pick the 32-bit boot identifier, and pass that to journalctl.
您可以从日期和时间戳中确定要查看其消息的引导,然后使用左侧列中的数字来获取该引导顺序的日志消息。 您还可以选择32位启动标识符,并将其传递给journalctl 。
sudo journalctl -b 1f00248226ed4ab9a1abac86e0d540d7

The log messages from the boot sequence we requested are retrieved and displayed.
检索并显示了我们请求的启动顺序中的日志消息。
管理日记硬盘空间 (Managing Journal Hard Drive Space)
Of course, the journal and all of its log messages are stored on your hard drive. That means they’ll be taking up hard drive space. To see how much space has been taken by the journal, use the --disk-usage option.
当然,日记及其所有日志消息都存储在您的硬盘驱动器上。 这意味着他们将占用硬盘空间。 要查看日志占用了多少空间,请使用--disk-usage选项。
journalctl --disk-usage

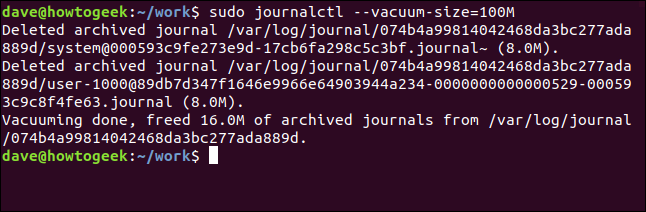
With today’s hard drives, 152 MB isn’t much space at all, but for demonstration purposes, we’ll still trim it back. There’s two way we can do this. The first is to set a size limit that you want the journal reduced back to. It’ll grow again, of course, but we can prune it now ready for that new growth.
对于当今的硬盘驱动器,152 MB的空间已不多了,但是出于演示目的,我们仍将其削减。 我们有两种方法可以做到这一点。 第一种是设置您希望日记帐减少到的大小限制。 当然,它会再次增长,但是我们现在可以修剪它以适应新的增长。
We’ll use the wonderfully titled --vacuum-size option, and pass in the size we’d like the journal reduced to. We’ll ask for 100 MB. The way to think of this is we’re asking journalctl to “throw away whatever you can, but don’t go lower than 100 MB.”
我们将使用标题--vacuum-size选项,并传递我们希望将日记帐减小到的大小。 我们将要求100 MB。 想到这一点的方法是,我们要求journalctl “扔掉您可以使用的所有东西,但不要低于100 MB。”
journalctl --vacuum-size=100M
The other way to trim back the journal size is to use the --vacuum-time option. This option tells journalctl to discard messages that are older than the period you provide on the command line. You can use days, weeks, months, and years in the time period.
减少日志大小的另一种方法是使用--vacuum-time选项。 此选项告诉journalctl丢弃早于您在命令行中提供的期限的消息。 您可以在该时间段内使用days , weeks , months和years 。
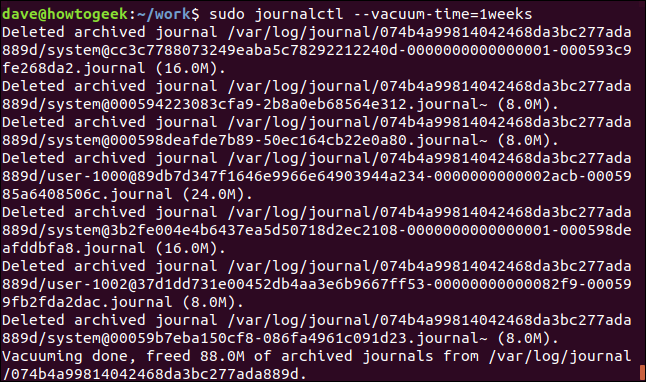
Let’s weed out all messages older than one week:
让我们清除所有超过一周的邮件:
journalctl --vacuum-time=1weeks
数据与信息 (Data vs. Information)
Data isn’t useful unless you can get at it and make use of it. Then it becomes useful information. The journalctl command is a flexible and sophisticated tool that allows you to get to the information of interest in a variety of ways.
除非您能够使用它,否则数据是没有用的。 然后,它成为有用的信息。 journalctl命令是一种灵活而复杂的工具,使您可以通过多种方式获取感兴趣的信息。
You can use just about any snippet of information you have to home in on the log messages you need.
您可以在需要的日志消息中使用几乎所有需要提供的信息片段。
翻译自: https://www.howtogeek.com/499623/how-to-use-journalctl-to-read-linux-system-logs/
linux读取日志


 2967
2967


 被折叠的 条评论
为什么被折叠?
被折叠的 条评论
为什么被折叠?
 到【灌水乐园】发言


