Once you have your Windows Home Server set up, you’ll want to add users and control the content they have access to. Here we take a look at how to add a new user, determine their access to shared folders, and how to disable or remove a user.
设置Windows Home Server之后,您将需要添加用户并控制他们有权访问的内容。 在这里,我们看一下如何添加新用户,确定他们对共享文件夹的访问以及如何禁用或删除用户。
Add a New User
添加新用户
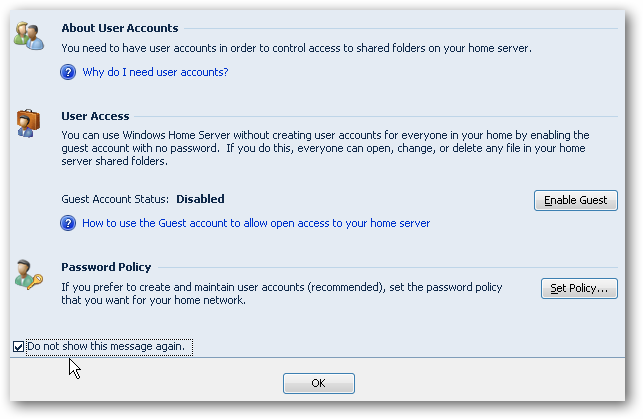
To add a new user to Windows Home Server (WHS), open the Home Server Console and select User Accounts. A screen will pop up advising you about user accounts, allow you to enable the Guest Account, and set a password policy. To stop it from popping up every time click the box next to Do not show this message again then click Ok.
要将新用户添加到Windows Home Server(WHS),请打开Home Server控制台并选择“用户帐户”。 将弹出一个屏幕,提示您有关用户帐户的信息,允许您启用来宾帐户并设置密码策略。 要阻止它每次弹出,请单击“不再显示此消息 ”旁边的框,然后单击“确定”。
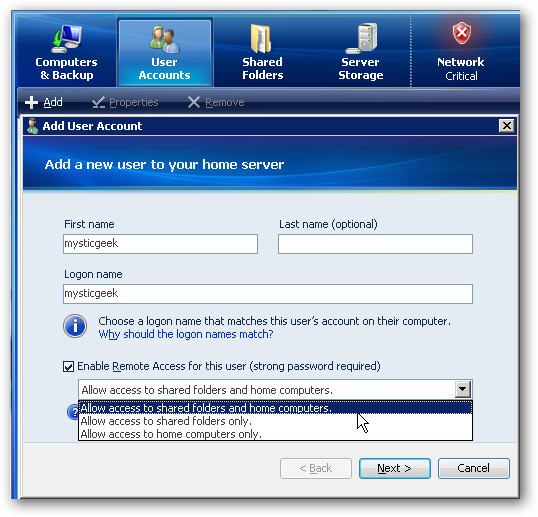
Now click on Add and an Add User Account screen comes up. Type in the user name, logon name, and determine if you want to enable Remote Access. Remote Access allows the user to connect to the server through the Internet. If you choose Remote Access, you can select if they have access to shared folders and home computers, shared folders only, or home computers only then click Next.
现在单击添加,出现添加用户帐户屏幕。 键入用户名,登录名,然后确定是否要启用远程访问。 远程访问允许用户通过Internet连接到服务器。 如果选择“远程访问”,则可以选择它们是否有权访问共享文件夹和家庭计算机,仅共享文件夹或仅家庭计算机,然后单击“下一步”。
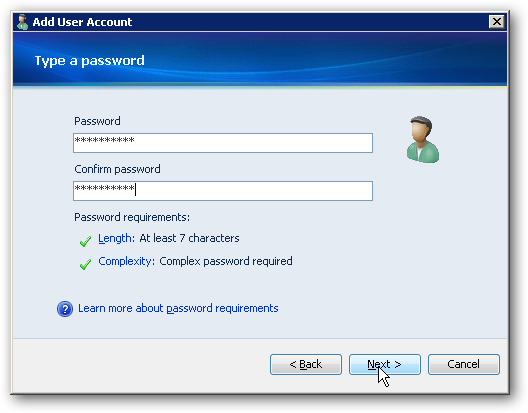
Type in a password for the user twice and make sure it meets the password requirements.
为用户键入两次密码,并确保它符合密码要求。
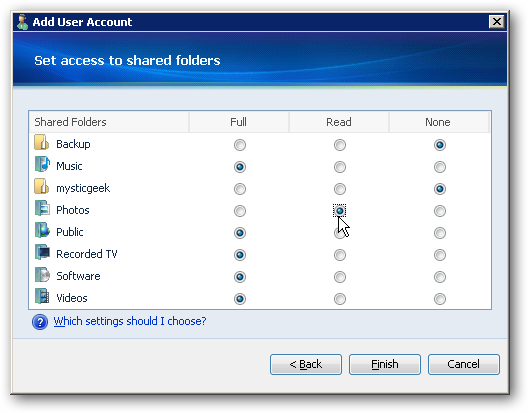
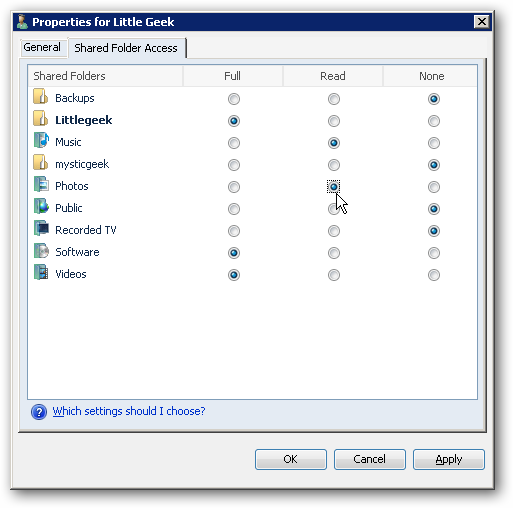
Next select the type of rights they have to each of the shared folders from Full, Read, or None.
接下来,从“完全”,“读取”或“无”中选择它们对每个共享文件夹所拥有的权限类型。
- Full – allows the user to create, change, and delete files in the shared folders. 完整–允许用户创建,更改和删除共享文件夹中的文件。
- Read – allows the user to read the files only. They cannot create, change or delete any files in the shared folders. 读取–允许用户仅读取文件。 他们不能创建,更改或删除共享文件夹中的任何文件。
- None – doesn’t allow the user any access to files in the shared folders. 无-不允许用户访问共享文件夹中的文件。
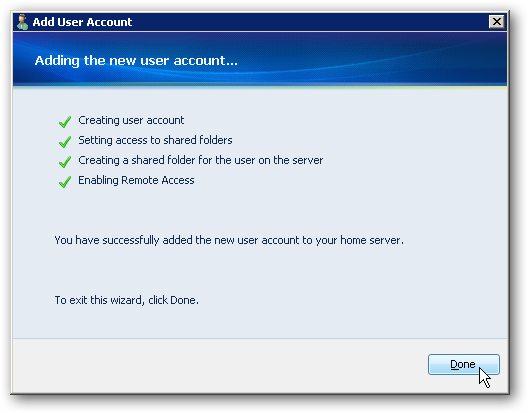
The settings you chose are configured and the new account is added.
您选择的设置已配置并添加了新帐户。
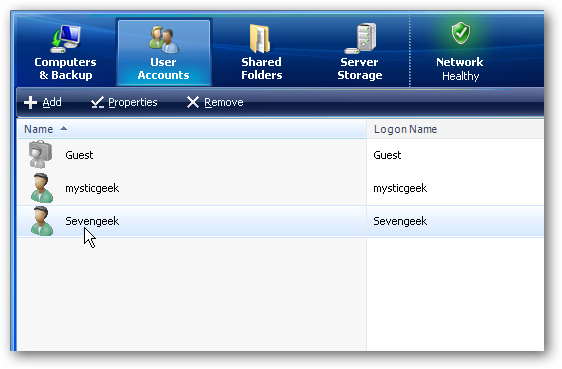
Now when you look at the list of users you’ll see the new account listed.
现在,当您查看用户列表时,将看到列出的新帐户。
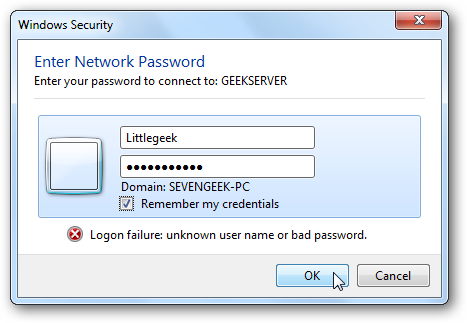
When a user logs on to their machine and tries to access the shared folders, they’ll be prompted to log on with the username and password you created for them.
当用户登录其计算机并尝试访问共享文件夹时,将提示他们使用您为其创建的用户名和密码登录。
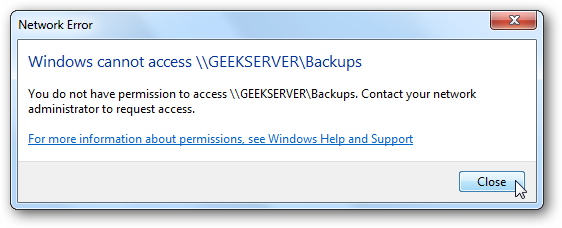
If you didn’t allow the user access to a certain folder, if they try to access it, they’ll get the following Network Error message.
如果您不允许用户访问某个文件夹,如果他们尝试访问该文件夹,他们将收到以下网络错误消息。
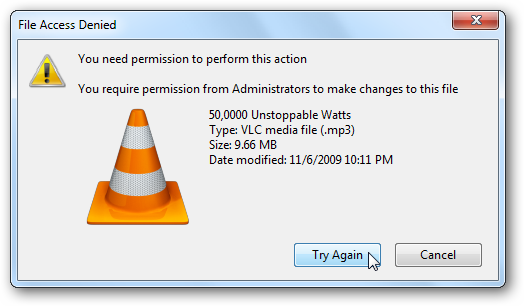
If the user only has Read rights, they can access the files but not make any changes to them. Like in this example, a user with only Read rights to the Music share, tried to delete a file and received a File Access Denied error message.
如果用户仅具有读取权限,则他们可以访问文件,但不能对其进行任何更改。 像在此示例中一样,仅具有“音乐”共享的“读取”权限的用户试图删除文件并收到“文件访问被拒绝”错误消息。
Passwords
密码
If you want to keep things simple for the user you might want to make sure the password on the machine and the server account are the same. This makes it easier for them so they don’t have to type in the server password every time they want to access the shared folders. If the passwords aren’t the same, when they log on their machine they’ll see the following notification.
如果要使用户的事情变得简单,则可能需要确保计算机和服务器帐户上的密码相同。 这使他们更轻松,因此他们不必每次都要访问共享文件夹时都输入服务器密码。 如果密码不同,则当他们登录自己的计算机时,他们会看到以下通知。
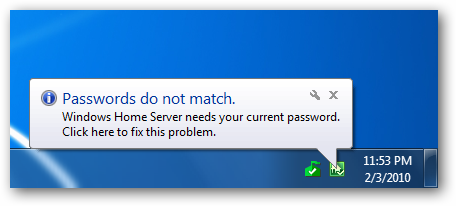
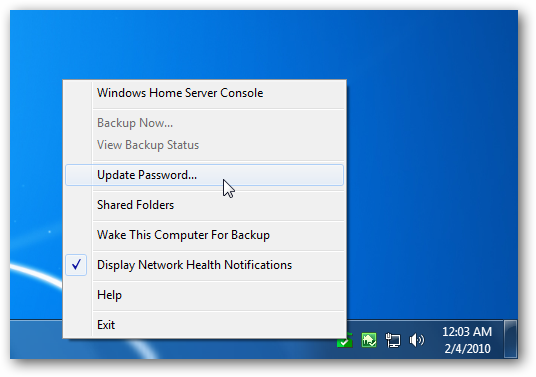
They can click the balloon message or right-click the Home Server Console icon and select Update Password.
他们可以单击气球消息或右键单击Home Server Console图标,然后选择“更新密码”。
Then select the radio button next to Update password and click Ok.
然后选择“更新密码”旁边的单选按钮,然后单击“确定”。

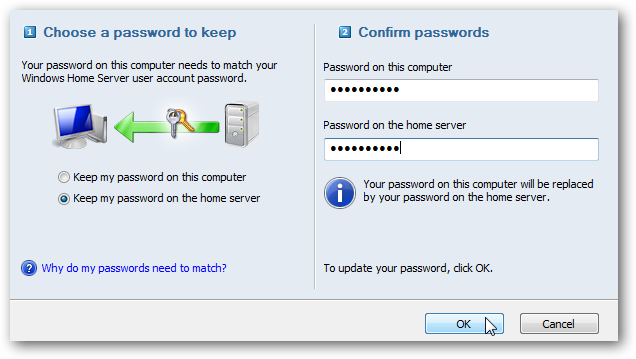
Now the user just needs to select Keep my password on the home server or Keep my password on this computer (whichever one they want) and type in their computer password and the password for the server and click Ok.
现在,用户只需要选择“ 将我的密码保留在家用服务器上”或“ 将我的密码保留在这台计算机上 (无论他们想要使用哪一个)”,然后输入他们的计算机密码和服务器的密码,然后单击“确定”即可。
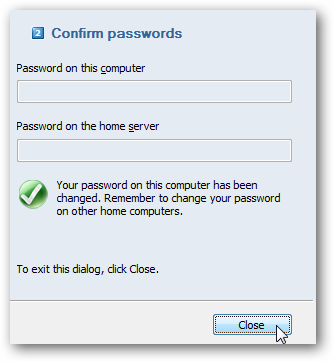
Then they’ll get a message showing it was changed successfully.
然后他们会收到一条消息,表明已成功更改。
Disable a User Account
禁用用户帐号
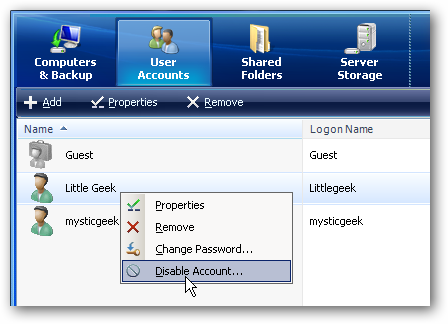
Sometimes you might want to disable a user account so they can’t access files on the server. Instead of completely removing the account, an easier method is to disable it. This will temporarily prevent a user from accessing shared folders on the server. Under User Accounts right-click the user and select Disable Account.
有时您可能想禁用用户帐户,以使他们无法访问服务器上的文件。 除了完全删除该帐户外,一种更简单的方法是禁用它。 这将暂时阻止用户访问服务器上的共享文件夹。 在“用户帐户”下,右键单击用户,然后选择“ 禁用帐户” 。
Then click on Yes when the dialog box comes up asking if you’re sure.
然后在出现对话框询问您是否确定时单击“是”。

Now when the user tries to access the shared folders on the server, they’ll get a message telling them the account is currently disabled.
现在,当用户尝试访问服务器上的共享文件夹时,他们会收到一条消息,告诉他们该帐户当前已被禁用。

Remove a User Account
删除用户帐号
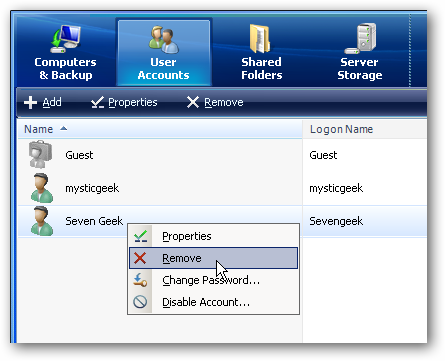
Sometimes you might need to remove a user account completely. Under User Accounts right-click on the user you want gone and select Remove.
有时您可能需要完全删除用户帐户。 在“用户帐户”下,右键单击要离开的用户,然后选择“ 删除” 。
You’ll be prompted to keep their shared folder or remove it. If you think you might add them at a future date, you’ll probably want to keep the shared folder. In this example we’re going to remove it.
系统会提示您保留或删除其共享文件夹。 如果您认为将来可能会添加它们,则可能要保留共享文件夹。 在此示例中,我们将其删除。
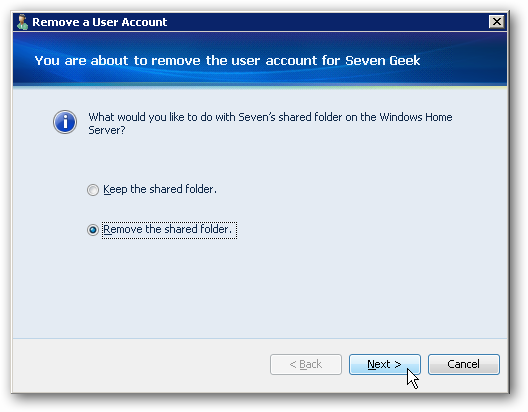
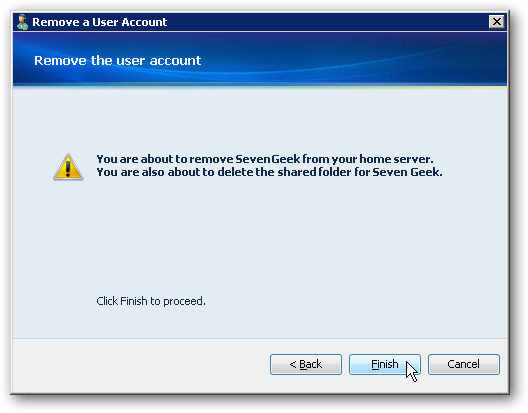
Next a message comes up telling you that you’re about to remove them and in this case delete the shared folder.
接下来会出现一条消息,告诉您您将要删除它们,在这种情况下,请删除共享文件夹。
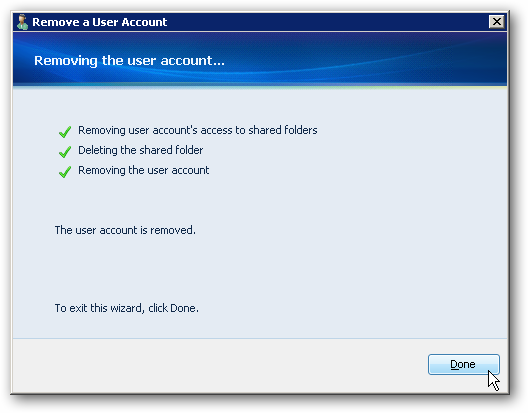
That’s it. Everything will be removed and when you close out of the wizard, they’ll no longer be listed under User Accounts.
而已。 所有内容都将被删除,并且当您退出向导时,它们将不再列在“用户帐户”下。
Manage User Account Properties
管理用户帐户属性
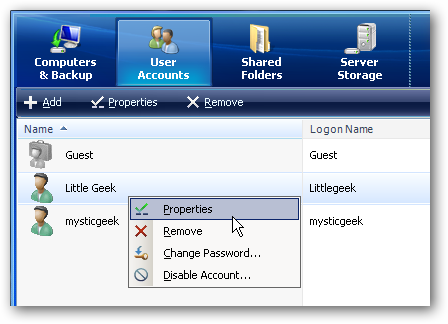
Sometimes you might need to change a user’s password or change the folders they have access to. Right-click on the user account and select Change Password if that’s all you need to do, or Properties to change folder access or other properties.
有时,您可能需要更改用户密码或更改他们有权访问的文件夹。 右键单击用户帐户,然后选择“ 更改密码”(如果需要这样做),或者选择“ 属性”以更改文件夹访问权限或其他属性。
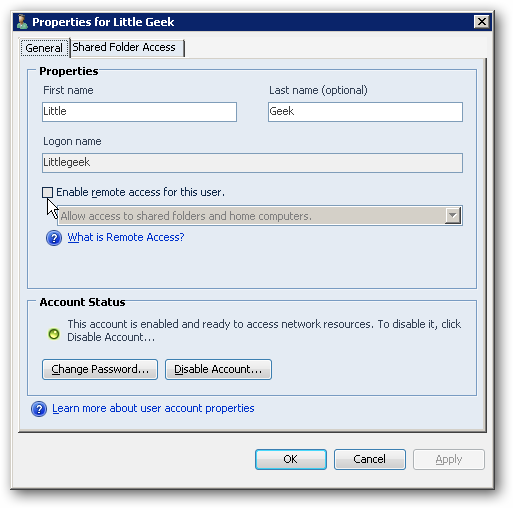
In the Properties window under the General tab you can change their logon name, Remote Access and Account Status.
在“常规”选项卡下的“属性”窗口中,您可以更改其登录名,“远程访问”和“帐户状态”。
Under the Shared Folder Access tab you can go through and change the type of access they have to each of the shared folders.
在“共享文件夹访问”选项卡下,您可以浏览并更改它们对每个共享文件夹的访问类型。
Note that any changes you make won’t go into effect until after the user logs off then back on again.
请注意,您所做的任何更改要等到用户注销然后再重新启动后才会生效。

Conclusion
结论
This should get you started with managing users on your home or small office network. Keep in mind that the maximum number of accounts allowed on WHS is 10…not including the Guest Account. Managing your users is a great way to administer the type of content they have access to, and preventing them from deleting important data.
这应该使您开始管理家庭或小型办公室网络上的用户。 请记住,WHS上允许的最大帐户数量为10…不包括访客帐户。 管理用户是一种很好的方式来管理他们有权访问的内容类型,并防止他们删除重要数据。
翻译自: https://www.howtogeek.com/howto/10325/manage-user-accounts-in-windows-home-server/


 1805
1805

 被折叠的 条评论
为什么被折叠?


