


While implementing pagination in mobile devices, one has to take a different approach since space is minimal unlike the web, due to this factor, infinite scrolling has always been the go to solution, giving your users a smooth and desirable experience.
在移动设备中实现分页时,由于与Web不同,空间极小,因此必须采取不同的方法,由于这一因素,无限滚动一直是解决问题的方法,可为您的用户提供流畅而理想的体验。
In this tutorial, we will be building an infinite scroll list using the FlatList component in React Native, we will be consuming Punk API which is a free beers catalogue API.
在本教程中,我们将使用React Native中的FlatList组件构建一个无限滚动列表,我们将使用Punk API ,这是一个免费的啤酒目录API。
示范影片 ( Demo Video )
Here's a small demo video of what the end result will look like:
这是一个小示范视频,显示最终结果:

配置 ( Setting Up )
We will be using create-react-native-app to bootstrap our React Native app, run the folowing command to install it globally:
我们将使用create-react-native-app引导我们的React Native应用程序,运行以下命令将其全局安装:
npm install -g create-react-native-appNext we need to bootstrap the app in your preffered directory:
接下来,我们需要在您的首选目录中引导该应用程序:
react-native init react_native_infinite_scroll_tutorialI'll be using an android emulator for this tutorial but the code works for both IOS and Android platforms. In case you don't have an android emulator setup follow the instructions provided in the android documentation here.
在本教程中,我将使用一个android模拟器,但是该代码可在IOS和Android平台上使用。 如果您没有android模拟器设置,请按照android文档中提供的说明进行操作 在这里 。
Make sure your emulator is up and running then navigate to your project directory and run the following command:
确保模拟器已启动并正在运行,然后导航至项目目录并运行以下命令:
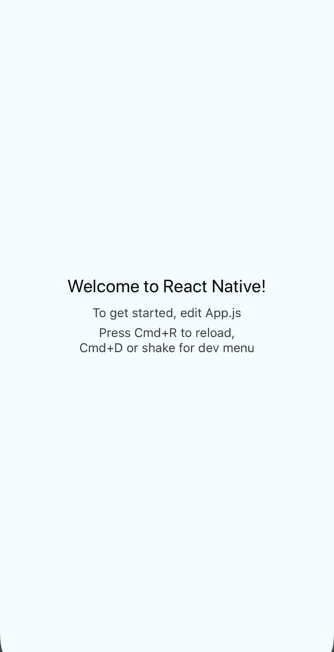
react-native run-androidThis should download all required dependecies and install the app on your emulator and then launch it automatically, You should have a screen with the default text showing as follows:
这应该下载所有必需的依赖项并在模拟器上安装该应用程序,然后自动启动它。您应该具有一个屏幕,其默认文本如下所示:
Now that we have our sample app up and running, we will now install the required dependecies for the project, we will be using the Axios for making requests to the server and Glamorous Native for styling our components, run the following command to install them:
现在,我们已经启动并运行了示例应用程序,现在我们将为项目安装所需的依赖项,我们将使用Axios向服务器发出请求,并使用Glamorous Native样式化组件,运行以下命令进行安装:
npm install -S axios glamorous-native目录结构 ( Directory Structure )
Directory structure is always crucial in an application, since this is a simple demo app, we'll keep this as minimal as possible:
目录结构在应用程序中始终至关重要,因为这是一个简单的演示应用程序,所以我们将其保持在最低限度:
src
├── App.js
├── components
│   ├── BeerPreviewCard
│   │   ├── BeerPreviewCard.js
│   │   └── index.js
│   ├── ContainedImage
│   │   └── index.js
│   └── Title
│       └── index.js
├── config
│   └── theme.js
└── utils
    └── lib
        └── axiosService.js
Axios配置 ( Axios Config )
In order to make our axios usage easy, we will create a singleton instance of the axios service that we can import across our components:
为了简化axios的使用,我们将创建axios服务的单例实例,可以将其跨组件导入:
import axios from 'axios';

const axiosService = axios.create({

  baseURL: 'https://api.punkapi.com/v2/',
  timeout: 10000,
  headers: {

    'Content-Type': 'application/json'
  }
});

// singleton instance
export default axiosService;
卡样式 ( Card Styling )
Next we will create cards to display our beer data and add some designs to it.
接下来,我们将创建卡片来显示我们的啤酒数据并向其中添加一些设计。
theme.js (theme.js)
This file contains the app color pallete which we will use across the app.
该文件包含我们将在整个应用程序中使用的应用程序颜色调色板。
export const colors = {

  french_blue: '#3f51b5',
  deep_sky_blue: '#007aff',
  white: '#ffffff',
  black: '#000000',
  veryLightPink: '#f2f2f2'
};
Title.js (Title.js)
This file contains the card text component that we will use to display the beer name in the card.
该文件包含卡片文本部分,我们将使用该文本部分来显示卡片中的啤酒名称。
import glamorous from 'glamorous-native';
import {
     colors } from '../../config/theme';

const Title = glamorous.text((props, theme) => ({

  fontFamily: 'robotoRegular',
  fontSize: 16,
  color: props.color || colors
最低0.47元/天 解锁文章


 567
567

 被折叠的 条评论
为什么被折叠?
被折叠的 条评论
为什么被折叠?
 到【灌水乐园】发言


