


Digital Ocean is a cloud computing platform that offers developers a Solid State Drive (SSD) to do whatever they want with. Sounds fun.
Digital Ocean是一个云计算平台,可为开发人员提供固态驱动器(SSD)来完成他们想做的任何事情。 听起来很有趣。
DigitalOcean is a simple and robust cloud computing platform, designed for developers.
DigitalOcean是一个简单而强大的云计算平台,专为开发人员设计。
Once you have this SSD, you have access to a rich API's to access the droplet, networking for your droplet, and Storage to attach to your droplet.
拥有此固态硬盘后,您就可以访问丰富的API来访问Droplet,为Droplet联网以及将存储连接到Droplet。
They also provide you with a couple of Server Operating Systems, which you use to start up your drople.
它们还为您提供了几个服务器操作系统,您可以使用它们来启动drople。
This approach has led to the development of some pre-built images or apps, such as Wordpress and the Ghost blogging platform, that can be installed in one click.
这种方法导致了一些预构建的图像或应用程序的开发 ,例如Wordpress和Ghost博客平台,可以一键安装。
托管方式 ( Hosting Approach )
We'll look at two ways of Hosting a NodeJS app to Digital Ocean.
我们将研究将NodeJS应用托管到Digital Ocean的两种方法。
- We'll first write our app locally, push to GitHub, then pull it from within our Digital Ocean Droplet. 我们将首先在本地编写我们的应用程序,推送到GitHub,然后从Digital Ocean Droplet中提取它。
- We'll dockerize our nodejs application and deploy it to Digital Ocean using Docker-Machine. 我们将对nodejs应用程序进行docker化,然后使用Docker-Machine将其部署到Digital Ocean。
示例节点应用 ( Sample Node App )
Since we are looking at deployment, we'll keep things simple. We'll just have a simple express server telling us where the magic happens.
由于我们正在研究部署,因此我们将使事情变得简单。 我们将只有一个简单的快递服务器,告诉我们魔术发生的位置。
If you already know how node apps work, especially with express, you can skip this part, and just head to the Setting Up Digital Ocean part, since we'll clone the node app from a git repo.
如果您已经知道节点应用程序是如何工作的,尤其是在Express中,则可以跳过此部分,而直接进入“设置数字海洋”部分,因为我们将从git repo中克隆节点应用程序。
Create a directory called DO-node, and inside initialize npm, then create a file, index.js
创建一个名为DO-node的目录,并在内部初始化npm,然后创建一个文件index.js
$mkdir DO-node
$ cd DO-node
$ npm init -y
$ npm install --save express
$ touch index.js
The package.json file created should look something similar to this.
创建的package.json文件应类似于此。
{
  "name": "node-do",
  "version": "1.0.0",
  "description": "",
  "main": "index.js",
  "scripts": {
    "start": "node index.js"
  },
  "keywords": [],
  "author": "",
  "license": "ISC",
  "dependencies": {
    "express": "^4.14.0"
  }
}
Write a simple express server that tells us where the magic happens. I pulled this one directly from the express documentation.
写一个简单的快递服务器,告诉我们魔术发生的地方。 我直接从快递文件中取出了这个。
var express = require('express')
var app = express()

app.get('/', function (req, res) {
  res.send('Hello Digital Ocean!')
})

app.listen(3000, function () {
  console.log('Magic is happening on port 3000!')
})
If we run
如果我们跑
$npm startWe should see the terminal with Magic is happening on port 3000! and opening the browser http://localhost:3000 should display the message Hello Digital Ocean!.
我们应该看到Magic is happening on port 3000!带有Magic is happening on port 3000!的终端Magic is happening on port 3000! 并打开浏览器http://localhost:3000显示消息Hello Digital Ocean! 。
Next, you can create a github repository and push this code, or just move on with the one I've created.
接下来,您可以创建一个github存储库并推送此代码,或者继续进行我创建的代码 。
If you chose to create your own repo, copy the github url, then run this.
如果您选择创建自己的存储库,请复制github url,然后运行它。
$git init
$ git remote add <put_your _github_repo_here>
$ echo "node_modules/" > .gitignore
$ git add .
$ git commit -m "initial commit"
$ git push origin master
Here we create a git repo, then create a .gitignore file and add in node_modules so that it's ignored. We then add everything with git add . and push it to the github repo.
在这里,我们创建一个git repo,然后创建一个.gitignore文件,并添加node_modules使其被忽略。 然后,我们使用git add .添加所有内容git add . 并将其推送到github仓库。
设置数字海洋 ( Setting up Digital Ocean )
First of all you need a Digital Ocean account. Head over to Digital Ocean and Sign up for an account.

首先,您需要一个Digital Ocean帐户。 前往Digital Ocean并注册一个帐户 。
Once you enter your details, you will receive a confirmation email, that will help you complete the sign up process.
输入详细信息后,您将收到确认电子邮件,这将帮助您完成注册过程。
You need at least $5 to be able to complete the Signing Up process. You can either add your Credit Card, or use Paypal.
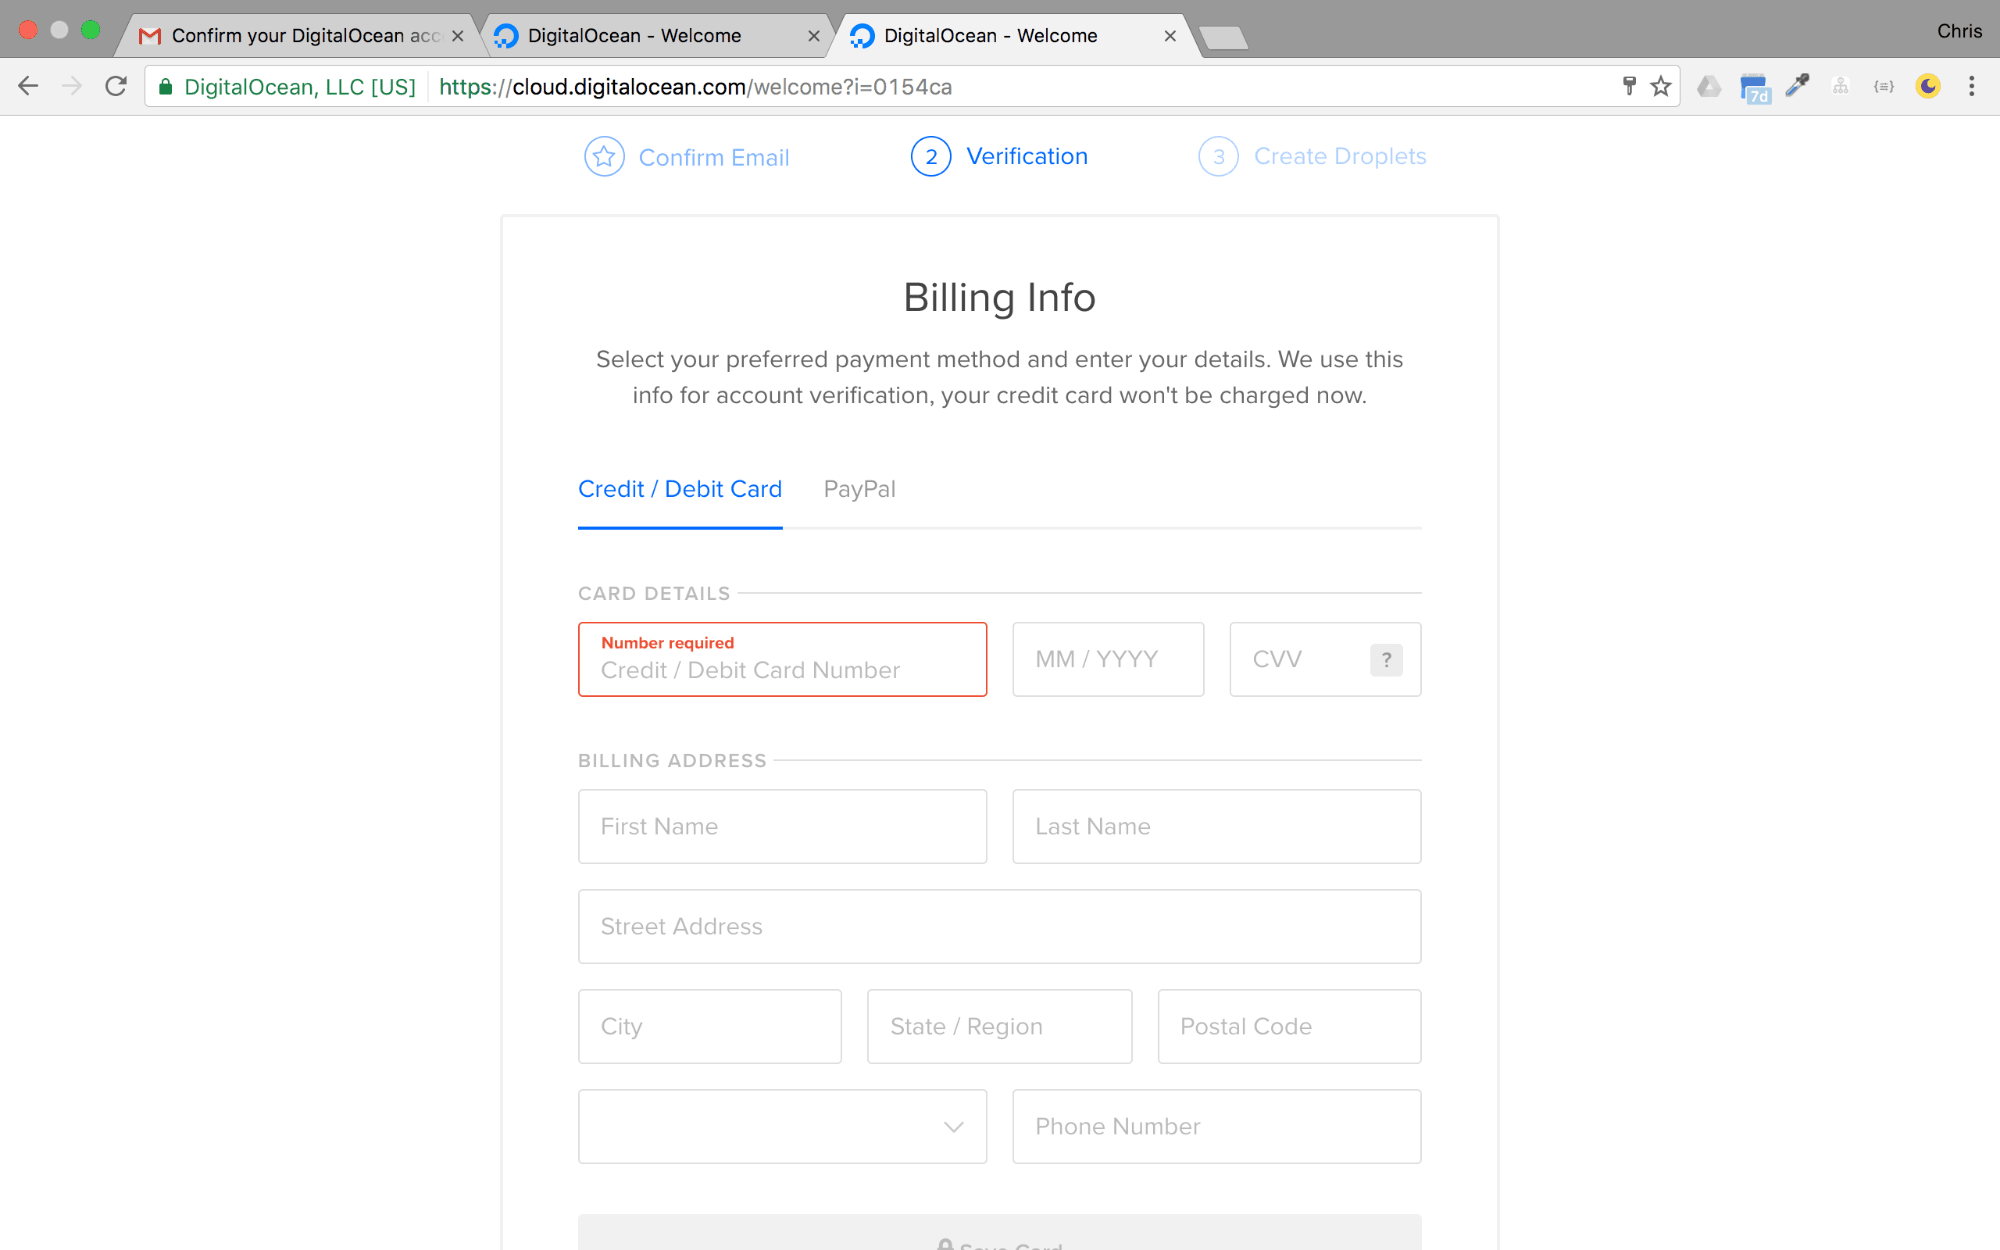
您至少需要$ 5才能完成注册过程。 您可以添加您的信用卡,也可以使用Paypal。
At the time I'm writing this, if you are a student, you can get the Github Student Pack, which has a $50 worth credit for Digital Ocean to get you started with hosting in Digital Ocean.
在撰写本文时,如果您是学生,可以获取Github Student Pack ,其中有价值$ 50的Digital Ocean信用额,可以让您开始在Digital Ocean中进行托管。
Once you've signed up, and have $5 or above in your account, we should be good to go.
注册后,如果您的帐户中有$ 5或以上的款项,我们就可以开始了。
创建一个Droplet。 ( Creating a Droplet. )
There are two ways to create a Droplet in Digital Ocean. You can do it with the Digital Ocean Control Panel, or using the Digital Ocean API. We'll cover the latter one on the second deployment with Docker Machine.
有两种方法可以在Digital Ocean中创建Droplet。 您可以使用Digital Ocean Control Panel或使用Digital Ocean API来完成此操作 。 我们将在Docker Machine的第二个部署中介绍后者。
When you log in to your Digital Ocean account you should see a Create Droplet button.

当您登录到Digital Ocean帐户时,您应该会看到一个Create Droplet按钮。
To see how much credit you have, you can click on the arrow next to your avatar on the far right, then click on settings, and click on the billing section on the left.
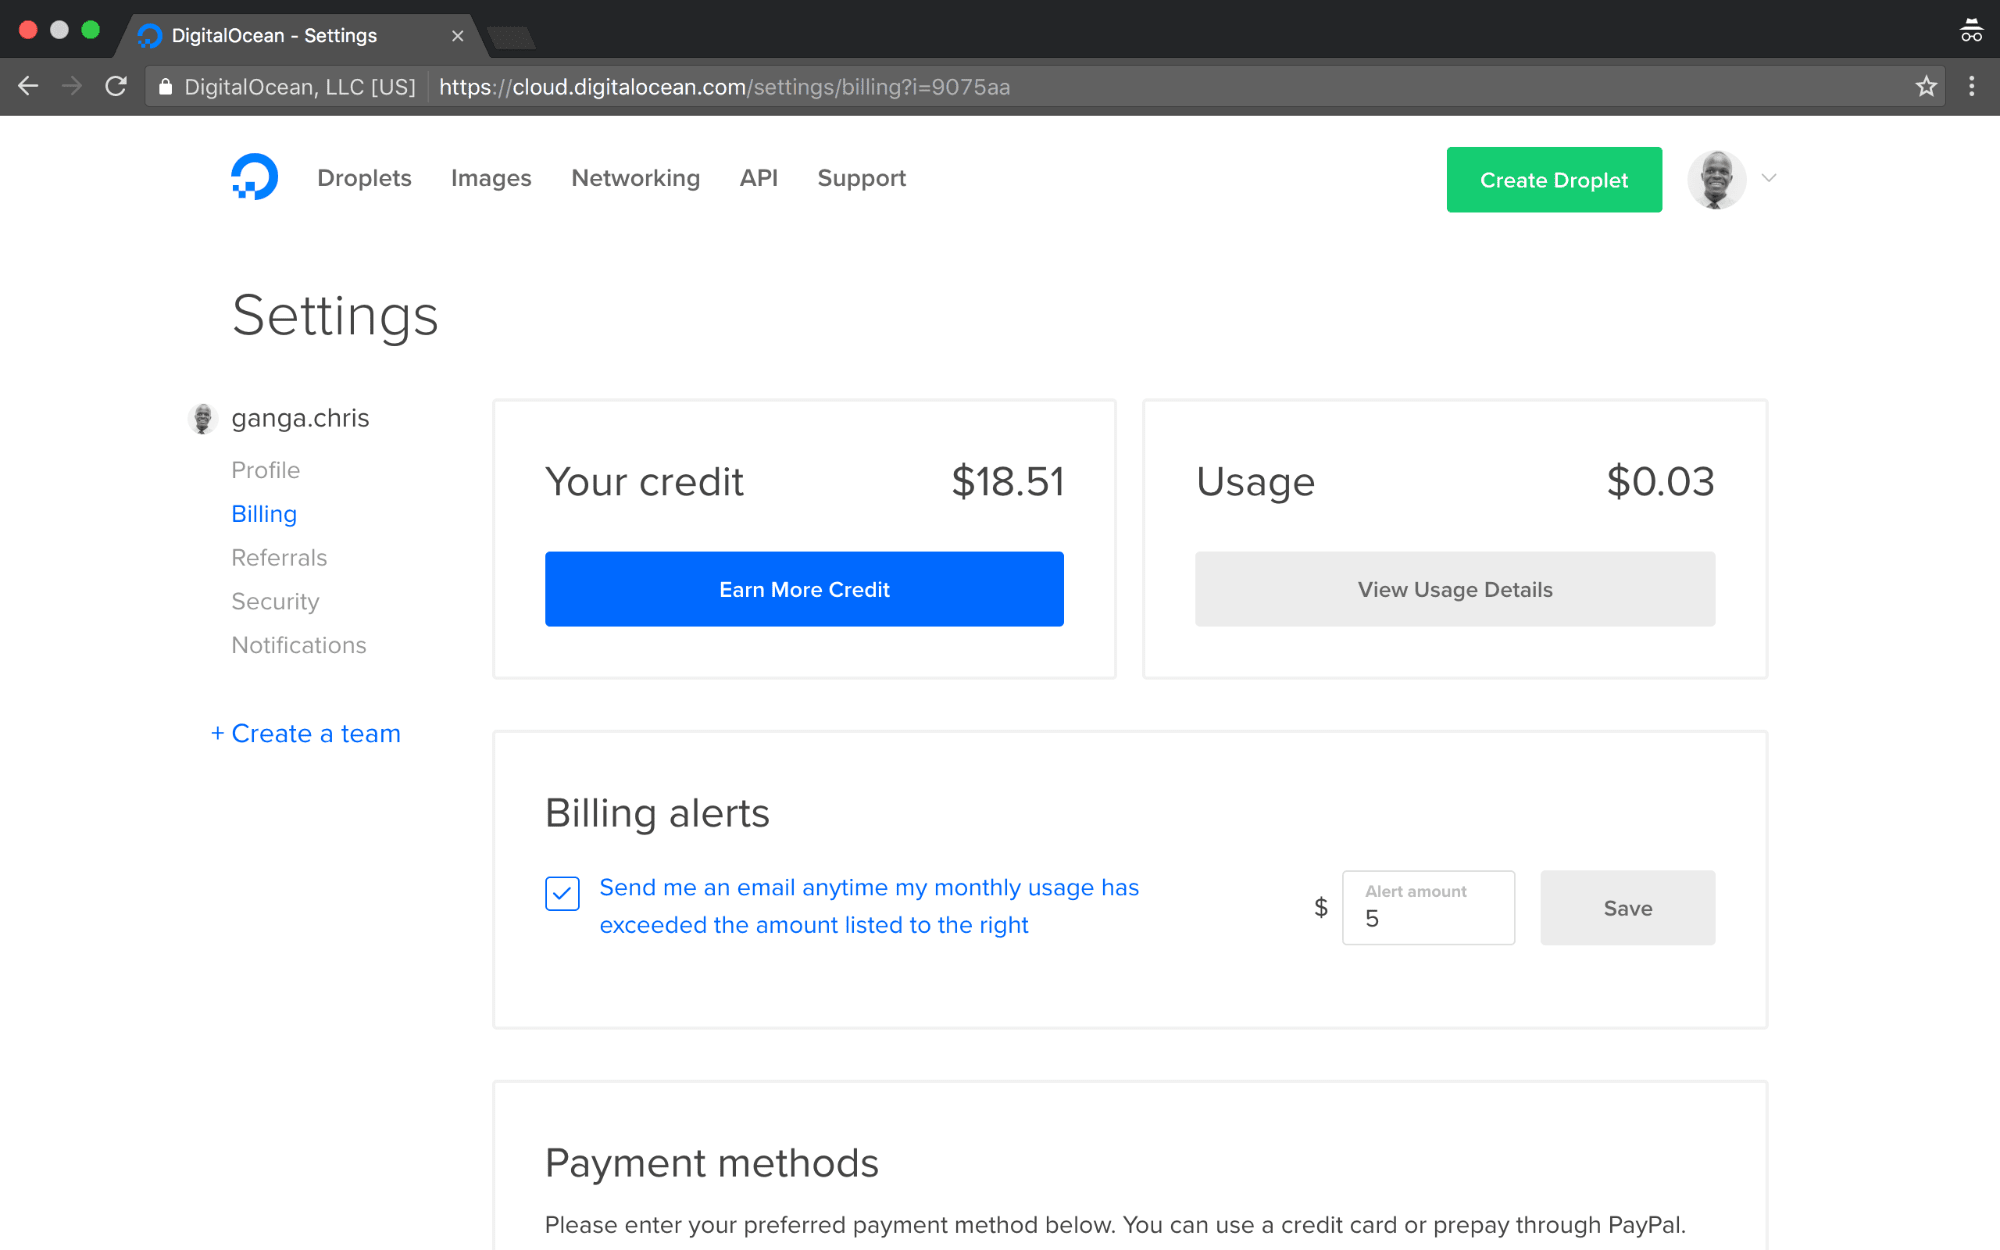
要查看您有多少信用,您可以点击最右边的头像旁边的箭头,然后点击设置 ,然后点击左侧的结算部分。
Once you are good to go, Click on the Create Droplet Button. You will be taken this page

一旦做好准备,请单击“ 创建液滴”按钮。 您将被带到此页面
You'll see we have three tabs
您会看到我们有三个标签
- Distributions refers to linux distros which we can install into the new droplet we are about to create. In this case we see Ubuntu, FreeBSD, Fedora, Debian, CoreOs and CentOS. Note that all these are the Server Versions of these distros. 分布是指我们可以安装到新的液滴,我们将要创建的Linux发行版。 在这种情况下,我们可以看到Ubuntu,FreeBSD,Fedora,Debian,CoreOs和CentOS。 请注意,所有这些都是这些发行版的服务器版本。
- One-click apps refers to images already built with support for some common softwares. If you click on the tab, you'll see common application platforms such as Django, MEAN, Wordpress, Drupal and even Docker. This installs all the dependencies required to run these apps, unlike the first distributions where we'll have to install everything manually. 一键式应用程序指的是已经建立了对某些常用软件的支持的图像。 如果单击选项卡,将看到常见的应用程序平台,例如Django,MEAN,Wordpress,Drupal甚至Docker。 这将安装运行这些应用程序所需的所有依赖项,这与第一个发行版不同,在第一个发行版中 ,我们必须手动安装所有内容。
- Snapshots refers to droplet images we've built before, and we'd like to create another droplet based off of them. 快照是指我们之前构建的小滴图像,我们希望基于它们创建另一个小滴。
So click on the One-click apps section, and select the NodeJS 6.9.2 on 16.04 which means nodejs on Ubuntu 16.04.

因此,单击“ 一键式应用程序”部分,然后选择16.04上的NodeJS 6.9.2,这意味着在Ubuntu 16.04上为nodejs。
Head to the next section. To choose a size.
 Choose the
前往下一部分。 选择尺寸。 $ 5 / mo (每月$ 5)选项。 此选项具有512 MB的ram和20GB的SSD,对于本文来说足够了。
The next section which is Add Block Storage which we can ignore for now.
下一部分是添加块存储,我们现在可以忽略它。
Next choose a region close to where you are. Ideally this should be close to where the users of your app will most likely be.
接下来,选择您附近的区域。 理想情况下,该位置应该接近您的应用程序用户最有可能到达的位置。
You can then add Select additional options, but this is not necesarry for now.
然后,您可以添加“选择其他选项”,但是现在这不是必需的。
The next section is the important one. We need to add a SSH key to enable us access our droplet remotely.

下一部分是重要的部分。 我们需要添加SSH密钥以使我们能够远程访问我们的Droplet。
I have a couple of options because I've added ssh keys before.
我有两个选择,因为我之前已经添加了ssh键。
SSH keys provide a more secure way of logging into a virtual private server with SSH than using a password alone. While a password can eventually be cracked with a brute force attack, SSH keys are nearly impossible to decipher by brute force alone.
与仅使用密码相比,SSH密钥提供了一种更安全的方式使用SSH登录虚拟专用服务器。 虽然最终可以通过蛮力攻击来破解密码,但仅凭蛮力几乎无法破解SSH密钥。
Click on the New SSH key option. A Modal will pop up for you to add your ssh key.
单击“ 新建SSH密钥”选项。 将会弹出一个Modal,供您添加ssh密钥。
You can go through Generating a new SSH key and adding it to the ssh-agent by Github. Note that if you are using Windows, you need to have Git Bash installed. You can do this by downloading git for windows, and enabling the Git Bash option during installation.
您可以通过Github 生成新的SSH密钥并将其添加到ssh-agent中 。 请注意 ,如果使用Windows,则需要安装Git Bash。 您可以通过为Windows下载git并在安装过程中启用Git Bash选项来实现。
But it generally involves the following commands
但是它通常涉及以下命令
$ ssh-keygen -t rsa -b 4096 -C"your_email@example.com"Which will then be followed by a couple of questions.
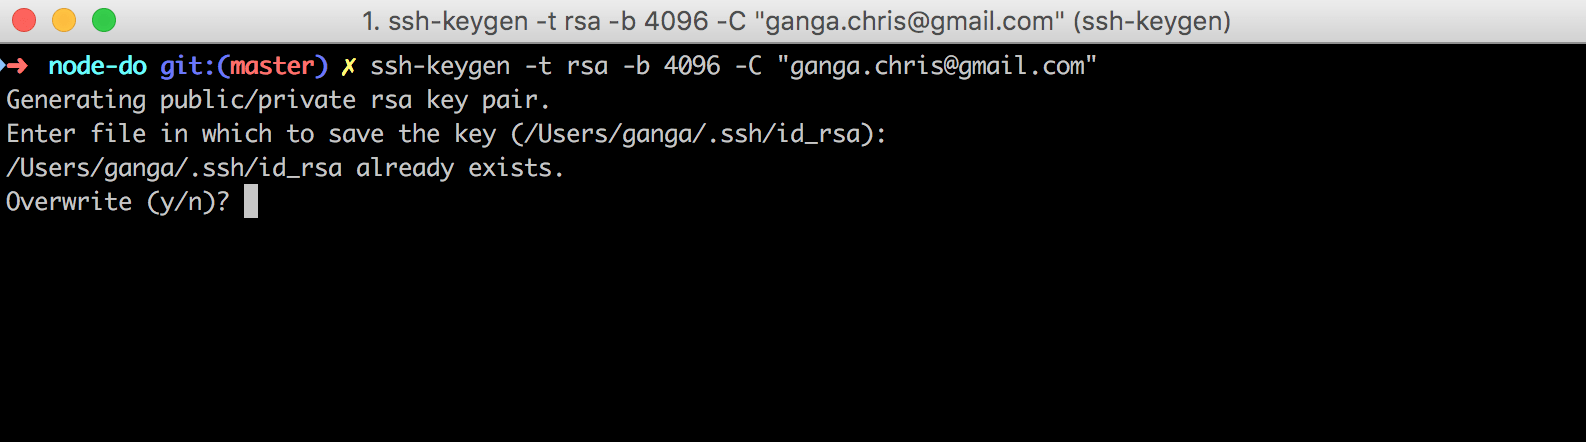
然后是几个问题。
The one thing to note is where the SSH key will be stored. Since you need to copy it.
要注意的一件事是SSH密钥的存储位置。 由于您需要复制它。
Once you've generated you ssh key, add it by clicking on the New SSH Key button
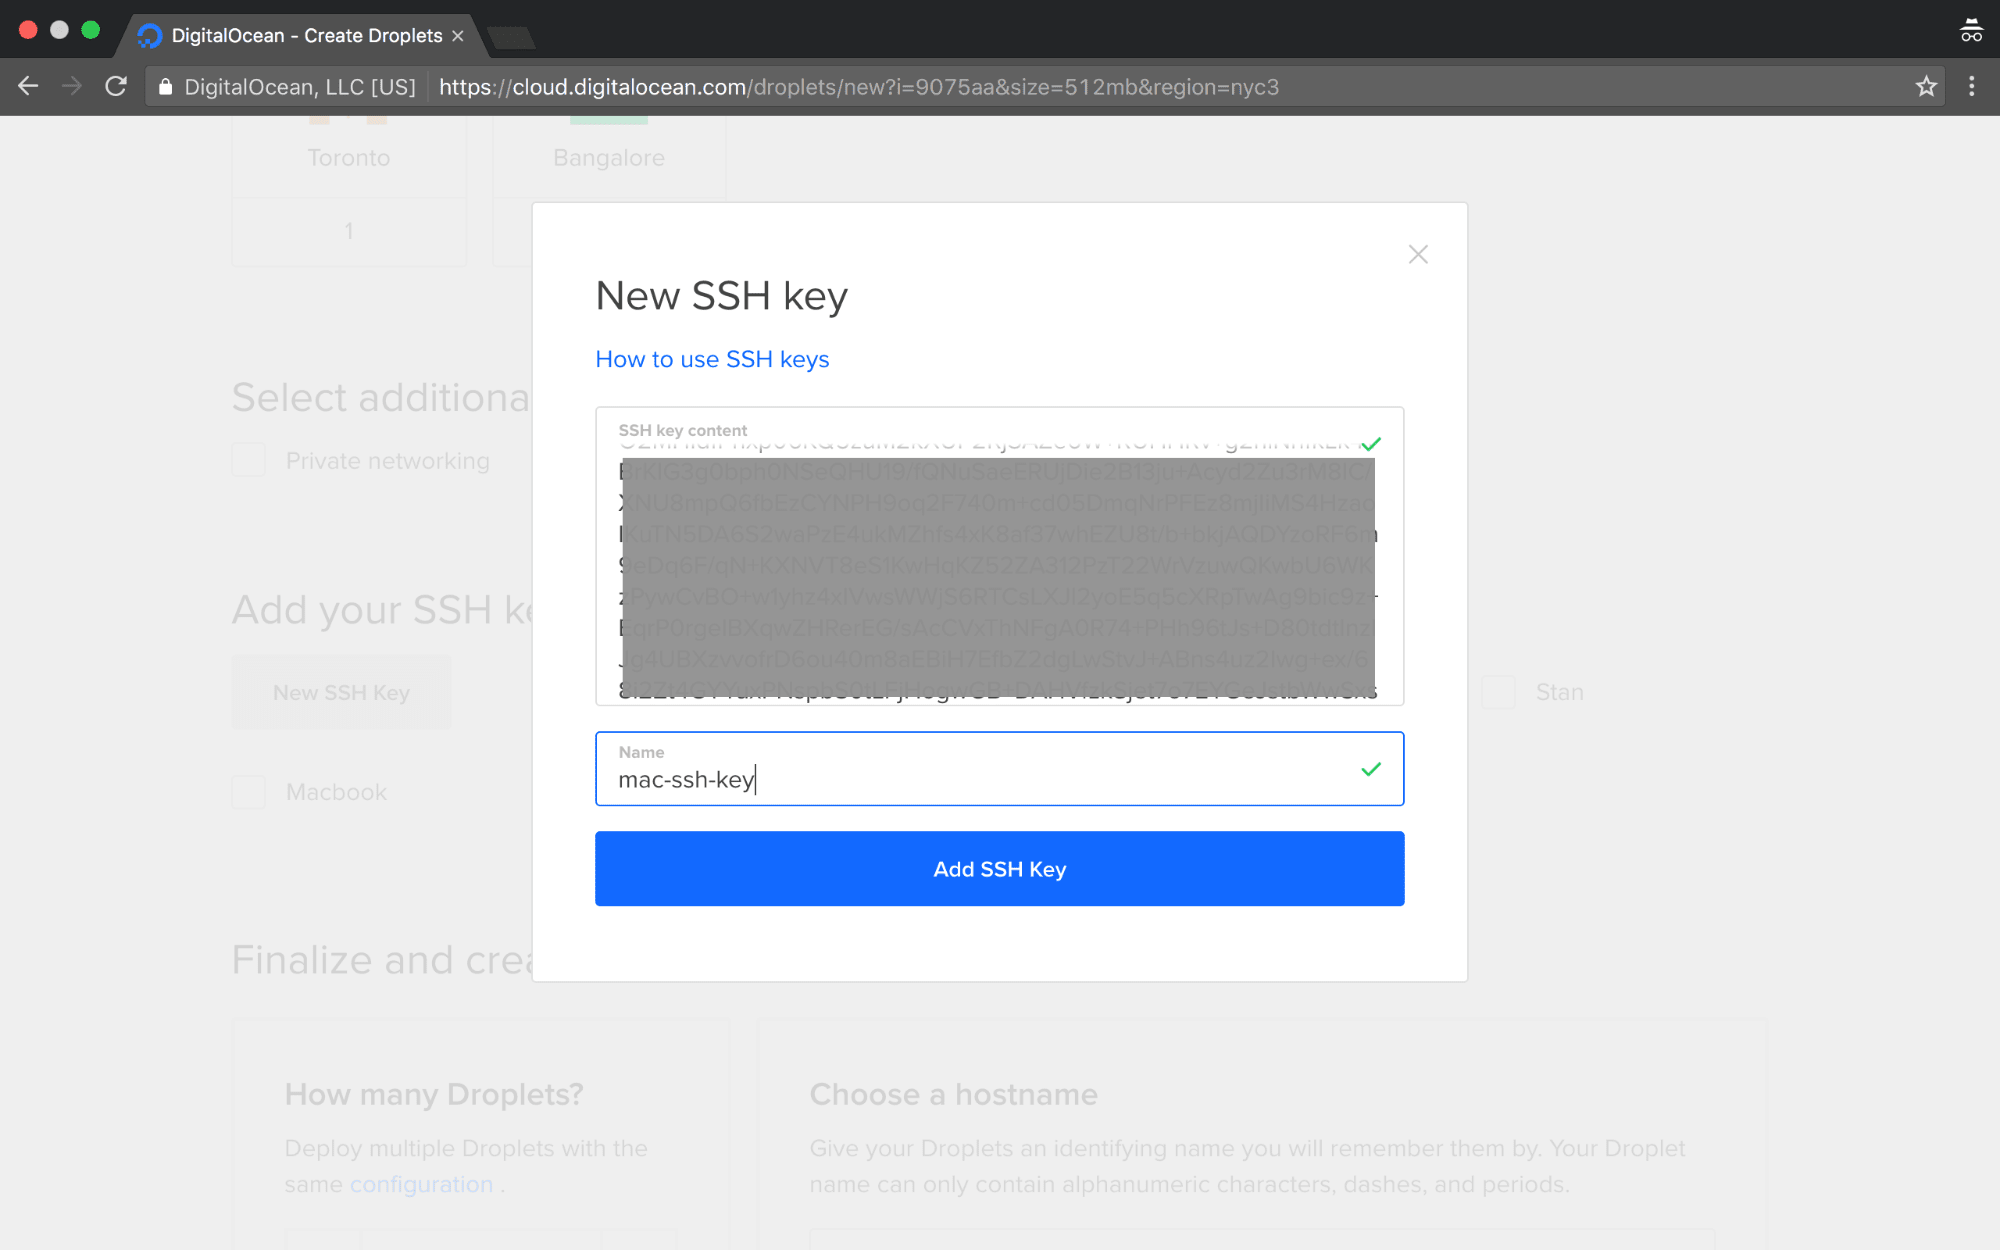 Paste in your SSH key and give it a name, then click on the Add SSH Key button.
生成ssh密钥后,请单击“ 新建SSH密钥”按钮将其添加
The new SSH Key will be selected by default.

默认情况下,将选择新的SSH密钥。
In the last section, you can choose whether to create more than one droplet, and edit the name of your droplet. You can leave them as they are, and click on the Create Button
在上一节中,您可以选择是否创建多个液滴,并编辑液滴的名称。 您可以保持原样,然后单击“ 创建”按钮
We'll see some cool animation there, it should take a few seconds to create your droplet.
我们将在那里看到一些很酷的动画,它需要几秒钟的时间来创建您的液滴。

You can see we've been assigned an IP address. Mine is 138.197.80.147, which I'll use for this article and delete after I'm done. So whenever I refer to your droplet IP address, I'm referring to this address.
您可以看到我们已经分配了一个IP地址。 我的是138.197.80.147 ,我将在本文中使用它,并在完成后将其删除。 因此,每当我指代您的Droplet IP地址时,我就是指该地址。
If you click on the droplet, it should take you to the droplet's settings and info

如果单击小滴,它将带您进入小滴的设置和信息
The ON toggle at the top right indicates that our droplet is running.
右上方的ON开关表示我们的液滴正在运行。
访问数字海洋滴 ( Accessing Digital Ocean Droplet )
If you generated an ssh key, go to your terminal and access your droplet with this syntax. If you are using windows, make sure you are using the Git Bash.
如果生成了ssh密钥,请转到终端并使用此语法访问Droplet。 如果您使用的是Windows,请确保使用的是Git Bash。
$ssh <user>@<droplet_ip_address>So we'll ssh into our droplet with this. Remember to replace the IP Address with the one generated for you in the Control Panel
因此,我们将以此为目标。 记住用“控制面板”中为您生成的IP地址替换IP地址。
$ssh root@138.197.80.147SSH usually warns you about the authenticity of a new host, so type in yes when you are prompted. You will then be prompted to change your password. Digital Ocean should have sent you a root password in the email. If you did not receive one, just click on the Access tab, then select Reset Root Password

SSH通常会警告您有关新主机的真实性,因此在出现提示时输入yes 。 然后将提示您更改密码。 Digital Ocean应该已经在电子邮件中向您发送了root密码。 如果没有收到,只需单击“访问”选项卡,然后选择“ 重置根密码”
Once this is done, you should see an ubuntu bash.
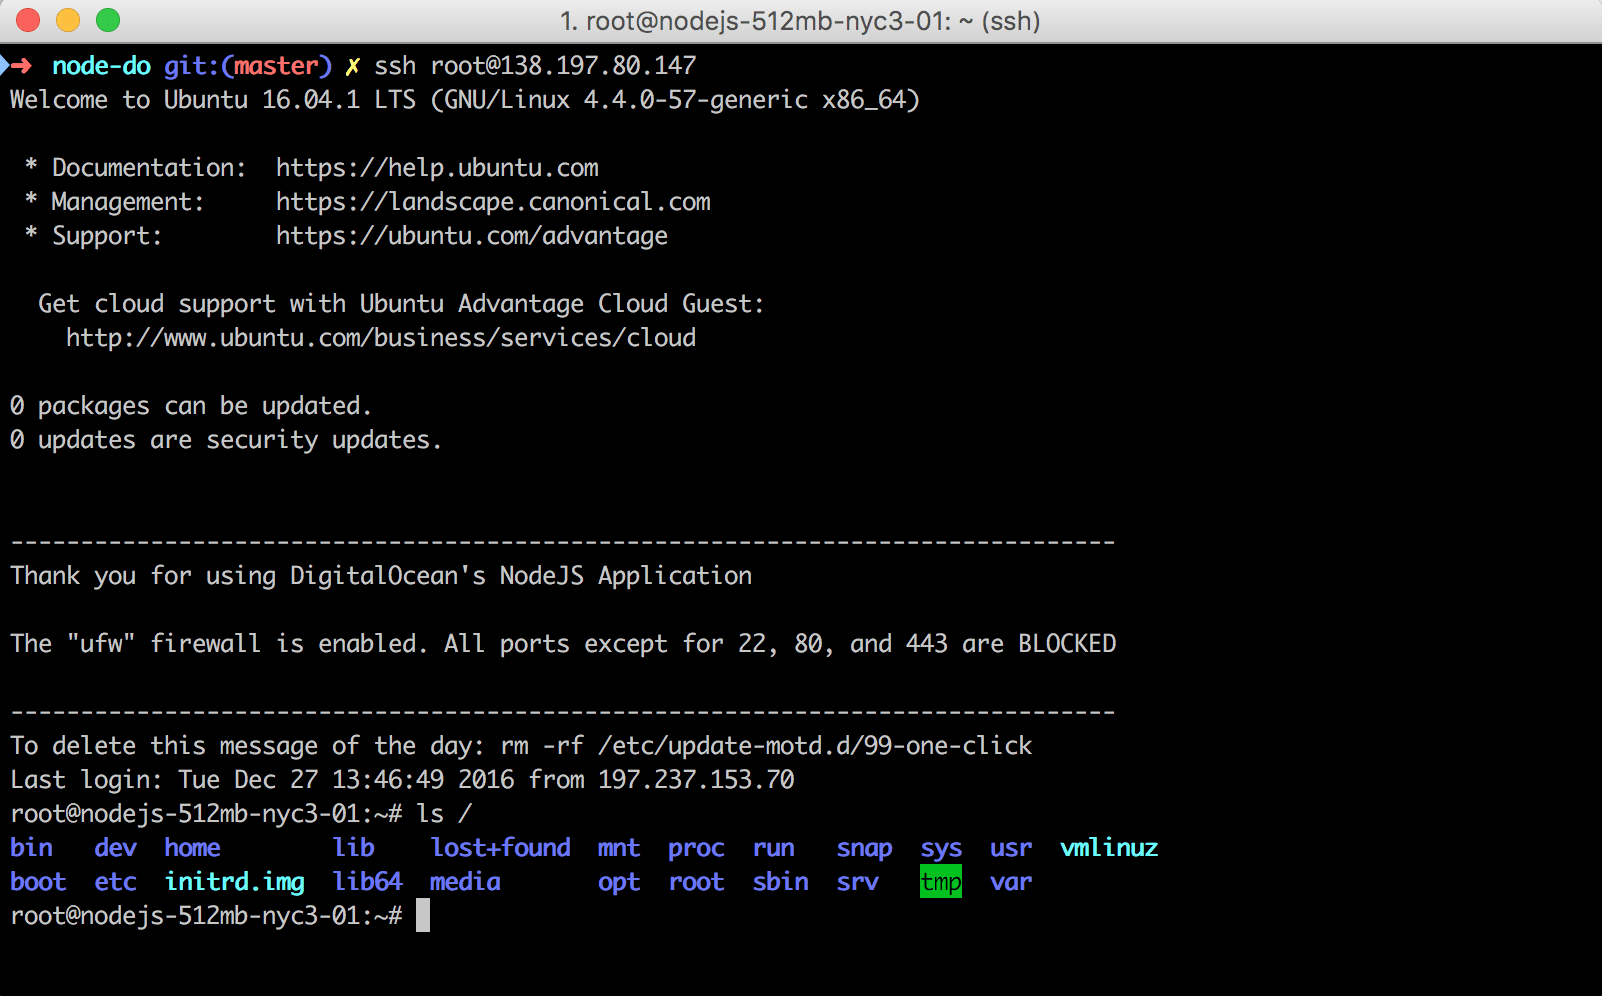
完成此操作后,您应该会看到ubuntu bash。
You can see running ls / lists the root file system of an ubuntu distro.
您可以看到运行ls /列出了ubuntu发行版的根文件系统。
托管Node JS应用。 ( Hosting the Node JS app. )
So we already have our node js app on this github repo, or the one that you created.
因此,我们已经在此github repo或您创建的那个上有了我们的node js应用程序。
We used the One Click apps to set up our droplet, so we have all the dependencies we need. If we hadn't done this, we'd have to follow these steps to do it run our app.
我们使用一键式应用程序来设置Droplet,因此我们拥有了所需的所有依赖项。 如果没有执行此操作,则必须按照以下步骤操作才能运行我们的应用程序。
- Get into our droplet 进入我们的小滴
- Install Git 安装Git
- Install NodeJS 安装NodeJS
- Clone our repo 克隆我们的仓库
- Serve the app. 服务应用程序。
Now, we can only focus on the last two.
现在,我们只能关注最后两个。
进入液滴 (Get into droplet)
Lets ssh into the droplet with the IP. Remember to replace the IP with your IP address from the Digital Ocean control panel. We should have a prompt like this.
让ssh进入具有IP的小滴。 请记住从Digital Ocean控制面板中用您的IP地址替换IP。 我们应该有这样的提示。
$ssh root@138.197.80.147
root@nodejs-512mb-nyc3-01:~#
Note your terminal may ocasionally hang depending on your internet connection, because SSH needs to maintian an open connection. In case this happens, just close the terminal, and start again.
请注意 ,由于SSH需要维护开放的连接,因此您的终端可能会暂时挂起,具体取决于您的Internet连接。 万一发生这种情况,请关闭终端,然后重新开始。
安装Git和NodeJS (Install Git and NodeJS)
We already have these installed. We can just confirm by
我们已经安装了这些。 我们可以通过以下方式确认
root@nodejs-512mb-nyc3-01:~# git --version
git version 2.7.4

root@nodejs-512mb-nyc3-01:~# node -v
v6.9.2
克隆仓库并启动应用 (Clone repo and start the app)
To clone the application,
要克隆该应用程序,
root@nodejs-512mb-nyc3-01:~# git clone https://github.com/gangachris/DO-nodejs
root@nodejs-512mb-nyc3-01:~# cd DO-nodejs
root@nodejs-512mb-nyc3-01:~# npm install
root@nodejs-512mb-nyc3-01:~# npm start
This should start the application inside your droplet. If you open a new tab in your browse and go to <your_ip_address>:3000, you should see the app running.
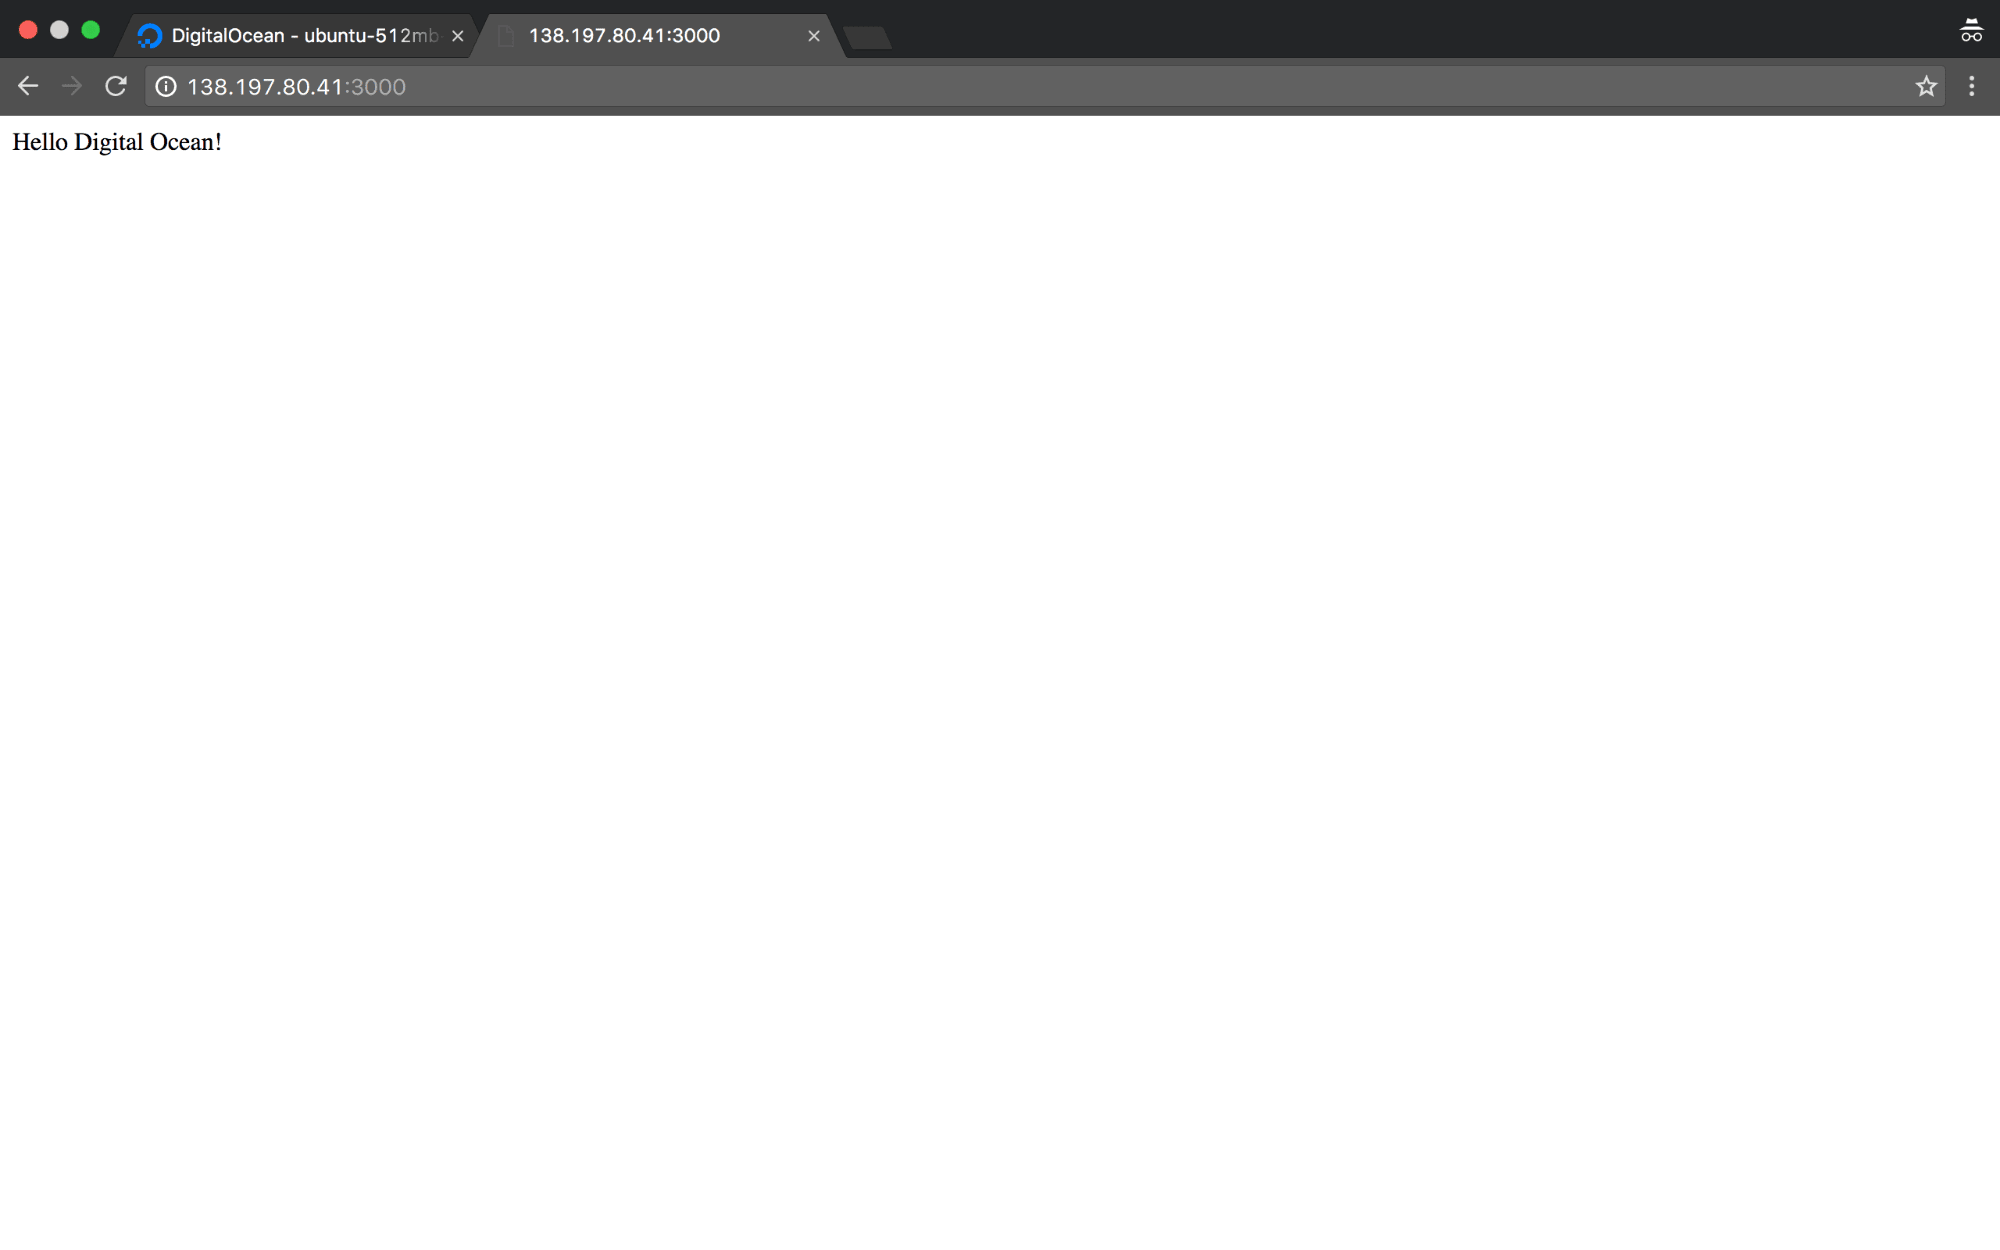
这应该在您的Droplet中启动应用程序。 如果在浏览器中打开一个新选项卡,然后转到<your_ip_address>:3000 ,则应该看到该应用程序正在运行。
Awesome, right.
太好了,对。
One problem though, if you close your ssh session, npm will stop and your app will be offline. We need to use something that will ensure our app keeps running.
但是,一个问题是,如果您关闭ssh会话,则npm将停止并且您的应用程序将脱机。 我们需要使用一些可以确保我们的应用程序继续运行的东西。
We'll use forever js. Stop you running app with Ctrl + C
我们将永远使用js 。 使用Ctrl + C停止运行应用程序
root@ubuntu-512mb-nyc3-01:~/DO-nodejs# npm install -g forever
root@ubuntu-512mb-nyc3-01:~/DO-nodejs# forever start index.js
Going to <your_ip_address>:3000 on the browser should still be running your app. Our app will run forever.
在浏览器上转到<your_ip_address>:3000应该仍在运行您的应用程序。 我们的应用程序将永远运行。
Stopping the app should be intuitive,
停止应用程序应该很直观,
root@ubuntu-512mb-nyc3-01:~/DO-nodejs# forever stop index.jsThat was the first approach. Let's look at the next one.
那是第一种方法。 让我们看下一个。
Docker机器方法 ( Docker Machine Approach )
Docker is an Open Source Containerization platform that allows us to run our applications inside containers.
Docker是一个开源容器化平台,它使我们能够在容器内运行应用程序。
To Dockerize an application, you usually need a Dockerfile, that gives instructions to docker on how to run our applications.
要对应用程序进行Docker化,通常需要一个Dockerfile,该文件向docker提供有关如何运行我们的应用程序的说明。
We recently Dockerized an Express App. Feel free to go through it.
最近,我们对Express App进行了Docker化 。 随意阅读。
In this instance, our app is pretty small. We'll create a Dockerfile for it.
在这种情况下,我们的应用程序很小。 我们将为其创建一个Dockerfile。
# Create image from nodejs base image
FROM node:6

# Clone the repo from github
RUN git clone https://github.com/gangachris/DO-nodejs

# Change workind directory to the cloned repo
WORKDIR /DO-nodejs

# Install all the dependencies
RUN npm install

# Expose port
EXPOSE 3000

# Run the application
CMD ["npm", "start"]
I've commented on the Dockerfile, to clearly explain each step.
我对Dockerfile进行了评论,以清楚地说明每个步骤。
To build this image and test if it works, we need to have docker installed. If you don't have docker installed, Install Docker for your respective platform. To ensure docker is intalled, just run
要构建此映像并测试其是否有效,我们需要安装docker。 如果您尚未安装docker,请为各自的平台安装Docker 。 为了确保安装了泊坞窗,只需运行
$ docker -v
Docker version 1.12.5, build 7392c3b
To build our app's image using the Dockerfile, simply use this syntax
要使用Dockerfile构建应用程序的映像,只需使用以下语法
$ docker build -t<image_name>:<tag> <directory_with_dockerfile>So in this case, the command will be.
因此,在这种情况下,命令将是。
$ docker build -t digital-ocean-node:dev.The .(dot) refers to the current Directory. If you run docker images, you should see the image you just built.
.(dot)表示当前目录。 如果您运行docker images ,则应该看到刚刚构建的映像。
Once the image is built successfully, we run a container based on the image with this syntax.
成功构建映像后,我们将使用此语法基于映像运行一个容器。
$ docker run -d -p<host_port>:<container_port> --name <contianer_name> <docker_image>In this case, the command will be.
在这种情况下,命令将是。
$ docker run -d -p 3000:3000 --name digital-ocean-container digital-ocean-node:devThe -d tells docker to run the container in detached mode, so you don't get stuck inside the container. Running docker ps should list the running containers.
-d告诉docker以分离模式运行容器,因此您不会卡在容器内。 正在运行的docker ps应该列出正在运行的容器。
Going to localhost:3000 in your browser should load the app.
在浏览器中转到localhost:3000应该会加载该应用程序。
Docker机器 (Docker Machine)
Docker Machine is a tool that lets you install Docker Engine on virtual hosts, and manage the hosts with docker-machine commands.
Docker Machine是一种工具,可让您在虚拟主机上安装Docker Engine,并使用docker-machine命令管理主机。
We have Digital Ocean, which will act as our virtual host.
我们拥有Digital Ocean,它将充当我们的虚拟主机。
Since Docker Machine enables running docker on multiple hosts, developers can make and distribute their own plugin for any virtualization technology or cloud provider. Docker machine comes with some plugins/drivers, including, Amazon Web Services, Digital Ocean, Google Compute Engine. This list shows some of the common Docker Machine plugins.
由于Docker Machine支持在多个主机上运行docker,因此开发人员可以为任何虚拟化技术或云提供商创建和分发自己的插件。 Docker机器随附一些插件/驱动程序,包括Amazon Web Services,Digital Ocean,Google Compute Engine。 该列表显示了一些常见的Docker Machine插件 。
Make sure you have docker-machine installed by runnning
确保您已通过runnning安装了docker-machine
$ docker-machine -v
docker-machine version 0.8.2, build e18a919
If not installed, you can go through this installation guide.
如果未安装,则可以阅读此安装指南 。
Once installed, Instructions for running docker-machine with the digital ocean driver can be found here.
安装后,可在此处找到有关使用数字海洋驱动程序运行docker-machine的说明。
The command required has this syntax.
所需的命令具有此语法。
$ docker-machine create --driver digitalocean --digitalocean-access-token=aa9399a2175a93b17b1c86c807e08d3fc4b79876545432a629602f61cf6ccd6b test-thisThe test-this part refers to the name we want to give to the virtual docker host.
test-this部分是指我们要赋予虚拟docker主机的名称。
From the command, we see that we need a digitalocean-access-token. Go to the API tab in your Digital Ocean account

从命令中,我们看到我们需要一个digitalocean-access-token。 转到您的Digital Ocean帐户中的“ API”标签
Then click on Generate New Token
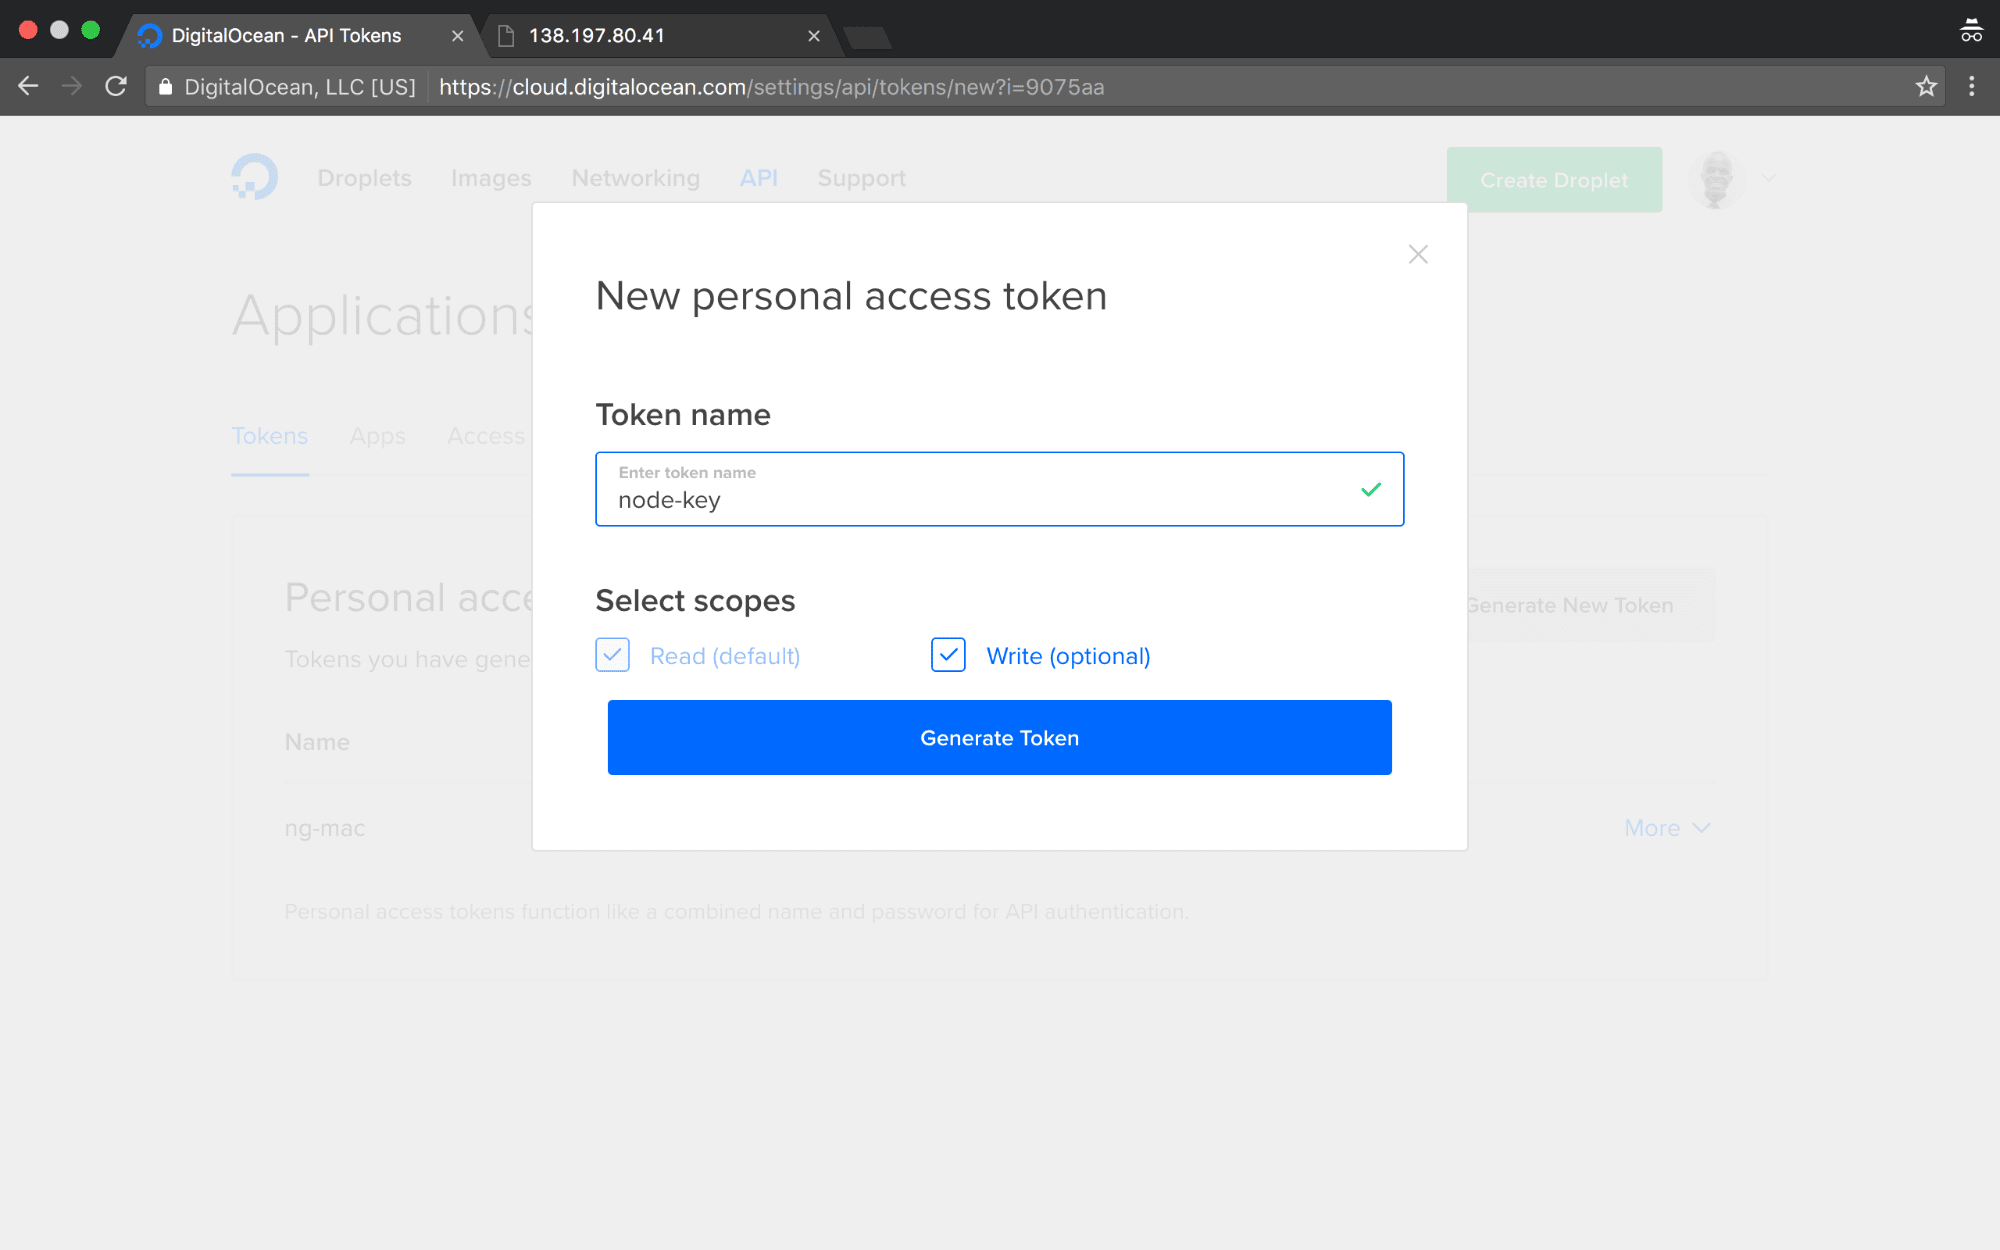
然后点击生成新令牌
Leave the read and write permissions checked. Then click on the Generate New Token button.
保留读取和写入权限处于选中状态。 然后单击生成新令牌按钮。
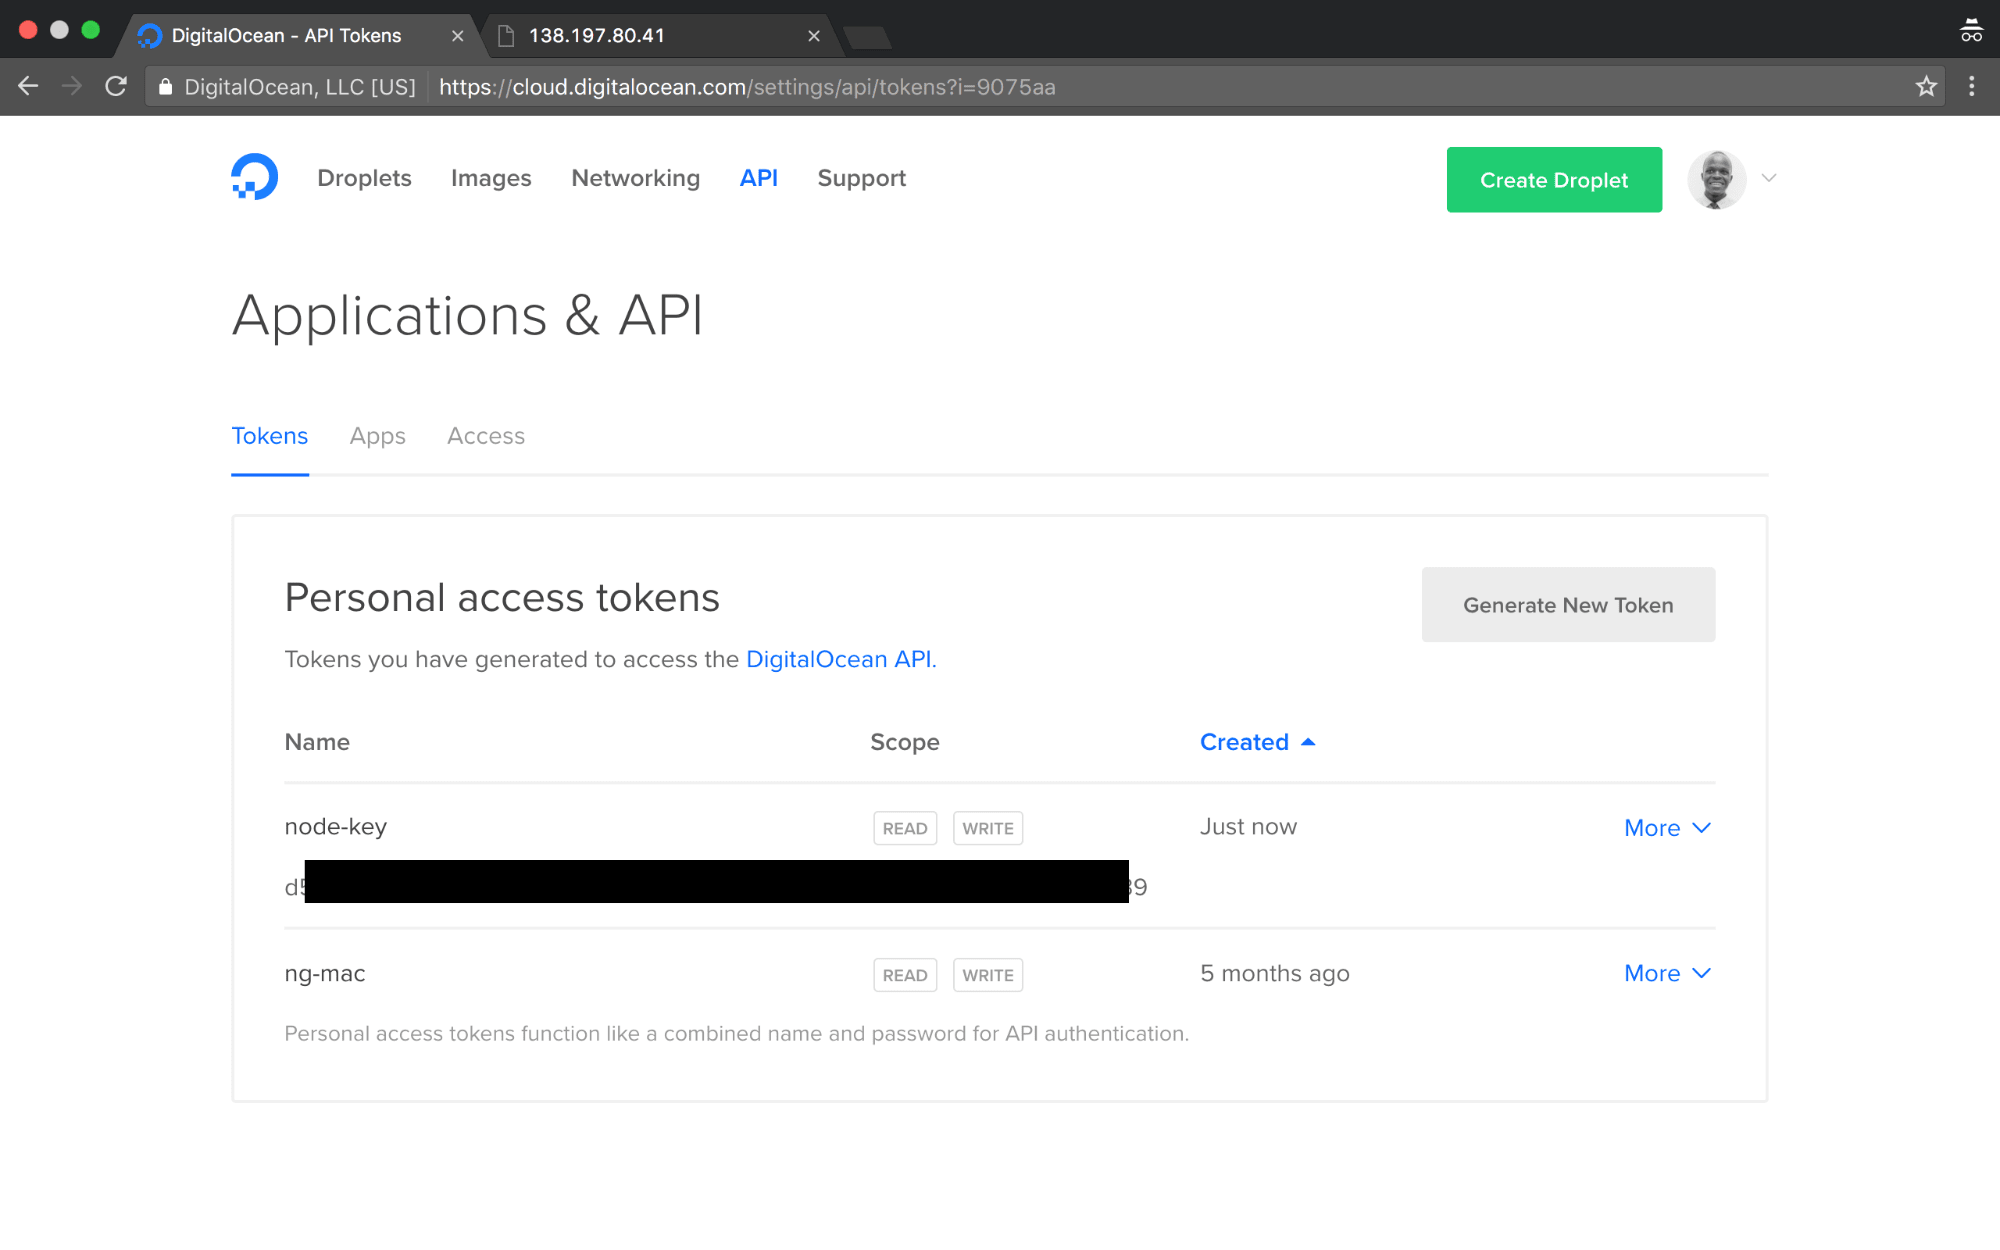
Your token should be displayed in the section I've blacked-out.
您的令牌应显示在我已涂黑的部分中。
Once you have all this, run the command now with the correct parameters. Replace the token section with your api-token.
完成所有操作后,立即使用正确的参数运行命令。 将令牌部分替换为您的api令牌。
$ docker-machine create --driver digitalocean --digitalocean-access-token=<your_api_access_token> digital-ocean-nodeThis will create a new droplet in your Digital Ocean Control Panel, once it completes. If it fails, you may have to delete the previous droplet you created. If you look at your droplets on Digital Ocean you should see a new one.

完成后,这将在“数字海洋控制面板”中创建一个新的液滴。 如果失败,则可能必须删除之前创建的Droplet。 如果您在Digital Ocean上看到飞沫,应该会看到一个新的飞沫。
Now we need to point our docker installation to use the Virtual Host docker we just intalled in our virtual server. Right now if we type in
现在,我们需要指向Docker安装位置,以使用我们刚刚在虚拟服务器中安装的Virtual Host Docker。 现在,如果我们输入
$ docker imagesWe'll see both the node and the digital-ocean-node:dev image present. When we switch docker to point to our Virtual Host, we should not see these images, since no image build or pull has been done in the Virtual Host.
我们将同时看到该节点和digital-ocean-node:dev图像。 当我们切换docker指向我们的虚拟主机时,我们不会看到这些映像,因为在虚拟主机中尚未完成任何映像构建或提取。
To point our docker to the Virtual Host, first run this command to see available hosts.
要将Docker指向虚拟主机,请首先运行此命令以查看可用主机。
$ docker-machinels
NAME                 ACTIVE   DRIVER         STATE     URL                        SWARM   DOCKER
digital-ocean-node   -        digitalocean   Running   tcp://45.55.254.215:2376           v1.12.5
You can see we have a docker-machine-node, which we created earlier. The IP should correspond to the IP address we saw in in the Digital Ocean Control Panel.
您可以看到我们有一个我们先前创建的docker-machine-node 。 该IP应该与我们在“数字海洋控制面板”中看到的IP地址相对应。
To see how to change docker to point to this virtual host, simply run this.
要查看如何将docker更改为指向该虚拟主机,只需运行此命令即可。
$ docker-machineenv digital-ocean-node
export DOCKER_TLS_VERIFY="1"
export DOCKER_HOST="tcp://45.55.254.215:2376"
export DOCKER_CERT_PATH="/Users/ganga/.docker/machine/machines/digital-ocean-node"
export DOCKER_MACHINE_NAME="digital-ocean-node"
# Run this command to configure your shell:
# eval $(docker-machine env digital-ocean-node)
We are instructed to run eval $(docker-machine env digital-ocean-node) to point our docker to the Virtual Host docker environment. So we run that.
我们被指示运行eval $(docker-machine env digital-ocean-node)将docker指向虚拟主机docker环境。 所以我们运行。
$eval $(docker-machine env digital-ocean-node)Done. Now running docker images should return an empty result since we are pointing to the Digital Ocean Virtual host.
做完了 现在运行的docker images应该返回空结果,因为我们指向的是Digital Ocean Virtual主机。
$ docker images
REPOSITORY          TAG                 IMAGE ID            CREATED             SIZE
So we need to do a new image build, and run a container based on the image.
因此,我们需要进行新的映像构建,并基于该映像运行一个容器。
$ docker build -t digital-ocean-node:dev.Now running docker images should give us the images.
现在运行docker images应该给我们这些镜像。
$ docker images
REPOSITORY           TAG                 IMAGE ID            CREATED             SIZE
digital-ocean-node   dev                 8834fa7b0496        2 minutes ago       658.6 MB
node                 6                   faaadb4aaf9b        11 days ago         655.5 MB
The last thing we need to do is run the container. The only difference from how we ran the container earlier is that We're going to point the default HTTP port 80 to 3000 from the container, so that we can access the container with just the IP address in the browser.
我们需要做的最后一件事是运行容器。 与我们之前运行容器的唯一区别是,我们将从容器中指向默认的HTTP端口80到3000 ,以便我们可以仅使用浏览器中的IP地址来访问该容器。
$ docker run -d -p 80:3000 --name digital-ocean-node digital-ocean-node:dev
225c7f305839864c25acfea47bf46921d235c44c23f6011518926a2ba6b08c0e
Going to your the IP that was created for the droplet should show the app running. Mine was 45.55.254.215, so
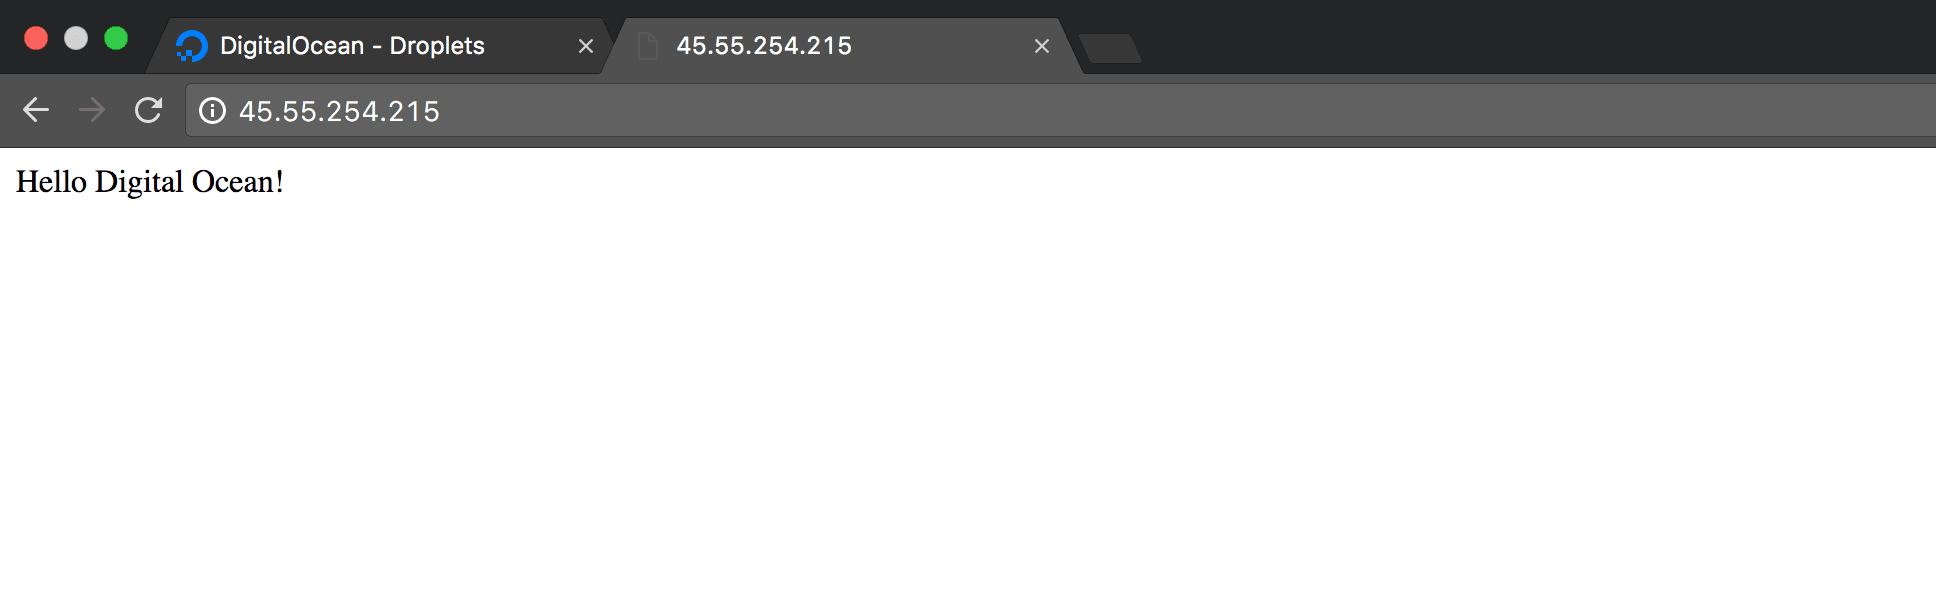
转到为Droplet创建的IP,这应显示该应用程序正在运行。 我的是45.55.254.215 ,所以
Note To change your docker to point back to your local host, simply run
注意要更改您的docker以指向您的本地主机,只需运行
$eval $(docker-machine env -u)The -u stands for unset.
-u代表未设置。
Last Note. Remember to either stop or destroy the droplets you are not using, since you'll end up being billed if they are running.
最后说明 。 切记停止或销毁您不使用的液滴,因为如果液滴运行,最终将被收取费用。
结论 ( Conclusion )
We've seen how easy it is to deploy a nodejs app to digital ocean. I personally prefer the docker approach, since updating my app will only involve doing new builds, and running them without ever going to the Control Panel.
我们已经看到将nodejs应用程序部署到数字海洋有多么容易。 我个人更喜欢docker方法,因为更新我的应用程序仅涉及完成新构建并运行它们,而无需进入控制面板。
The first approach, while it's also easy, will require you ssh-ing into your droplet often, unless you set up some continuous deployment platform.
第一种方法虽然也很容易,但是将需要您经常将其插入dash,除非您设置了一些连续的部署平台。
Hope this was helpful.
希望这会有所帮助。
翻译自: https://scotch.io/tutorials/how-to-host-a-node-js-app-on-digital-ocean


 804
804

 被折叠的 条评论
为什么被折叠?
被折叠的 条评论
为什么被折叠?
 到【灌水乐园】发言


