


While tools like the Magic Eraser can sometimes remove your backgrounds, the fact is you’re going to have to get your hands dirty with the eraser if you have images with complex backgrounds that need removing. While this can be time consuming, you can save yourself a lot of time with a little Photoshop wizardry. Let’s take a look.
尽管诸如魔术橡皮擦之类的工具有时可以删除背景,但事实是,如果您需要删除具有复杂背景的图像,则必须用手擦拭橡皮擦。 尽管这可能很耗时,但是您可以通过使用一些Photoshop向导来节省大量时间。 让我们来看看。
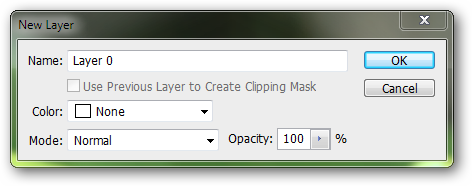
Right click your Background Layer in your Layers Palette, and choose “Layer from Background…” It automatically renames as Layer 0. Simply press OK.
右键单击“图层面板”中的“背景图层”,然后选择“来自背景的图层...”,它将自动重命名为“ 0层”。只需按OK。
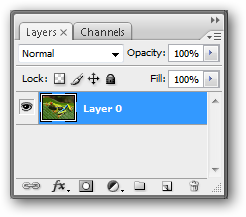
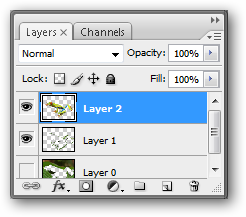
Your Layers Palette should only have a single layer, your newly unlocked “Layer 0.”
您的“图层面板”应仅包含一个图层,即新解锁的“第0层”。

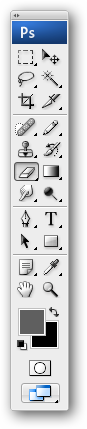
Press to select the Lasso Tool. Check your options on your Control Palette near the top of your Photoshop screen. Make sure that yours looks like this screenshot. Most importantly, be certain that “Anti-Alias” is turned off.
按下以选择套索工具。 在Photoshop屏幕顶部附近的控制面板上检查选项。 确保您的屏幕看起来像此屏幕截图。 最重要的是,请确保“ Anti-Alias”已关闭。
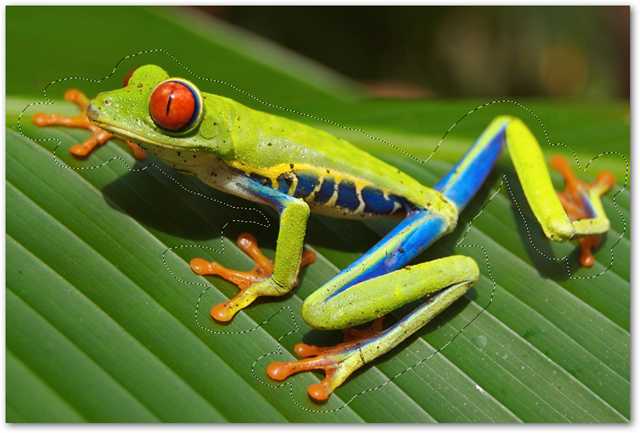
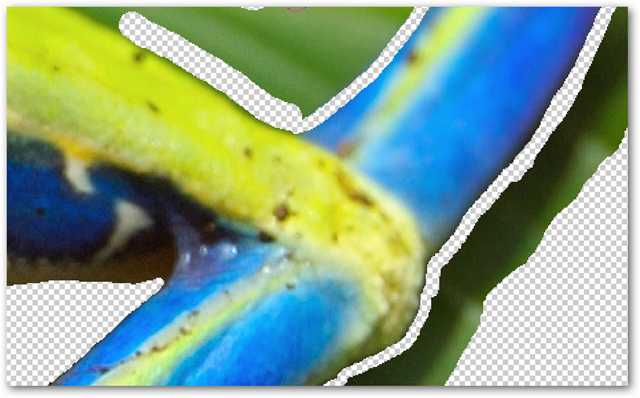
Use your Lasso to draw a rough selection around your image. Don’t worry about being precise—we’re going to cut it out with more precision later.
使用套索在图像周围绘制粗略选择。 不必担心精确-我们稍后将更精确地进行裁剪。
When your selection is done, press to move your rough selection to a new layer with “Layer Via Cut.” You can safely delete “Layer 0” and work only in your new layer.
选择完成后,按将您的粗略选择通过“ Layer Via Cut”移动到新图层。 您可以安全地删除“第0层”,并且只能在新层中使用。
Press to bring up the eraser tool, or find it in your Toolbox.
按下以打开橡皮擦工具,或在工具箱中找到它。

Visit your Control Palette again and set your “Mode” to “Pencil.” This ensures your eraser has a hard edge.
再次访问控制面板,并将“模式”设置为“铅笔”。 这样可以确保您的橡皮擦具有坚硬的边缘。
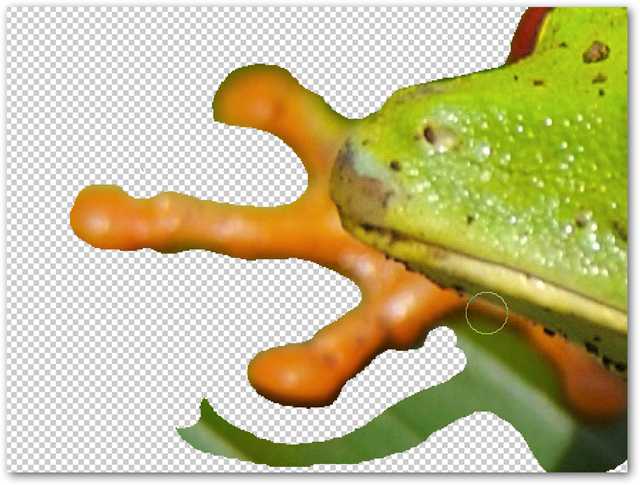
Use the eraser to mouse around and delete the parts you don’t want. Get close to your image, but be careful when cutting into it.
使用橡皮擦来回移动并删除不需要的部分。 靠近图像,但切入图像时要小心。
Keep in mind you can always undo with a swift to undo or step back through your history(It’s like multiple levels of undo, in case you’re not familiar).
请记住,您始终可以快速撤消操作,也可以回顾历史记录(就像您不熟悉多个撤消操作一样)。
You don’t need to remove every bit at this point. Once you’ve created a continuous gap around your image, we can start to remove the superfluous stuff you no longer need.
您此时无需删除所有内容。 一旦您在图像周围创建了连续的间隙,我们就可以开始移除不再需要的多余内容。

Here’s where it gets a little advanced. You can simply use your eraser to remove the remainder of your image, but I don’t like spending more time on a routine task than I need to.
这是它有点先进的地方。 您可以简单地使用橡皮擦删除图像的其余部分,但是我不喜欢在例行任务上花费比我需要更多的时间。
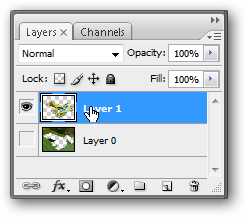
Hold and click your “Layer 1.” This will load a selection around your entire roughly cut out image.
按住并单击“第一层”。 这将在整个粗略裁剪的图像周围加载选择。
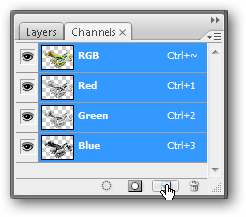
Open the Channels Palette and click the icon to create a new Alpha Channel.
打开“通道”面板,然后单击图标以创建新的Alpha通道。
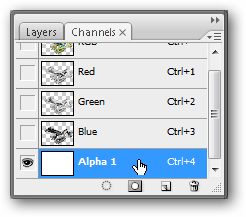
Select this Alpha Channel (likely “Alpha 1”) by clicking it. It also lists a shortcut to it. A simple in an RGB file will jump right to it.
通过单击选择此Alpha通道(可能是“ Alpha 1”)。 它还列出了它的快捷方式。 RGB文件中的简单文件将直接跳至该文件。
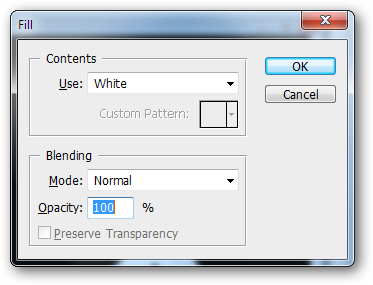
Go to Edit > Fill and set your fill Dialog Box to “Use: White” like I show here and simply press OK.
转到“编辑”>“填充”,然后将填充对话框设置为“使用:白色”,如我在此处显示的那样,只需按OK。
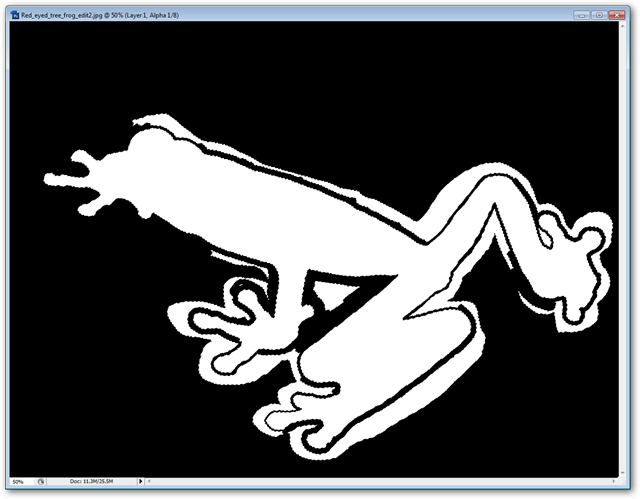
Your Alpha chanel should fill with white in the shape of your roughly cut out image. Press to Deselect.
您的Alpha香奈儿应该以您大致裁剪的图像的形状填充白色。 按取消选择。
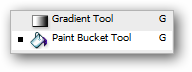
Click and hold on the Gradient Tool to bring up the Contextual Menu. Pick the Paint Bucket Tool. Ensure your “Foreground Color” is Black.
单击并按住“渐变工具”以打开上下文菜单。 选择油漆桶工具。 确保您的“前景颜色”是黑色。

Simply click in the areas you don’t want to fill them with black. If any of your superfluous areas touch your image, it will fill as well, so be careful.
只需单击您不想用黑色填充的区域。 如果您的多余区域有任何触摸到您的图像,则该图像也会填满,因此请小心。

and Click on your Alpha 1 Channel to load the new selection you have just made.
并点击您的Alpha 1频道以加载您刚刚做出的新选择。
Press to return to your RGB. The Tilde key is located to the left of your on a USA keyboard.
按返回到RGB。 Tilde键位于美国键盘上的左侧。
Return to your Layers Palette. Press to move your selected image to a new layer. You can safely delete your old layer or simply choose to hide it.
返回您的图层面板。 按将所选图像移动到新图层。 您可以安全地删除旧图层,也可以选择隐藏它。
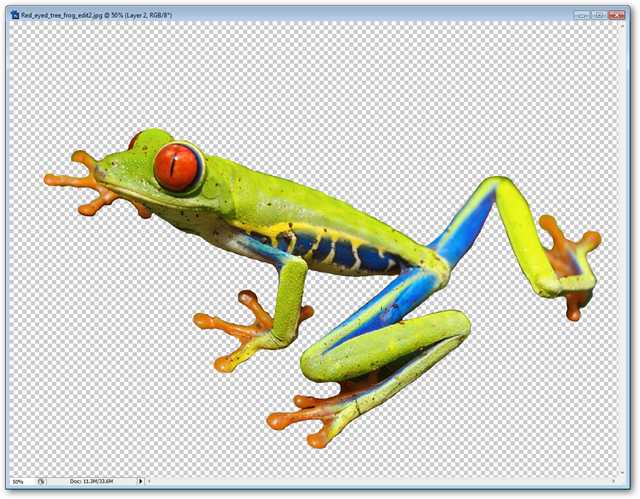
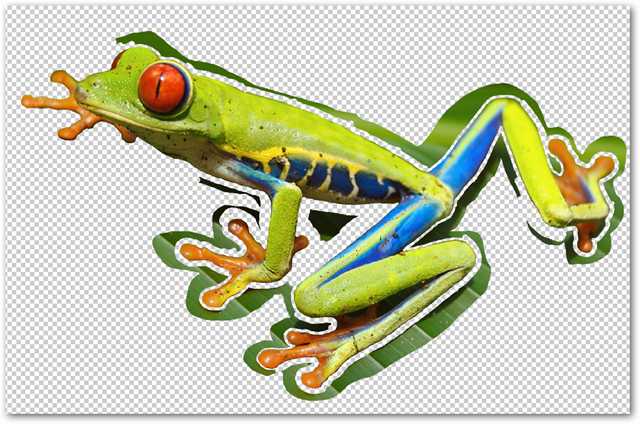
Your image is now precisely cut from your background.
现在,您的图像已从背景中精确切出。

I usually click the to add a Color Fill style Adjustment Layer at the bottom of my Layers. This helps me check my work for halos and mistakes.
我通常单击,在图层的底部添加一个“颜色填充”样式调整图层。 这可以帮助我检查工作中是否出现光环和错误。
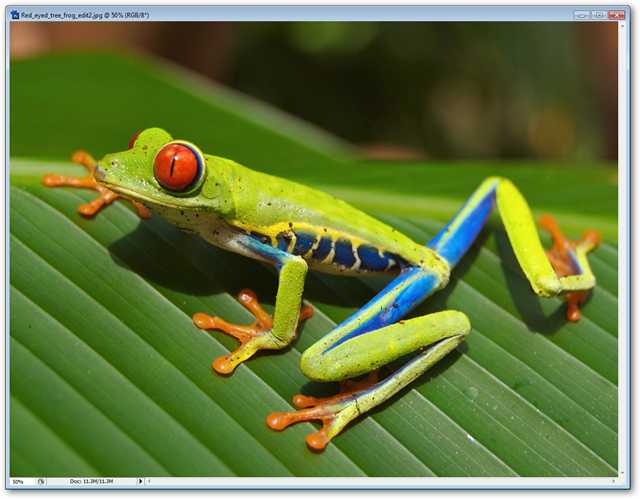
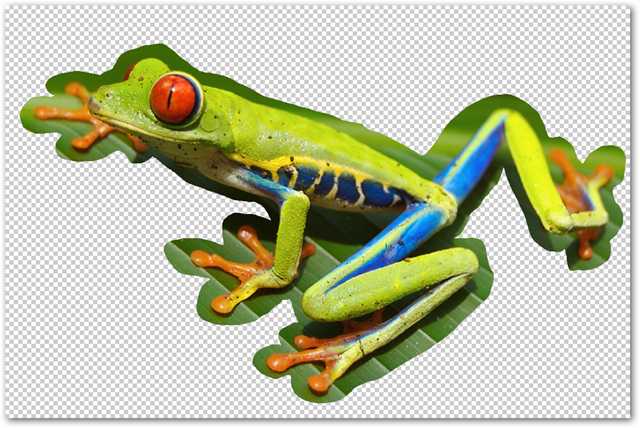
Image by Careyjamesbalboa via Wikipedia, in Public Domain.
Careyjamesbalboa 在公共领域通过Wikipedia 拍摄的 图像 。
翻译自: https://www.howtogeek.com/howto/29811/remove-complex-backgrounds-from-images-in-photoshop/


 1万+
1万+


 被折叠的 条评论
为什么被折叠?
被折叠的 条评论
为什么被折叠?
 到【灌水乐园】发言


