


身份证号码验证验证 js
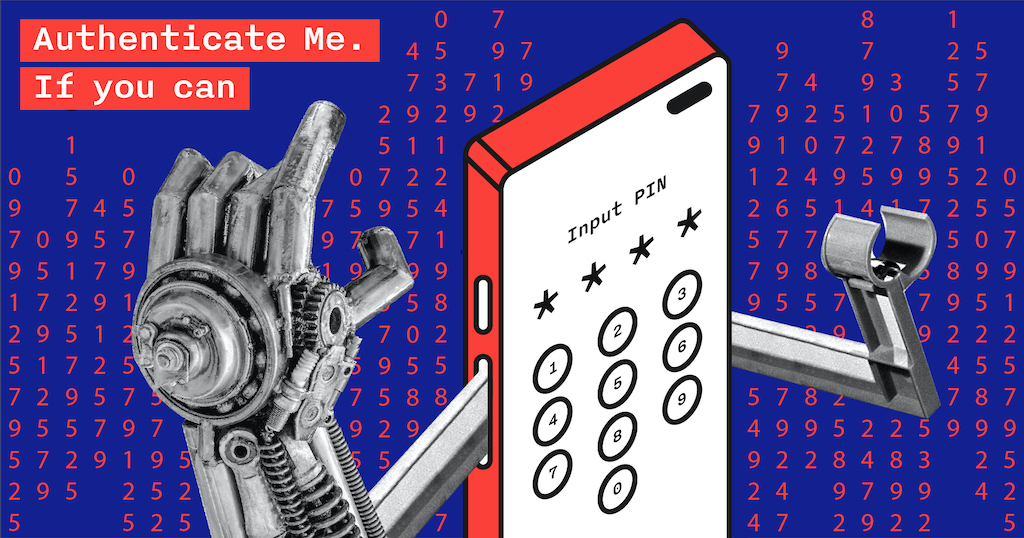
I frequently hear questions like "How to implement authentication in an Android app?", "Where to store a PIN?", "Hey man, will I be secure if I implement an authentication feature in such a way?" and a lot of the kind. I got really tired answering these questions so I decided to write all my thoughts about it once to share with all questioners.
我经常听到诸如“如何在Android应用程序中实现身份验证?”,“在哪里存储PIN?”,“嘿,如果我以这种方式实现身份验证功能,我会安全吗?”之类的问题。 还有很多。 我真的很疲倦地回答这些问题,所以我决定一次写下所有想法,与所有提问者分享。
目录 (Table of contents)
身份验证:为什么必须这样做? (Authentication: Why do I have to do it?)
Let's start from the definition. Authentication (from Greek: αὐθεντικός authentikos, "real, genuine", from αὐθέντης authentes, "author") is the act of proving an assertion, such as the identity of a computer system user.
让我们从定义开始。 身份验证 (来自希腊语:“真实”,来自“真实”,来自“ Authentes”,“作者”)是证明诸如计算机系统用户身份之类的断言的行为。
So, if your application has sensitive information (any user's information are sensitive IMHO) you have to add an authentication scenario to the app to prevent unauthorized access to this information.
因此,如果您的应用程序具有敏感信息(任何用户的信息都是敏感的恕我直言),则必须向该应用程序添加身份验证方案,以防止未经授权访问此信息。
The most popular authentication scenarios are as follows:
最受欢迎的身份验证方案如下:
- Login + Password 登录名和密码
- Master password 主密码
- PIN (4 or more digits) PIN(4位或更多数字)
- Biometrics 生物识别
Naturally, login&password authentication comes to your application from a back-end and the security of this mechanism we'll leave to the back-end security assurance team ;) Just don't forget to implement Public Key Pinning.
自然, 登录和密码身份验证是从后端进入您的应用程序的,这种机制的安全性将留给后端安全保证团队;)只是不要忘记实现公钥固定 。
Master password authentication is very rarely used and only in apps that require a high level of security (e.g. password managers).
主密码身份验证很少使用,仅在要求高度安全性的应用程序(例如密码管理器)中使用。
Thus, we have only two most popular scenarios: a PIN and Biometrics. They are quite user-friendly and relatively easy in implementation (actually they aren't...). In this article we'll cover the main aspects of the correct implementation of these features.
因此,我们只有两种最流行的方案: PIN和Biometrics 。 它们非常人性化并且易于实施(实际上不是。)。 在本文中,我们将介绍这些功能的正确实现的主要方面。
简单的方法 (Simple way)
Just imagine, you're an Android developer and your code prints you money. You don't worry about anything, and you ain't got much need in serious mobile apps security expertise. But one day, a manager comes to you and gives a task to "Implement an additional authentication via a PIN and a fingerprint in our application". The story begins here...
试想一下,您是一名Android开发人员,而您的代码可以印钱。 您无需担心任何事情,并且对严肃的移动应用程序安全性专业知识也不需要太多。 但是有一天,一位经理来找您,任务是“在我们的应用程序中通过PIN和指纹实施额外的身份验证”。 故事从这里开始...
To implement PIN authentication you would create a couple of screens like these:
要实现PIN身份验证,您将创建几个屏幕,如下所示:
And write such code for creating and checking your PIN
并编写用于创建和检查PIN的代码
fun savePin(pin: String) {
    preferences.edit().putString(StorageKey.PIN, pin).apply()
}
fun authenticate(pin: String) {
authenticationState.value = if (pinIsValid(pin)) {
AuthenticationState.AUTHENTICATED
} else {
AuthenticationState.INVALID_AUTHENTICATION
}
}
private fun pinIsValid(pin: String): Boolean {
return preferences.getString(StorageKey.PIN, null) == pin
}That's all! Now, you have a cool authentication system via a PIN. Congratulations. It was so easy, wasn't it?
就这样! 现在,您已经可以通过PIN使用很酷的身份验证系统。 恭喜你 这很容易,不是吗?
Of course, you've already caught the irony in my words. This way is terribly bad because a PIN is stored as plaintext. If malware somehow gets access to the internal application storage, it'll get the user PIN as is. You can ask me "Why is it so bad? It's just a PIN from local authentication...". Yeah, but users tend to set the same PIN everywhere. Therefore, knowledge of a user PIN allows an intruder to expand the attack surface.
当然,用我的话你已经引起了讽刺。 这种方法非常糟糕,因为PIN以明文形式存储。 如果恶意软件以某种方式可以访问内部应用程序存储,它将按原样获取用户PIN。 您可以问我“为什么这么糟?这只是本地身份验证的PIN码...”。 是的,但是用户倾向于在各处设置相同的PIN。 因此,了解用户PIN可以使入侵者扩大攻击面。
Moreover, such authentication scheme doesn't allow you to implement user data encryption based on a PIN in a secure manner (we'll talk about it later).
而且,这种身份验证方案不允许您以安全的方式基于PIN来实现用户数据加密(我们将在后面讨论)。
让我们变得更好 (Let's make it better)
How can we improve our previous implementation? The first and evident approach is taking a hash from your PIN and storing this hash.
我们如何改善以前的实施方式? 第一种明显的方法是从PIN中获取哈希值并存储该哈希值。
hash function is any function that can be used to map data of arbitrary size to fixed-size values. The values returned by a hash function are called hash values, hash codes, digests, or simply hashes. The values are used to index a fixed-size table called a hash table. Use of a hash function to index a hash table is called hashing or scatter storage addressing. 散列函数是可用于将任意大小的数据映射到固定大小的值的任何函数。 哈希函数返回的值称为哈希值,哈希码,摘要或哈希。 这些值用于索引称为哈希表的固定大小的表。 使用哈希函数为哈希表建立索引称为哈希或分散存储寻址。
There are lots of available hash functions in Android Framework (in Java Cryptography Architecture, to be precise), but today not each of them is considered secure. I don't recommend using MD5 and SHA-1 due to collisions. SHA-256 is a good choice for most tasks.
Android Framework(准确地说,是Java密码体系结构 )中有很多可用的哈希函数,但是今天并不是每个函数都被认为是安全的。 由于冲突,我不建议使用MD5和SHA-1 。 SHA-256是大多数任务的不错选择。
fun sha256(byteArray: ByteArray): ByteArray {
    val digest = try {
        MessageDigest.getInstance("SHA-256")
    } catch (e: NoSuchAlgorithmException) {
        MessageDigest.getInstance("SHA")
    }

    return with(digest) {
            update(byteArray)
            digest()
        }
}
Let's modify our savePin(...) method to store the hashed PIN
让我们修改savePin(...)方法以存储散列PIN
fun savePin(pin: String) {
    val hashedPin = sha256(pin.toByteArray())
    val encodedHash = Base64.encodeToString(hashedPin, Base64.DEFAULT)

    preferences.edit().putString(StorageKey.PIN, encodedHash).apply()
}
Using hash is a good start, but bare hash is not enough for our task. In the real life an attacker has already pre-computed all the 4-digit PIN hashes. He will be able to decrypt all those stolen hashed PINs quite easily. There is an approach to deal with it — a salt.
使用哈希是一个好的开始,但是光是哈希不足以完成我们的任务。 在现实生活中,攻击者已经预先计算了所有4位PIN哈希。 他将能够很容易地解密所有那些被盗的散列PIN。 有一种解决方法- 盐 。
salt is random data that is used as an additional input to a one-way function that "hashes" data, a password or passphrase. Salts are used to safeguard passwords in storage. Historically a password was stored in plaintext on a system, but over time additional safeguards developed to protect a user's password against being read from the system. A salt is one of those methods. 盐是随机数据,用作“散列”数据,密码或密码短语的单向函数的附加输入。 盐用于保护存储中的密码。 过去,密码以明文形式存储在系统中,但是随着时间的流逝,开发了其他保护措施以保护用户的密码免于从系统中读取。 盐是那些方法之一。
To add a salt to our security mechanism we need to change the code shown above in such a way
为了增加安全性,我们需要以这种方式更改上面显示的代码
fun generate(lengthByte: Int = 32): ByteArray {
    val random = SecureRandom()
    val salt = ByteArray(lengthByte)

    random.nextBytes(salt)

    return salt
}
fun savePin(pin: String) {
val salt = Salt.generate()
val saltedPin = pin.toByteArray() + salt
val hashedPin = Sha256.hash(saltedPin)
val encodedHash = Base64.encodeToString(hashedPin, Base64.DEFAULT)
val encodedSalt = Base64.encodeToString(salt, Base64.DEFAULT)
preferences.edit()
.putString(StorageKey.PIN, encodedHash)
.putString(StorageKey.SALT, encodedSalt)
.apply()
}Note, you have to store the salt together with the PIN because you need to compute resulted hash (using salt) every time when checking the PIN from user input.
请注意,您必须将盐与PIN一起存储,因为每次从用户输入中检查PIN时都需要计算生成的哈希值(使用盐)。
private fun pinIsValid(pin: String): Boolean {
    val encodedSalt = preferences.getString(StorageKey.SALT, null)
    val encodedHashedPin = preferences.getString(StorageKey.PIN, null)

    val salt = Base64.decode(encodedSalt, Base64.DEFAULT)
    val storedHashedPin = Base64.decode(encodedHashedPin, Base64.DEFAULT)

    val enteredHashedPin = Sha256.hash(pin.toByteArray() + salt)

    return storedHashedPin contentEquals enteredHashedPin
}
As you can see, the code is still not so hard to understand, but the security of this solution has become much stronger. I'll say even more, this approach is quite production ready for the most applications that don't require a high level of security.
如您所见,代码仍然不难理解,但是此解决方案的安全性变得更加强大。 我还要说的是,这种方法已经为大多数不需要高安全性的应用程序准备就绪。
"But what if I need a much more secure solution?", you ask. Ok, follow me.
您问:“但是,如果我需要更安全的解决方案怎么办?” 好吧跟我来
正确的方式 (The right way)
Let's discuss several improvement points for our authentication approach.
让我们讨论我们的身份验证方法的几个改进点。
Firstly, the main flaw of "ordinary hashes" (and even "salted ordinary hashes") is relatively high speed of a brute-force attack (about billions of hashes per minute). To eliminate this flaw we've got to use a special KDF-function like PBKDF2 which is natively supported by the Android Framework. Of course, there is some difference between KDF functions and you'll probably want to choose the other one, but it's out of this article scope. I'll give you several useful links about this topic at the end of the article.
首先,“普通哈希”(甚至“盐渍普通哈希”)的主要缺陷是蛮力攻击的速度相对较高( 每分钟约数十亿个哈希 )。 为了消除此缺陷,我们必须使用特殊的KDF功能(例如PBKDF2) ,该功能由Android Framework本地支持。 当然,KDF函数之间有一些区别,您可能要选择另一个,但这不在本文的讨论范围之内。 在文章结尾,我将为您提供有关此主题的一些有用链接。
Secondly, we have no user data encryption at this point. There are a lot of ways to implement it and I'll show the simplest and the most reliable one. It'll be a set of two libraries and some code around them.
其次,我们目前还没有用户数据加密。 有很多方法可以实现它,我将展示最简单和最可靠的方法。 这将是两个库的集合,以及围绕它们的一些代码。
Let's write a PBKDF2 key creating factory to begin with.
首先,让我们编写一个PBKDF2密钥创建工厂。
object Pbkdf2Factory {
    private const val DEFAULT_ITERATIONS = 10000
    private const val DEFAULT_KEY_LENGTH = 256

    private val secretKeyFactory by lazy {
        if (Build.VERSION.SDK_INT < Build.VERSION_CODES.O) {
            SecretKeyFactory.getInstance("PBKDF2withHmacSHA1")
        } else {
            SecretKeyFactory.getInstance("PBKDF2withHmacSHA256")
        }
    }

    fun createKey(
        passphraseOrPin: CharArray,
        salt: ByteArray,
        iterations: Int = DEFAULT_ITERATIONS,
        outputKeyLength: Int = DEFAULT_KEY_LENGTH
    ): SecretKey {
        val keySpec = PBEKeySpec(passphraseOrPin, salt, iterations, outputKeyLength)
        return secretKeyFactory.generateSecret(keySpec)
    }
}
Now armed with this factory we've got to refactor our savePin() and pinIsValid() methods
现在有了这个工厂,我们必须重构我们的savePin()和pinIsValid()方法
fun savePin(pin: String) {
    val salt = Salt.generate()
    val secretKey = Pbkdf2Factory.createKey(pin.toCharArray(), salt)

    val encodedKey = Base64.encodeToString(secretKey.encoded, Base64.DEFAULT)
    val encodedSalt = Base64.encodeToString(salt, Base64.DEFAULT)

    preferences.edit()
        .putString(StorageKey.KEY, encodedKey)
        .putString(StorageKey.SALT, encodedSalt)
        .apply()

    pinIsCreated.value = true
}
private fun pinIsValid(pin: String): Boolean {
val encodedSalt = preferences.getString(StorageKey.SALT, null)
val encodedKey = preferences.getString(StorageKey.KEY, null)
val salt = Base64.decode(encodedSalt, Base64.DEFAULT)
val storedKey = Base64.decode(encodedKey, Base64.DEFAULT)
val enteredKey = Pbkdf2Factory.createKey(pin.toCharArray(), salt)
return storedKey contentEquals enteredKey.encoded
}Thus, we've just mitigated the main flaw of our previous solution. It's good, and now we've got to add user data encryption. To implement it, we'll take these libraries:
因此,我们只是减轻了先前解决方案的主要缺陷。 很好,现在我们必须添加用户数据加密。 为了实现它,我们将使用以下库:
Tink — A multi-language, cross-platform library that provides cryptographic APIs that are secure, easy to use correctly, and hard(er) to misuse.
Tink —一种多语言,跨平台的库,提供安全,易于正确使用且难以滥用的加密API。
Jetpack Security — Read and write encrypted files and shared preferences by following security best practices.
Jetpack安全性 —通过遵循安全性最佳做法来读写加密的文件和共享首选项。
To get a good encrypted storage, we've got to write such code:
为了获得良好的加密存储,我们必须编写以下代码:
class App : Application() {
    ...
    val encryptedStorage by lazy {
        EncryptedSharedPreferences.create(
            "main_storage",
            "main_storage_key",
            this,
            EncryptedSharedPreferences.PrefKeyEncryptionScheme.AES256_SIV,
            EncryptedSharedPreferences.PrefValueEncryptionScheme.AES256_GCM
        )
    }
    ...
}
That's all. Later, we can work with it as if it were regular SharedPreferences, but all data will be encrypted. Now we can easily replace the previous implementation.
就这样。 以后,我们可以像常规的SharedPreferences一样使用它,但是所有数据都将被加密。 现在,我们可以轻松替换以前的实现。
class CreatePinViewModel(application: Application) : AndroidViewModel(application) {
    ...
    private val preferences by lazy {
            getApplication<App>().encryptedStorage
    }
    ...
}
class InputPinViewModel(application: Application) : AndroidViewModel(application) {
...
private val preferences by lazy {
getApplication<App>().encryptedStorage
}
...
}Let's summarize the subtotal. We have quite a secure key derived from a PIN, and a fairly reliable approach to store it. That looks cool, but not enough. What if we assume that the attacker has got access to our device and has extracted the whole data from it. In theory, he has all components to decrypt the data at this moment. To solve this problem, we've got to achieve two things:
让我们总结一下小计。 我们有从PIN派生的相当安全的密钥,以及存储它的相当可靠的方法。 看起来很酷,但还不够。 如果我们假设攻击者可以访问我们的设备并从中提取全部数据怎么办。 从理论上讲,他此时具有解密数据的所有组件。 为了解决这个问题,我们必须实现两件事:
- a PIN isn't stored at all 完全不存储PIN
- encryption operations are based on the PIN 加密操作基于PIN
How can we achieve these goals without rewriting the whole code? It's easy! Insofar as we're using Tink, we can apply its encryption feature named as associated data.
我们如何在不重写整个代码的情况下实现这些目标? 这很容易! 就使用Tink而言,我们可以应用其加密功能(称为关联数据)。
Associated data to be authenticated, but not encrypted. Associated data is optional, so this parameter can be null. In this case the null value is equivalent to an empty (zero-length) byte array. For successful decryption the same associatedData must be provided along with the ciphertext.
关联的数据需要认证,但不加密。 相关数据是可选的,因此此参数可以为null。 在这种情况下,空值等效于一个空(零长度)字节数组。 为了成功解密,必须与密文一起提供相同的associatedData。
That's it! We can use a PIN as associated data to achieve our designated goals. Thus, possibility or impossibility to decrypt the user data will act as an indicator of the PIN correctness. This scheme usually works as follows:
而已! 我们可以使用PIN作为关联数据来实现我们的指定目标。 因此,解密用户数据的可能性或不可能性将作为PIN正确性的指标。 该方案通常如下工作:
If a user enters an incorrect PIN, you'll receive GeneralSecurityException when trying to decrypt the access token. So, the final implementation might look like this:
如果用户输入了错误的PIN,则在尝试解密访问令牌时会收到GeneralSecurityException 。 因此,最终的实现可能如下所示:
显示代码 (Show the code)
class CreatePinViewModel(application: Application): AndroidViewModel(application) {
 ...
 private val fakeAccessToken = "eyJhbGciOiJIUzI1NiIsInR5cCI6IkpXVCJ9.eyJzZWNyZXQiOiJXZSdyZSBoaXJpbmcgOykifQ.WZrEWG-l3VsJzJrbnjn2BIYO68gHIGyat6jrw7Iu-Rw"

 private val preferences by lazy { getApplication<App>().encryptedStorage }

 private val aead by lazy { getApplication<App>().pinSecuredAead }
 ...
 fun savePin(pin: String) {
  val salt = Salt.generate()
  val secretKey = Pbkdf2Factory.createKey(pin.toCharArray(), salt)

  val encryptedToken = aead.encrypt(
    fakeAccessToken.toByteArray(),
    secretKey.encoded
  )

  preferences.edit {
   putString(StorageKey.TOKEN, Base64.encodeToString(
     encryptedToken,
     Base64.DEFAULT
   ))

   putString(StorageKey.SALT, Base64.encodeToString(salt, Base64.DEFAULT))
   putBoolean(StorageKey.PIN_IS_ENABLED, true)
  }
  ...
 }
}
class InputPinViewModel(application: Application) : AndroidViewModel(application) {
...
private val preferences by lazy { getApplication<App>().encryptedStorage }
private val aead by lazy { getApplication<App>().pinSecuredAead }
fun authenticate(pin: String) {
authenticationState.value = if (pinIsValid(pin)) {
AuthenticationState.AUTHENTICATED
} else {
AuthenticationState.INVALID_AUTHENTICATION
}
}
private fun pinIsValid(pin: String): Boolean {
val salt = Base64.decode(
preferences.getString(StorageKey.SALT, null), Base64.DEFAULT
)
val secretKey = Pbkdf2Factory.createKey(pin.toCharArray(), salt)
val token = try {
val encryptedToken = Base64.decode(
preferences.getString(StorageKey.TOKEN, null), Base64.DEFAULT
)
aead.decrypt(encryptedToken, secretKey.encoded)
} catch (e: GeneralSecurityException) {
null
}
return token?.isNotEmpty() ?: false
}
}Nice result! Now we are not storing the PIN anymore, and all data is encrypted by default. Of course, there are a lot of ways to improve this implementation if you want to. I've just shown the basic principle.
好结果! 现在我们不再存储PIN,并且默认情况下所有数据都是加密的。 当然,如果需要,有很多方法可以改善此实现。 我刚刚展示了基本原理。
但是等等,生物识别技术呢? (But wait, what about biometrics?)
I don't think that "biometrics" is about security. I'd rather name it "a very convenient user feature". And it's a terribly old holy war between convenience and security. But most users like this kind of authentication and we as developers have to implement it as secure as possible.
我认为“生物计量学”与安全性无关。 我宁愿将其命名为“一种非常方便的用户功能”。 这是便利与安全之间的一场古老的圣战。 但是大多数用户都喜欢这种身份验证,我们作为开发人员必须尽可能安全地实施它。
Unfortunately, biometric auth implementation is quite tricky. That's why I'll start with showing you some common implementation principle and give some explanations. After this we'll dive deep into the code.
不幸的是,生物特征认证实现非常棘手。 这就是为什么我将首先向您展示一些常见的实现原理并给出一些解释。 之后,我们将深入研究代码。
This scheme contains one important nuance: The secret key is saved on the disk. Of course not as a plain text, but nonetheless.
该方案包含一个重要的细微差别: 密钥保存在磁盘上 。 当然,不是纯文本,而是。
As you can see, we have created a new encryption key in the keystore and we use this key to encrypt our secret key that is derived from a PIN. Such a scheme allows us not to re-encrypt all data when changing an authentication method. Moreover, we still have the ability to enter a PIN if biometric authentication had failed for any reasons. Ok, let's write a lot of code.
如您所见,我们在密钥库中创建了一个新的加密密钥,并使用该密钥对从PIN派生的秘密密钥进行加密。 这种方案使我们在更改身份验证方法时不必重新加密所有数据。 此外,如果生物特征认证由于任何原因失败,我们仍然可以输入PIN。 好的,让我们写很多代码。
Firstly, I'll show the changes in the PIN creation flow:
首先,我将显示PIN创建流程中的更改:
显示代码 (Show the code)
class CreatePinViewModel(application: Application): AndroidViewModel(application) {
 companion object {
  private const val ANDROID_KEY_STORE = "AndroidKeyStore"
  private const val KEY_NAME = "biometric_key"
 }
 ...
 val biometricEnableDialog = MutableLiveData<SingleLiveEvent<Unit>>()
 val biometricParams = MutableLiveData<BiometricParams>()

 val authenticationCallback = object : BiometricPrompt.AuthenticationCallback() {
  override fun onAuthenticationError(errorCode: Int, errString: CharSequence) {
   super.onAuthenticationError(errorCode, errString)
  }

  override fun onAuthenticationSucceeded(result: AuthenticationResult) {
   super.onAuthenticationSucceeded(result)

   val encryptedSecretKey = result.cryptoObject?.cipher?.doFinal(
    secretKey.encoded
   )

   preferences.edit {
    putString(StorageKey.KEY, Base64.encodeToString(
     encryptedSecretKey, Base64.DEFAULT
    ))
   }

   pinIsCreated.postValue(true)
  }

  override fun onAuthenticationFailed() {
   super.onAuthenticationFailed()
  }
 }
 ...
 private val biometricManager by lazy { getApplication<App>().biometricManager }

 private val keyStore = KeyStore.getInstance(ANDROID_KEY_STORE)

 private lateinit var secretKey: SecretKey
 ...
 fun enableBiometric(isEnabled: Boolean) {
  generateKey()

  val cipher = createCipher().also {
   preferences.edit {
    putString(StorageKey.KEY_IV, Base64.encodeToString(it.iv, Base64.DEFAULT))
   }
  }

  val promptInfo = createPromptInfo()
  val cryptoObject = BiometricPrompt.CryptoObject(cipher)

  if (isEnabled) {
   biometricParams.value = BiometricParams(isEnabled, promptInfo, cryptoObject)
  } else {
   pinIsCreated.value = true
  }
 }

 private fun createPromptInfo(): BiometricPrompt.PromptInfo {
  return BiometricPrompt.PromptInfo.Builder()
   .setTitle("Create biometric authorization")
   .setSubtitle("Touch your biometric sensor")
   .setNegativeButtonText("Cancel")
   .build()
 }

 private fun generateKey() {
  try {
   keyStore.load(null)

   val keyProperties = PURPOSE_ENCRYPT or PURPOSE_DECRYPT
   val builder = KeyGenParameterSpec.Builder(KEY_NAME, keyProperties)
    .setBlockModes(BLOCK_MODE_CBC)
    .setUserAuthenticationRequired(true)
    .setEncryptionPaddings(ENCRYPTION_PADDING_NONE)

   val keyGenerator = KeyGenerator.getInstance(
       KEY_ALGORITHM_AES,
       ANDROID_KEY_STORE
   )

   keyGenerator.run {
    init(builder.build())
    generateKey()
   }
  } catch (e: Exception) {
   authenticationCallback.onAuthenticationError(
    BiometricConstants.ERROR_NO_DEVICE_CREDENTIAL,
    e.localizedMessage
   )
  }
 }

 private fun createCipher(): Cipher {
  val key = with(keyStore) {
   load(null)
   getKey(KEY_NAME, null)
  }

  return Cipher.getInstance(
      "$KEY_ALGORITHM_AES/$BLOCK_MODE_CBC/$ENCRYPTION_PADDING_NONE"
    ).apply {
    init(Cipher.ENCRYPT_MODE, key)
   }
 }
}
I would be glad if Google included Tink in Biometrics, but… We have to write this boilerplate code with Cipher and KeyStore. This code is quite familiar to those people who work with cryptography in Android, but I want to pay your attention to encryption paddings. Yes, to prevent Padding Oracle attack we don't use padding at all. Thus, we mitigate risks when storing the secret key on the disk.
如果Google将Tink纳入生物识别技术,我将感到非常高兴,但是……我们必须使用Cipher和KeyStore编写此样板代码。 对于使用Android加密技术的人们来说,这段代码非常熟悉,但是我想特别注意加密填充。 是的,为防止Padding Oracle攻击,我们根本不使用padding。 因此,我们降低了将密钥存储在磁盘上时的风险。
The code for biometric checking is very similar:
生物特征检查的代码非常相似:
显示代码 (Show the code)
class InputPinViewModel(application: Application) : AndroidViewModel(application) {
 companion object {
  private const val ANDROID_KEY_STORE = "AndroidKeyStore"
  private const val KEY_NAME = "biometric_key"
 }
 ...
 val biometricErrorMessage = MutableLiveData<SingleLiveEvent<String>>()

 val biometricParams = MutableLiveData<BiometricParams>()
 ...
 private val biometricManager by lazy { getApplication<App>().biometricManager }

 private val keyStore = KeyStore.getInstance(ANDROID_KEY_STORE)

 val authenticationCallback = object : BiometricPrompt.AuthenticationCallback() {
  override fun onAuthenticationError(errorCode: Int, errString: CharSequence) {
   super.onAuthenticationError(errorCode, errString)
  }

  override fun onAuthenticationSucceeded(result: AuthenticationResult) {
   super.onAuthenticationSucceeded(result)

   val encryptedSecretKey = Base64.decode(
    preferences.getString(StorageKey.KEY, ""),
    Base64.DEFAULT
   )
   val secretKey = result.cryptoObject?.cipher?.doFinal(encryptedSecretKey)

   val token = try {
    val encryptedToken = Base64.decode(
     preferences.getString(StorageKey.TOKEN, null),
     Base64.DEFAULT
    )

    aead.decrypt(encryptedToken, secretKey)
   } catch (e: GeneralSecurityException) {
    null
   }

   val state = if (token?.isNotEmpty() == true) {
    AuthenticationState.AUTHENTICATED
   } else {
    AuthenticationState.INVALID_AUTHENTICATION
   }

   authenticationState.postValue(state)
  }

  override fun onAuthenticationFailed() {
   super.onAuthenticationFailed()
  }
 }
 ...
 fun biometricAuthenticate() {
  if (preferences.contains(StorageKey.KEY)) {
   when (biometricManager.canAuthenticate()) {
    BiometricManager.BIOMETRIC_SUCCESS -> {
     val promptInfo = createPromptInfo()
     val cryptoObject = BiometricPrompt.CryptoObject(createCipher())

     biometricParams.value = BiometricParams(promptInfo, cryptoObject)
    }
   }
  } else {
   biometricErrorMessage.value = SingleLiveEvent(
    "Biometric authentication isn't configured"
   )
  }
 }
 ...
 private fun createPromptInfo(): BiometricPrompt.PromptInfo {
  return BiometricPrompt.PromptInfo.Builder()
   .setTitle("Biometric login for my app")
   .setSubtitle("Log in using your biometric credential")
   .setNegativeButtonText("Cancel")
   .build()
 }

 private fun createCipher(): Cipher {
  val key = with(keyStore) {
   load(null)
   getKey(KEY_NAME, null)
  }

  return Cipher.getInstance(
      "$KEY_ALGORITHM_AES/$BLOCK_MODE_CBC/$ENCRYPTION_PADDING_NONE"
   ).apply {
   val iv = Base64.decode(
    preferences.getString(StorageKey.KEY_IV, null),
    Base64.DEFAULT
   )

   init(Cipher.DECRYPT_MODE, key, IvParameterSpec(iv))
  }
 }
}
Pay your attention to the authenticationCallback.onAuthenticationSucceeded, it contains the key logic of post-biometric authentication. In fact, this is an alternative implementation of the pinIsValid() method. If you have no strong understanding of what's happening in two previous code blocks, please refer to the biometric official documentation.
请注意authenticationCallback.onAuthenticationSucceeded ,它包含生物识别后认证的关键逻辑。 实际上,这是pinIsValid()方法的替代实现。 如果您对前两个代码块中发生的事情不太了解,请参阅生物识别官方文档 。
我是否受到完全保护? (Am I completely protected?)
We've done a lot of cool things to realize authentication with a PIN and biometrics, but is it so reliable and secure? Of course, we've done our best, but there is a couple of points to take into account.
为了通过PIN和生物识别技术实现身份验证,我们做了很多很酷的事情,但是它是如此可靠和安全吗? 当然,我们已尽力而为,但有几点需要考虑。
A classic PIN has only four digits and the entropy of it is too low. So, such kind of code isn't quite secure to use. Despite everything we've done, there is a chance that an intruder can crack this code. Yeah, he has to fulfil the reverse engineering of your application and understand how you're encrypting user's data, but nonetheless. If an attacker is motivated enough he'll do it without hesitation.
经典PIN码只有四位数,并且其熵太低。 因此,这种代码使用起来不太安全。 尽管我们已经做了一切,入侵者还是有可能破解此代码。 是的,他必须完成应用程序的逆向工程,并了解您如何加密用户数据。 如果攻击者有足够的动力,他会毫不犹豫地这样做。
The second point is about rooted smartphones. When it comes to rooted devices, you can throw away all your security assurance attempts. Any malware with root access is able to bypass all security mechanisms. Therefore, you have to add extra security features and checks to the application. I suggest you two most simple things to mitigate these flaws:
第二点是关于扎根的智能手机。 对于生根设备,您可以放弃所有安全保证尝试。 任何具有root访问权限的恶意软件都可以绕过所有安全机制。 因此,您必须向应用程序添加额外的安全功能和检查。 我建议您通过两个最简单的方法来缓解这些缺陷:
SafetyNet — it provides a set of services and APIs that help protect your app against security threats, including device tampering, bad URLs, potentially harmful apps, and fake users
SafetyNet-它提供了一组服务和API,可帮助保护您的应用程序免受安全威胁,包括设备篡改,URL错误,潜在有害的应用程序和虚假用户
Obfuscation — please remember that ProGuard is not an obfuscation tool! ProGuard is about minifying and resource shrinking, not obfuscation or security. Use something like DexGuard, DexProtector, etc.
混淆 - 请记住 ProGuard 不是混淆工具! ProGuard致力于减少资源和缩小资源,而不是混淆或安全性。 使用类似DexGuard,DexProtector等的东西。
Usage of SafetyNet and obfuscation are a good next step after applying approaches from this article. If you note inaccuracies, security flaws or other bullshit, please let me know. You can find all the code from the article on GitHub.
在应用本文中的方法之后,SafetyNet的使用和模糊处理是很好的下一步。 如果您发现错误,安全漏洞或其他废话,请通知我。 您可以从GitHub上的文章中找到所有代码。
And next time I'll show you how to implement a PIN authentication using back-end. Stay tuned.
下次,我将向您展示如何使用后端实现PIN身份验证。 敬请关注。
有用的链接 (Useful links)
身份证号码验证验证 js


 2090
2090


 被折叠的 条评论
为什么被折叠?
被折叠的 条评论
为什么被折叠?
 到【灌水乐园】发言


