


Looking for a quick way to transform your photos into handsome, convincing vintage art? Lots of programs offer vintage photograph filters, but these are often rough, and give unexciting, unconvincing results. With a few moments in practically any version of Photoshop, you can make realistic-looking vintage photos from nearly any picture you might have on your hard drive. Here’s how to do it.
是否正在寻找一种快速的方法将您的照片转换为美观,令人信服的复古艺术品? 许多程序都提供老式的照片滤镜,但是这些滤镜通常很粗糙,并给出令人激动,令人信服的结果。 几乎在任何版本的Photoshop中都花了一些时间,您几乎可以从硬盘上的任何照片中制作出逼真的老式照片。 这是操作方法。
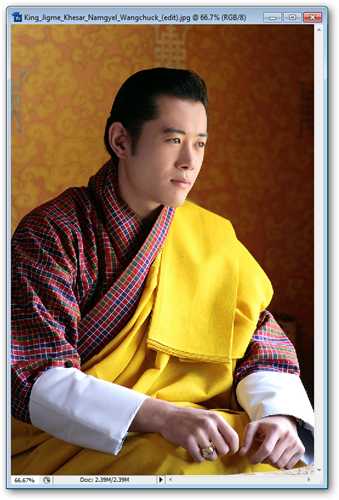
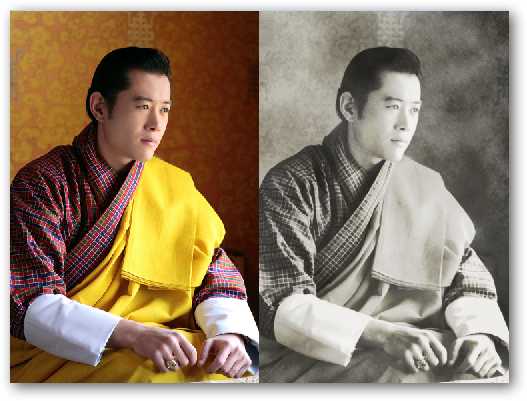
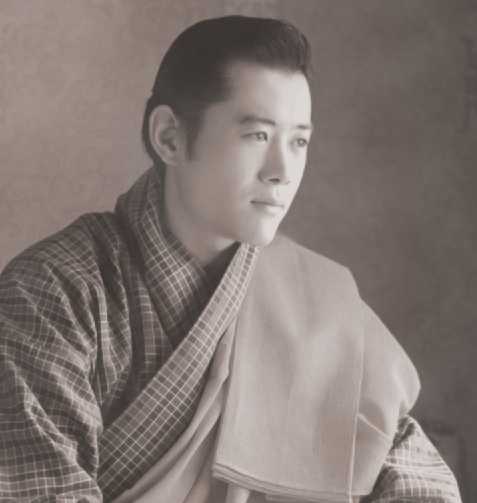
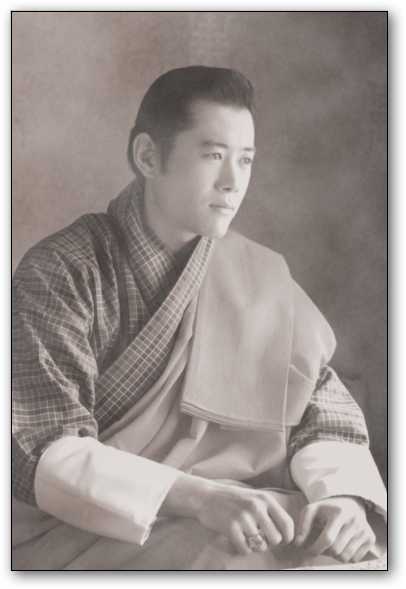
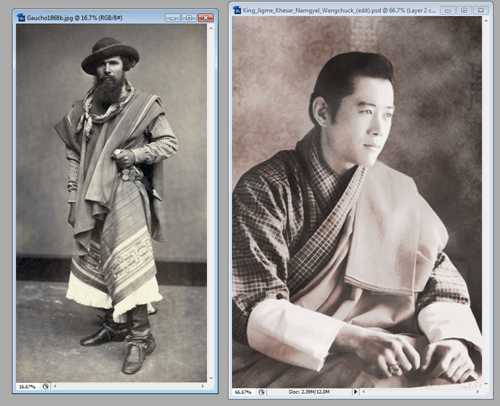
I came across this pic of the King of Bhutan and thought it had some nice possibilities. You will, of course, be using whatever photo you want. I recommend one with high resolution, and good contrast between lights and darks. You can, of course, use any photo, but some will give you stronger results that others.
我碰到这张不丹国王的照片,认为它有一些不错的可能性。 当然,您将使用所需的任何照片。 我建议您使用高分辨率,并且在明暗之间具有良好的对比度。 您当然可以使用任何照片,但是有些照片会给您带来比其他照片更强的效果。
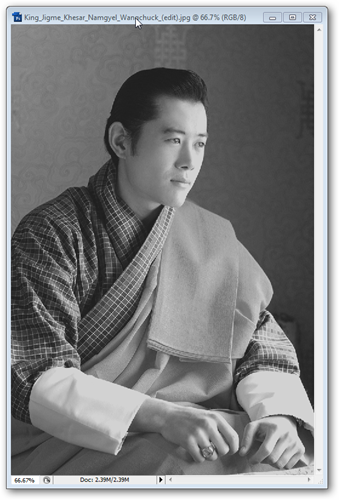
Press to do a quick desaturate and turn the image to grayscale.
按下以进行快速去饱和并将图像转换为灰度。
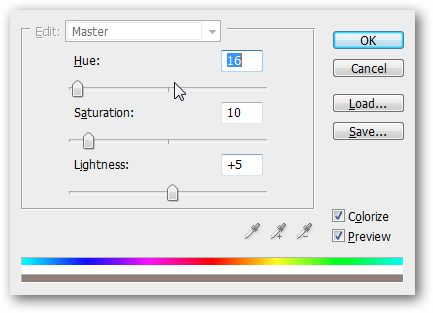
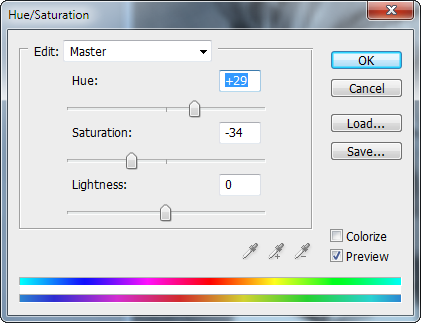
Then, press to bring up the Hue/Saturation palette and set it to “Colorize” with these Hue/Saturation/Lightness values.
然后,按调出色相/饱和度调色板,并使用这些色相/饱和度/亮度值将其设置为“着色”。
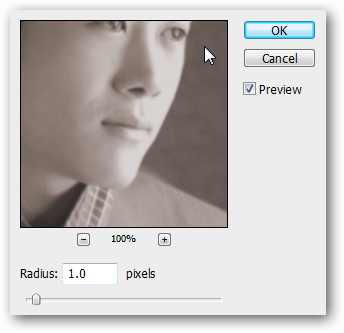
Go to FIlters > Blur > Gaussian Blur and set the “Radius” to 1.0, or more if you want.
转到“滤镜”>“模糊”>“高斯模糊”,然后将“半径”设置为1.0,或者根据需要设置更多。
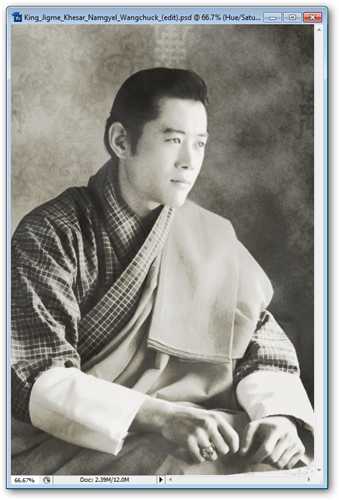
Our image is looking nicely sepia toned already, with softened edges from the Gaussian blur.
我们的图像看起来棕褐色调已经很好,高斯模糊造成的边缘变柔和。
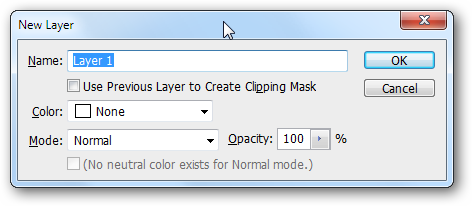
Press to create a new layer.
按创建一个新层。
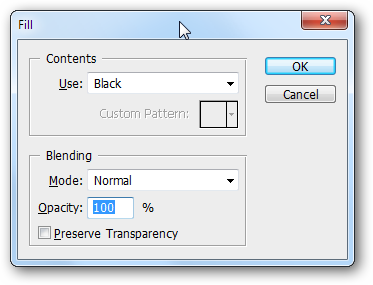
Fill your new layer with black by going to Edit > Fill and tell the Fill window to “Use” Black. From there, you’ll want to open Filters > Render > Clouds to fill that layer with the texture below.
通过转到“编辑”>“填充”,用黑色填充新图层,并告诉“填充”窗口为“使用”黑色。 在此处,您需要打开“滤镜”>“渲染”>“云”,以使用下面的纹理填充该层。
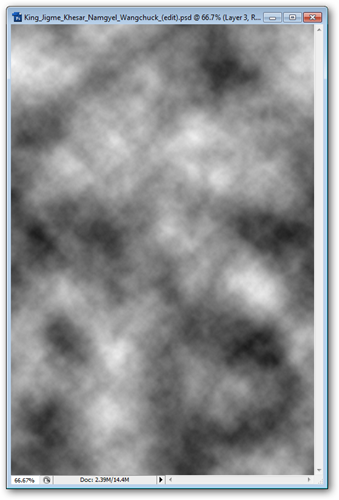
The layer of clouds should look about like this. If you used Filters > Render > Difference Clouds, it won’t look very different.
云层应该看起来像这样。 如果您使用了“滤镜”>“渲染”>“差异云”,则外观不会有太大不同。
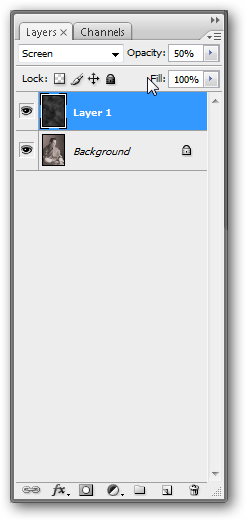
Set your Layer Effect to “Screen” in your Layers Palette. And bump the “Opacity” down to 50%.
在“图层面板”中将“图层效果”设置为“屏幕”。 并将“不透明度”降低到50%。
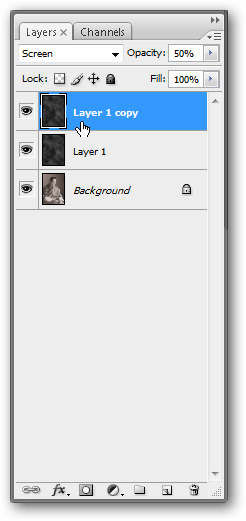
Make of copy of the layer by right clicking and pressing “Duplicate.”
右键单击并按“复制”,以复制层。
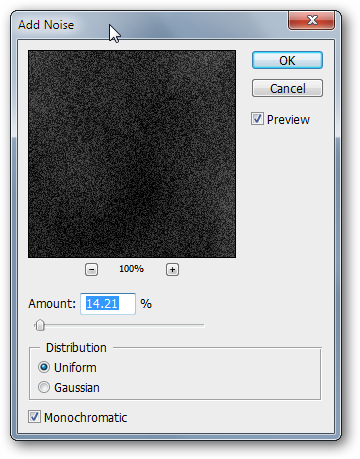
While on your new duplicated layer, Go to Filters > Noise > Add Noise and use settings similar to this. It’s important to use the “Monochromatic” setting.
在新的重复图层上,进入“滤镜”>“噪波”>“添加噪波”,然后使用与此类似的设置。 使用“单色”设置很重要。
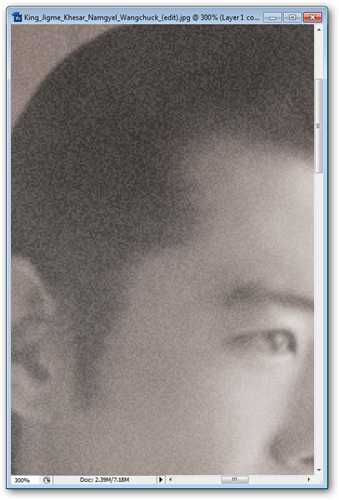
This layer of noise will add a reticulation effect to your photo. It’s a little harsh, so let’s look into softening it.
这层噪点会为您的照片增添网状效果。 这有点苛刻,所以让我们研究一下软化它。
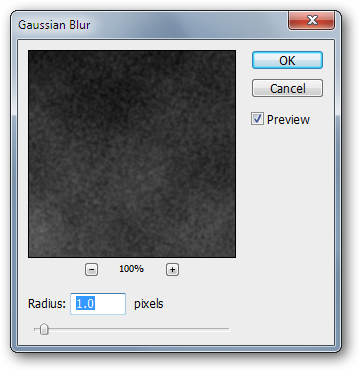
Use Filters > Blur > Gaussian Blur again. The same settings as last time will be fine.
再次使用滤镜>模糊>高斯模糊。 与上次相同的设置会很好。
At this point, you should have a pretty good look going on in your image. I decide I want some harsher values, so I want to play with my levels a bit.
此时,您的图像应该看起来不错。 我决定我想要一些更苛刻的值,所以我想稍微练习一下自己的水平。
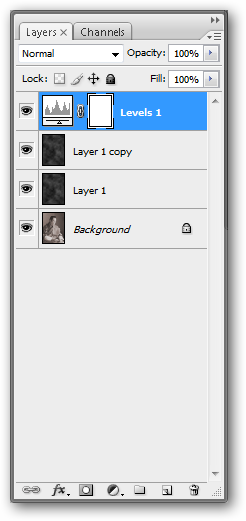
Click the at the bottom of your layers palette to bring up “Adjustment Layers.” Choose “Levels.”
单击图层面板底部的,以显示“调整图层”。 选择“级别”。
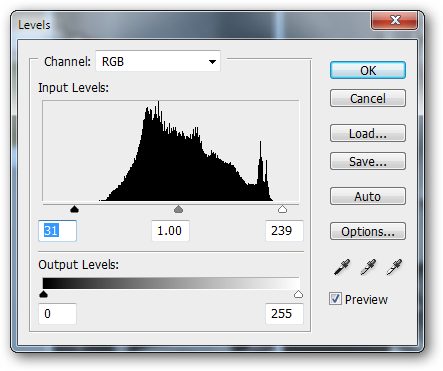
Set your levels as shown. The black arrow moves to the right, making your darks darker. Your white arrow moves left, increasing the whites in your image. You can also just copy my values if you don’t want to play with the tool (those values are 31, 1.00, 239).
如图所示设置您的水平。 黑色箭头向右移动,使您的黑暗更暗。 白色箭头向左移动,增加图像中的白色。 如果您不想使用该工具(这些值分别是31、1.00、239),也可以复制我的值。
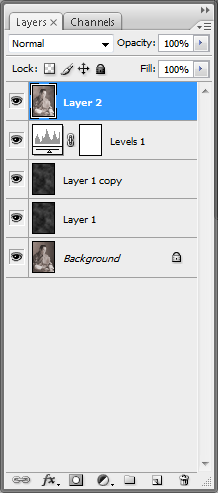
Press to make a complete copy of your image and put it on top of all your layers.
按下可制作图像的完整副本,并将其放在所有图层的顶部。

On this new layer, go to Filters > Sharpen > Unsharp Mask and use values similar to these. This will harshen a lot of your darks and lights even further.
在这个新图层上,转到“滤镜”>“锐化”>“锐化蒙版”,并使用与这些相似的值。 这将进一步加剧您的许多黑暗和黑暗。
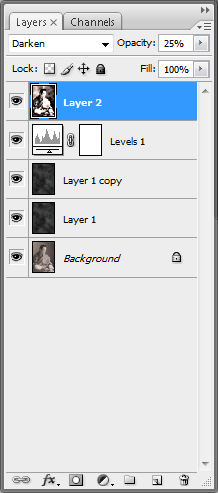
Set this layer effect to “Darken.” From there, adjust your “Opacity” to 25%. This will add some harsh, dark values to your image.
将此图层效果设置为“变暗”。 从那里,将“不透明度”调整为25%。 这将为您的图像添加一些苛刻的深色值。
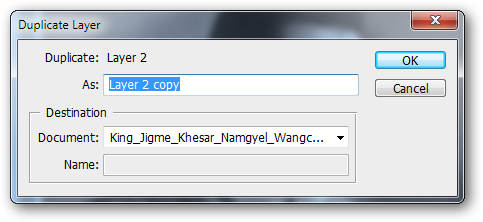
Duplicate your layer by right clicking and picking duplicate.
通过右键单击并选择重复项来复制图层。

Set this duplicated layer’s effect to “Lighten” with the same opacity.
将此重复图层的效果设置为具有相同不透明度的“变亮”。
Our image looks pretty good, but the color is off when you compare it to a real vintage photograph.
我们的图像看起来不错,但是当您将其与真实的老式照片进行比较时,颜色会变淡。
Go to your Layers Palette and press the to bring up your adjustment layers again. Create a “Hue/Saturation” layer effect on top. Use values similar to these.
转到“图层面板”,然后按再次调出调整图层。 在顶部创建“色相/饱和度”图层效果。 使用类似于这些的值。
You may need to change around some of the values in the filters to suit your own photo. But the basic steps can remain the same and will give you a similar look.
您可能需要更改滤镜中的某些值以适合您自己的照片。 但是基本步骤可以保持不变,并且外观类似。
Image of King Jigme Khesar Namgyel Wangchuck by Royal Family of Bhutan via Wikipedia. My derivative image free under CC license.
不丹王室通过 维基百科 拍摄的吉格梅•格萨尔•南吉•王楚克国王的 形象 。 我的衍生图片在 CC许可 下免费提供 。
翻译自: https://www.howtogeek.com/howto/29674/quick-and-dirty-vintage-photo-effect-in-photoshop/


 129
129

 被折叠的 条评论
为什么被折叠?
被折叠的 条评论
为什么被折叠?
 到【灌水乐园】发言


