win10禁用uac

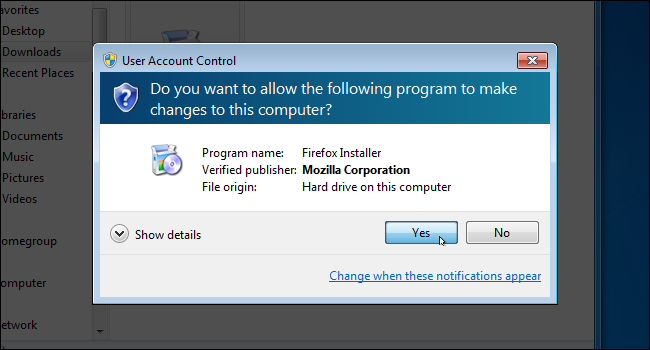
If you’ve been using Windows for a while, you likely remember how annoying the User Account Control (UAC) was when it first popped up in Windows Vista. We showed you back then how to disable it, and you can still disable it in Windows 8 and 10. Here’s how.
如果您已经使用Windows一段时间,您可能还记得用户帐户控件(UAC)在Windows Vista中首次弹出时有多烦人。 我们向您展示了如何禁用它,您仍然可以在Windows 8和10中禁用它。
A word of warning first, though. We actually recommend that you not disable the UAC. You’ll end up with a less secure PC (and we’ve written a great guide explaining that very thing). If you always disable it on a new Windows installation, you might want to give it another try. The UAC on Windows 8 and 10 is much more streamlined and less annoying than than it used to be. That said, we’re not here to tell you what to do.
不过要先警告一下。 实际上,我们建议您不要禁用UAC。 您最终会得到一台不太安全的PC(并且我们写了一篇很好的指南来解释这一点 )。 如果您始终在新的Windows安装上禁用它,则可能需要再次尝试。 与以前相比,Windows 8和10上的UAC更加精简且烦人。 就是说,我们不是要告诉您该怎么做。
In Windows 7, 8, or 10, hit Start, type “uac” into the search box, and then click the “Change User Account Control settings” result. On Windows 8, you’ll use the Start screen (instead of the Start menu), and you’ll have to change your search to “settings” but it still works basically the same.
在Windows 7、8或10中,单击“开始”,在搜索框中键入“ uac”,然后单击“更改用户帐户控制设置”结果。 在Windows 8上,您将使用“开始”屏幕(而不是“开始”菜单),并且必须将搜索更改为“设置”,但其工作原理基本上相同。

In the “User Account Control Settings” window, drag the slider all the way down to the “Never Notify” setting. Click “OK” when you’re done.
在“用户帐户控制设置”窗口中,将滑块一直向下拖动到“从不通知”设置。 完成后,单击“确定”。

Pretty simple.
很简单
Also note that you don’t have to turn UAC all the way off. Here are the settings you can apply with the slider:
另请注意,您不必完全关闭UAC。 以下是您可以使用滑块应用的设置:
Always notify: Windows asks you to verify through UAC whenever an app tries to install software or make changes to your PC. It also asks for verification when you make changes to Windows settings.
始终通知:每当应用程序尝试安装软件或对PC进行更改时,Windows都会要求您通过UAC进行验证。 当您更改Windows设置时,它还会要求进行验证。
Notify only about apps: The middle two settings on the slider work similarly, both notifying you only when apps try to make changes, but not when you change Windows settings. The difference between the two settings is that the first one dims your screen during the notification and the second one doesn’t. The second setting is intended for people with PCs that (for whatever reason) take a long time dimming the screen.
仅通知有关应用程序的信息:滑块上的中间两个设置的工作原理类似,都仅在应用程序尝试进行更改时通知您,而在更改Windows设置时不会通知您。 两种设置之间的区别在于,第一种在通知过程中使屏幕变暗,而第二种则不会。 第二个设置适用于装有PC的人(无论出于何种原因)需要很长时间使屏幕变暗。
Never notify: UAC doesn’t notify you about changes you make or those made by apps. This setting essentially turns UAC off.
从不通知: UAC不会通知您您所做或应用程序所做的更改。 此设置实质上关闭了UAC。
Like we said, we strongly encourage you not to turn off UAC. It’s what makes it safe for you to run an administrator account as your daily user account. But, if you’re determined to turn it off, at least now you know how easy it is.
就像我们说的,我们强烈建议您不要关闭UAC。 这就是使您可以安全地将管理员帐户作为日常用户帐户运行的原因。 但是,如果您决定关闭它,至少现在您知道它是多么容易。
win10禁用uac


 37
37

 被折叠的 条评论
为什么被折叠?


