


打印时选 平铺 原始大小

If the boring wall posters at Spencers aren’t tickling your fancy and you’d rather have something more customized to your tastes, you can actually make and print your own posters using a method called tiled printing.
如果Spencers的无聊墙贴没有让您喜欢,并且您想根据自己的喜好定制一些东西,则实际上可以使用称为平铺打印的方法制作和打印自己的海报。
Tiled printing is when you print out a large image over several pieces of paper, with each piece of paper acting as a “tile,” hence the name. From there, you line up the tiles to form a grid, thus creating your huge wall poster.
平铺打印是指在几张纸上打印出较大图像时,每张纸都充当“平铺”,因此得名。 从那里,您将瓷砖排列成一个网格,从而创建了巨大的墙海报。
There are several free online tools that can convert images into a format suitable for tiled printing, but my favorite one (and the most popular service by far) is The Rasterbator. But before we continue, it’s important to know about a couple of terms.
有几种免费的在线工具可以将图像转换为适合平铺打印的格式,但是我最喜欢的工具(也是迄今为止最受欢迎的服务)是The Rasterbator 。 但是在继续之前,了解几个术语很重要。
矢量图像与半色调图像 (Vector Images vs. Halftoned Images)
Before you can take any image and blow it up into a wall-size piece of art, you first need to convert the image into either a vector image or a halftoned image, because it’s likely that the image doesn’t have a high enough resolution to be enlarged. A photo taken with your smartphone, for example, can be blown up to around 13″x10″ (a bit larger using some editing tricks) before the quality starts to diminish. Anything larger than that and the photo’s resolution is just too small.
在拍摄任何图像并将其炸成一堵墙大小的艺术品之前,首先需要将其转换为矢量图像或半色调图像,因为该图像可能没有足够高的分辨率放大。 例如,使用智能手机拍摄的照片在质量开始下降之前,可能会被炸毁约13“ x10” (使用一些编辑技巧会更大)。 大于此值的照片和照片的分辨率都太小。
Without going into an entire confusing explanation about how these types of graphics work, I’ll just say that the benefit of a vector image is that you can blow it up as big as you want without the quality suffering at all. If you take a regular .JPG photo and zoom in a ways, you’ll notice it gets pretty blurry and pixelated pretty fast. This won’t happen with a vector image.
在不对这些类型的图形如何工作进行完整的混乱解释时,我只想说矢量图像的好处是您可以将其放大到所需的大小,而质量却丝毫不受影响。 如果您拍摄普通的.JPG照片并以某种方式缩放,您会发现它变得非常模糊并且像素化非常快。 矢量图像不会发生这种情况。

A halftoned image has mostly the same benefits (i.e. you can blow up an image and still have it look sharp and crisp), but the image uses halftoning to accomplish this. In other words, the pixels of an image are converted into a series of tiny dots that, when viewed from a distance, looks like a relatively-crisp photo, depending on the size of the dots.
半色调图像具有几乎相同的好处(即,您可以放大图像,但仍使其看起来清晰锐利),但是图像使用半色调来实现此目的。 换句话说,图像的像素会转换为一系列细小的点,从远处看时,取决于点的大小,它们看起来像一张相对清晰的照片。

The image you choose for your wall art needs to be either a vector or a halftoned image. The Rasterbator has a built-in converter for halftoning images, but if you want to go the vector route, you’ll need to convert your image into a vector graphic first. I personally like Autotracer, which is a free online vector conversion tool.
您为墙壁艺术品选择的图像必须是矢量图像或半色调图像。 Rasterbator有一个用于对图像进行半色调处理的内置转换器,但是如果您要使用矢量路径,则需要先将图像转换为矢量图形。 我个人喜欢Autotracer ,它是一个免费的在线矢量转换工具。
A word of warning, though, as you may have noticed from the examples above. Converting a photo that you took with your camera or phone to either a vector or halftoned image will make it look a bit animated (almost like a painting of sorts) and you’ll lose some of the quality. This is because vector graphics rely on lines and shapes (and halftone graphics rely on dots) rather than pixels. And all those pixels need to be converted to the proper format.
但是,从上面的示例中您可能已经注意到了警告。 将您用相机或手机拍摄的照片转换为矢量图像或半色调图像,会使它看起来有点生气(几乎像一幅画),并且会失去一些画质。 这是因为矢量图形依赖于线条和形状(而半色调图形依赖于点)而不是像素。 所有这些像素都需要转换为正确的格式。
Halftoned images can still look good (and they’ll look a bit artsy if you’re into that style), but if you’re wanting to retain full photo quality, this probably isn’t for you. It’s recommended to at least stick with graphic illustrations (because they can be vectored naturally) or photos that are super high-resolution if you want to create huge pieces of wall art. For this tutorial, though, I’ll be using a graphic illustration (this poster image file from iFixit) and will only be printing out a reasonably-sized poster.
半色调图像仍然可以看起来不错(如果您喜欢这种样式,它们看起来会显得有些艺术),但是如果您想保留完整的照片质量,可能不适合您。 如果您要创建巨大的壁画作品,建议至少坚持使用图形插图(因为它们可以自然矢量化)或超高分辨率的照片。 不过,对于本教程,我将使用图形插图(来自iFixit的海报图像文件 ),并且只会打印出尺寸适当的海报。
创建您的巨型墙艺术 (Create Your Giant Wall Art)
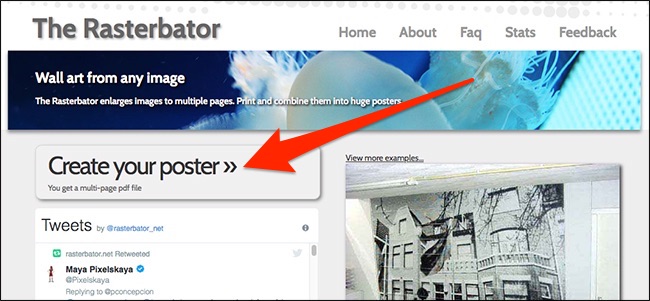
Start by visiting The Rasterbator website and clicking the “Create Your Poster” button to get going.
首先访问Rasterbator网站,然后单击“创建海报”按钮开始操作。
Next, under the “Upload” field, click the “Choose File” and select your image. Then hit the “Upload” button.
接下来,在“上传”字段下,单击“选择文件”,然后选择您的图像。 然后点击“上传”按钮。

You’ll now see a preview of how your wall art will look and how big it will be. However, the webpage shows metric measurements by default. Click the “Inch” link on the bottom right to convert everything to imperial units.
现在,您将预览壁画的外观和大小。 但是,该网页默认显示度量标准度量。 单击右下角的“英寸”链接,将所有内容转换为英制单位。

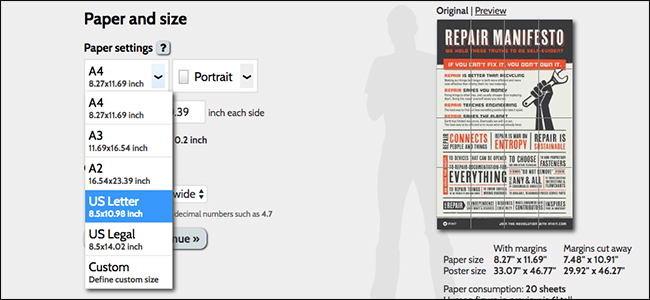
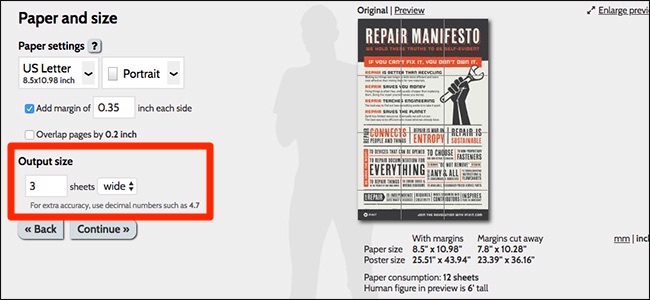
Now it’s time to customize how your wall art will be printed. Under “Paper Settings,” use the dropdown to select the paper type. Choose “US Letter” if you’ll be using regular printer paper, but you can choose other sizes as well.
现在是时候自定义您的壁画打印方式了。 在“纸张设置”下,使用下拉菜单选择纸张类型。 如果要使用普通打印机纸,请选择“美国信函”,但也可以选择其他尺寸。
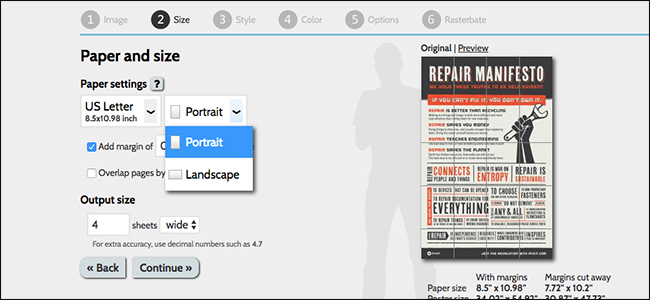
Next, choose whether to have the tiles laid out horizontally or in portrait. This doesn’t really matter much, and is more of a preference than anything.
接下来,选择是将瓷砖水平放置还是纵向放置。 这实际上并没有多大关系,而且比什么都更可取。
After that, you can add margins (and adjust the size), as well as add an overlap. The margin governs the size of the blank border on each tile. The margin allows you to overlay tile edges on each other to glue or tape them together. Adding an overlap print a bit extra from the previous tile so that you can line them up without the risk of the blank border peeking through. Both of these options are a personal preference, but I at least recommend adding margins to make it easier to put all the tiles together come assembly time.
之后,您可以添加边距(并调整大小),也可以添加重叠部分。 边距控制每个图块上空白边框的大小。 边距使您可以彼此重叠瓷砖边缘以将其胶合或粘贴在一起。 在上一个图块上添加重叠打印可以使它们排成一行,而不会冒空白边框的危险。 这两个选项都是个人喜好,但我至少建议增加边距,以便在组装时更轻松地将所有砖块放在一起。
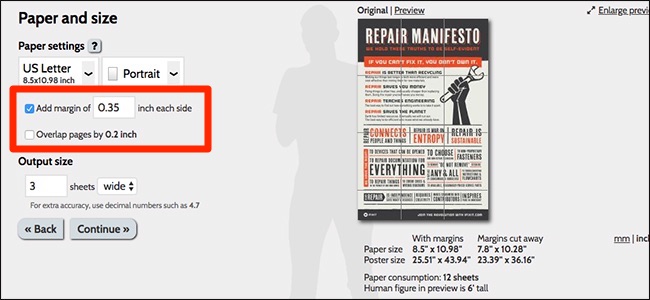
You’ll use the “Output Size” section to customize the overall size of the wall art by changing how many sheets wide or tall to print.
您将使用“输出尺寸”部分,通过更改要打印的宽度或高度来定制壁画的整体尺寸。
On the right side, you’ll get a preview of your wall art with dimensions on how big the poster size will turn out, as well as how many sheets of paper will be used. In this example, I’m only making the poster about two feet wide by three feet tall, but you can make yours as big as you want. Hit “Continue” to move on to the next step.
在右侧,您将预览墙壁艺术,其中包含海报尺寸的大小以及将使用多少张纸的尺寸。 在此示例中,我仅将海报制作成大约2英尺宽乘3英尺高,但是您可以根据需要将其放大。 点击“继续”进入下一步。
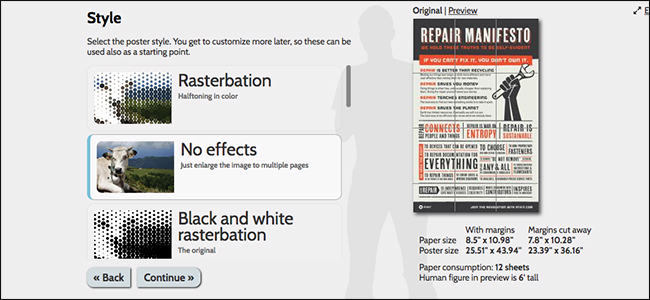
On the next screen, choose the style of your wall art. You can choose from several styles (including halftoning), but in this case, since the image is already high resolution and I’m not making it super huge, I’m going with “No Effects.”
在下一个屏幕上,选择墙壁艺术的风格。 您可以从几种样式中进行选择(包括半色调),但是在这种情况下,由于图像已经是高分辨率,并且我并没有使其变得超大,因此我将使用“无效果”。
If you choose one of the other styles, you can click “Preview” to see what your wall art looks like in that style. Click “Continue” after you choose a style you like.
如果您选择其他样式之一,则可以单击“预览”以查看该样式的墙壁艺术品。 选择所需的样式后,单击“继续”。
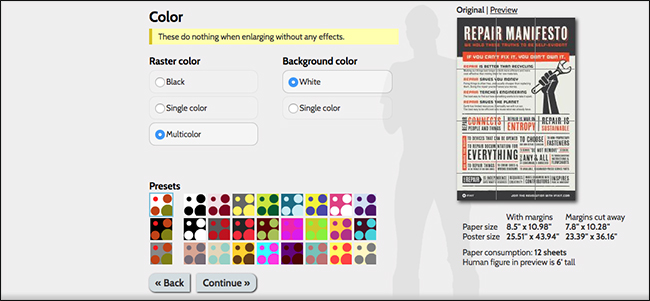
The next screen lets you choose colors if you chose to go with halftoning, but since I opted for no effects in this example, I don’t need to bother with these. Hit “Continue” to move on.
如果选择半色调,则在下一个屏幕中可以选择颜色,但是由于在此示例中我没有选择任何效果,因此无需理会这些效果。 点击“继续”继续。
Next, you’ll select the output type, and there are a few to choose from. In my case, I’m just going to choose “Enlarge,” but if you went with halftoning, you could select from the other options for a more customized look.
接下来,您将选择输出类型,并且有一些可供选择。 就我而言,我只是选择“放大”,但是如果您进行半色调处理,则可以从其他选项中进行选择,以获得更自定义的外观。
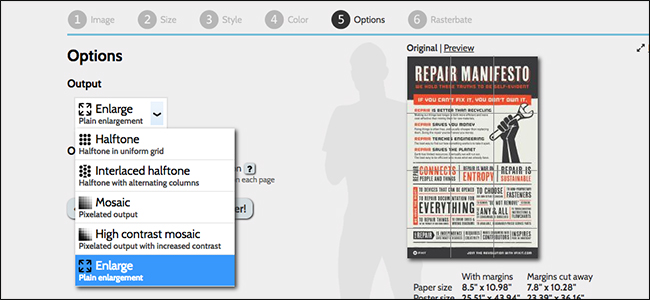
Under the “Other” section, you can include crop marks (which let you more easily line up the tiles) and page positions, which places a small number in the corner of each tile to tell you where they go. Both of these are helpful during assembly.
在“其他”部分下,您可以包括裁切标记(可让您更轻松地排列图块)和页面位置,这些位置在每个图块的一角放置少量数字以告诉您它们的去向。 这两个在组装过程中都很有帮助。
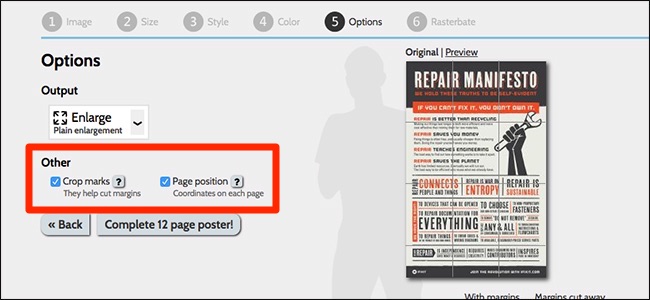
Click “Complete” when you’re finished.
完成后,单击“完成”。

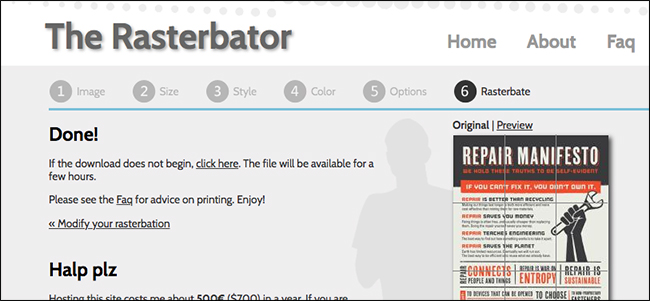
Give it a few seconds to create your wall art, and eventually it will automatically download the .PDF file that you’ll print out. Go ahead and print it out whenever you’re ready.
花费几秒钟来创建您的壁画,最终它将自动下载要打印的.PDF文件。 随时准备好并打印出来。
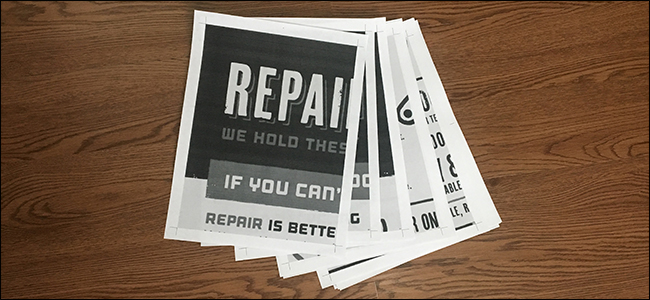
The printout is ordered so that you can take the top sheet from the stack and place them out from left to right, top to bottom.
打印输出是有序的,因此您可以从纸堆中取出顶层,然后从左到右,从上到下放置它们。
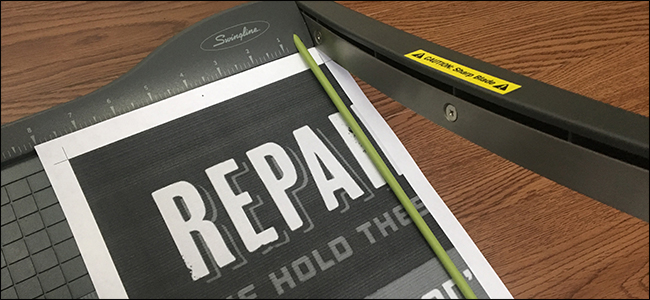
Next, you’ll need to cut away some of the blank border so that you can line up the tiles seamlessly. You only need to do this on certain sides of each sheet, since you’ll overlay one on top of the other as you go. Scissors work fine for this, but a guillotine paper cutter is highly recommended. This is also where setting an “overlap” can come in handy, as you can cut off a bit more than the white border and still be okay.
接下来,您需要切掉一些空白边框,以便可以无缝地排列瓷砖。 您只需要在每张纸的某些面上进行此操作,因为您将在进行过程中将一张纸叠放在另一张纸上。 剪刀可以很好地工作,但是强烈建议使用断头台切纸机 。 这也是设置“重叠”的方便之处,因为您可以剪裁多于白色边框,但仍然可以。
Now it’s time to start assembling the tiles. It’s up to you on how you want to place the sheets on your wall, using glue, thumb tacks, sticky tack, whatever. I’m just going to use clear thumb tacks for this. You’ll notice from the photo below that I cut away the border on one sheet, but left the border on the next sheet intact so I can connect them together using my thumb tacks.
现在是时候开始组装瓷砖了。 由您自己决定如何使用胶水,图钉,粘式大头钉等将薄板放置在墙上。 我将为此使用清晰的图钉。 您会从下面的照片中注意到,我切掉了一张纸上的边框,但保留了下一张纸上的边框,因此我可以使用图钉将它们连接在一起。

Take your time and be patient while lining up the tiles, but eventually you’ll end up with a sweet-looking poster that you made with just regular sheets of copier paper.
花些时间并在排列瓷砖时耐心等待,但最终您会得到一张看起来很甜美的海报,该海报仅由普通的复印纸制成。
How cool is that?
多么酷啊?
翻译自: https://www.howtogeek.com/351763/how-to-make-your-own-posters-using-tiled-printing/
打印时选 平铺 原始大小


 592
592


 被折叠的 条评论
为什么被折叠?
被折叠的 条评论
为什么被折叠?
 到【灌水乐园】发言


