


stringify
Stringify is an incredibly powerful automation tool that connects your favorite web apps and smart home gadgets. In this guide, we’re going to take a look at one of its more advanced features called Mode. This “Thing” allows you to run several Flows at once based on whether you’re home or away from the house, and whether you’re awake or asleep.
Stringify是一个功能强大的自动化工具 ,可连接您喜欢的Web应用程序和智能家居小工具。 在本指南中,我们将介绍其更高级的功能之一,即“模式”。 这种“事物”使您可以根据自己是在家还是不在家,以及清醒还是睡着一次运行多个流。
Mode is one of Stringify’s built in Things. This Thing allows you to set one of four states for your house: Home, Away, Awake, and Asleep. You can then use these states to activate Flows. For example, you can turn your living room light on, set your Nest to Home, and start playing music whenever your state is set to Home. Mode comes with three triggers and actions:
Mode是Stringify内置的Things中的一种 。 通过此功能,您可以为房屋设置以下四个状态之一:“回家”,“离开”,“唤醒”和“睡眠”。 然后,您可以使用这些状态来激活流程。 例如,您可以打开客厅灯,将Nest设置为Home,然后在状态设置为Home时开始播放音乐。 模式带有三个触发器和动作:
WHEN Trigger – “Mode changes to…”: This trigger will activate whenever you change your Mode to something different. So, if your Mode changes from Away to Home, you can tell Stringify to turn on your living room light.
WHEN触发器–“模式更改为……”:每当您将模式更改为其他方式时,此触发器将激活。 因此,如果您的模式从“离开”更改为“回家”,则可以告诉Stringify打开您的客厅灯。
ONLY IF Trigger – “My mode is…”: This trigger allows you to restrict a flow to a certain mode. For example, you can set your Nest Cam to send you an email whenever it detects motion, but only if your Mode is set to Asleep.
仅当IF触发器–“我的模式是…”:此触发器允许您将流限制为特定模式。 例如,您可以将Nest Cam设置为在检测到运动时向您发送电子邮件,但前提是您的Mode设置为Asleep。
Action – “Change my mode to…”: This can change your mode in response to a trigger. Like changing your Mode to Home whenever your GPS Location is at your house.
行动–“将我的模式更改为...”:这可以响应触发而更改您的模式。 就像每当GPS位置在家里时将模式更改为家庭模式一样。
These three triggers and actions combine to create a powerful system you can use to create more complex Flows, as well as making it easier to add new ones to your existing set up.
这三个触发器和动作结合在一起,创建了一个功能强大的系统,您可以使用它来创建更复杂的流程,并使向现有设置中添加新流程变得更加容易。
首先,连接Stringify的“模式” (First, Connect Stringify’s “Mode” Thing)
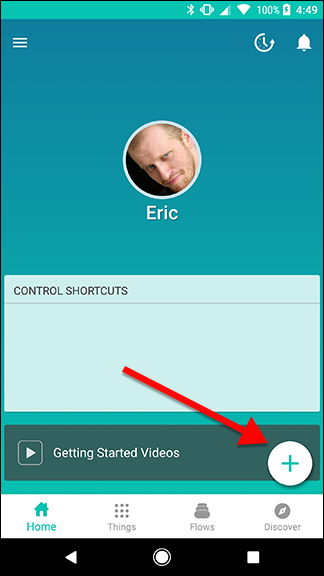
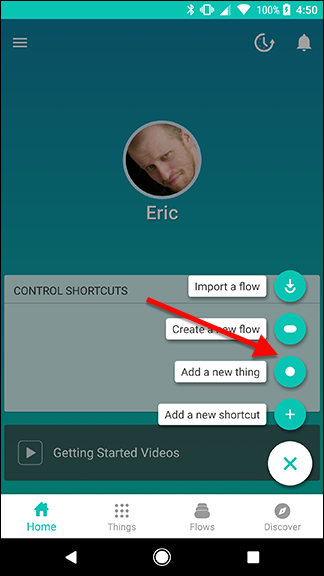
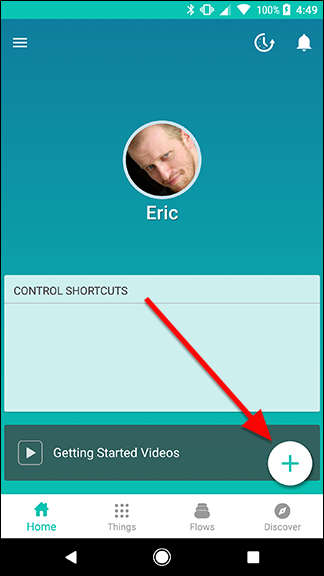
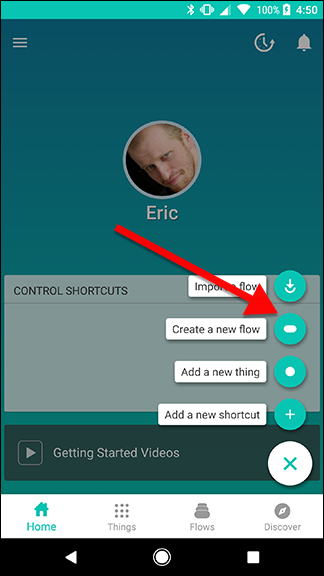
Before you add it to your Flows, you’ll need to add the Mode Thing (at least “Thing” really is the technical term this time) to your Stringify collection. To do so, open up the Stringify app on your phone and tap the plus icon. Then, tap “Add a new thing.”
在将其添加到Flows之前,您需要将Mode Thing(这次至少是Thing是真正的技术术语)添加到Stringify集合中。 为此,请在手机上打开Stringify应用程序,然后点击加号图标。 然后,点击“添加新事物”。
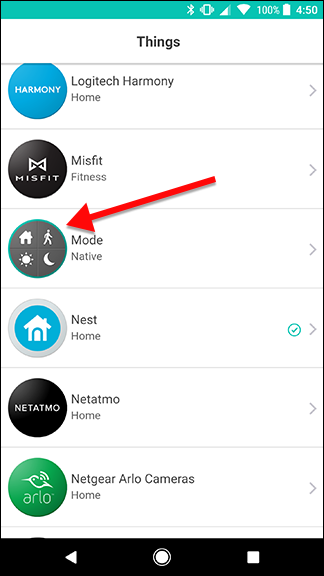
Scroll down the list and find “Mode,” then tap on it.
向下滚动列表,找到“模式”,然后点击它。
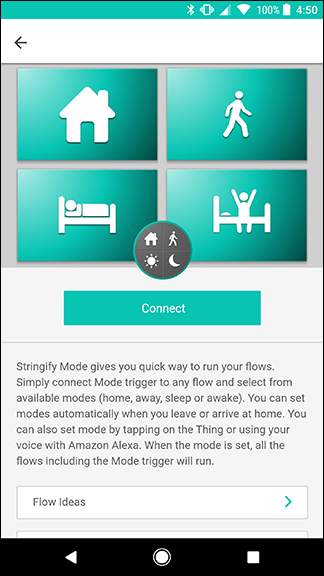
Tap the big green “Connect” button to add it to your collection of Things.
点击绿色的大“连接”按钮,将其添加到您的事物集合中。
Now, when you select Things from your collection, you can add Mode. So, it’s time to start using it.
现在,当您从集合中选择“事物”时,可以添加“模式”。 因此,该开始使用它了。
顺畅改变模式 (Change Your Mode With a Flow)
There are two parts to using a Mode. You’ll need one Flow to change your Mode, and another Flow (or Flows) that are triggered when you change Modes. For our guide, we’ll build a Flow that changes your Mode to Home whenever you get to your house. To get started, tap the plus icon on the main page of Stringify’s app and tap “Create a new flow.”
使用模式分为两个部分。 您将需要一个流程来更改您的模式,并且需要另一个流程(当您更改模式时触发)。 对于我们的指南,我们将构建一个流程,当您到家时将其模式更改为“家庭”。 要开始使用,请点击Stringify应用程序主页上的加号图标,然后点击“创建新流程”。
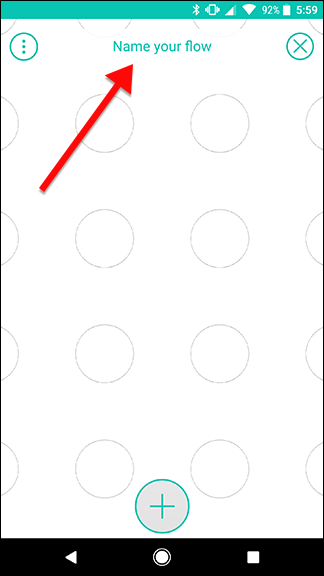
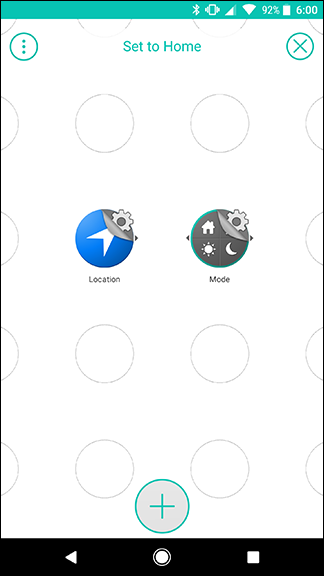
At the top of the screen, tap “Name your flow” and give it a name. For clarity’s sake, we’re going to name this one “Set to Home” and later we’ll connect other Flows to do specific things like turn your lights on or adjust the temperature.
在屏幕顶部,点击“命名您的流”并为其命名。 为了清楚起见,我们将其命名为“ Set to Home”,稍后我们将连接其他Flow以执行特定的操作,例如打开灯光或调节温度。

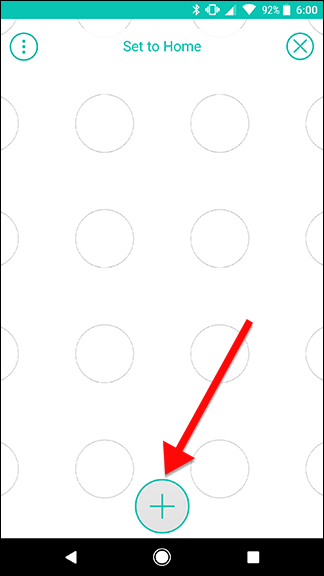
Tap the plus icon at the bottom of the screen to add your Things.
点按屏幕底部的加号图标以添加您的事物。
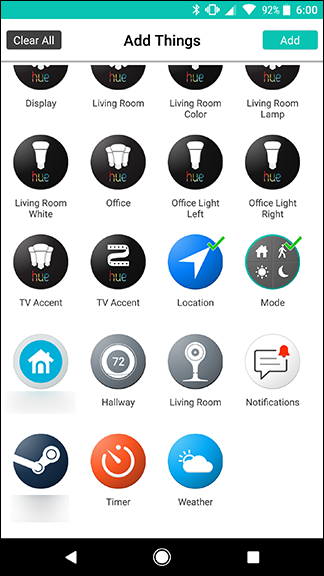
Scroll down and choose Location and Mode from the list. Tap Add at the top of the screen when you’re finished.
向下滚动并从列表中选择“位置和模式”。 完成后,点击屏幕顶部的添加。
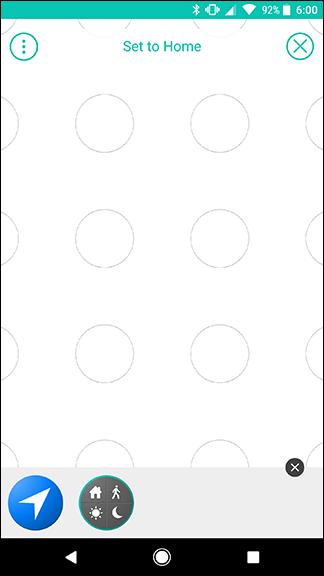
Drag the Location and Mode icons out onto the grid. Place Location on the left and Mode on the right. When you’re done, tap the gear icon peeking from behind the Location icon.
将位置和模式图标拖出到网格上。 将位置放在左侧,将模式放在右侧。 完成后,点击“位置”图标后面的齿轮图标。
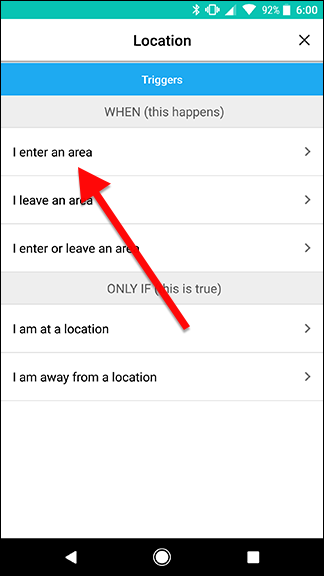
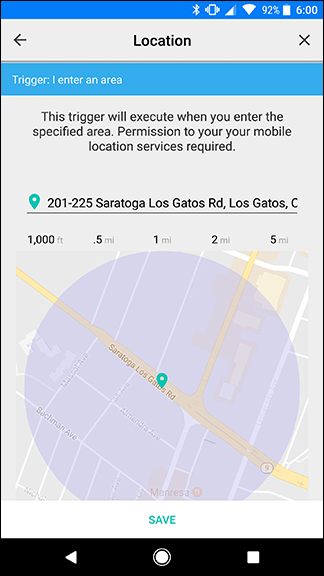
In the list of actions, tap “I enter an area…” On the next screen, enter your address and choose a radius around it. As soon as you enter this circle, the Flow will activate. When you’ve finished confirming your address, tap Save.
在操作列表中,点击“我输入一个区域...”。在下一个屏幕上,输入您的地址并选择一个半径。 进入该圈子后,流程就会激活。 完成确认地址后,点击“保存”。
Back on the grid screen, tap the gear icon peeking behind the Mode icon.
返回网格屏幕,点击“模式”图标后面的齿轮图标。
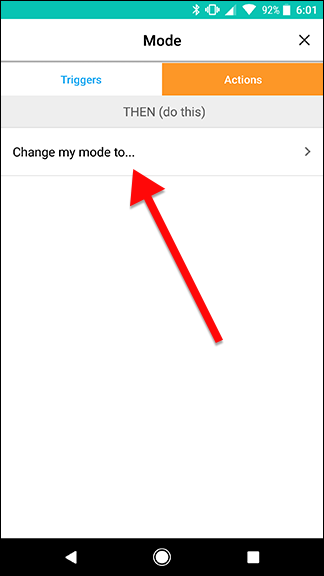
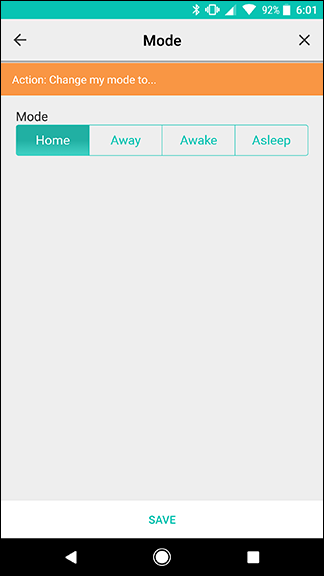
Tap the Actions tab at the top of the screen and choose “Change my mode to…” On the next screen, make sure Home is selected under Mode and tap Save at the bottom.
点击屏幕顶部的“动作”选项卡,然后选择“将我的模式更改为...”。在下一个屏幕上,确保在“模式”下选择了“主页”,然后点击底部的“保存”。
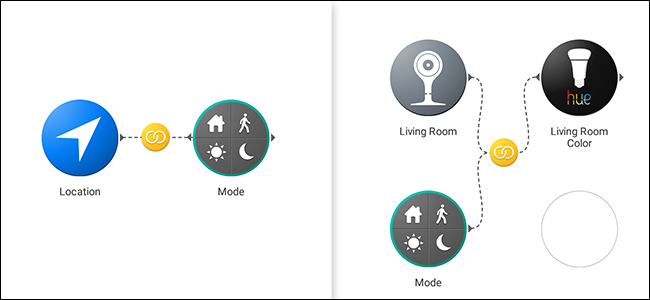
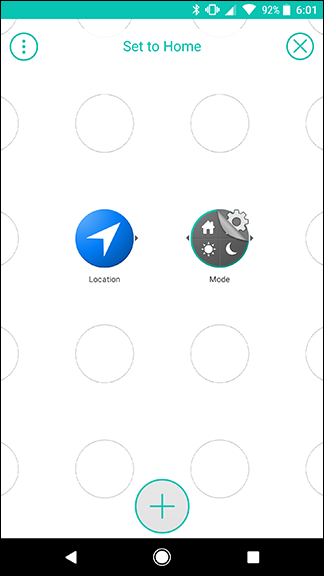
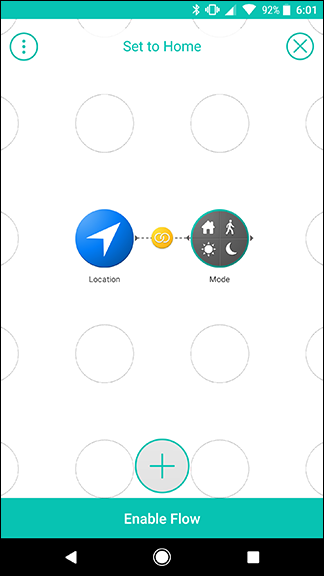
On the grid screen, swipe between the Location and Mode icons to create a link like the one shown below. When you’re done, tap Enable Flow.
在网格屏幕上,在“位置”和“模式”图标之间滑动以创建一个如下所示的链接。 完成后,点击“启用流”。
That’s all you need to do to set your Mode. As you might notice, this doesn’t actually do anything on its own. However, it gives you more flexibility. For example, you can add another Flow that will change your mode to Home if an Automatic Pro-enabled car arrives home—say, your spouse or child—or when a motion sensor detects motion in your foyer. Stringify only allows one WHEN trigger per Flow, but this lets you assign multiple triggers to change your Mode.
这就是设置模式所需要做的。 您可能会注意到,这实际上并不能单独执行任何操作。 但是,它为您提供了更大的灵活性。 例如,您可以添加另一个Flow,如果启用了Pro的自动驾驶汽车到达您的家中(例如您的配偶或孩子),或者当运动传感器检测到门厅中有运动时,它将把模式更改为Home。 Stringify每个流仅允许一个WHEN触发器,但这使您可以分配多个触发器来更改模式。
根据您的模式触发其他流 (Trigger Other Flows Based On Your Mode)
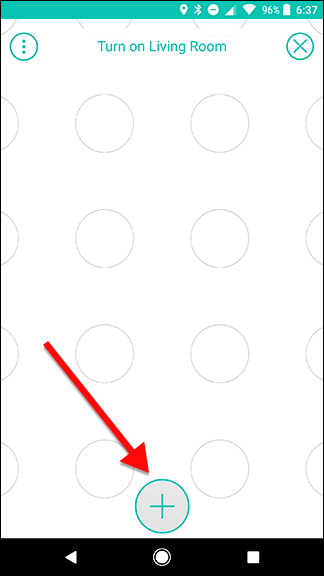
Now that you have a Flow that will set your Mode to Home, you can build off of it. To demonstrate, we’re going to create a Flow that will turn on your lights if a Nest Cam detects movement, but only while your mode is set to Home. First, tap the plus icon on the home screen of the Stringify app and tap “Create a new flow.”
现在您有了将“模式”设置为“家庭”的流程,就可以以此为基础了。 为了演示,我们要创建一个流程,如果鸟巢凸轮检测运动,但只有当你的模式设置为主页,将您开灯。 首先,点击Stringify应用程序主屏幕上的加号图标,然后点击“创建新流程”。


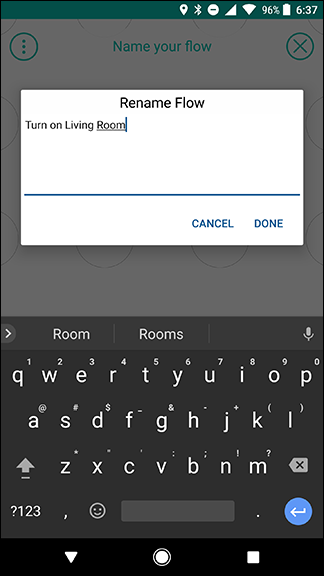
Give your Flow a name. In this case, we’re going with “Turn on Living Room.”
给您的Flow命名。 在这种情况下,我们将使用“打开客厅”。

Tap the plus icon at the bottom of the screen to add your Things.
点按屏幕底部的加号图标以添加您的事物。
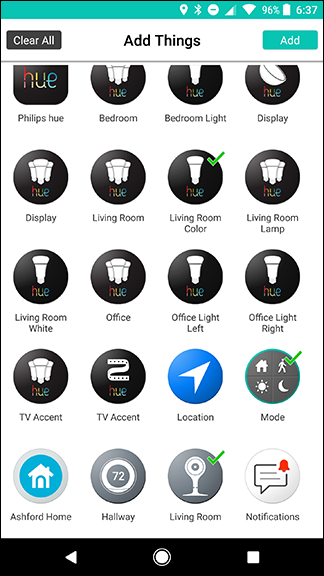
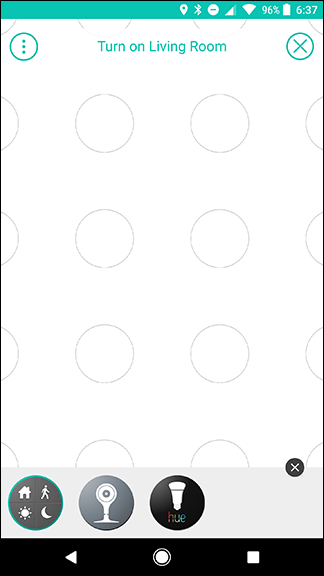
For this Flow, we’re going to use Nest Cam, Philips Hue, and Mode. Select your Things and tap Add.
对于本流程,我们将使用Nest Cam,Philips Hue和Mode。 选择您的事物,然后点击添加。
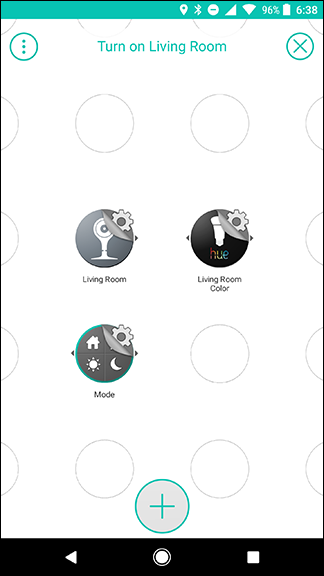
First, drag your three Thing icons out as shown below. Nest and Mode should be in one column, with Hue next to one of them in the second column. When you’re done, tap the gear symbol behind the Nest icon.
首先,将三个Thing图标拖出,如下所示。 Nest和Mode应该在一列中,而Hue在第二列中应位于其中。 完成后,点击Nest图标后面的齿轮符号。
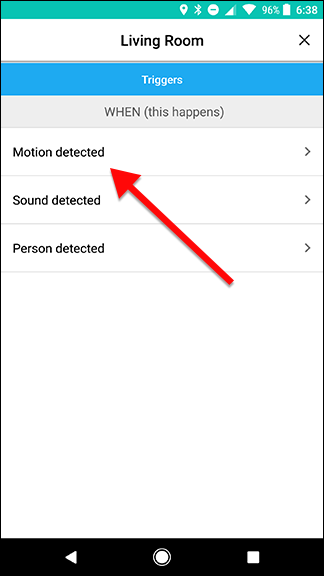
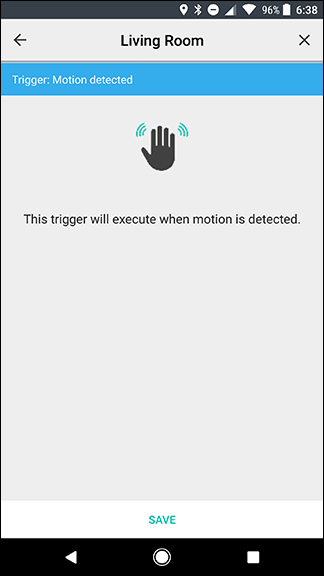
Under the list of triggers, choose “Motion detected.” On the next screen, tap Save.
在触发器列表下,选择“检测到运动”。 在下一个屏幕上,点击“保存”。
Back on the grid screen, tap the gear symbol behind the Mode icon.
返回网格屏幕,点击“模式”图标后面的齿轮符号。

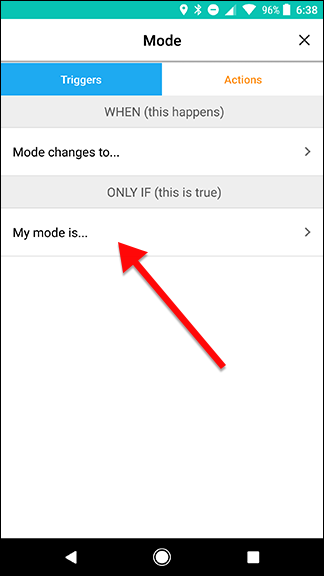
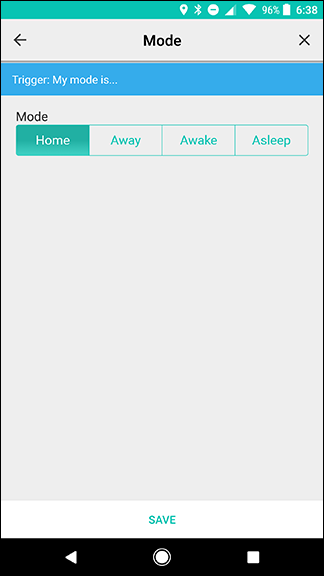
Under the ONLY IF section of the triggers list, choose “My mode is…” On the next screen, make sure the Home mode is selected, then tap Save.
在触发器列表的“仅IF”部分下,选择“我的模式是…”。在下一个屏幕上,确保选择了“家庭”模式,然后点击“保存”。
On the grid screen, tap the gear symbol behind the Hue icon.
在网格屏幕上,点击“色相”图标后面的齿轮符号。

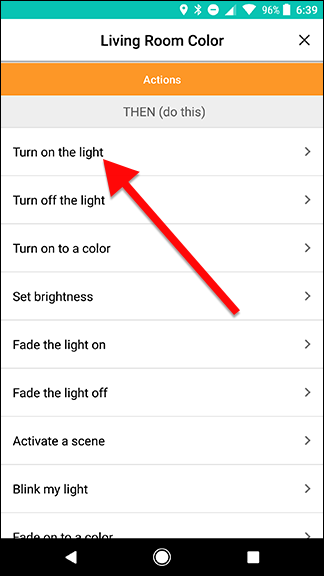
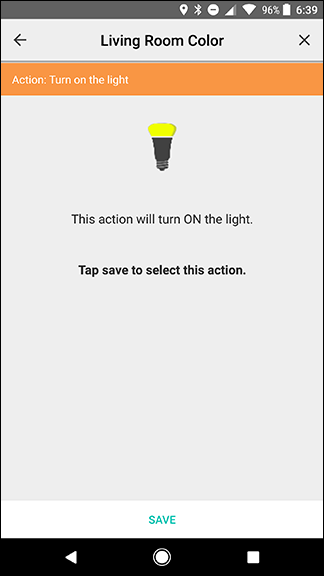
Under the list of actions, choose “Turn on the light.” On the next screen, tap Save.
在操作列表下,选择“打开灯”。 在下一个屏幕上,点击“保存”。
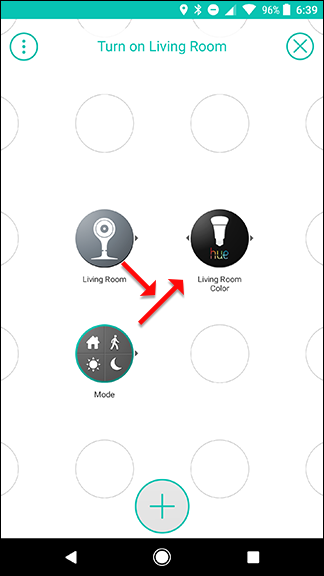
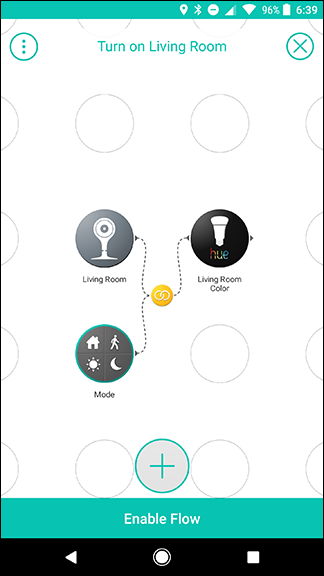
Back on the grid screen, swipe quickly from the Mode icon to the Hue icon. Then, swipe from the Nest icon to the yellow link icon that you just created, as demonstrated by the arrows below. The result should look like the image on the right. This will create a trigger that will activate whenever motion is detected by your Nest Cam, but only if your Mode is set to Home.
返回网格屏幕,从“模式”图标快速滑动到“色调”图标。 然后,从“嵌套”图标滑动到您刚刚创建的黄色链接图标,如下面的箭头所示。 结果应该看起来像右边的图像。 这将创建一个触发器,每当运动通过你的巢凸轮检测将激活,但只有当你的模式设置为主页。
When you’re done, tap Enable Flow.
完成后,点击“启用流”。
Now, this Flow will turn on your living room light whenever your Nest Cam detects any movement, but only if you’re home so your cats won’t turn the lights on while you’re gone.
现在,只要您的Nest Cam检测到任何运动,此Flow就会打开您的客厅灯,但是仅当您在家时,您的猫才会在离开时不打开灯。
Of course, if you only wanted to do this one thing, you could replace Mode with a simple ONLY IF Location trigger. However, separating that function into a variable gives you more flexibility. As we mentioned before, you could create multiple triggers that will turn on Home, so this Flow will still work even if you, specifically, aren’t the one at home. You can also add more Flows later on that are triggered by the same Mode change.
当然,如果您只想做一件事,则可以用简单的“仅IF位置”触发器替换“模式”。 但是,将该函数分成一个变量可为您提供更大的灵活性。 正如我们之前提到的,您可以创建多个将打开Home的触发器,因此,即使您不是家里的那个,此Flow仍然可以工作。 您还可以稍后添加更多由相同模式更改触发的流程。
翻译自: https://www.howtogeek.com/307900/how-to-use-stringifys-modes-to-run-more-complex-flows/
stringify


 2677
2677


 被折叠的 条评论
为什么被折叠?
被折叠的 条评论
为什么被折叠?
 到【灌水乐园】发言


