


介绍 ( Introduction )
Source-code versioning control has always been at the core of Continuous Integration (CI) development practice. In fact tools by JetBrains and Microsoft (amongst, many vendors) have provided development teams an ability to implement some form of CI in their Software Development Lifecycle (SDLC). In recent years, however, the focus of an effective CI strategy has expanded to include mechanisms of keeping track of database files. The possibility of this gradual expansion has largely been driven by two factors:
源代码版本控制一直是持续集成(CI)开发实践的核心。 实际上,JetBrains和Microsoft(包括许多供应商)提供的工具为开发团队提供了在其软件开发生命周期(SDLC)中实施某种形式的CI的能力。 但是,近年来,有效的CI策略的重点已扩展到包括跟踪数据库文件的机制。 这种逐渐扩展的可能性很大程度上取决于两个因素:
- Stability and maturity of source control systems such as TFS and Git TFS和Git等源代码控制系统的稳定性和成熟度
- Availability of freeware and proprietary tools that make it convenient for data professionals to keep control of their database source code 免费软件和专有工具的可用性,使数据专业人员可以方便地控制其数据库源代码
Thus, this article is a first of many in a series of conducting effective CI strategy for your database projects using Microsoft’s cloud-based Visual Studio Online (VSO) service. We will kick-off this series with a step-by-step tutorial on setting up a VSO service, configuring Git source control as well as checking in your first T-SQL script.
因此,本文是使用Microsoft的基于云的Visual Studio Online(VSO)服务为数据库项目执行有效CI策略的一系列文章中的第一篇。 我们将通过分步教程来开始本系列文章,该分步教程包括设置VSO服务,配置Git源代码控制以及签入第一个T-SQL脚本。
安装 ( Installation )
登录到Visual Studio ( Sign into Visual Studio )
The first pre-requisite of setting up source control using VSO is to have an active MSDN subscription or Microsoft account i.e. Outlook, Hotmail.
使用VSO设置源代码控制的第一个前提条件是拥有活动的MSDN订阅或Microsoft帐户,即Outlook,Hotmail。
If you have an existing account or setup a new one, you can launch the Visual Studio website
如果您已有一个帐户或设置了一个新帐户,则可以启动Visual Studio网站
Click on Get Started for Free. Sign into visual studio using your account.
单击免费入门 。 使用您的帐户登录Visual Studio。
设置一个Visual Studio在线帐户 ( Setup a Visual Studio Online Account )
Next step after successfully logging in, is to setup a VSO account.
成功登录后,下一步是设置VSO帐户。
Click on the “Create a free account now” hyperlink located underneath Accounts heading.
You should then be redirected to a “Create a Visual Studio Online Account” page.
点击位于其下方帐户标题中的“现在创建一个免费帐户”的超链接。
然后应将您重定向到“创建Visual Studio在线帐户”页面。
Under the Account URL textbox, type in a recognizable yet unique name – remember this name will form part of your TFS cloud instance. This means that every time you need to connect to your source control you will have provide a part of this name. I opted for almsifiso as shown below:
在“帐户URL”文本框中,键入一个可识别但唯一的名称-请记住,该名称将成为TFS云实例的一部分。 这意味着每次您需要连接到源代码管理时,都将提供此名称的一部分。 我选择了almsifiso ,如下所示:
Click “Create Account” to complete this step.
点击“创建帐户”以完成此步骤。
设置团队项目 ( Setup Team Project )
If you have setup both cloud-based TFS as well as on-premise TFS, you will concur that one of the benefit of using the cloud is that team explorer is not required to create a default team project. Instead, shortly after you have created your VSO account, you are redirected to “Create your first team project” page as shown below:
如果同时设置了基于云的TFS和本地TFS,您将同意使用云的好处之一是不需要使用团队资源管理器来创建默认的团队项目。 相反,在创建VSO帐户后不久,您将被重定向到“创建您的第一团队项目”页面,如下所示:
(This guide assumes that you have familiarised yourself with TFS architectural concepts such as Team Project, Team Project Collection, Teams, differences between process templates as well differences between version control systems available in VSO.)
(本指南假定您已熟悉TFS架构概念,例如团队项目,团队项目集合,团队,流程模板之间的差异以及VSO中可用的版本控制系统之间的差异。)
For the purposes of exercise – I have chosen Git version control system. I have also opted to include the README.md file which will become out first file to be checked into git source control.
为了便于练习,我选择了Git版本控制系统。 我还选择包括README.md文件,它将成为第一个要检查到git source control中的文件。
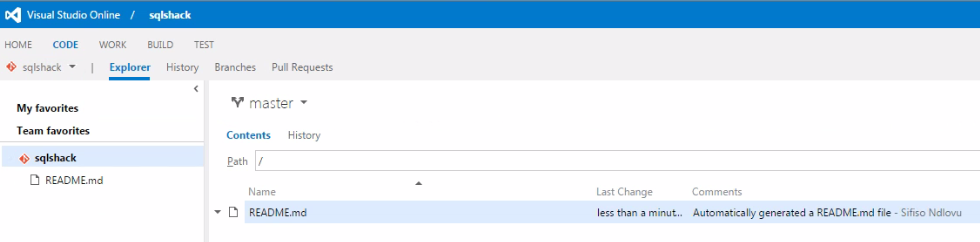
After you have clicked on the “Create project” button, you should be redirected to your web portal page. The code explorer page of your portal should consist of only the README.md file within the master repository as shown below:
单击“创建项目”按钮后,应将您重定向到您的Web门户页面。 门户的代码浏览器页面应仅由主存储库中的README.md文件组成,如下所示:
This concludes the installation section of this guide, the next section is configuration. Prior to moving onto the next section – ensure that you have a URL of your TFS site in your clipboard.
到此结束本指南的安装部分,下一部分是配置。 在进入下一部分之前–确保剪贴板中有TFS站点的URL。
You can do this by navigating on the right far-end of your code-explorer window.
您可以通过在代码浏览器窗口的右端导航来完成此操作。
Click on the Clone icon and copy out its content.
单击克隆图标,然后复制其内容。
组态 ( Configuration )
The details of the client machine I used for this configuration were as follows:
我用于此配置的客户端计算机的详细信息如下:
- Oracle Virtual Box 4.3.30 Oracle Virtual Box 4.3.30
- Windows 7 Ultimate 64 bit with SP 1 Windows 7 Ultimate 64位SP 1
- IE 10 IE 10
- Team Explorer for Visual Studio 2013 Visual Studio 2013的团队资源管理器
- SQL Server 2012 Express SQL Server 2012 Express
You don’t have to match my configuration but beware that the minimum version of visual studio required to connect to VSO is any edition of Visual Studio 2013.
您不必匹配我的配置,但是请注意,连接到VSO所需的Visual Studio的最低版本是Visual Studio 2013的任何版本。
将团队资源管理器连接到TFS ( Connect Team Explorer to TFS )
The first step towards configuring your development environment to integrate with VSO is to connect to your TFS cloud instance. This is done by launching Team Explorer for VS 2013.
配置开发环境以与VSO集成的第一步是连接到TFS云实例。 这是通过启动VS 2013的Team Explorer来完成的。
Navigate to Team menu and click “Connect to Team Foundation Server…”
导航到团队菜单,然后单击“连接到Team Foundation Server…”。
Click on the “Clone” link under the “Local Git Repositories” sub-heading.
单击“本地Git存储库”子标题下的“克隆”链接。
Paste the TFS url from your clipboard.
从剪贴板粘贴TFS网址。
(You can change path to your working directory by clicking ellipsis)
(您可以通过单击省略号来更改工作目录的路径)
Click the Clone button.
单击克隆按钮。
This is probably the first time you connect to your TFS cloud instance which means that you will be prompted to login with your Microsoft account. After you have signed in using your account – the cloning of your repository should be successful as shown below:
这可能是您第一次连接到TFS云实例,这意味着系统将提示您使用Microsoft帐户登录。 使用帐户登录后–克隆存储库应该如下所示:
Open your working directory to confirm that the README.md file was downloaded as shown below:
打开工作目录以确认README.md文件已下载,如下所示:
发展历程 ( Development )
Now that we have setup and configured our source control, we can now proceed to conduct our first development check-in. The first step towards achieving our first development check-in would be to configure user name and email address that will be used to synchronise with cloud-based git. Again, this article assumes that you are familiar with the architecture of the git source system. Git source system allows you to commit your changes on a local version and later synchronise with the online service (i.e. GITHUB, VSO etc.).
现在我们已经设置和配置了源代码控制,现在我们可以继续进行我们的第一次开发签入。 实现我们的第一个开发签到的第一步是配置用户名和电子邮件地址,该用户名和电子邮件地址将用于与基于云的git同步。 同样,本文假设您熟悉git源系统的体系结构。 Git源系统允许您在本地版本上提交更改,然后与在线服务(即GITHUB,VSO等)同步。
配置Git全局设置 ( Configure Git Global Settings )
In your Team Explorer window, click Configure as shown below:
在“团队资源管理器”窗口中,单击“配置”,如下所示:
Click update when you have provided the settings.
提供设置后,单击更新。
您的第一个DML T-SQL脚本签入 ( Your First DML T-SQL Script Check-In )
Launch SQL Server Express.
启动SQL Server Express。
Open new query and type SELECT ‘I love oranges!!’
打开新查询并输入SELECT'I love oranges !!'
Save the script as myfirstscript.sql underneath your git working directory.
将脚本另存为git工作目录下的myfirstscript.sql 。
Navigate back to Team Explorer and the newly saved script should now appear under Untracked Files sub-heading.
导航回Team Explorer,新保存的脚本现在应出现在Untracked Files子标题下。
Right click and choose the Add commandto include the script in your check-in. This will move the script under the Included Changes sub-heading
右键单击并选择添加命令以将脚本包括在签入中。 这会将脚本移动到“ 包含的更改”子标题下
Enter a commit message and click the Commit button.
输入提交消息,然后单击“ 提交”按钮。
When the commit process completes, click Sync to share your changes with VSO.
提交过程完成后,单击“同步”以与VSO共享您的更改。
When the Sync is complete, navigate back to the web portal and click on the code explorer. The T-SQL script should be listed as part of the contents of the master repository:
同步完成后,导航回Web门户并单击代码浏览器。 T-SQL脚本应作为主存储库内容的一部分列出:
结论 ( Conclusion )
In this article we’ve gone through the steps necessary to setup Visual Studio Online account, configure a Team Project that uses Git source control system, integrate Team Explorer 2013 with VSO, and finally check-in your first database file in both local and cloud-based source control system. What has been demonstrated in this exercise is very basic and therefore subsequent articles will be used to focus more on advanced features of VSO and Git, including, resolving merge conflicts, code-reviews and setting build agents against your source code check-ins.
在本文中,我们介绍了设置Visual Studio Online帐户,配置使用Git源代码控制系统的Team Project,将Team Explorer 2013与VSO集成以及最终在本地和云中签入您的第一个数据库文件所必需的步骤基于源的控制系统。 此练习中展示的内容非常基础,因此,后续文章将重点介绍VSO和Git的高级功能,包括解决合并冲突,代码审查以及针对源代码签入设置构建代理。
翻译自: https://www.sqlshack.com/sql-server-database-source-control-using-visual-studio-online-git/


 1067
1067

 被折叠的 条评论
为什么被折叠?
被折叠的 条评论
为什么被折叠?
 到【灌水乐园】发言


