When running the latest version of Windows 8 in a virtual machine in VMware Workstation, the shared folders feature doesn’t work because you can’t install VMware Tools. So, how are you supposed to transfer files between your VM and your Windows 7 host?
在VMware Workstation的虚拟机中运行最新版本的Windows 8时,共享文件夹功能不起作用,因为您无法安装VMware Tools。 因此,您应该如何在VM和Windows 7主机之间传输文件?
There is a way around this problem. You can share a folder on your Windows 7 host machine and then map that folder as a network drive in your Windows 8 virtual machine. We’ve shown you how to transfer files between a Windows 8 PC and a Windows 7 PC. This method uses that procedure, but there are also some settings you need to work with in VMware Workstation to ensure that you can both access your Windows 7 host machine and the internet through the VMware network connection.
有一个解决此问题的方法。 您可以在Windows 7主机上共享一个文件夹,然后将该文件夹映射为Windows 8虚拟机中的网络驱动器。 我们已经向您展示了如何在Windows 8 PC和Windows 7 PC之间传输文件。 此方法使用该过程,但是在VMware Workstation中还需要使用一些设置,以确保可以通过VMware网络连接访问Windows 7主机和Internet。
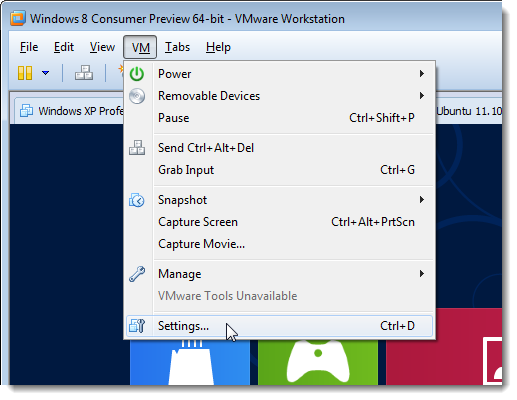
Start your Windows 8 virtual machine in VMware Workstation. When you’ve logged into Windows 8, select Settings from the VM menu.
在VMware Workstation中启动Windows 8虚拟机。 登录Windows 8后,从VM菜单中选择Settings。
NOTE: You’ll have to press Ctrl + Alt to get the mouse to access items outside of the virtual machine.
注意:您必须按Ctrl + Alt才能使鼠标访问虚拟机外部的项目。
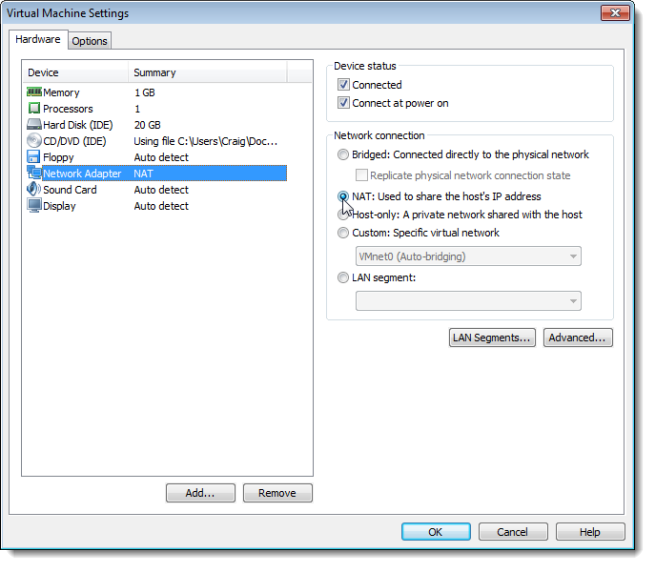
The Virtual Machine Settings dialog box displays. On the Hardware tab, select Network Adapter. Make sure the NAT option is selected in the Network connection box. Click OK to accept your changes and close the dialog box.
显示“虚拟机设置”对话框。 在“硬件”选项卡上,选择“网络适配器”。 确保在“网络连接”框中选择了NAT选项。 单击“确定”接受更改,然后关闭对话框。
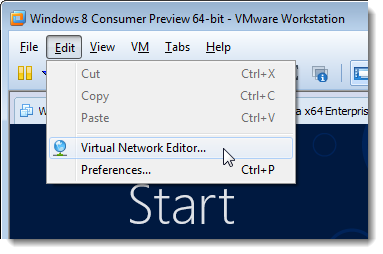
Select Virtual Network Editor from the Edit menu.
从编辑菜单中选择虚拟网络编辑器。
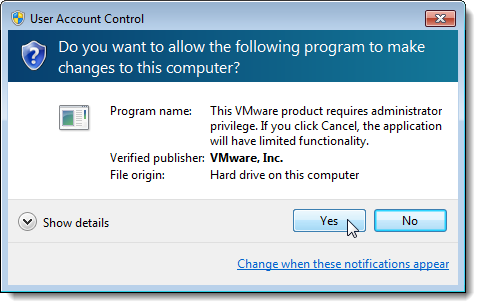
If the User Account Control dialog box displays, click Yes to continue.
如果显示“用户帐户控制”对话框,请单击“是”继续。
NOTE: You may not see this dialog box, depending on your User Account Control settings.
注意:根据您的“用户帐户控制”设置,您可能看不到此对话框。
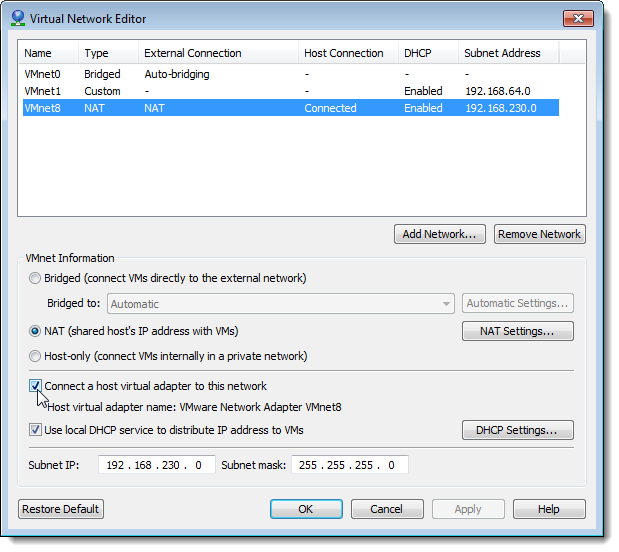
Select the NAT type of network connection in the list of connections at the top of the Virtual Network Editor dialog box. Make sure the Connect a host virtual adapter to this network check box is selected. The name of your host virtual adapter displays below the check box item. The Use local DHCP service to distribute IP address to VMs check box should also be selected.
在“虚拟网络编辑器”对话框顶部的连接列表中选择网络连接的NAT类型。 确保选中“将主机虚拟适配器连接到此网络”复选框。 主机虚拟适配器的名称显示在复选框项下方。 还应该选中“使用本地DHCP服务向IP分配IP地址”复选框。
NOTE: This is the name of the connection displayed when you run the “ipconfig” command on your Windows 7 host machine to check the IP address, as we’ve previously described.
注:这是当你在Windows 7主机上运行“IPCONFIG”命令检查IP地址,作为连接的名称显示我们前面已经描述。
To connect the Windows 8 virtual machine and Windows 7 host machine, you must now share a folder on your Windows 7 host machine and then map to that folder in the Windows 8 virtual machine. For instructions on how to do this, see our article about transferring files between a Windows 8 PC and a Windows 7 PC.
要连接Windows 8虚拟机和Windows 7主机,您现在必须在Windows 7主机上共享一个文件夹,然后映射到Windows 8虚拟机中的该文件夹。 有关如何执行此操作的说明,请参阅有关在Windows 8 PC和Windows 7 PC之间传输文件的文章。


 2万+
2万+

 被折叠的 条评论
为什么被折叠?


