


介绍 (Introduction)
I’ve introduced how to build React App with .NET Core in Part 1. Now we start to touch the fun part, React-Redux. There are states everywhere in an application. Data morphing over time involves complexity. To handle state in React, Redux is often used as the solution. In this article, we’ll rewrite Global Weather with react-redux step by step.
我已经在第1部分中介绍了如何使用.NET Core构建React App。 现在我们开始涉及有趣的部分,React-Redux。 应用程序中到处都有状态。 随时间变化的数据会涉及复杂性。 为了处理React中的状态,经常使用Redux作为解决方案。 在本文中,我们将逐步使用react-redux重写Global Weather。
Redux (Redux)
Redux is a state management tool. While it’s mostly used with React, it can be used with any other JavaScript/TypeScript framework or library. In an app, the data in a component should live in just one component. So sharing data among sibling components becomes difficult.
Redux是一种状态管理工具。 尽管它主要与React一起使用,但它可以与任何其他JavaScript / TypeScript框架或库一起使用。 在应用程序中,组件中的数据应仅存在于一个组件中。 因此,在同级组件之间共享数据变得困难。
For instance, in React, to share data among siblings, a state has to live in the parent component. A method for updating this state is provided by this parent component and passed as props to these sibling components. This is exactly what happens in our Global Weather React app. Weather View Model stays in Home component (parent component), and pass it to WeatherDetails component as properties. The state will have to be lifted up to the nearest parent component and to the next until it gets to an ancestor that is common to both components that need the state and then it is passed down. This makes the state difficult to maintain and less predictable. This is why we need a state management tool like Redux that makes it easier to maintain these states.
例如,在React中,要在同级之间共享数据,状态必须存在于父组件中。 此父组件提供了一种更新此状态的方法,并将其作为道具传递给这些同级组件。 这正是我们的Global Weather React应用程序发生的情况。 Weather View Model停留在Home组件(父组件)中,并将其作为属性传递给WeatherDetails组件。 必须将状态提升到最接近的父组件,再提升到下一个父组件,直到到达需要该状态的两个组件所共有的祖先,然后将其传递给下一个父组件。 这使得状态难以维护且难以预测。 这就是为什么我们需要像Redux这样的状态管理工具,以便更轻松地维护这些状态。
There are three parts in Redux: actions, store and reducers.
Redux由三部分组成:动作,存储和缩减器。
- Actions are events. They are the way to send data from application to Redux store. 行动就是事件。 它们是将数据从应用程序发送到Redux存储的方式。
- Reducers are functions that take the current state of an application, perform an action and returns a new state. 精简器是获取应用程序当前状态,执行操作并返回新状态的函数。
- The store holds the application state. There is only one store in a Redux application. 商店保存应用程序状态。 Redux应用程序中只有一家商店。
Now we have concepts of Redux. Let’s rewrite Global Weather app with Redux.
现在我们有了Redux的概念。 让我们用Redux重写Global Weather应用。
Visual Studio程式码 (Visual Studio Code)
In this article, coding will be focused on front end React, “weatherclient”. So I’ll use Visual Studio Code rather than Visual Studio. Visual Studio Code is a lightweight but powerful source code editor which runs on your desktop and is available for Windows, macOS and Linux. It comes with built-in support for JavaScript, TypeScript and Node.js and has a rich ecosystem of extensions for other languages (such as C++, C#, Java, Python, PHP, Go) and runtimes (such as .NET and Unity). You can download Visual Studio Code from here.
在本文中,编码将集中在前端React,即“ weatherclient ”。 因此,我将使用Visual Studio Code而不是Visual Studio。 Visual Studio Code是一个轻量级但功能强大的源代码编辑器,可在您的桌面上运行,并且可用于Windows,macOS和Linux。 它具有对JavaScript,TypeScript和Node.js的内置支持,并具有丰富的其他语言(例如C ++,C#,Java,Python,PHP,Go)和运行时(例如.NET和Unity)扩展的生态系统。 。 您可以从此处下载Visual Studio代码。
Open weatherclient folder from Visual Studio Code.
从Visual Studio Code中打开weatherclient文件夹。

Run npm install in powershell terminal.
在Powershell终端中运行npm install 。
Then go to parent folder, “GlobalWeatherReact”, to start ASP.NET core from command line.
然后转到父文件夹“ GlobalWeatherReact ”,从命令行启动ASP.NET Core。
dotnet run
Install “Debugger Chrome” plugin, and add launch configuration.
安装“ Debugger Chrome ”插件,并添加启动配置。

Click Debug button, GlobalWeather app starts running with Chrome.
单击“ 调试”按钮, GlobalWeather应用将开始在Chrome中运行。

It’s very easy to debug typescript/javascript code from Visual Studio Code. I’ll show you how to do it later.
从Visual Studio Code调试Typescript / javascript代码非常容易。 稍后我将向您展示如何做。
安装React-Redux和中间件 (Install React-Redux and Middleware)
Go to “weatherclient” folder to install libraries we need.
转到“ weatherclient ”文件夹以安装我们需要的库。
React-Redux (React-Redux)
React-Redux is official react binding for redux.
React-Redux是Redux的官方React绑定。
npm install react-redux @types react-redux --save
Redux-thunk (Redux-thunk)
Thunks are the recommended middleware for basic Redux side effects logic, including complex synchronous logic that needs access to the store, and simple async logic like AJAX requests. Redux Thunk middleware allows you to write action creators that return a function instead of an action. The thunk can be used to delay the dispatch of an action, or to dispatch only if a certain condition is met.
Thunk是基本Redux副作用逻辑的推荐中间件,其中包括需要访问存储的复杂同步逻辑以及诸如AJAX请求之类的简单异步逻辑。 Redux Thunk中间件使您可以编写返回函数而不是操作的操作创建者。 重击程序可用于延迟操作的分发,或者仅在满足特定条件时调度。
npm install redux-thunk --save
Axios和Redux-Axios-middlware (Axios and redux-axios-middlware)
Axios is a library to make http request. As with Fetch, Axios is promise-based. However, it provides a more powerful and flexible feature set. Advantages over the native Fetch API include:
Axios是一个发出http请求的库。 与Fetch一样,Axios也基于承诺。 但是,它提供了更强大,更灵活的功能集。 与本地Fetch API相比,优势包括:
- Request and response interception 请求和响应拦截
- Streamlined error handling 简化的错误处理
- Protection against XSRF 防止XSRF
- Support for upload progress 支持上传进度
- Response timeout 响应超时
- The ability to cancel requests 取消请求的能力
- Support for older browsers 支持旧版浏览器
- Automatic JSON data transformation 自动JSON数据转换
Redux-Axios中间件 (Redux-axios-middleware)
Redux middleware for fetching data with axios HTTP client.
Redux中间件,用于使用axios HTTP客户端获取数据。
npm install axios redux-axios-middleware --save
创建动作 (Creating Actions)
From the work we’ve already done, we know that our state needs to have 2 properties of state, countries, and current weather for the specified location.
从我们已经完成的工作中,我们知道我们的州需要具有2个州,国家和指定位置的当前天气的属性。
So let’s started create action types. Create an types/actions.ts file to container our action types.
因此,让我们开始创建动作类型。 创建一个type / actions.ts文件以包含我们的操作类型。
import { AxiosRequestConfig, AxiosResponse, AxiosError } from 'axios';
import { Weather } from "../types/Weather"
export type AppActions =
    {
        type: 'GET_WEATHER',
    } | {
        type: 'GET_WEATHER_SUCCESS',
        payload: Weather
    } | {
        type: 'GET_WEATHER_FAIL',
        error: string
    }  | {
        type: 'GET_COUNTRIES',
        payload: {
            request: AxiosRequestConfig
            }
    } | {
        type: 'GET_COUNTRIES_SUCCESS',
        payload: AxiosResponse
    } | {
        type: 'GET_COUNTRIES_FAIL',
        error: AxiosError
    };
export const GET_WEATHER = 'GET_WEATHER';
export const GET_WEATHER_SUCCESS = 'GET_WEATHER_SUCCESS';
export const GET_WEATHER_FAIL = 'GET_WEATHER_FAIL';
export const GET_COUNTRIES = 'GET_COUNTRIES';
export const GET_COUNTRIES_SUCCESS = 'GET_COUNTRIES_SUCCESS';
export const GET_COUNTRIES_FAIL = 'GET_COUNTRIES_FAIL';
Then create an actions/actions.ts file to container our action creators.
然后创建一个action / actions.ts文件,以容纳我们的动作创建者。
getCountries action creator:
getCountries动作创建者:
import { AppActions } from "../types/actions";
import { Constants } from "../Constants";
export const getCountries = (): AppActions => ({
    type: "GET_COUNTRIES",
    payload: {
        request: {
            url: `${Constants.locationAPIUrl}/countries?apikey=${Constants.apiKey}`
        }
    }
});
With redux axios middleware, we just need configure axios request with the correct url.
使用redux axios中间件,我们只需要使用正确的URL配置axios请求。
getWeather action creator:
getWeather动作创建者:
export const getWeather = (countryCode: string, searchText: string) => {
    return async (dispatch: ThunkDispatch<any, any, AppActions>) => {
        try {
            var res = await Axios.get(`${Constants.locationAPIUrl}/cities/
                      ${countryCode}/search?apikey=${Constants.apiKey}&q=${searchText}`);
            const cities = res.data as City[];
            var weather = {} as Weather;
            if (cities.length > 0) {
                const city = cities[0];
                weather = await getCurrentWeather(city);
            }

            return dispatch({
                type: "GET_WEATHER_SUCCESS",
                payload: weather
            });
        }
        catch (e) {
            return dispatch({
                type: "GET_WEATHER_FAIL",
                error: e.isAxiosError ? e.message : JSON.stringify(e)
            });
        }
    }
}
export async function getCurrentWeather(city: City): Promise<Weather> {
    const res = await Axios.get(`${Constants.currentConditionsAPIUrl}/
                               ${city.Key}?apikey=${Constants.apiKey}`);
    const currentConditions = res.data as CurrentCondition[];
    if (currentConditions.length > 0) {
        return new Weather(currentConditions[0], city);
    }
    return {} as Weather;
}
The code logic is not new, just combine some functions was in Home component. But you can see we’re using Thunk Dispatch here. A thunk is a function that wraps an expression to delay its evaluation. Return value from the action creator will be return value of dispatch itself. This is convenient for orchestrating an asynchronous control flow with thunk action creators dispatching each other and returning Promises to wait for each other’s completion.
代码逻辑不是新的,只是结合了一些功能在Home组件中。 但是您可以看到我们在这里使用Thunk Dispatch。 thunk是包装表达式以延迟其求值的函数。 动作创建者的返回值将是调度本身的返回值。 这很方便编排动作创建者相互调度并返回Promises来等待彼此完成的情况,从而协调异步控制流。
Also, this creator function returns different action type and payload depends on the fetch result.
同样,此创建器函数返回不同的操作类型,并且有效负载取决于获取结果。
创建减速器 (Creating Reducers)
With action creators defined, we now write reducers that take this action and return a new state of our application.
定义了动作创建者后,我们现在编写执行该动作并返回应用程序新状态的化简器。
Create a reducers/countriesReducer.ts file.
创建一个reducers / countriesReducer.ts文件。
import { Country } from "../types/Country";
import { AppActions } from "../types/actions";
import * as Actions from "../types/actions";

const countriesReducerDefaultState: Country [] = [];

const countriesReducer = (state = countriesReducerDefaultState, action: AppActions):
         Country [] => {
    switch (action.type) {
        case Actions.GET_COUNTRIES_SUCCESS:
            const data = action.payload.data;
            return data as Country [];
        case Actions.GET_COUNTRIES_FAIL:
            return state;
        default:
            return state;
    }
};
export { countriesReducer };
Create reducers/weatherReducer.ts file.
创建reducers / weatherReducer.ts文件。
import { Weather } from "../types/Weather";
import { AppActions } from "../types/actions";
import * as Actions from "../types/actions";
const weatherReducerDefaultState: Weather = {};
const weatherReducer = (state = weatherReducerDefaultState, action: AppActions): Weather => {
    switch (action.type) {
        case Actions.GET_WEATHER_SUCCESS:
            const weather = action.payload;
            return weather;

        case Actions.GET_WEATHER_FAIL:
            return {
                error: action.error
            } as Weather;

        default:
            return state;
    }
};
export { weatherReducer };
配置商店 (Configure the Store)
Essentially, the redux store does the following:
本质上,redux存储执行以下操作:
- Holds application state 保持应用程序状态
Allows access to state via
getState(). ThegetStatemethod returns the current state tree of your app.允许通过
getState()访问状态。getState方法返回应用程序的当前状态树。Allows state to be updated via
dispatch(action). Thedispatchmethod “dispatches” an action, consequently triggering a state change.允许通过
dispatch(action)更新状态。dispatch方法“派发”动作,因此触发状态更改。Registers listeners via
subscribe(listener). Thesubscribe(listener)adds a change listener.通过
subscribe(listener)注册侦听器。subscribe(listener)添加一个更改侦听器。Handles unregistering of listeners via the function returned by
subscribe(listener)通过
subscribe(listener)返回的函数处理监听器的注销
Let’s create store/configureStore.ts with:
让我们使用以下命令创建store / configureStore.ts :
import axios, {AxiosRequestConfig} from 'axios';
import thunk, { ThunkMiddleware } from "redux-thunk";
import { createStore, combineReducers, applyMiddleware } from "redux";
import axiosMiddleware from 'redux-axios-middleware';
import { AppActions } from "../types/actions";
import { countriesReducer } from "../reducers/countriesReducer";
import { weatherReducer } from "../reducers/weatherReducer";
export const rootReducer = combineReducers({
    countries: countriesReducer,
    weather: weatherReducer
});
const config: AxiosRequestConfig = {
    responseType: 'json'
};
const defaultClient = axios.create(config);
export type AppState = ReturnType<typeof rootReducer>;
export const store = createStore(rootReducer, applyMiddleware(axiosMiddleware(defaultClient),
                     thunk as ThunkMiddleware<AppState, AppActions>));
Now change our app’s App.tsx to include <Provider />, configureStore, set up our store and wrap our app to pass the store down as props:
现在,更改应用程序的App.tsx以包括<Provider /> , configureStore ,设置商店并包装我们的应用程序以将商店作为道具传递:
import React from 'react';
import "./App.css";
import { Provider } from "react-redux";
import { store } from './store/configureStore';
import AppRouter from "./router";
const App: React.FC = () => {
    return (
        <Provider store={store}>
            <AppRouter />
        </Provider>
    );
}
export default App;
在组件中使用Redux存储和方法 (Use the Redux Store and Methods in Components)
Now we need map action creation dispatch to component, and connect app state to component.
现在我们需要将映射动作创建分派到组件,并将应用程序状态连接到组件。
家庭组件 (Home Component)
Before we using redux, we fetch all countries in ComponentDidMount of Home component, then pass country array to Form component as property.
在使用redux之前,我们先获取Home组件的ComponentDidMount的所有国家,然后将country数组作为属性传递给Form组件。
Below is the current render method of Home component. Different components sharing data via the parent component.
下面是Home组件的当前渲染方法。 不同的组件通过父组件共享数据。
render() {
    return (
        <div className="container content panel">
            <div className="container">
                <div className="row">
                    <div className="form-container">
                        <WeatherDetails weather={this.state.weather} />
                        <Form getWeather={this.getWeather} countries={this.state.countries} />
                    </div>
                </div>
            </div>
        </div>
    );
}
With redux, we don’t need this approach any more. The component can connect to app state (shared data) from itself.
使用redux,我们不再需要这种方法。 该组件可以从自身连接到应用状态(共享数据)。
We change render method as the below:
我们将render方法更改如下:
render() {
        return (
            <div className="container content panel">
                <div className="container">
                    <div className="row">
                        <div className="form-container">
                            <WeatherDetails />
                            <Form  />
                        </div>
                    </div>
                </div>
            </div>
        );
}
And also remove all API methods, like getCountries, getCity, getWeather, … We’ll implement these functionalities with redux actions.
并删除所有API方法,例如getCountries , getCity , getWeather 。我们将通过redux操作实现这些功能。
First, add IDispatch interface for Home component.
首先,为Home组件添加IDispatch接口。
interface IDispatchProps {
    getCountries: () => void;
}
Then change Home component to extend this properties interface.
然后更改Home组件以扩展此属性接口。
class Home extends React.Component<IDispatchProps, IState>
Connect is what allows us to connect a component to Redux's store, and getCountries is the action creator we wrote earlier.
Connect是使我们能够将组件连接到Redux的商店的方法,而getCountries是我们先前编写的操作创建者。
Map IDispatchProp to Action Creator with Thunk middleware.
使用Thunk中间件将IDispatchProp映射到Action Creator。
class Home extends React.Component<IDiconst mapDispatchToProps =
    (dispatch: ThunkDispatch<any, any, AppActions>): IDispatchProps => ({
    getCountries: bindActionCreators(getCountries, dispatch),
});
export default connect(null, mapDispatchToProps)(Home);
表单组件 (Form Component)
Form component needs to do two things. Map AppState.countries to the form property, and connect getWeather action.
Form组件需要做两件事。 地图AppState.countries到窗体属性,并连接getWeather行动。
interface IFormProps {
    countries: Country[];
}
interface IDispatchProps {
    getWeather: (country: string, city: string) => void;
}
interface IProps extends IFormProps, IDispatchProps {}
Connect to Form component.
连接到Form组件。
export default connect (mapStateToProps, mapDispatchToProps) (Form)
Change handleSubmit function to use dispatch property.
更改handleSubmit函数以使用dispatch属性。
handleSubmit = async (e: any) => {
        e.preventDefault();
        if (this.state.searchText && this.state.country)
            this.props.getWeather(this.state.country.ID, this.state.searchText);
}
WeatherDetails组件 (WeatherDetails Component)
Map AppState.weather to component property in WeatherDetails component.
将AppState.weather到WeatherDetails组件中的组件属性。
const mapStateToProps = (state: AppState) : IProp =>({
    weather : state.weather
});
export default connect (mapStateToProps) (WeatherDetails)
That’s it. Run “npm run build” in terminal to make sure all is compilable.
而已。 在终端中运行“ npm run build ”以确保所有内容都是可编译的。

在Visual Studio Code中调试React App (Debug React App in Visual Studio Code)
As I said before, install “Debugger for Chrome” plugin and create a Json configuration. For example:
如我之前所说,安装“ Debugger for Chrome ”插件并创建一个Json配置。 例如:
{
    "version": "0.2.0",
    "configurations": [
        {
            "type": "chrome",
            "request": "launch",
            "name": "Launch Chrome against localhost",
            "url": "https://localhost:5001",
            "webRoot": "${workspaceFolder}"
        }
    ]
}
Now you need start server first, for our app is .NetCore API. We can do it in command line.
现在您需要首先启动服务器,因为我们的应用程序是.NetCore API。 我们可以在命令行中完成。
Go to GloablWeatherReact (ASP.NET Core) project folder, run “dotnet run”.
转到GloablWeatherReact (ASP.NET Core)项目文件夹,运行“ dotnet run ”。

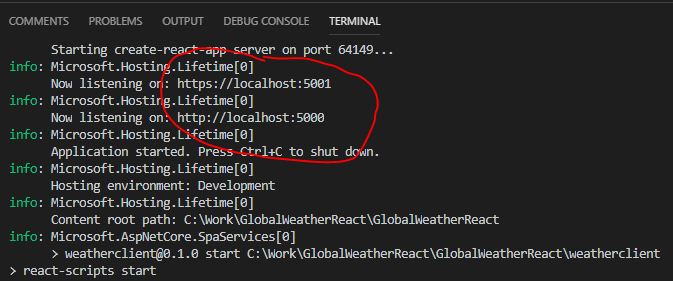
You can see the development server is started at https://localhots:5001 and http://localhost:5000.
您可以看到开发服务器从https:// localhots:5001和http:// localhost:5000启动 。
That gives you an idea of how to set url in Chrome Debugger configuration.
这样您就可以了解如何在Chrome调试器配置中设置url。
You can check all launch settings from GloblaWeatherReact/properties/launchSettings.json.
您可以从GloblaWeatherReact / properties / launchSettings.json检查所有启动设置。
Now we set breakpoints at actions/actions.ts. Then click the launch button.
现在我们在action / actions.ts设置断点。 然后单击启动按钮。

When you select a country and input location name, click “Go”, the break point is getting triggered.
当您选择一个国家并输入位置名称时,单击“ 转到 ”,将触发断点。


You can see call stack and add whatever object to watch.
您可以看到调用堆栈并添加任何要监视的对象。
Ok. Let it go, click Continue button, or press “F5”.
好。 放开手,单击“ 继续”按钮,或按“ F5 ”。

It’s working perfectly.
运行良好。
GlobalWeatherReact GitHub (GlobalWeatherReact GitHub)
Global Weather React App now is available on GitHub. The master branch is implemented by react, and redux branch is for react-redux implementation.
GitHub上现在可以使用Global Weather React App。 master分支由react实现,redux分支用于react-redux实现。
结论 (Conclusion)
In this article, we learned how to integrate rest API calls into React-Redux for client-side state management, using Redux to manage the data instead of directly accessing component state. Keep in mind that the whole purpose of Redux is to manage a global state for us, and gives react app really cool superpowers. We also learned how to use an awesome VS Code plugin for debugging React-Redux apps.
在本文中,我们学习了如何将其余API调用集成到React-Redux中以进行客户端状态管理,如何使用Redux来管理数据而不是直接访问组件状态。 请记住,Redux的全部目的是为我们管理一个全局状态,并为React应用赋予真正的超能力。 我们还学习了如何使用很棒的VS Code插件来调试React-Redux应用程序。
翻译自: https://www.codeproject.com/Articles/5251155/Global-Weather-React-App-with-ASP-NET-Core-3-0-Par


 770
770

 被折叠的 条评论
为什么被折叠?
被折叠的 条评论
为什么被折叠?
 到【灌水乐园】发言


