


前言:使用onnxruntime 加载YOLOV5的onnx模型,基于python版本的http.server搭建mjpg-streamer服务器,使用opencv打开电脑摄像头或RTSP流等完成目标检测后上传到mjpg-streamer后,就可以通过 浏览器实时观看检测后的视频流。
一、使用python版本的onnxruntime 加载yolov5模型
import cv2
import numpy as np
import onnxruntime as ort

class yolov5:
    def __init__(self, modelpath, confThreshold=0.5, nmsThreshold=0.5, objThreshold=0.5):
        with open('class.names', 'rt') as f:
            self.classes = f.read().rstrip('\n').split('\n')
        self.num_classes = len(self.classes)
        if modelpath.endswith('6.onnx'):
            self.inpHeight, self.inpWidth = 1280, 1280
            anchors = [[19, 27, 44, 40, 38, 94], [96, 68, 86, 152, 180, 137], [140, 301, 303, 264, 238, 542], [436, 615, 739, 380, 925, 792]]
            self.stride = np.array([8., 16., 32., 64.])
        else:
            self.inpHeight, self.inpWidth = 640, 640
            anchors = [[10, 13, 16, 30, 33, 23], [30, 61, 62, 45, 59, 119], [116, 90, 156, 198, 373, 326]]
            self.stride = np.array([8., 16., 32.])
        self.nl = len(anchors)
        self.na = len(anchors[0]) // 2
        self.grid = [np.zeros(1)] * self.nl
        self.anchor_grid = np.asarray(anchors, dtype=np.float32).reshape(self.nl, -1, 2)
        so = ort.SessionOptions()
        so.log_severity_level = 3
        self.net = ort.InferenceSession(modelpath, so)
        self.confThreshold = confThreshold
        self.nmsThreshold = nmsThreshold
        self.objThreshold = objThreshold
        # self.inpHeight, self.inpWidth = (self.net.get_inputs()[0].shape[2], self.net.get_inputs()[0].shape[3])

    def resize_image(self, srcimg, keep_ratio=True):
        top, left, newh, neww = 0, 0, self.inpWidth, self.inpHeight
        if keep_ratio and srcimg.shape[0] != srcimg.shape[1]:
            hw_scale = srcimg.shape[0] / srcimg.shape[1]
            if hw_scale > 1:
                newh, neww = self.inpHeight, int(self.inpWidth / hw_scale)
                img = cv2.resize(srcimg, (neww, newh), interpolation=cv2.INTER_AREA)
                left = int((self.inpWidth - neww) * 0.5)
                img = cv2.copyMakeBorder(img, 0, 0, left, self.inpWidth - neww - left, cv2.BORDER_CONSTANT,
                                         value=(114, 114, 114))  # add border
            else:
                newh, neww = int(self.inpHeight * hw_scale), self.inpWidth
                img = cv2.resize(srcimg, (neww, newh), interpolation=cv2.INTER_AREA)
                top = int((self.inpHeight - newh) * 0.5)
                img = cv2.copyMakeBorder(img, top, self.inpHeight - newh - top, 0, 0, cv2.BORDER_CONSTANT,
                                         value=(114, 114, 114))
        else:
            img = cv2.resize(srcimg, (self.inpWidth, self.inpHeight), interpolation=cv2.INTER_AREA)
        return img, newh, neww, top, left

    def _make_grid(self, nx=20, ny=20):
        xv, yv = np.meshgrid(np.arange(ny), np.arange(nx))
        return np.stack((xv, yv), 2).reshape((-1, 2)).astype(np.float32)

    def preprocess(self, img):
        img = cv2.cvtColor(img, cv2.COLOR_BGR2RGB)
        img = img.astype(np.float32) / 255.0
        return img

    def postprocess(self, frame, outs, padsize=None):
        frameHeight = frame.shape[0]
        frameWidth = frame.shape[1]
        newh, neww, padh, padw = padsize
        ratioh, ratiow = frameHeight / newh, frameWidth / neww
        # Scan through all the bounding boxes output from the network and keep only the
        # ones with high confidence scores. Assign the box's class label as the class with the highest score.

        confidences = []
        boxes = []
        classIds = []
        for detection in outs:
            if detection[4] > self.objThreshold:
                scores = detection[5:]
                classId = np.argmax(scores)
                confidence = scores[classId] * detection[4]
                if confidence > self.confThreshold:
                    center_x = int((detection[0] - padw) * ratiow)
                    center_y = int((detection[1] - padh) * ratioh)
                    width = int(detection[2] * ratiow)
                    height = int(detection[3] * ratioh)
                    left = int(center_x - width * 0.5)
                    top = int(center_y - height * 0.5)

                    confidences.append(float(confidence))
                    boxes.append([left, top, width, height])
                    classIds.append(classId)
        # Perform non maximum suppression to eliminate redundant overlapping boxes with
        # lower confidences.
        # indices = cv2.dnn.NMSBoxes(boxes, confidences, self.confThreshold, self.nmsThreshold).flatten()
        indices = cv2.dnn.NMSBoxes(boxes, confidences, self.confThreshold, self.nmsThreshold)
        for i in indices:
            box = boxes[i]
            left = box[0]
            top = box[1]
            width = box[2]
            height = box[3]
            frame = self.drawPred(frame, classIds[i], confidences[i], left, top, left + width, top + height)
        return frame

    def drawPred(self, frame, classId, conf, left, top, right, bottom):
        # Draw a bounding box.
        cv2.rectangle(frame, (left, top), (right, bottom), (255, 0, 0), thickness=4)

        label = '%.2f' % conf
        label = '%s:%s' % (self.classes[classId], label)

        # Display the label at the top of the bounding box
        labelSize, baseLine = cv2.getTextSize(label, cv2.FONT_HERSHEY_SIMPLEX, 0.5, 1)
        top = max(top, labelSize[1])
        # cv.rectangle(frame, (left, top - round(1.5 * labelSize[1])), (left + round(1.5 * labelSize[0]), top + baseLine), (255,255,255), cv.FILLED)
        cv2.putText(frame, label, (left, top - 10), cv2.FONT_HERSHEY_SIMPLEX, 1, (0, 255, 0), thickness=2)
        return frame

    def detect(self, srcimg):
        img, newh, neww, padh, padw = self.resize_image(srcimg)
        img = self.preprocess(img)
        # Sets the input to the network
        blob = np.expand_dims(np.transpose(img, (2, 0, 1)), axis=0)

        outs = self.net.run(None, {self.net.get_inputs()[0].name: blob})[0].squeeze(axis=0)

        # inference output
        row_ind = 0
        for i in range(self.nl):
            h, w = int(img.shape[0] / self.stride[i]), int(img.shape[1] / self.stride[i])
            length = int(self.na * h * w)
            if self.grid[i].shape[2:4] != (h, w):
                self.grid[i] = self._make_grid(w, h)

            outs[row_ind:row_ind + length, 0:2] = (outs[row_ind:row_ind + length, 0:2] * 2. - 0.5 + np.tile(
                self.grid[i], (self.na, 1))) * int(self.stride[i])
            outs[row_ind:row_ind + length, 2:4] = (outs[row_ind:row_ind + length, 2:4] * 2) ** 2 * np.repeat(
                self.anchor_grid[i], h * w, axis=0)
            row_ind += length
        srcimg = self.postprocess(srcimg, outs, padsize=(newh, neww, padh, padw))
        return srcimg
二、基于http.server搭建mjpg-streamer服务器
import logging
import socketserver
from threading import Condition, Thread
from PIL import Image
import cv2
import traceback
import io
import time
from http.server import BaseHTTPRequestHandler, HTTPServer
from yolo import yolov5
import threading


class StreamingOutput(object):
    def __init__(self):
        self.frame = None
        self.condition = Condition()

    def write(self, frame):
        with self.condition:
            self.frame = frame
            self.condition.notify_all()


class StreamingHandler(BaseHTTPRequestHandler):
    def do_GET(self):
        # 自定义网站访问地址,修改self.path,默认http://ip:8000/stream.mjpg
        if self.path == '/stream.mjpg':
            self.send_response(200)
            self.send_header('Age', 0)
            self.send_header('Cache-Control', 'no-cache, private')
            self.send_header('Pragma', 'no-cache')
            self.send_header('Content-Type', 'multipart/x-mixed-replace; boundary=FRAME')
            self.end_headers()
            try:
                while True:
                    with output.condition:
                        output.condition.wait()
                        frame = output.frame
                    self.wfile.write(b'--FRAME\r\n')
                    self.send_header('Content-Type', 'image/jpeg')
                    self.send_header('Content-Length', len(frame))
                    self.end_headers()
                    self.wfile.write(frame)
                    self.wfile.write(b'\r\n')
            except Exception as e:
                traceback.print_exc()
                logging.warning(
                    'Removed streaming client %s: %s',
                    self.client_address, str(e))
        else:
            self.send_error(404)
            self.end_headers()


class StreamingServer(socketserver.ThreadingMixIn, HTTPServer):
    allow_reuse_address = True
    daemon_threads = True


class Camera:
    def __init__(self, output, width, height, framerate, url):
        self.output = output
        self.width = width
        self.height = height
        self.framerate = framerate
        self.url = url

    def __enter__(self):
        # 相机或rtsp流打开路径,参数0表示打开笔记本的内置摄像头

        self.cap = cv2.VideoCapture(self.url)
        self.cap.set(cv2.CAP_PROP_FRAME_WIDTH, self.width)
        self.cap.set(cv2.CAP_PROP_FRAME_HEIGHT, self.height)
        self.stop_capture = False
        self.thread = Thread(target=self.capture)
        self.thread.start()
        return self

    def __exit__(self, exc_type, exc_value, traceback):
        self.stop_capture = True
        self.thread.join()
        self.cap.release()

    def getIniVal(self, secname, keyname, defVal='', inifile='.\\para.ini'):
        alines = open(inifile, 'r', errors='ignore').readlines()
        findsec = 0
        for linec in alines:
            if linec.find('[' + secname + ']') >= 0:
                findsec = 1
            if linec.find(keyname + '=') >= 0 and findsec == 1:
                return linec[len(keyname) + 1:].strip()
        return defVal

    def capture(self):
        # 实例化一个yolov5对象
        yolonet = yolov5(modelpath='weights/yolov5x.onnx', confThreshold=0.3, nmsThreshold=0.5,objThreshold=0.3)
        frame_duration = 1. / self.framerate
        while not self.stop_capture:
            start = time.time()
            ret, frame = self.cap.read()
            if ret:
                frame = cv2.cvtColor(frame, cv2.COLOR_BGR2RGB)
                srcimg = yolonet.detect(frame)
                img = Image.fromarray(srcimg)
                img.save(self.output, format='JPEG')
            elapsed = time.time() - start
            logging.debug("Frame acquisition time: %.2f" % elapsed)
            if elapsed < frame_duration:
                time.sleep(frame_duration - elapsed)


try:
    output = StreamingOutput()
    # 可以修改视频的fps,宽度和高度
    with Camera(output, 640, 480, 25, url=0) as camera:
        # 访问地址和端口
        address = ('', 8000)
        server = StreamingServer(address, StreamingHandler)
        server.serve_forever()
except KeyboardInterrupt:
    pass
三、运行程序
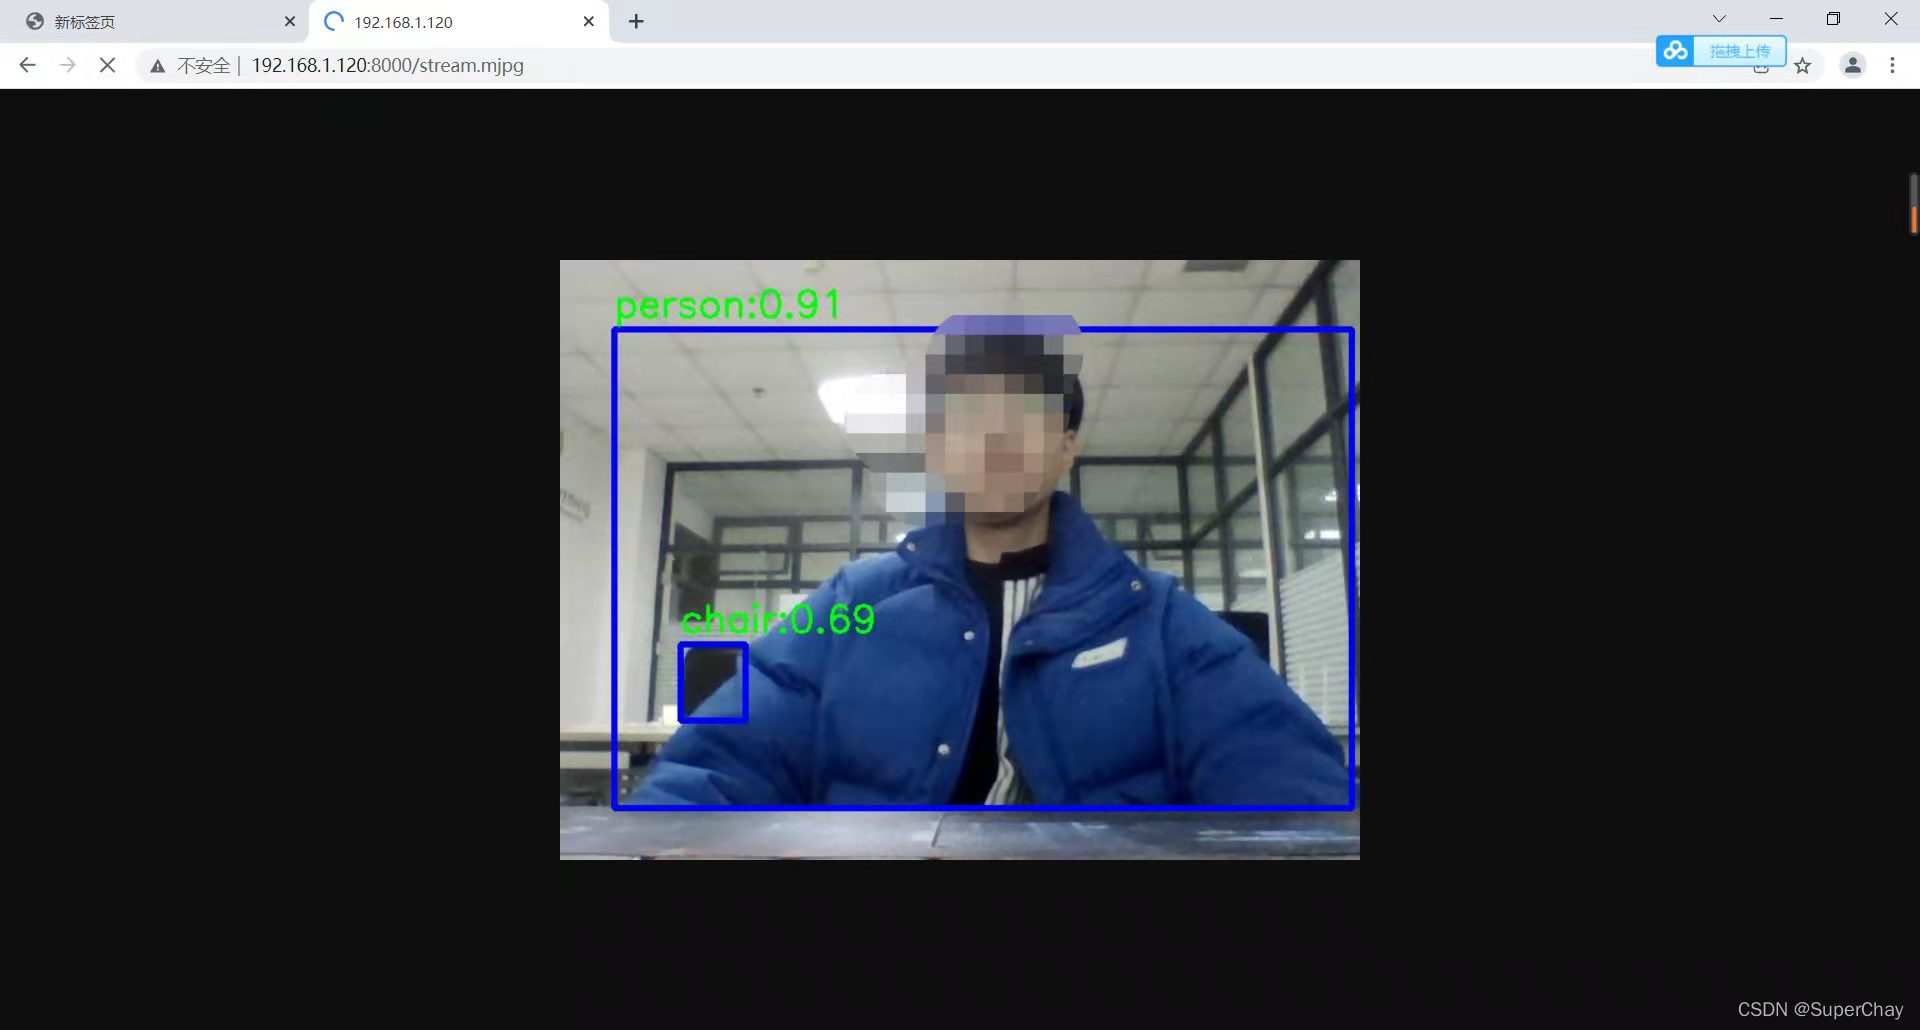
运行yolo_streamer.py程序后访问http://ip:8000/stream.mjpg![]() http://ip:8000/stream.mjpg
http://ip:8000/stream.mjpg
四、查看效果
浏览器打开上面的网页即可在浏览器实时观看效果
五、实验环境
windows10+python3.8+opencv4.5.4+onnxruntime1.10.0
六:项目说明:
此项目只是完成了基本的检测,没有引入多线程来实现同时检测几个摄像头并实时观看,我目前已实现同时拉取三路rtsp流后实现目标检测,并分别上传到不同的网页,这里不详细介绍了,感兴趣的朋友可以尝试二次开发。
七、项目地址
https://github.com/SuperChay/mjpg_streamer-yolov5![]() https://github.com/SuperChay/mjpg_streamer-yolov5
https://github.com/SuperChay/mjpg_streamer-yolov5


 2126
2126


 被折叠的 条评论
为什么被折叠?
被折叠的 条评论
为什么被折叠?
 到【灌水乐园】发言


