


android 布局xml
可以通过两种不同的方式将用户界面组件与活动安排在一起。
- 在layoutfile中声明UI元素
基本上,布局文件是res / layout中存在的xml格式的文件。 在此文件中,标记用于定义任何UI组件,而属性用于配置组件。 它类似于HTML标签。 首选这种样式,因为与UI相关的代码和业务逻辑代码是分开的。 比较容易管理。 - 在运行时创建视图元素
UI Companent可以通过编程创建。 UI组件类的setter方法有助于配置组件。 除非确实需要,否则不建议使用此样式。 在这种样式中,业务逻辑与组件UI代码混合在一起。 它看起来并不整洁,有时很难管理。
在本教程中,我们将使用相同的UI组件但使用不同的技术创建两个不同的Activity类。
创建一个Android项目(如本教程所示),并将Activity命名为XMLLayoutActivity,并将布局文件命名为activity_xmllayout.xml。 我们将定义一些在布局文件和Activity中使用的字符串常量。 打开res / values中存在的文件string.xml ,然后放入以下内容:
<resources>
    <string name='app_name'>AndroidLayout</string>
    <string name='menu_settings'>Settings</string>
    <string name='title_activity_xmllayout'>XMLLayoutActivity</string>
    <string name='c4r'>Code4Reference.com</string>
    <string name='OtherActivity'>Other Activity</string>
    <string name='dynamic_layout_activity'>Dynamic Layout Activity</string>
</resources>
现在,我们将编写一个非常简单的布局文件,其中包含Textview,EditText和Button UI组件,如下所示。
<LinearLayout xmlns:android='http://schemas.android.com/apk/res/android'
    xmlns:tools='http://schemas.android.com/tools'
    android:layout_width='match_parent'
    android:layout_height='match_parent'
    android:orientation='vertical'>

    <TextView
        android:layout_width='match_parent'
        android:layout_height='wrap_content'
        android:padding='@dimen/padding_medium'
        android:text='@string/c4r'
        tools:context='.XMLLayoutActivity' />
    <EditText
        android:layout_width='match_parent'
        android:layout_height='wrap_content'
        android:padding='@dimen/padding_medium'
        android:hint='@string/c4r'
        tools:context='.XMLLayoutActivity'/>

    <Button
        android:id='@+id/btOtherActivity'
        android:layout_width='match_parent'
        android:layout_height='wrap_content'
        android:padding='@dimen/padding_medium'
        android:text='@string/OtherActivity'
        />
</LinearLayout>
让我们定义第一个活动类XMLLayoutActivity。 本活动使用上面定义的布局文件。
package com.code4reference.androidlayout;

import android.app.Activity;
import android.content.Intent;
import android.os.Bundle;
import android.view.View;
import android.view.View.OnClickListener;
import android.widget.Button;

public class XMLLayoutActivity extends Activity {

 Button btOtherActivity;

 @Override
 public void onCreate(Bundle savedInstanceState) {
  super.onCreate(savedInstanceState);
  // Attaching the layout file with the current Activity.
  setContentView(R.layout.activity_xmllayout);
  // Associate the Button object with the Button defined in the layout
  // file. Notice that R.id.btOtherActivity is associated with the
  //button in activity_xmllayout.xml layoutfile.
  btOtherActivity = (Button) findViewById(R.id.btOtherActivity);
  //Attaching the OnclickListener with the button.
  btOtherActivity.setOnClickListener(new OnClickListener() {
   @Override
   public void onClick(View view) {
    //Creating an Intent which will invoke
    //the other Activity (DynamicLayoutActivity).
    Intent intent = new Intent(getApplicationContext(),
      DynamicLayoutActivity.class);
    //This method will start the other activity.
    startActivity(intent);
   }
  });
 }
}
现在,将另一个DynamicLayoutActivity类添加到扩展Activity类的同一包中。该活动类将UI组件动态添加到Activity中。 将以下内容放入类定义中。 嵌入的注释将有助于理解代码。
package com.code4reference.androidlayout;

import android.app.Activity;
import android.os.Bundle;
import android.view.View;
import android.view.View.OnClickListener;
import android.widget.Button;
import android.widget.EditText;
import android.widget.LinearLayout;
import android.widget.LinearLayout.LayoutParams;
import android.widget.TextView;
import android.widget.Toast;

public class DynamicLayoutActivity extends Activity {

 @Override
 protected void onCreate(Bundle savedInstanceState) {
  super.onCreate(savedInstanceState);
  // This will create the LinearLayout
  LinearLayout ll = new LinearLayout(this);
  ll.setOrientation(LinearLayout.VERTICAL);

  // Configuring the width and height of the linear layout.
  LayoutParams llLP = new LayoutParams(
    //android:layout_width='match_parent' an in xml
    LinearLayout.LayoutParams.MATCH_PARENT,
    //android:layout_height='wrap_content'
    LinearLayout.LayoutParams.MATCH_PARENT);
  ll.setLayoutParams(llLP);

  TextView tv = new TextView(this);
  LayoutParams lp = new LayoutParams(
    LinearLayout.LayoutParams.MATCH_PARENT,
    LinearLayout.LayoutParams.WRAP_CONTENT);

  tv.setLayoutParams(lp);
  //android:text='@string/c4r'
  tv.setText(R.string.c4r);
  //android:padding='@dimen/padding_medium'
  tv.setPadding(8, 8, 8, 8);
  ll.addView(tv);
  EditText et = new EditText(this);
  et.setLayoutParams(lp);
  et.setHint(R.string.c4r);
  et.setPadding(8, 8, 8, 8);

  ll.addView(et);
  Button bt = new Button(this);
  bt.setText(R.string.OtherActivity);
  bt.setPadding(8, 8, 8, 8);
  ll.addView(bt);
  //Now finally attach the Linear layout to the current Activity.
  setContentView(ll);

  //Attach OnClickListener to the button.
  bt.setOnClickListener(new OnClickListener() {
   @Override
   public void onClick(View view) {
    Toast.makeText(getApplicationContext(),
      'This is dynamic activity', Toast.LENGTH_LONG).show();
   }
  });
 }
}
如您所见,与前一个代码相比,该代码看起来并不那么整洁。 在OnClickListener中,Toast类已用于提示消息。 现在,我们需要修改AndroidManifest文件,因为已添加了另一个活动类。
<manifest xmlns:android='http://schemas.android.com/apk/res/android'
    package='com.code4reference.androidlayout'
    android:versionCode='1'
    android:versionName='1.0' >
    <uses-sdk
        android:minSdkVersion='8'
        android:targetSdkVersion='15' />
    <application
        android:icon='@drawable/ic_launcher'
        android:label='@string/app_name'
        android:theme='@style/AppTheme' >
        <activity
            android:name='.XMLLayoutActivity'
            android:label='@string/title_activity_xmllayout' >
            <intent-filter>
                <action android:name='android.intent.action.MAIN' />
                <category android:name='android.intent.category.LAUNCHER' />
            </intent-filter>
        </activity>
        <activity android:name='.DynamicLayoutActivity'
            android:label='@string/dynamic_layout_activity'>
            <intent-filter >
                <category android:name='android.intent.category.LAUNCHER'/>
            </intent-filter>
        </activity>
    </application>
</manifest>
编码完成后,执行应用程序,您将在屏幕上注意到以下活动。
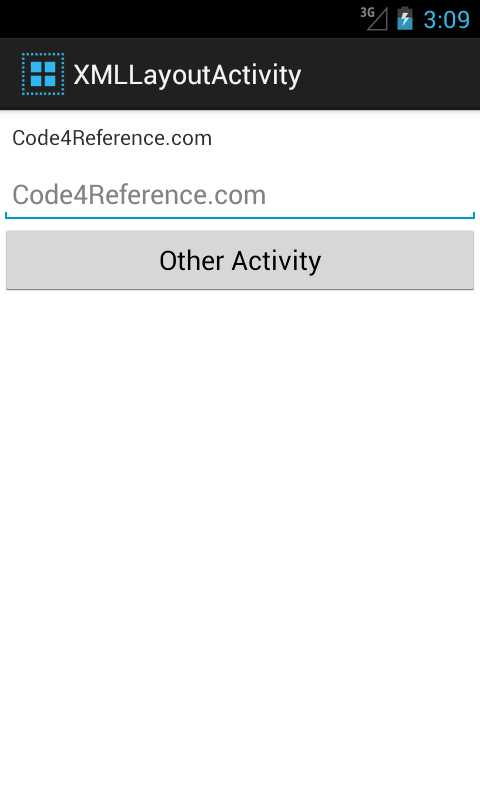
如果单击该按钮,则下一个活动将以几乎相似的布局出现,但标题不同。 如果单击另一个活动上的按钮,它将显示一条敬酒消息。 您可以从github / Code4Reference获取源代码。 您可以在此处阅读有关android布局的更多信息。
参考:来自我们的JCG合作伙伴 Rakesh Cusat的Android动态和xml布局,来自Code4Reference博客。
翻译自: https://www.javacodegeeks.com/2012/09/android-dynamic-and-xml-layout.html
android 布局xml


 194
194


 被折叠的 条评论
为什么被折叠?
被折叠的 条评论
为什么被折叠?
 到【灌水乐园】发言


