


如下是我做的一个示例代码,具体的就不说了,程序运行需要glew和glut库,找不到这两个库的朋友可以跟我联系。
#include <stdlib.h>
#include <stdio.h>

#include <GL/glew.h>
#include <GL/glut.h>


#define VERTEX 0
#define INDICES 1
#define COLOR 2
#define NUM_BUFFERS 3
#define TIMER1 100
#define FRAMETIME 100

GLint angle = 0;

GLuint buffers[NUM_BUFFERS]  = {0,0};

GLfloat vertexs[][3] = {
	{-1, -1, -1},
	{1, -1, -1},
	{1, 1, -1},
	{-1, 1, -1},
	{-1, -1, 1},
	{1, -1, 1},
	{1, 1, 1},
	{-1, 1, 1},
};

GLubyte indices[][4] ={
	{0,1,2,3},
	{4,7,6,5},
	{0,4,5,1},
	{3,2,6,7},
	{0,3,7,4},
	{1,5,6,2}
};

GLfloat color[][3] ={
	{1, 0, 0},
	{0, 1, 0},
	{0, 0, 1},
	{0.5, 0, 0},
	{0, 0.5, 0},
	{0, 0, 0.5},
	{0.5, 0.5, 0.5}
};

void init(void)
{
   glClearColor (0, 0, 0, 0);
   glShadeModel (GL_SMOOTH);

   glewInit();

   //顶点
   glGenBuffers(NUM_BUFFERS, buffers);
   //glGenBuffers(1, &bufferId);
   glBindBuffer(GL_ARRAY_BUFFER, buffers[VERTEX]);
   glBufferData(GL_ARRAY_BUFFER, sizeof(GLfloat)*3*8, vertexs, GL_STATIC_DRAW);
   glVertexPointer(3, GL_FLOAT, 0, (GLvoid*)0);
   glEnableClientState(GL_VERTEX_ARRAY);

   //顶点颜色
   glBindBuffer(GL_ARRAY_BUFFER, buffers[COLOR]);
   glBufferData(GL_ARRAY_BUFFER, sizeof(GLfloat)*3*8, color, GL_STATIC_DRAW);
   glColorPointer(3, GL_FLOAT, 0, (GLvoid*)0);
   glEnableClientState(GL_COLOR_ARRAY);

   glBindBuffer(GL_ELEMENT_ARRAY_BUFFER, buffers[INDICES]);
   glBufferData(GL_ELEMENT_ARRAY_BUFFER, sizeof(GLubyte)*24, indices, GL_STATIC_DRAW);


}

void display(void)
{
   glClear (GL_COLOR_BUFFER_BIT);
   glLoadIdentity();

   glColor4f(0, 1.0, 0, 1.0);
   glRotatef(angle, 0, 1.0, 0);
   glDrawElements(GL_QUADS, sizeof(indices)/sizeof(GLubyte), GL_UNSIGNED_BYTE, 0);

   glFlush ();
}

void reshape (int w, int h)
{
   glViewport (0, 0, (GLsizei) w, (GLsizei) h);
   glMatrixMode (GL_PROJECTION);
   glLoadIdentity ();
   glOrtho (-2,  4, -2,  4, -10, 10);
   glMatrixMode(GL_MODELVIEW);
   glLoadIdentity();
}

void mouse (int button, int state, int x, int y)
{

}

void keyboard(unsigned char key, int x, int y)
{
   switch (key) {
      case 27:
         exit(0);
         break;
   }
}

void timer1(int value)
{
	if (value != TIMER1)
		return;

	printf("value=%d\n",value);
	angle += 15;
	angle %= 360;

	glutPostRedisplay();
	glutTimerFunc(FRAMETIME, timer1,TIMER1);  //1/24 24帧
}

int main(int argc, char** argv)
{
   glutInit(&argc, argv);
   glutInitDisplayMode (GLUT_SINGLE | GLUT_RGB);
   glutInitWindowSize (350, 350);
   glutInitWindowPosition (100, 100);
   glutCreateWindow (argv[0]);
   init ();
   glutDisplayFunc(display);
   glutReshapeFunc(reshape);
   glutMouseFunc(mouse);
   glutKeyboardFunc (keyboard);
   glutTimerFunc(FRAMETIME, timer1,TIMER1);  //1/24 24帧

   glutMainLoop();

   return 0;
}

//附glutTimeFunc的说明:
//(1)如果用定时器的话,初始的时候注册一个定时器的回调函数,原型是
// glutTimerFunc(unsigned int millis, void (*func)(int value), int value);
//参数对应关系为:glutTimerFunc(毫秒数, 回调函数指针, 区别值);
//(2)写自己的回调函数 void OnTimer(int value);
//用value区分是哪个定时器
// (3)在函数里改变和位置有关的变量,然后调用glutPostRedisplay();用来重绘
// (4)最后再次调用glutTimerFunc,因为glut的定时器是调用一次才产生一次定时,所以如果要持续产生定时的话,

// 在定时函数末尾再次调用glutTimerFunc
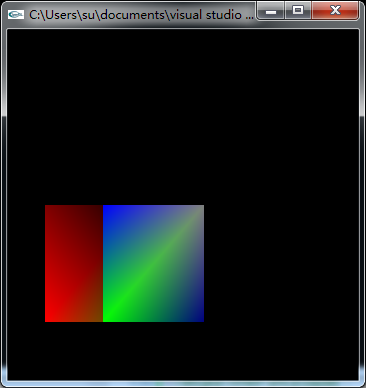
运行的效果图如下:
另外在我们获取缓冲数据的时候,需要注意的是映射完数据之后需要关闭数据映射。否则会导致数据处于不能读取的状态,导致无法正常绘制。
colorBuffer = (GLfloat*)glMapBuffer(GL_ARRAY_BUFFER, GL_READ_ONLY);
for (i=0; i<24; ++i)
{
assert(colorBuffer[i] == color[i/3][i%3]);
}
glUnmapBuffer(GL_ARRAY_BUFFER);
glBindBuffer(GL_ARRAY_BUFFER, buffers[VERTEX]);
vertexBuffer = (GLfloat*)glMapBuffer(GL_ARRAY_BUFFER,GL_READ_ONLY);
for (i=0; i<24;++i)
{
assert(vertexBuffer[i] == vertexs[i/3][i%3]);
}
glUnmapBuffer(GL_ARRAY_BUFFER);
glMapBuffer需要和glUnmapBuffer结合起来使用。


 4441
4441


 被折叠的 条评论
为什么被折叠?
被折叠的 条评论
为什么被折叠?
 到【灌水乐园】发言


